三、Swagger验证(全局token)
一、开启Swagger验证
启用验证之后再看:多了个小按钮
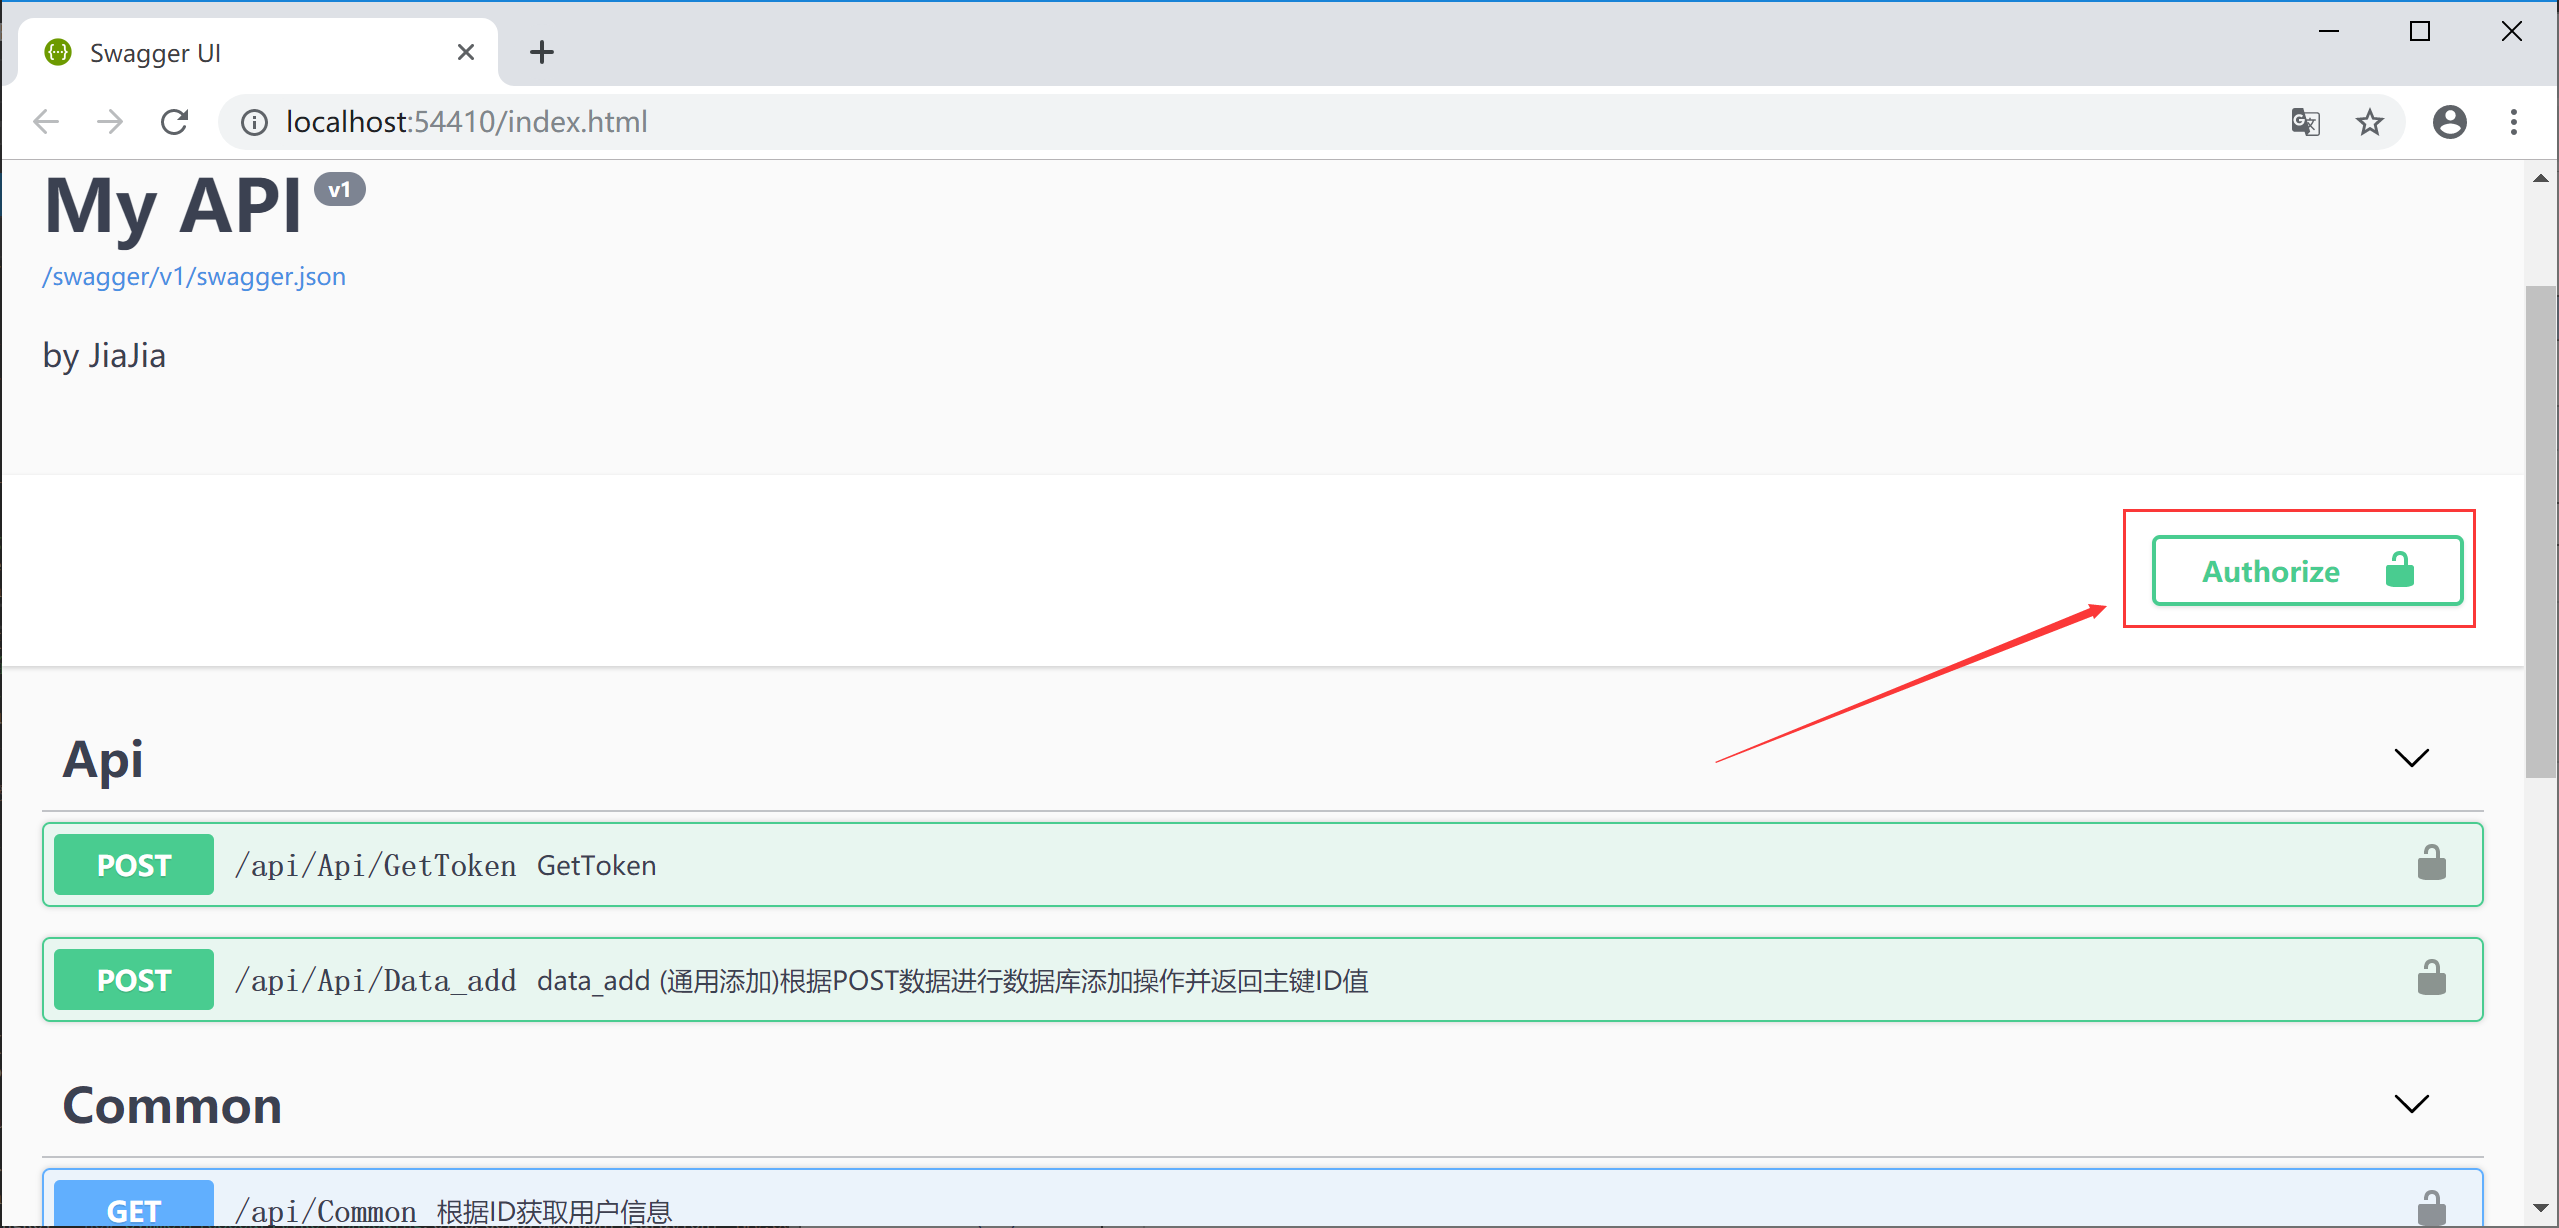
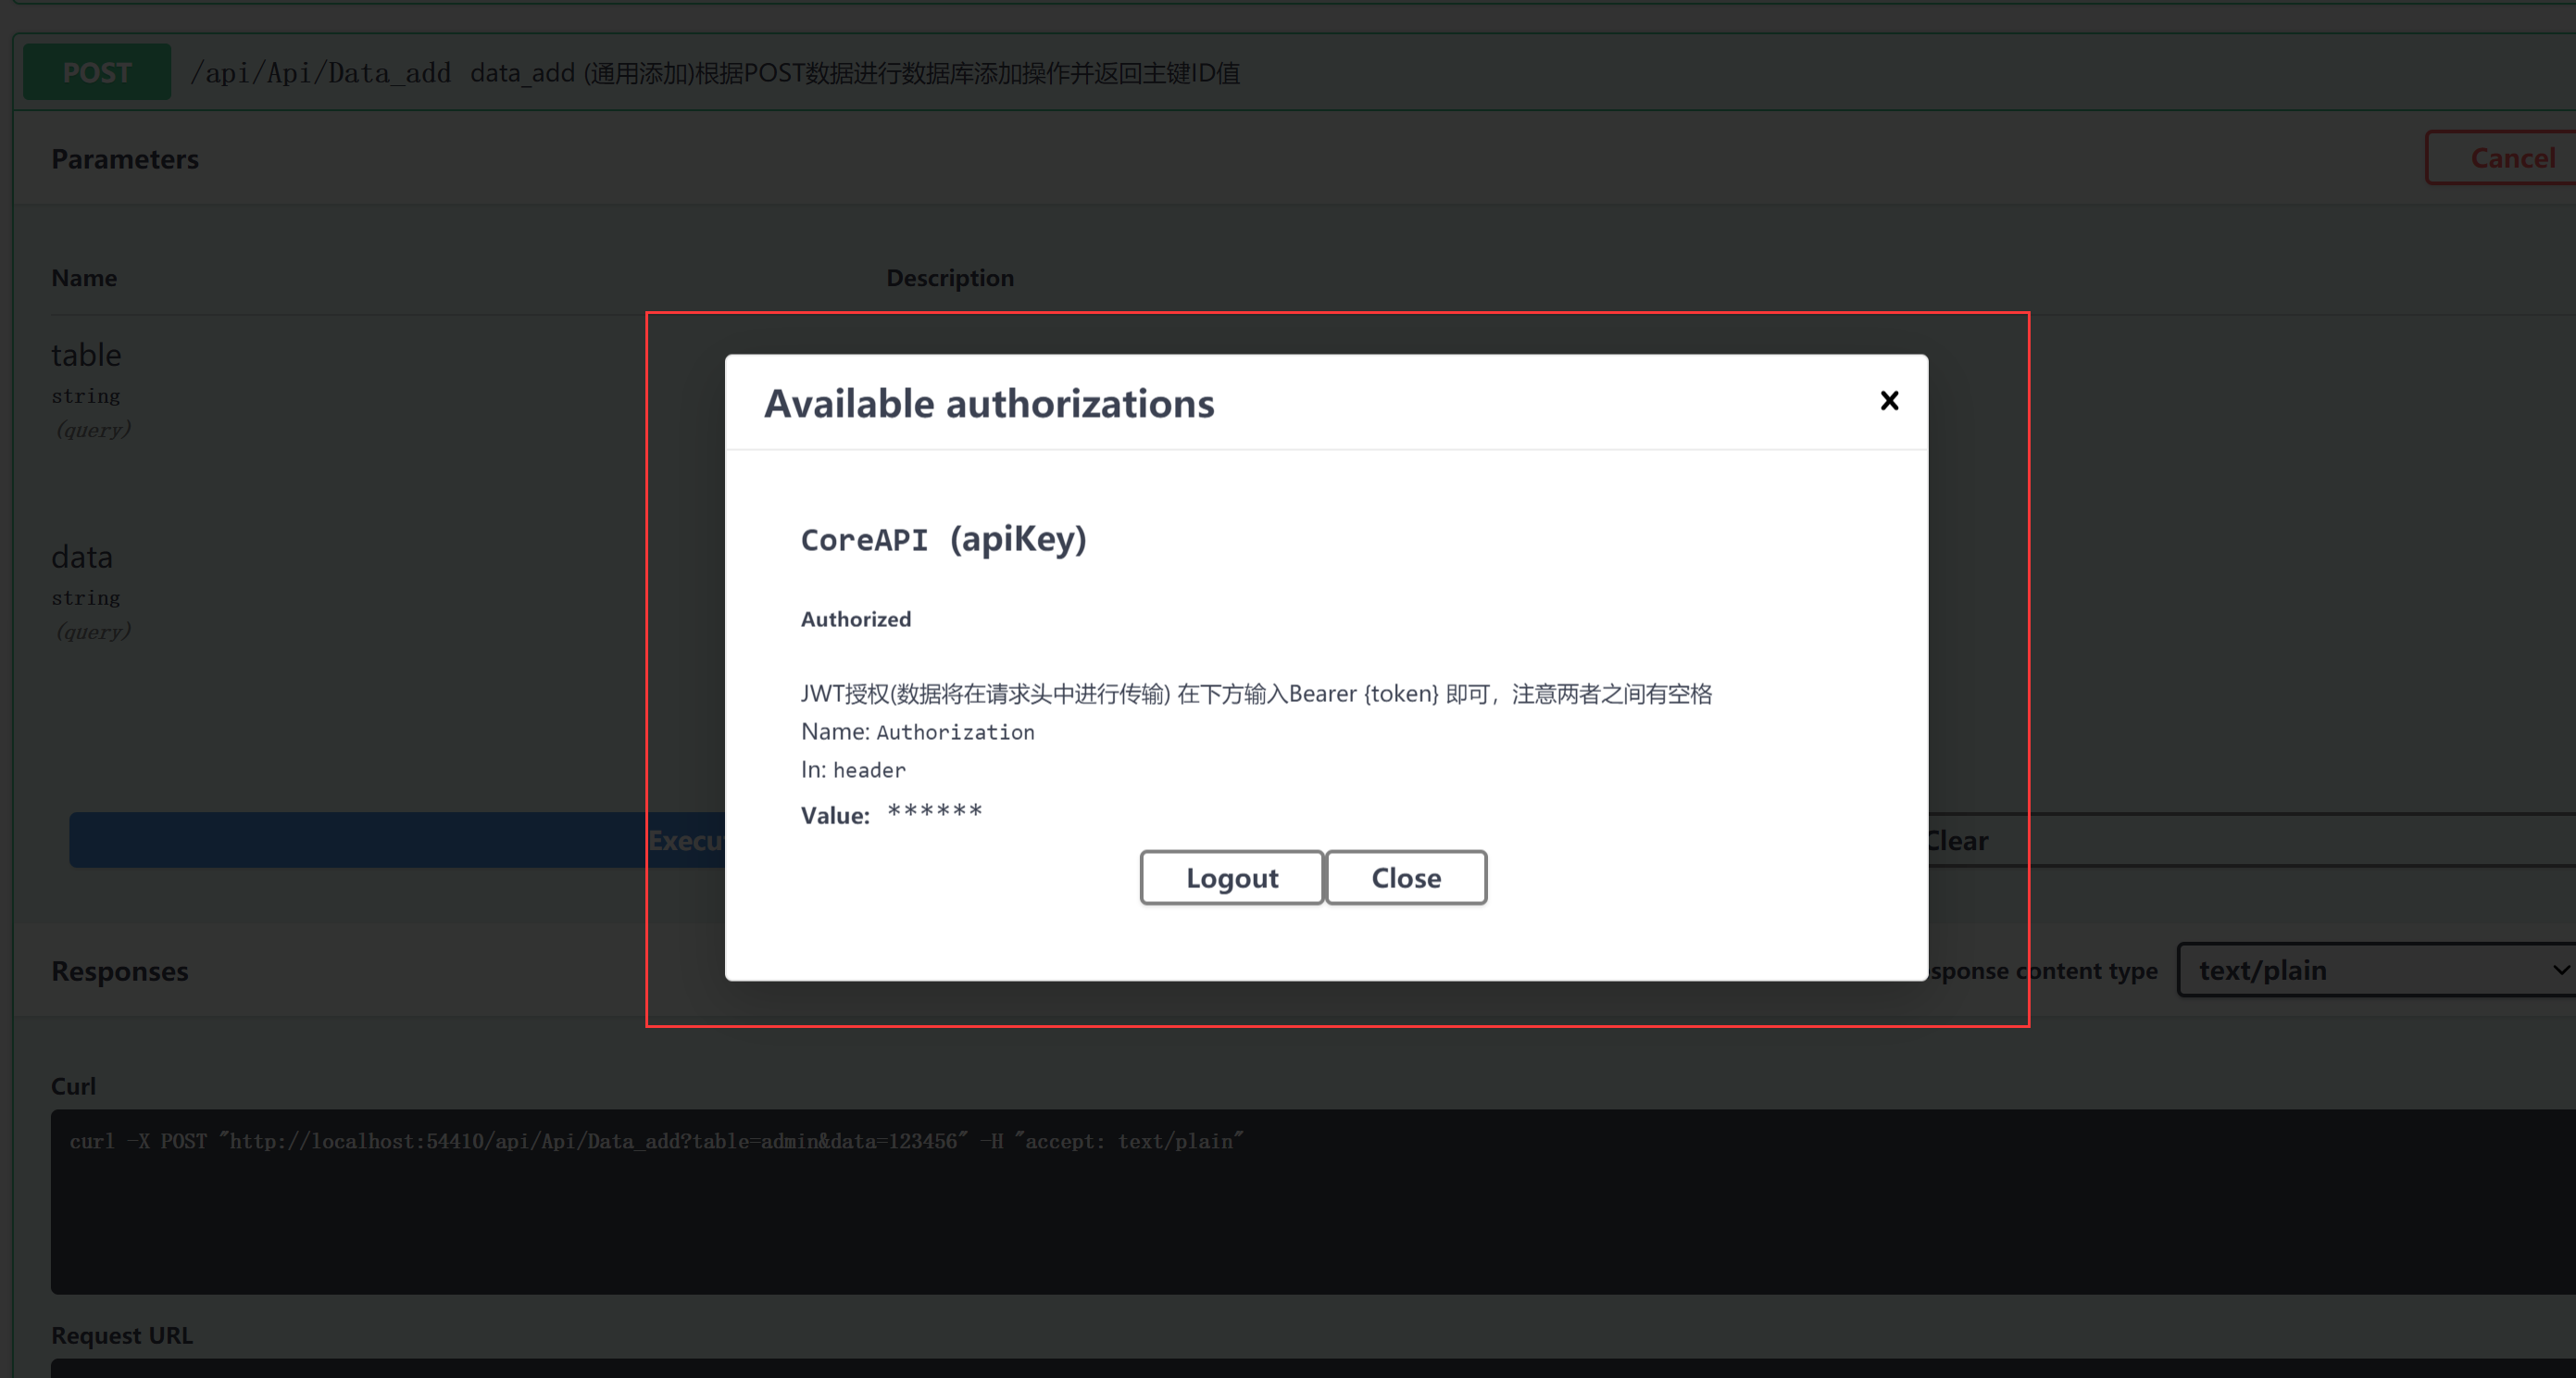
点开之后是如下界面:文本框里要如输入从服务器获取的Token。格式为:Bearer + 空格+token。 Bearer可以看作是一个默认的规则。

添加配置代码
                #region 启用swagger验证功能
                //添加一个必须的全局安全信息,和AddSecurityDefinition方法指定的方案名称一致即可,CoreAPI。
                var security = new Dictionary<string, IEnumerable<string>> { { "CoreAPI", new string[] { } }, };
                options.AddSecurityRequirement(security);
                options.AddSecurityDefinition("CoreAPI", new ApiKeyScheme
                {
                    Description = "JWT授权(数据将在请求头中进行传输) 在下方输入Bearer {token} 即可,注意两者之间有空格",
                    Name = "Authorization",//jwt默认的参数名称
                    In = "header",//jwt默认存放Authorization信息的位置(请求头中)
                    Type = "apiKey"
                });
                #endregion
整体部分为:
            //1、注册服务Swagger
            services.AddSwaggerGen(options =>
            {
                options.SwaggerDoc("v1", new Swashbuckle.AspNetCore.Swagger.Info
                {
                    Version = "v1",
                    Title = "My API",
                    Description = "by JiaJia"
                });
                //在 Start.cs => ConfigureServices 方法中的 AddSwaggerGen 处增加 IncludeXmlComments 处理。
                options.IncludeXmlComments(string.Format("{0}/ZanLveCore.xml",
                AppDomain.CurrentDomain.BaseDirectory));

                #region 启用swagger验证功能
                //添加一个必须的全局安全信息,和AddSecurityDefinition方法指定的方案名称一致即可,CoreAPI。
                var security = new Dictionary<string, IEnumerable<string>> { { "CoreAPI", new string[] { } }, };
                options.AddSecurityRequirement(security);
                options.AddSecurityDefinition("CoreAPI", new ApiKeyScheme
                {
                    Description = "JWT授权(数据将在请求头中进行传输) 在下方输入Bearer {token} 即可,注意两者之间有空格",
                    Name = "Authorization",//jwt默认的参数名称
                    In = "header",//jwt默认存放Authorization信息的位置(请求头中)
                    Type = "apiKey"
                });
                #endregion

            });
二、在Startup类中配置身份认证服务
            //添加jwt验证:
            services.AddAuthentication(JwtBearerDefaults.AuthenticationScheme)
                    .AddJwtBearer(options =>
                    {
                        options.TokenValidationParameters = new TokenValidationParameters
                        {
                            ValidIssuer = Configuration["Jwt:Issuer"],
                            ValidAudience = Configuration["Jwt:Audience"],
                            IssuerSigningKey = new SymmetricSecurityKey(Encoding.UTF8.GetBytes(Configuration["Jwt:SecretKey"]))
                        };
                    });
并在Configure启动
app.UseAuthentication();
配置appsettings.json
{
  "Logging": {
    "LogLevel": {
      "Default": "Information",
      "Microsoft": "Warning",
      "Microsoft.Hosting.Lifetime": "Information"
    }
  },
  "AllowedHosts": "*",
  "Jwt": {
    "Issuer": "ZanLveCore",
    "Audience": "ZanLve",
    "SecretKey": "YupklGvHpiKbzqsKsBFVamQxXYWiNiYNxHAkcqqMYfeJpXIyerJLZGdBlTxVanUYJultDOtmQKJYgTKVrhLffeutSbxfFVbEQPe"
  }
}
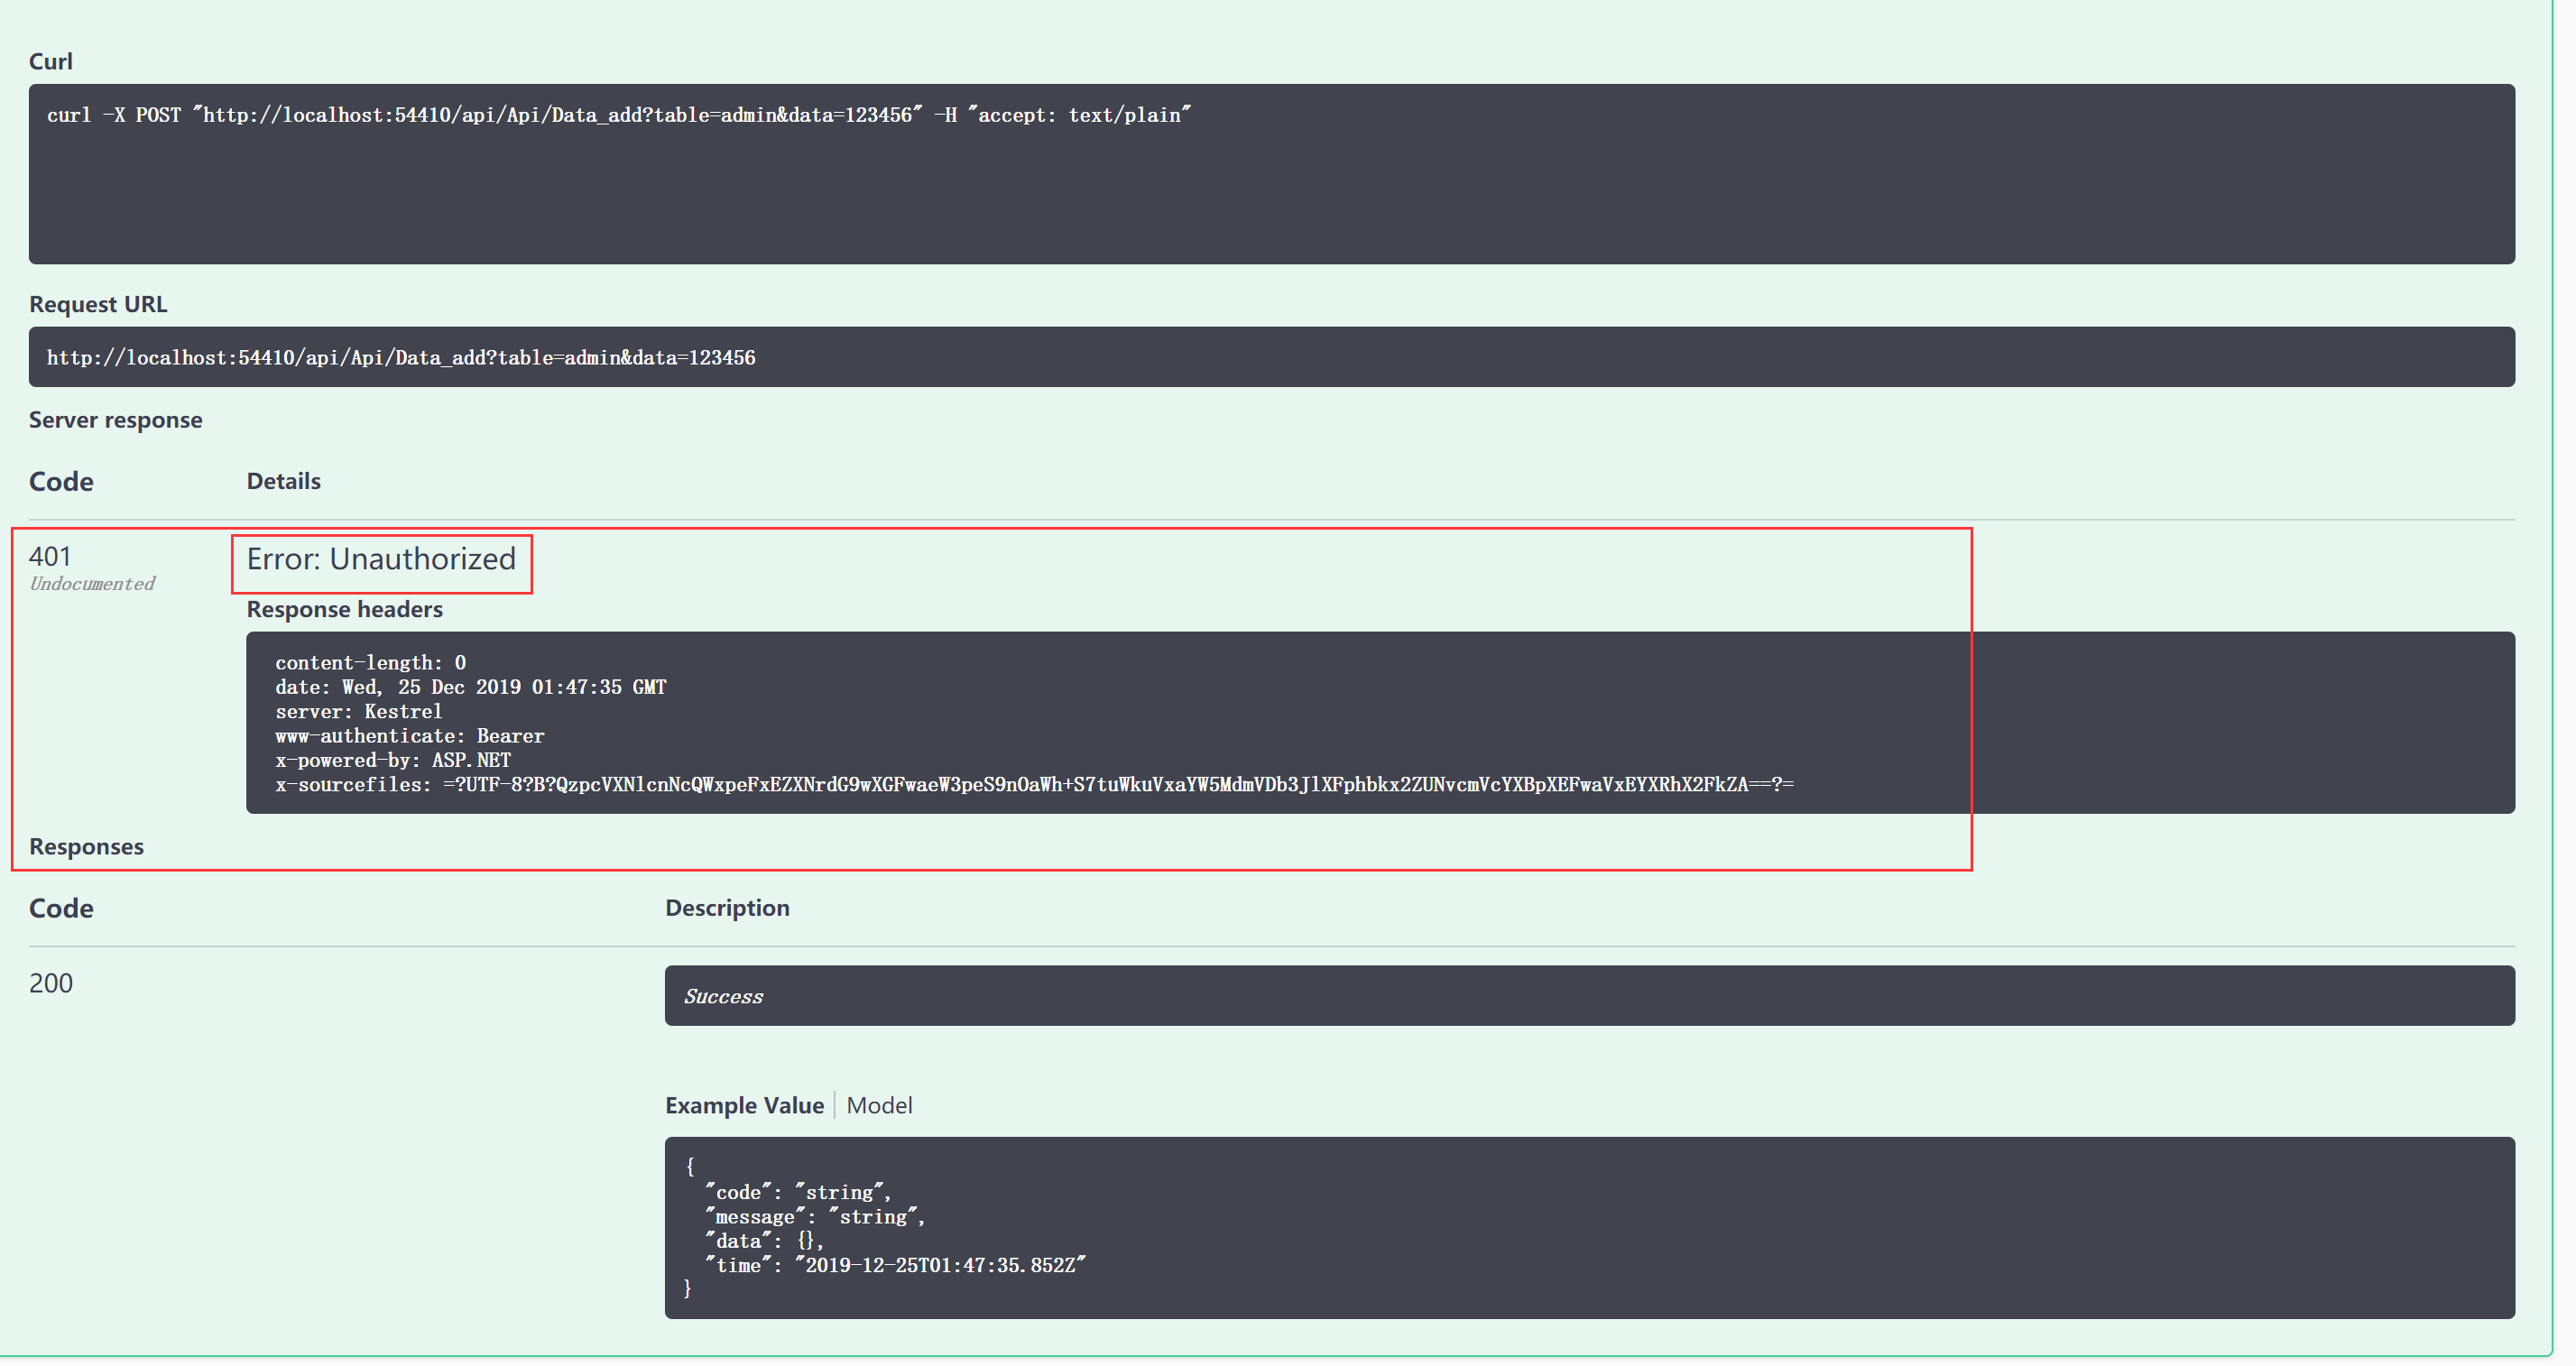
返回401 身份验证未通过
测试二:先访问GetJToken接口获取token,在访问接口
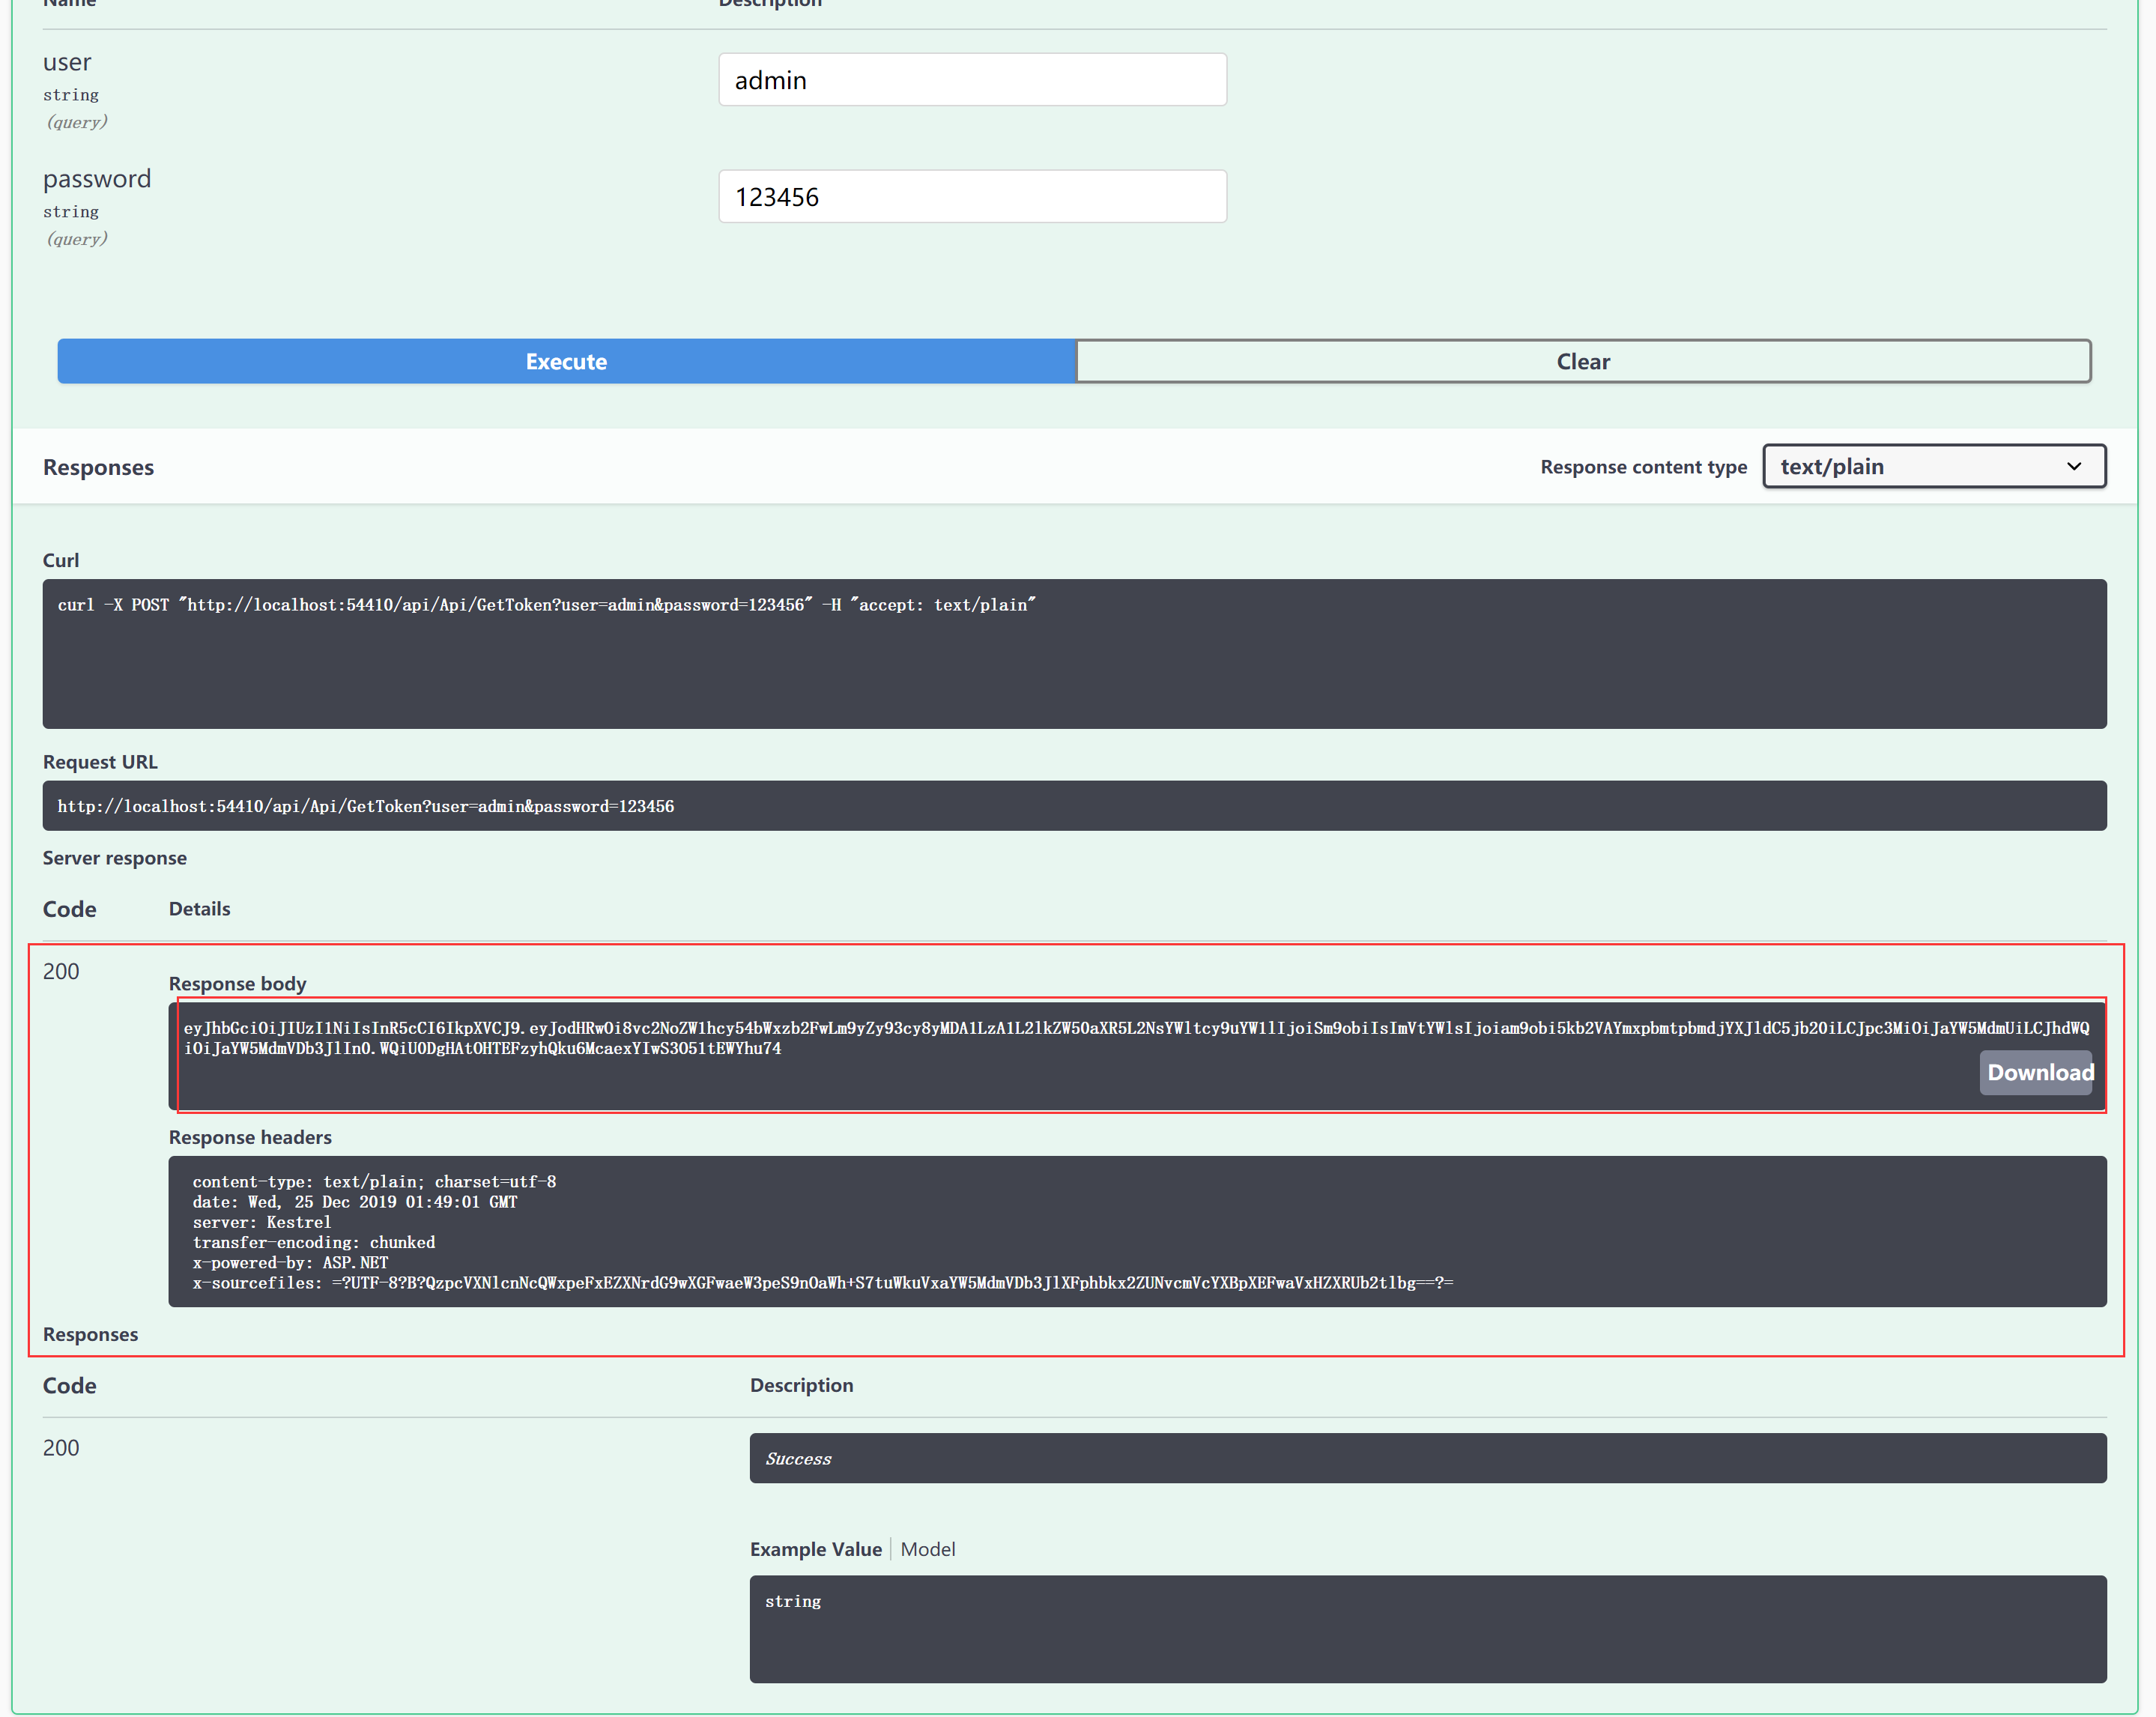
后将获取的token输入到Swagger的文本框中:Bearer +空格+Token
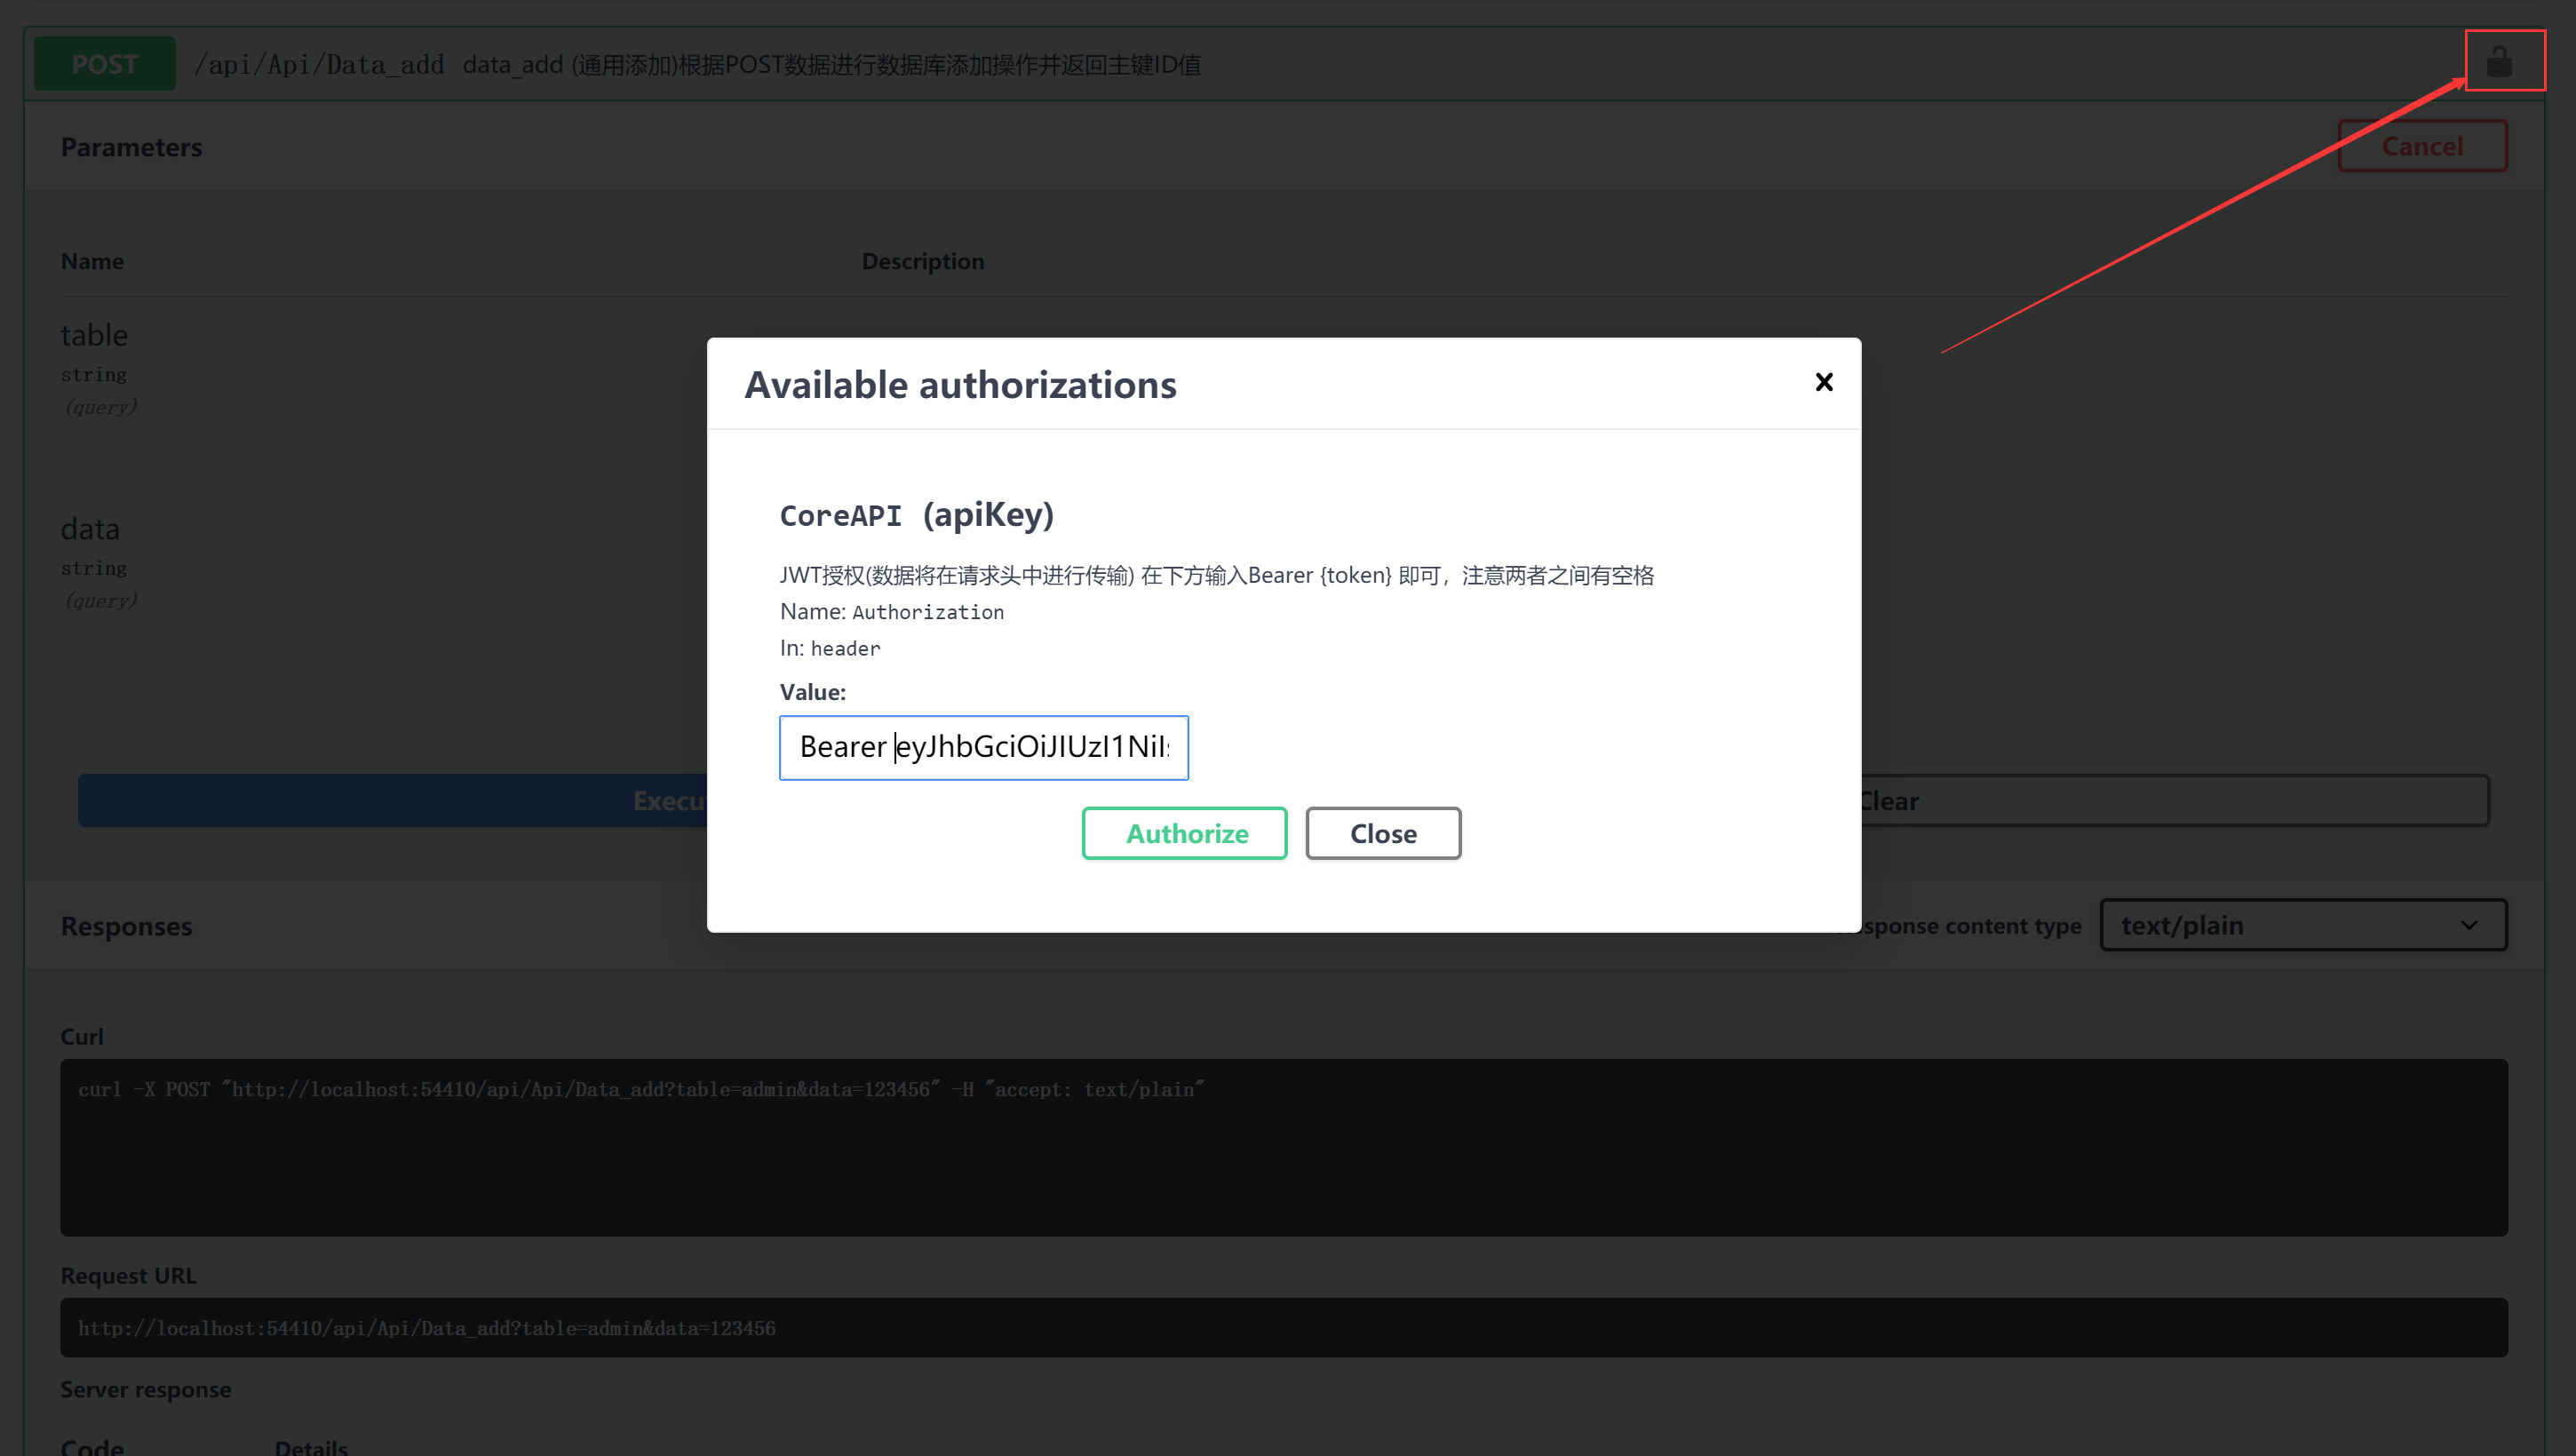
点击确认
GetToken代码
        /// <summary>
        /// GetToken
        /// </summary>
        /// <returns></returns>
        [HttpPost]
        public string GetToken(string user, string password)
        {
            //验证用户名和密码
            var claims = new Claim[] {
                new Claim(ClaimTypes.Name, "John"),
                new Claim(JwtRegisteredClaimNames.Email, "john.doe@blinkingcaret.com")
            };

            var key = new SymmetricSecurityKey(Encoding.UTF8.GetBytes(_config["Jwt:SecretKey"]));
            var creds = new SigningCredentials(key, SecurityAlgorithms.HmacSha256);

            var token = new JwtSecurityToken(
              //颁发者
              issuer: _config["Jwt:Issuer"],
              //接收者
              audience: _config["Jwt:Audience"],
              //添加claims
              claims: claims,
              //指定token的生命周期,过期时间
              expires: DateTime.Now.AddMinutes(30),
              //签名证书
              signingCredentials: creds);

            return new JwtSecurityTokenHandler().WriteToken(token);
        }
注意:必须指定token过期时间(即便你不验证token的时间)不然,请求获取的token是不会变的(固定值的token)

点到为止

 浙公网安备 33010602011771号