从零开始设计一个ESP-32 for PC联动装置
硬件准备:ESP32-WROOM-32开发板
SSD1306显示器(不带驱动板)
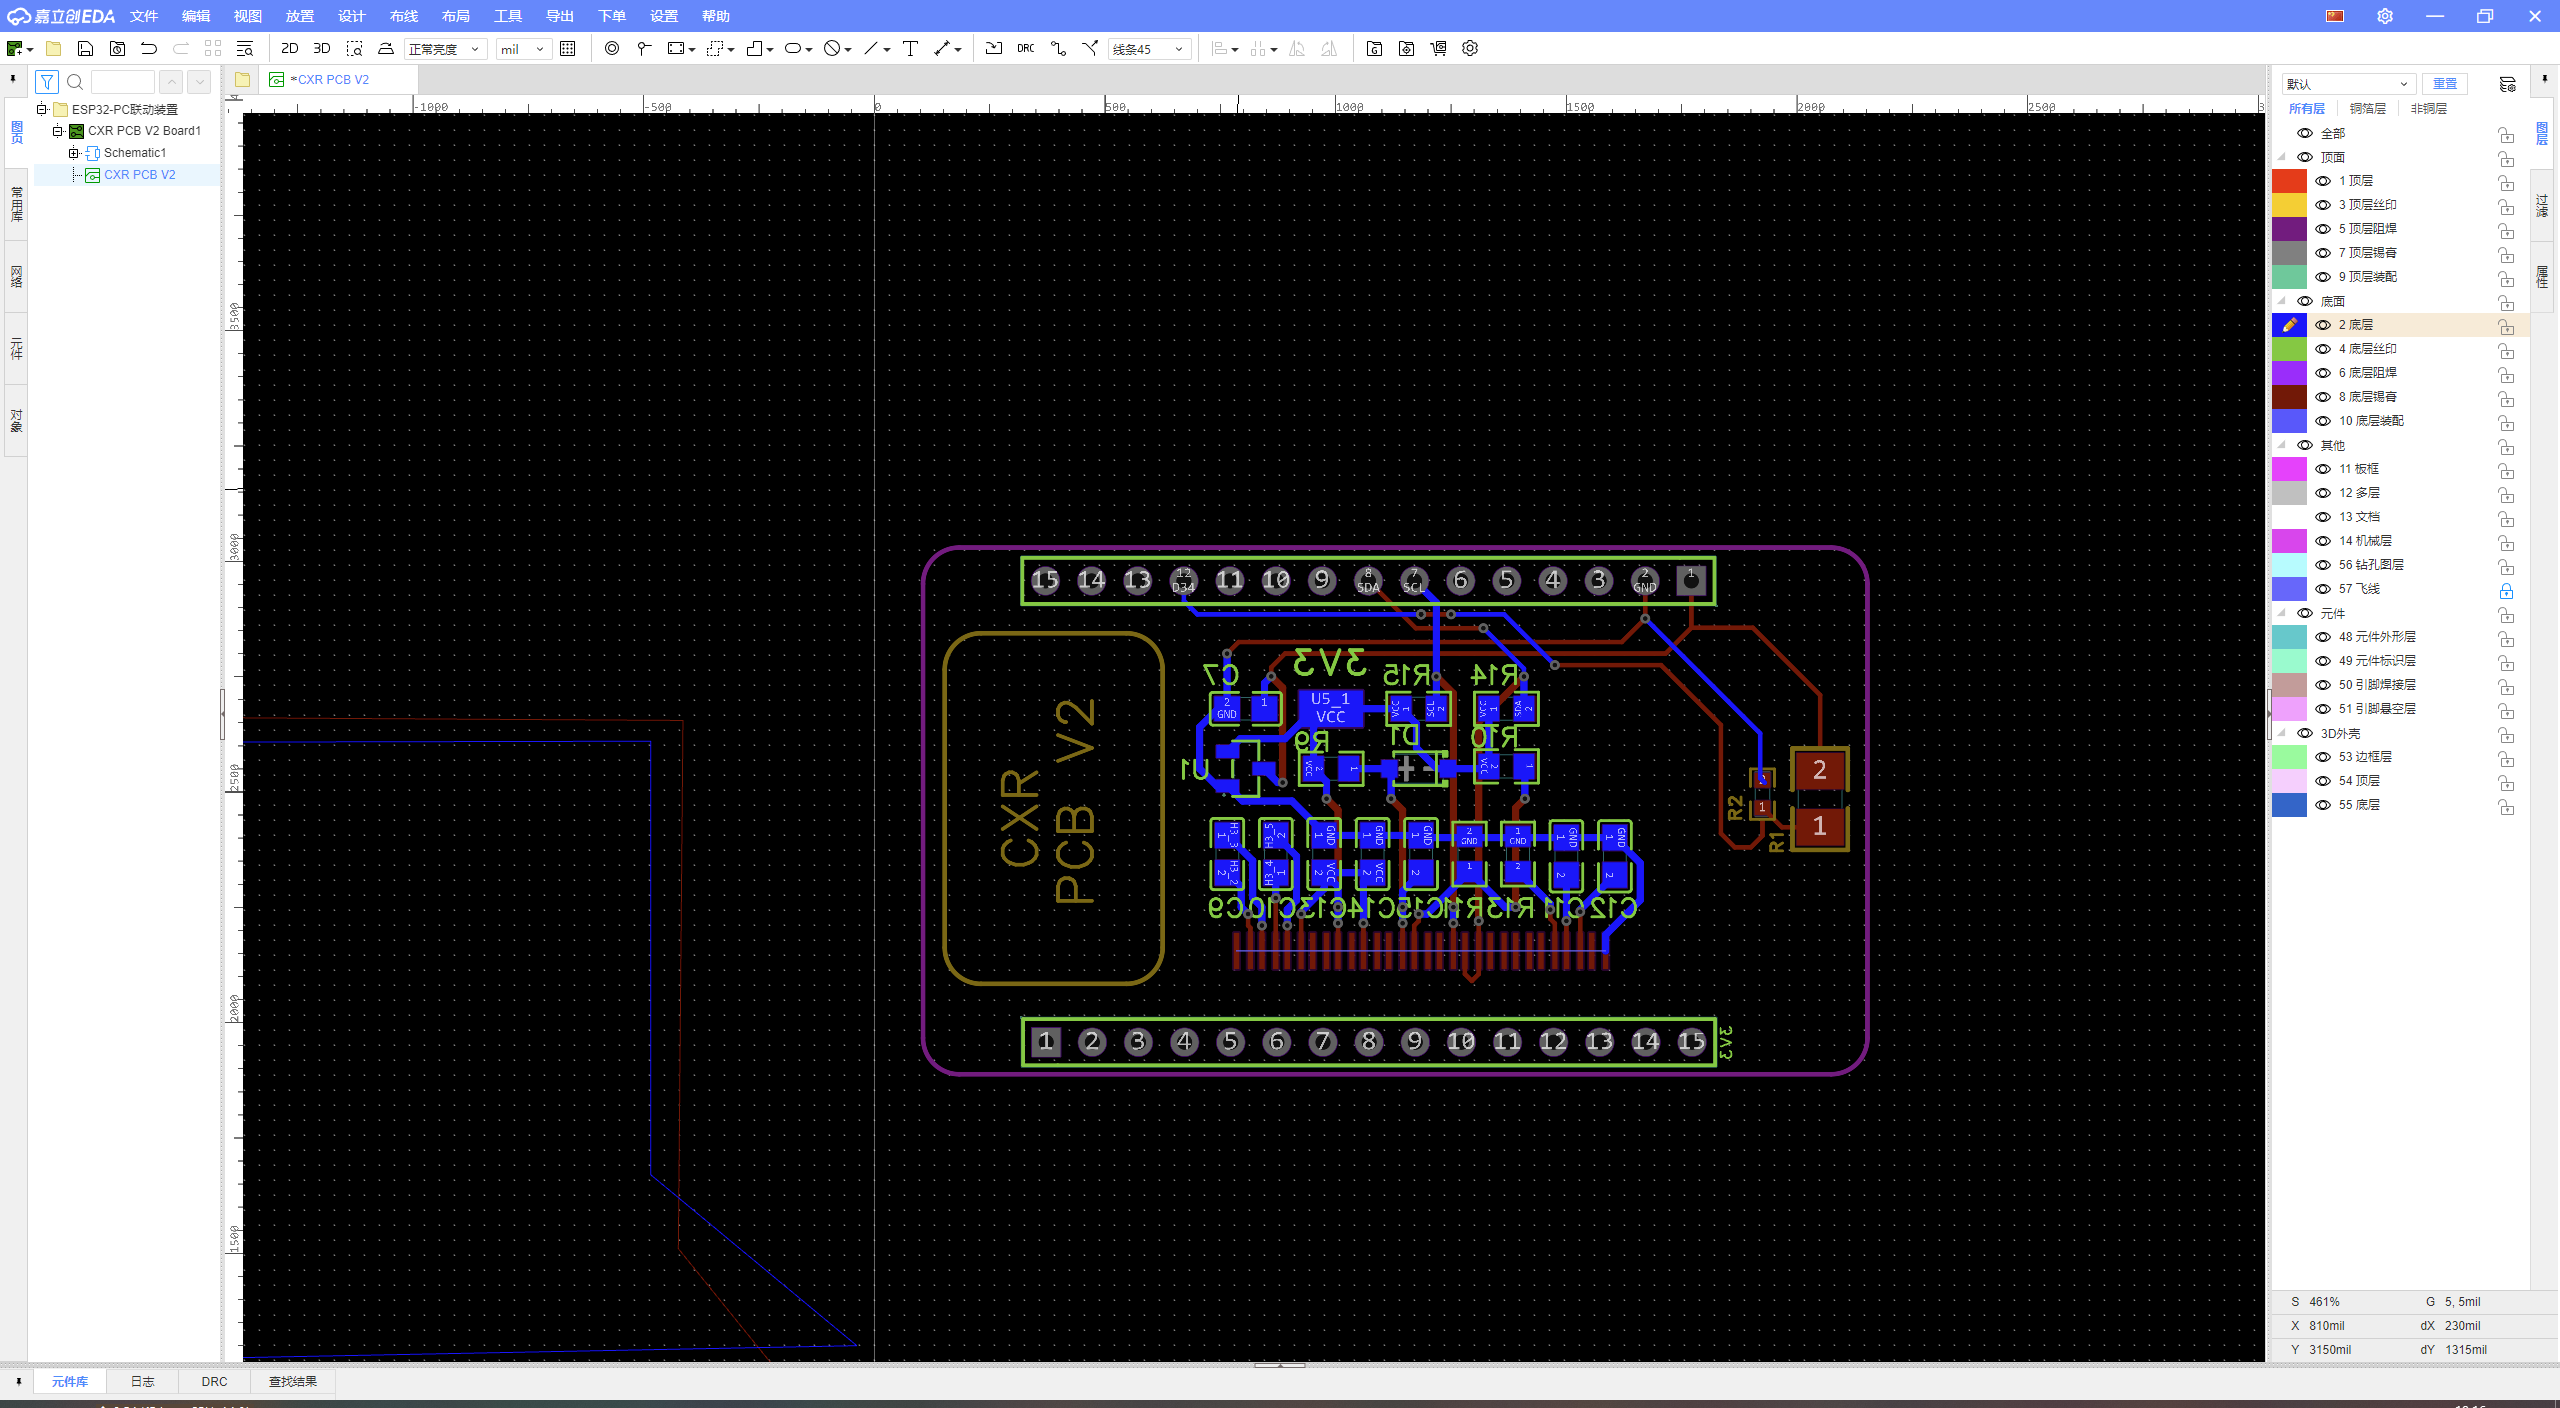
嘉立创打板,工程文件地址:lanzouw.com/i9XhY0e6qhuj 密码:5ykd
下单板子并且根据工程文件下单元件。
焊接。
拿出ESP32-WROOM-32开发板,用Arduino.exe烧录程序。
#include "SSD1306.h"
#include <Arduino.h>
#include "BluetoothSerial.h"

#if !defined(CONFIG_BT_ENABLED) || !defined(CONFIG_BLUEDROID_ENABLED)
#error Bluetooth is not enabled! Please run `make menuconfig` to and enable it
#endif


SSD1306 display(0x3c, 25, 26);
String str="";
RTC_DATA_ATTR int bootCount = 0;
const int potpin = 34;
int potValue = 0;
BluetoothSerial SerialBT;

void setup() {
  pinMode(LED_BUILTIN, OUTPUT);
  SerialBT.begin("ESP32test"); //Bluetooth device name
  SerialBT.printf("ESP32 is restart now! It's the %d time\r\n", ++bootCount);
  display.init();
  display.setFont(ArialMT_Plain_16);
  Serial.begin(115200); //set up serial library baud rate to 9600
}

void loop() {
  digitalWrite(LED_BUILTIN, HIGH);
  str = "";
  while (SerialBT.available() > 0)
  {
    display.clear();
    str += char(SerialBT.read());   // read是剪切,而不是复制
    display.drawString(15, 42 , "light:   " + String(potValue));
    delay(10);  // 延时2
  }
  potValue = analogRead(potpin);
  SerialBT.println(potValue);
  display.drawString(15, 3, str);
  display.drawRect(0, 0, 128, 64);
  display.drawHorizontalLine(0, 21, 128);
  display.drawHorizontalLine(0, 42, 128);
  display.display();
  digitalWrite(LED_BUILTIN, LOW);
  delay(100);
}
烧录好之后打开PC蓝牙,连接“ESP32test”。
PC上运行以下python程序:
import serial
import time
import psutil
def get_cpu():
psutil.cpu_percent(None) # 第一次返回的结果是0
time.sleep(0.5)
return psutil.cpu_percent(None)
def get_ram():
return psutil.virtual_memory().percent
def poweroffSchedule(text):
ser = serial.Serial('com5', 115200, parity='E', stopbits=1, bytesize=8, timeout=0.5)
ser.write(text.encode("gbk"))
print('光照强度:' + ser.readline().decode('utf-8'))
# ser.close()
if __name__ == "__main__":
# for i in li:
while True:
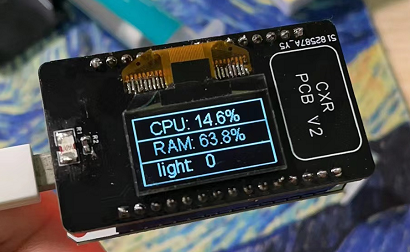
poweroffSchedule('CPU:' + ' ' + str(get_cpu()) + '%\r\n' + 'RAM:' + ' ' + str(get_ram()) + '%')
time.sleep(1)成品如下:
#include <Arduino.h>
#include <U8g2lib.h>
#include "BluetoothSerial.h"

#if !defined(CONFIG_BT_ENABLED) || !defined(CONFIG_BLUEDROID_ENABLED)
#error Bluetooth is not enabled! Please run `make menuconfig` to and enable it
#endif

String str="";
RTC_DATA_ATTR int bootCount = 0;
const int potpin = 34;
int potValue = 0;
BluetoothSerial SerialBT;
U8G2_SSD1306_128X64_NONAME_F_SW_I2C u8g2(U8G2_R0, /* clock=*/ 26, /* data=*/ 25, /* reset=*/ U8X8_PIN_NONE);   // ESP32 Thing, pure SW emulated I2C
int intArray [3];

void setup(void) {
  u8g2.begin();
  u8g2.enableUTF8Print();		// enable UTF8 support for the Arduino print() function
  pinMode(LED_BUILTIN, OUTPUT);
  SerialBT.begin("ESP32test"); //Bluetooth device name
  SerialBT.printf("ESP32 is restart now! It's the %d time\r\n", ++bootCount);
  Serial.begin(115200); //set up serial library baud rate to 115200
}

void loop(void) {
  digitalWrite(LED_BUILTIN, HIGH);
  str = "";
  u8g2.setFont(u8g2_font_unifont_t_chinese2);  // use chinese2 for all the glyphs of "你好世界"
  u8g2.setFontDirection(0);
  while (SerialBT.available() > 0)
  {
    u8g2.clearBuffer();
    str += char(SerialBT.read());   // read是剪切,而不是复制
    u8g2.setCursor(0, 15);
    u8g2.print("light:   " + String(potValue));
    //display.drawString(15, 42 , "light:   " + String(potValue));
    delay(10);  // 延时2
  }
  potValue = analogRead(potpin);
  SerialBT.println(potValue);
  // intArray [2] =3;
  // intArray [1] =2;
  // intArray [0] =1;
  u8g2.setCursor(0, 40);
  u8g2.print(intArray [1]);		// Chinese "Hello World"
  u8g2.sendBuffer();
  digitalWrite(LED_BUILTIN, LOW);
  delay(100);
  //\
  // display.drawString(15, 3, str);
  // display.drawRect(0, 0, 128, 64);
  // display.drawHorizontalLine(0, 21, 128);
  // display.drawHorizontalLine(0, 42, 128);
  // display.display();

  // delay(100);
}

 浙公网安备 33010602011771号