angular入门篇2----商店首页
Angular入门篇2
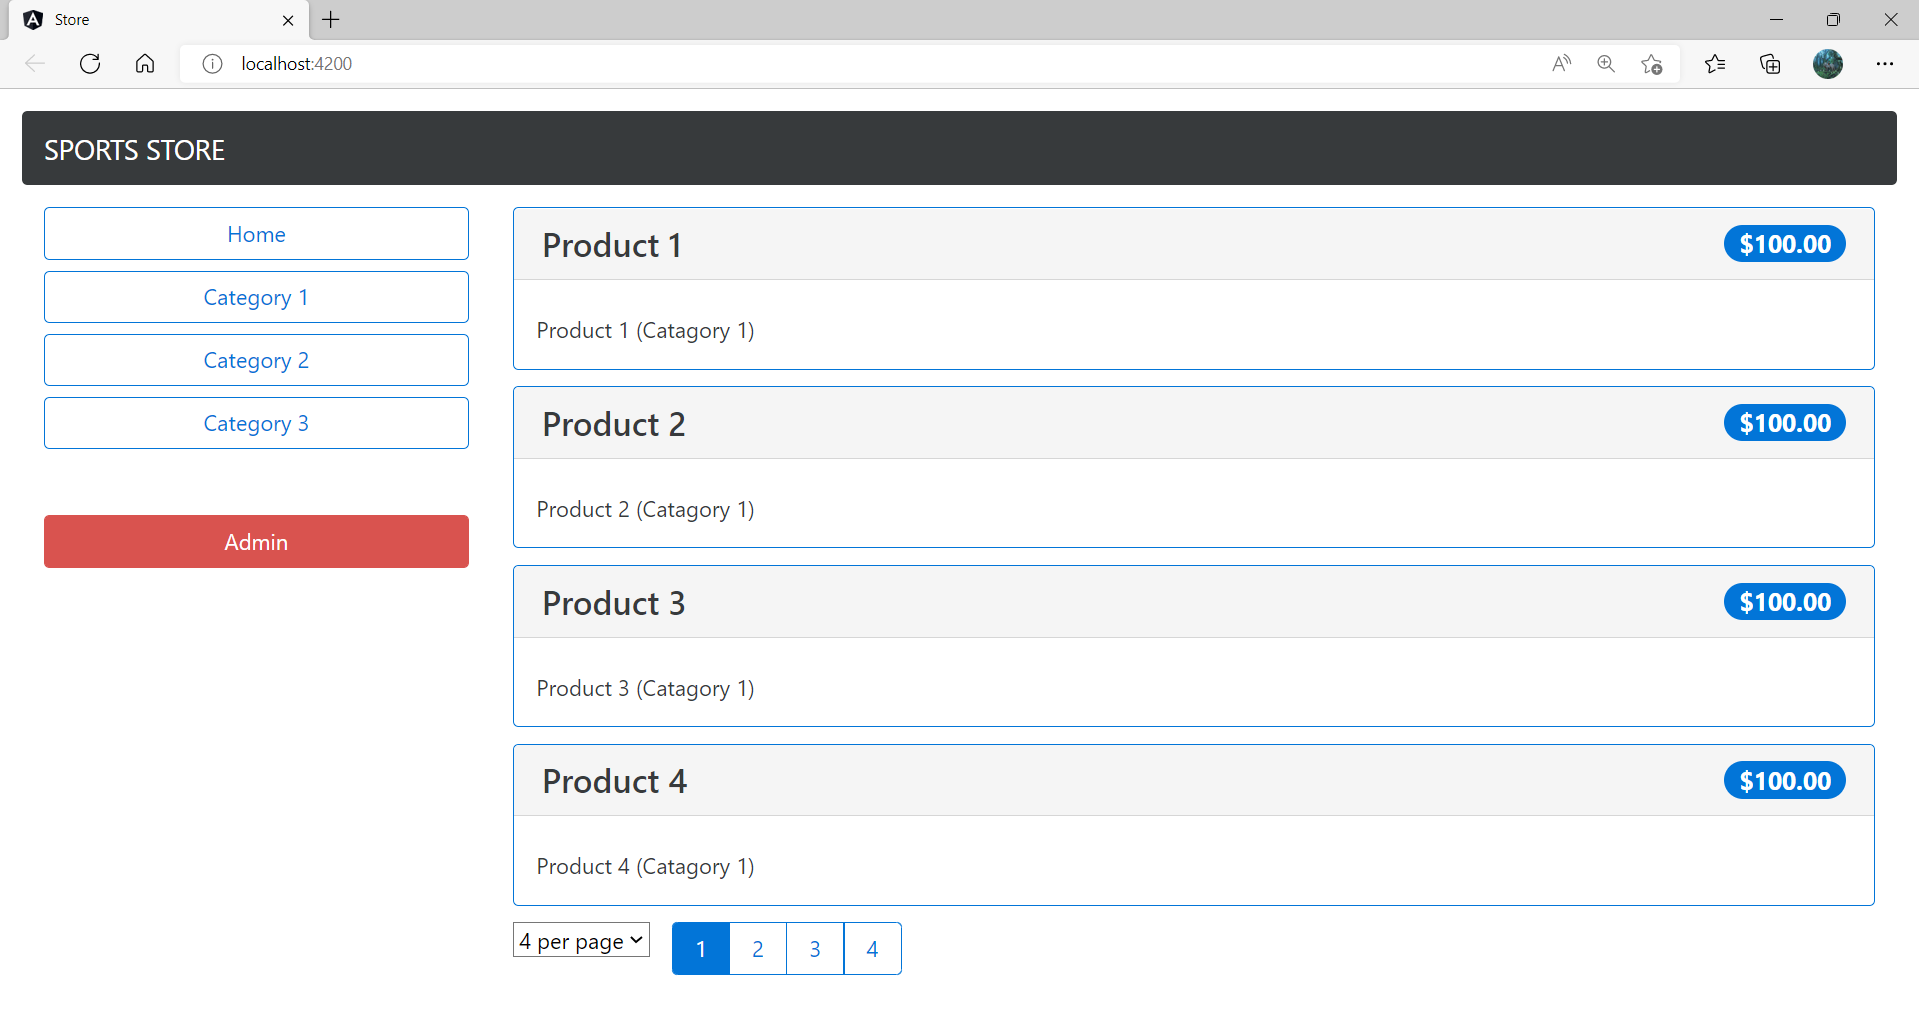
预期效果:
1. 新项目配置
1.1 创建项目
首先使用"ng new Store" 指令在Angular文件夹下创建一个新项目。
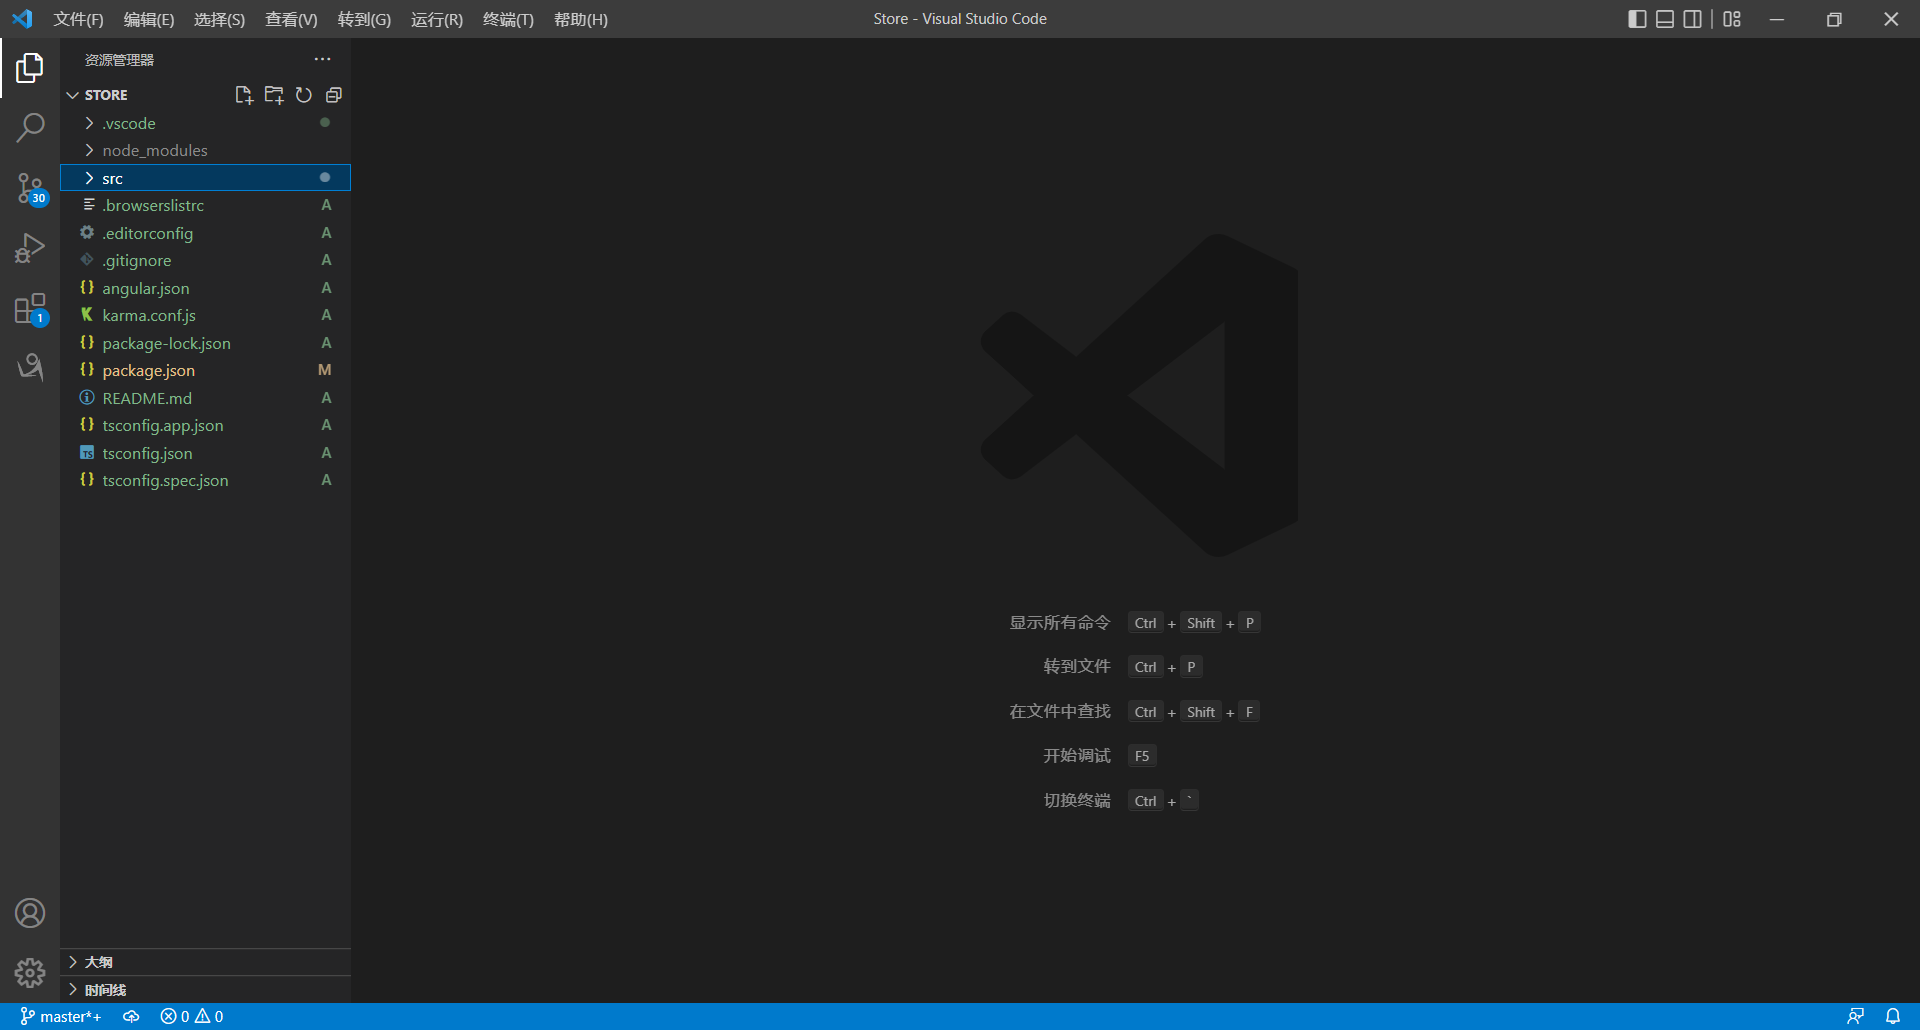
下面利用vscode打开项目进行操作(部分插件已安装)。
1.2添加软件包
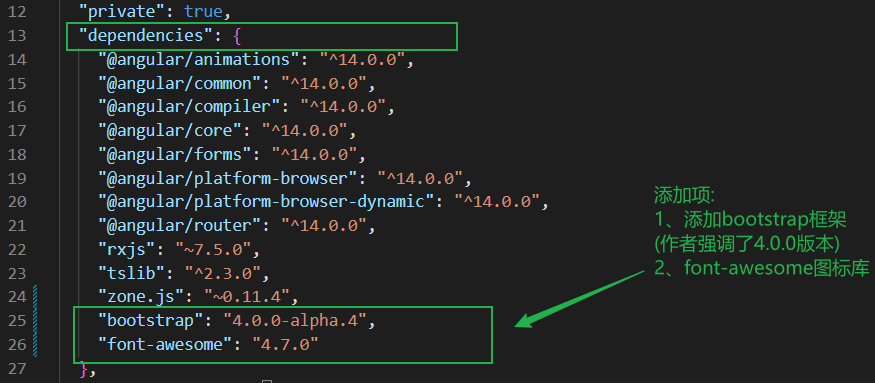
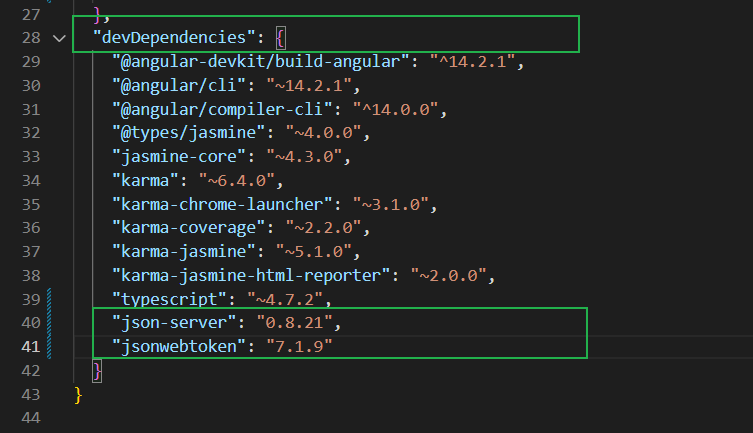
找到package.json文件,我们需要添加一些软件包(如下三处):

1.3 添加boostrap样式库路径
找到angular.json文件,在style下添加如下路径:
"./node_modules/bootstrap/dist/css/bootstrap.min.css",
"./node_modules/font-awesome/css/font-awesome.css"

在cmd输入更新指令安装上述软件包:
npm install

(warning可以忽略,未出现error即可)
2. 创建模型类
2.1 创建商品数据模型
在Store/src/app下建立model文件夹。
定义一个商品类,作为数据的描述模型(Store/src/app/model):
product.model.ts
export class Product{
    constructor(
        public id: number,
        public name: string,
        public category: string,
        public description: string,
        public price: number
    ){ }
}
2.2 创建虚拟数据源
为了让内容不涉及后端,在《Angular5》的教程中,作者建立了一个数据源“模拟数据库”:
static.datasource.ts
import { Injectable } from "@angular/core";
import { Product } from "./product.model";
import { Observable, from } from "rxjs";
import "rxjs/internal/observable/from";

@Injectable()
export class StaticDataSource{
    private products:Product[]=[
        new Product(1, "Product 1", "Category 1", "Product 1 (Catagory 1)",100),
        new Product(2, "Product 2", "Category 1", "Product 2 (Catagory 1)",100),
        new Product(3, "Product 3", "Category 1", "Product 3 (Catagory 1)",100),
        new Product(4, "Product 4", "Category 1", "Product 4 (Catagory 1)",100),
        new Product(5, "Product 5", "Category 1", "Product 5 (Catagory 1)",100),
        new Product(6, "Product 6", "Category 2", "Product 6 (Catagory 2)",100),
        new Product(7, "Product 7", "Category 2", "Product 7 (Catagory 2)",100),
        new Product(8, "Product 8", "Category 2", "Product 8 (Catagory 2)",100),
        new Product(9, "Product 9", "Category 2", "Product 9 (Catagory 2)",100),
        new Product(10, "Product 10", "Category 2", "Product 10 (Catagory 2)",100),
        new Product(11, "Product 11", "Category 3", "Product 11 (Catagory 3)",100),
        new Product(12, "Product 12", "Category 3", "Product 12 (Catagory 3)",100),
        new Product(13, "Product 13", "Category 3", "Product 13 (Catagory 3)",100),
        new Product(14, "Product 14", "Category 3", "Product 14 (Catagory 3)",100),
        new Product(15, "Product 15", "Category 3", "Product 15 (Catagory 3)",100),
    ];
    getProducts():Observable<Product[]> {
        return from([this.products]);
    }
}
此处便用上了1中创建的Product类。需要注意的是Angular14中引入Observable、from的方式与Angular5教程有所不同(rxjs的版本不同的缘故,博主的版本为7.5.0,详细版本可以在package.json查看):
Angular5教程:

import {Observable} from "rxjs/Observable"

本文:

import {Observable, from} from "rxjs"
2.3 建立存储库
存储库的作用是对获得数据进行操作。
Store/src/app/model下:
product.repository.ts
import { Injectable } from "@angular/core";
import { Product } from "./product.model";
import { StaticDataSource } from "./static.datasource";

@Injectable()
export class ProductRepository{
    private products: Product[]=[];
    private categories: string[]=[];

    constructor(private dataSource: StaticDataSource){
        dataSource.getProducts().subscribe(data => {
            this.products = data;
            this.categories = data.map(p => p.category)
                .filter((c, index, array) => array.indexOf(c) == index)
                .sort()
        })
    }

    getProducts(category: string=""): Product[]{
        return this.products
                   .filter(p=>category == "" || category == p.category);
    }

    getProduct(id:number): Product|undefined {
        return this.products.find(p=>p.id == id);
    }

    getCategories(): string[] {
        return this.categories;
    }

}
3. 创建store组件
在Store/src/app下创建Store文件夹,并创建如下文件:
store.component.ts
store.component.html
store.module.ts
3.1 内容填充
store.component.html(HTML模板)
<div class="navbar navbar-inverse bg-inverse">
    <a class="navbar-brand">SPORTS STORE</a>
</div>
<div class="col-xs-3 p-a-1">
    <button class="btn btn-block btn-outline-primary" (click)="changeCategory">Home</button>
    <button *ngFor="let cat of categories" class="btn btn-outline-primary btn-block"
    [class.active]="cat == selectedCategory">{{cat}}</button>
    <button class="btn btn-block btn-danger m-t-3" routerLink="/admin">Admin</button>
</div>
<div class="col-xs-9 p-a-1">
    <div *ngFor="let product of products" class="card card-outline-primary">
        <h4 class="card-header">
            {{product.name}}
            <span class="pull-xs-right tag tag-pill tag-primary">
                {{ product.price | currency:"USD":"symbol":"2.2-2"}}
            </span>
        </h4>
        <div class="card-text p-a-1">{{product.description}}</div>
    </div>
    <div class="form-inline pull-xs-left m-r-1">
        <select calss="form-control" [value]="productsPerPage" (change)="changePageSize($event.target)" >
            <option value="3">3 per page</option>
            <option value="4">4 per page</option>
            <option value="6">6 per page</option>
            <option value="8">8 per page</option>
        </select>
    </div>
    <div class="btn-group pull-xs-rigth">
        <button *ngFor="let page of pageNumbers" (click)="changePage(page)"
                class="btn btn-outline-primary" [class.active]=" page == selectedPage">
                {{page}}
        </button>
    </div>
</div>
store.component.ts(向HTML模板提供数据和逻辑)
import { Component} from "@angular/core";
import { Product } from "../model/product.model";
import { ProductRepository } from "../model/product.repository";

@Component({
    selector: "store",
    moduleId: module.id,
    templateUrl: "store.component.html"
})
export class StoreComponent {
    public selectedCategory: string;
    public productsPerPage: number;
    public selectedPage: number;

    constructor(private repository: ProductRepository) {
        this.selectedCategory= "";
        this.productsPerPage= 4;
        this.selectedPage= 1;
    }

    get products(): Product[] {
        let pageIndex = (this.selectedPage-1)*this.productsPerPage;
        return this.repository.getProducts(this.selectedCategory)
                   .slice(pageIndex, pageIndex + this.productsPerPage);
    }

    get categories(): string[] {
        return this.repository.getCategories();
    }

    ///分页设置函数
    changeCategory(newCategory?: string) {
        this.selectedCategory = newCategory??"";
    }

    changePage(newPage: number) {
        this.selectedPage= newPage;
    }

    changePageSize(target:EventTarget|null) {
        let newSizeObject = target as HTMLSelectElement;

        if(newSizeObject==null)
        {
           this.productsPerPage = 4;
        }else{
            let selectedOption = newSizeObject.selectedOptions[0];
            let pageValue = selectedOption.value
            this.productsPerPage=Number(pageValue);
        }

        this.changePage(1);
    }

    get pageNumbers(): number[] {
        return Array(Math.ceil(this.repository
            .getProducts(this.selectedCategory).length/
            this.productsPerPage)).fill(0).map((x,i) => i+1);
    }
}
store.module.ts
import { NgModule } from "@angular/core";
import { BrowserModule } from "@angular/platform-browser";
import { FormsModule } from "@angular/forms";
import { ModelModule } from "../model/model.module";
import { StoreComponent } from "./store.component";

@NgModule({
    imports: [ModelModule, BrowserModule, FormsModule],
    declarations: [StoreComponent],
    exports:[StoreComponent]
})
export class StoreModule { }
4. 更新根组件及部分配置
4.1 更新根组件
Store/src/app/app.component.ts:
import { Component } from '@angular/core';

@Component({
  selector: 'app',
  template: "<store></store>"
})

export class AppComponent { }
Store/src/app/app.module.ts
import { NgModule } from '@angular/core';
import { BrowserModule } from '@angular/platform-browser';
import { AppComponent } from './app.component';
import { StoreModule } from './store/store.module';
@NgModule({
  imports:[BrowserModule, StoreModule],
  declarations:[AppComponent],
  bootstrap: [AppComponent]
})
export class AppModule { }
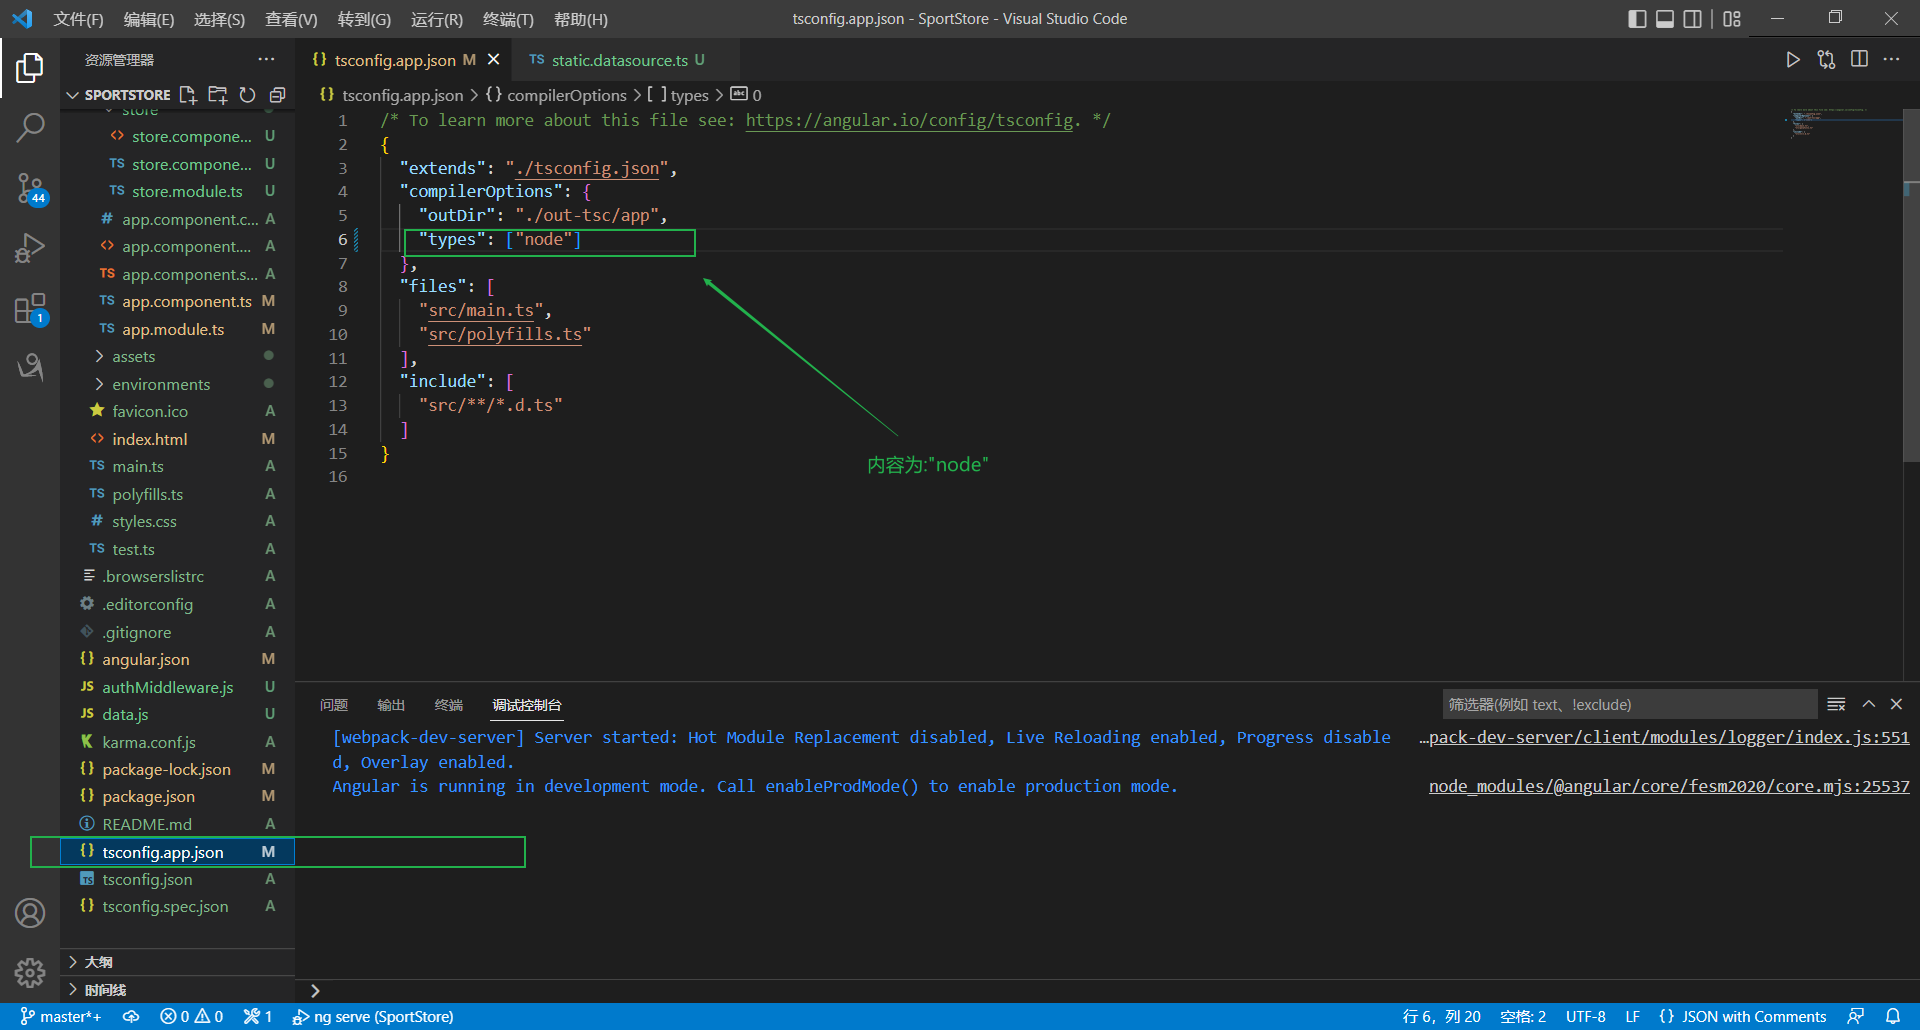
此时编译后会出现"module.id"相关的问题,需要进行下面的配置
2.Store/src/app/
index.html内容改为:
<!doctype html>
<html>
  <head>
    <meta charset="utf-8">
    <title>Store</title>
    <base href="/">
    <meta name="viewport" content="width=device-width, initial-scale=1">
  </head>
  <body class="m-a-1">
    <app>Store Will Go Here</app>
  </body>
</html>
5. 效果展示
效果如图:

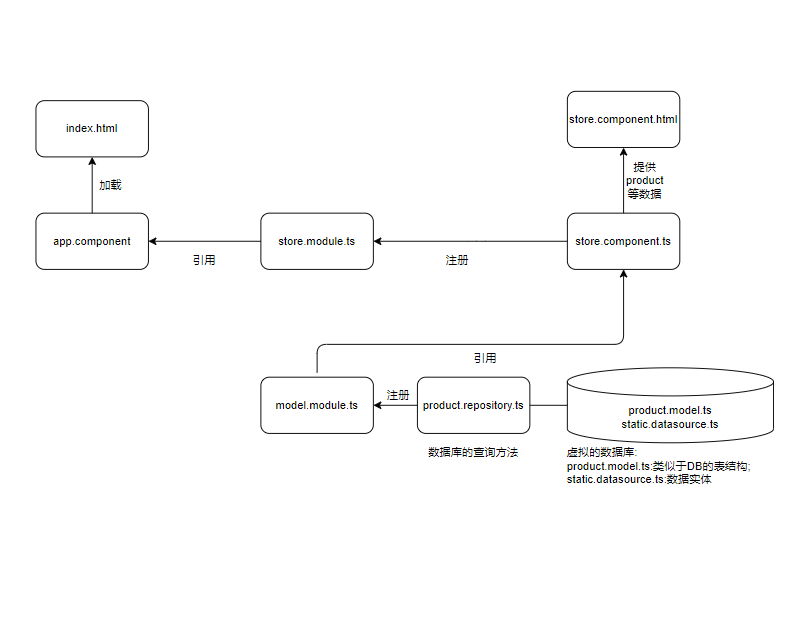
项目结构
项目的结构如下(个人理解),目前看起来还是比较"线性"的。

 浙公网安备 33010602011771号