centos7部署nginx+keepalived实现高可用负载均衡
一、实验规划
node1:nginx+keepalived用作负载均衡 IP地址:192.168.200.111(主)
node2:nginx+keepalived用作负载均衡 IP地址:192.168.200.111(从)
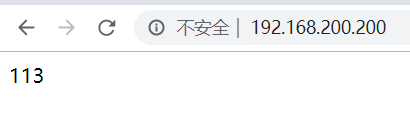
nginx1:nginx作为web服务器 IP地址:192.168.200.113
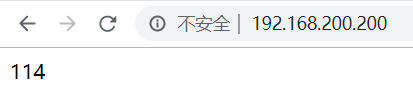
nginx2:nginx最为web服务器 IP地址:192/168.200.114
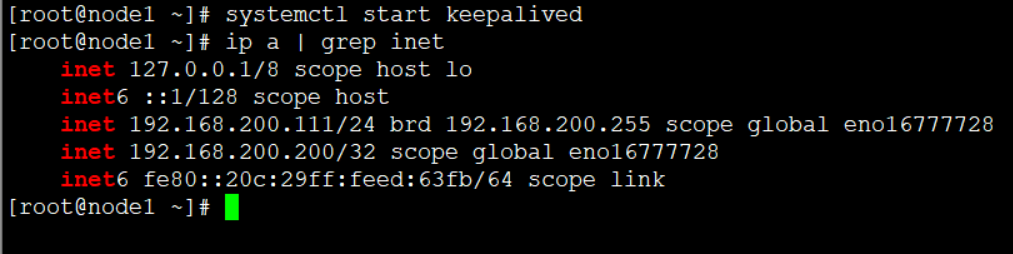
VIP地址:192.168.200.200
二、安装前操作
1. 修改主机名


#node1
hostname node1
bash
#node2
hostname node2
bash
#nginx1
hostname nginx1
bash
#nginx2
hostname nginx2
bash
2. 修改hosts文件
192.168.200.111 node1
192.168.200.112 node2
192.168.200.113 nginx1
192.1683200.114 nginx2
3. 关闭防火墙与安全机制
systemctl restart firewalld
iptables -F
setenforce 0
4. 配置yum环境(不再介绍)
使用的是阿里的网络yum源与epel源
三、node1部署
1. 安装nginx
#安装nginx
yum -y install nginx
#修改配置文件
vim /etc/nginx/nginx.conf
upstream webs { #添加地址池
server 192.168.200.113:80;
server 192.168.200.114:80;
}
location / {
proxy_pass http://webs/; #进行匹配
}
2. 安装keepalived
#安装keepalived
yum -y install keepalived
#配置keepalived
vim /etc/keepalived/keepalive.conf
global_defs {
script_user root
enable_script_security
}
vrrp_script nginx {
script "/etc/keepalived/check_nginx.sh"
interval 2
weight 2
}
vrrp_instance VI_1 {
state MASTER
interface eno16777728
virtual_router_id 51
priority 100
advert_int 1
authentication {
auth_type PASS
auth_pass 1111
}
track_script {
nginx
}
virtual_ipaddress {
192.168.200.200
}
}
#编写检查脚本
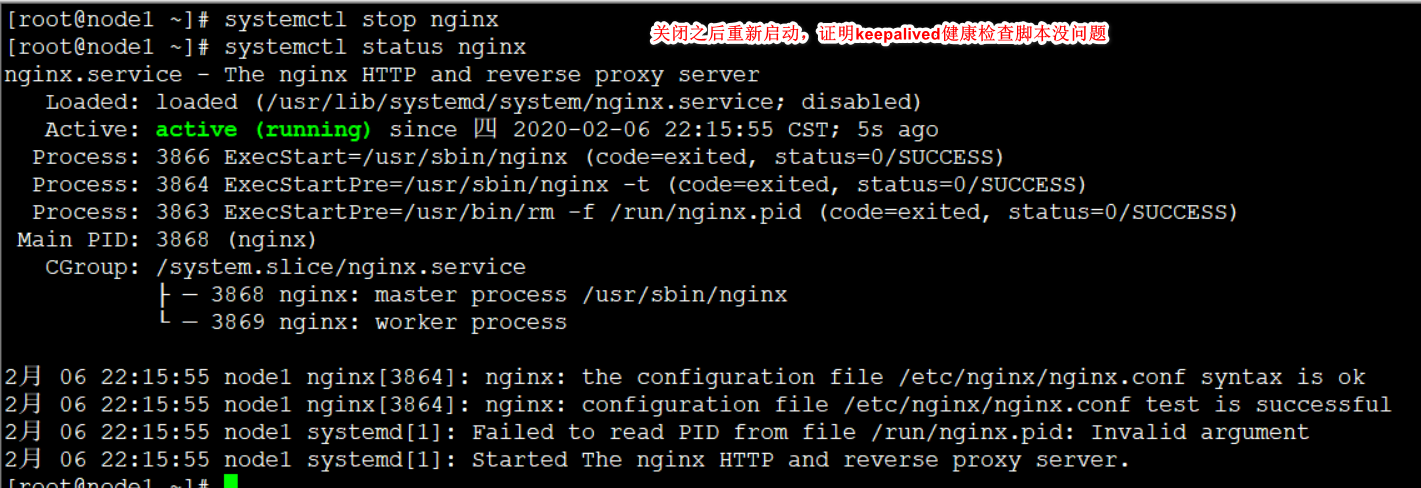
vim /etc/keepalived/check_nginx.sh
#!/bin/bash
a=$(ps -C nginx --no-header | wc -l)
if [ $a -eq 0 ];then
systemctl restart nginx
if [ `ps -C nginx --no-header | wc -l` -eq 0 ];then
systemctl stop keepalived
fi
fi
#给脚本加执行权限
chmod 755 /etc/keepalived/check_nginx.sh
四、node2部署
1. 安装nginx
#安装nginx
yum -y install nginx
#修改配置文件
vim /etc/nginx/nginx.conf
upstream webs { #添加地址池
server 192.168.200.113:80;
server 192.168.200.114:80;
}
location / {
proxy_pass http://webs/; #进行匹配
}
2. 安装keepalived
#安装keepalived
yum -y install keepalived
#配置keepalived
vrrp_script nginx {
script "/etc/keepalived/check_nginx.sh"
interval 2
weight 2
}
vrrp_instance VI_1 {
state BACKUP
interface eno16777736
virtual_router_id 51
priority 90
advert_int 1
authentication {
auth_type PASS
auth_pass 1111
}
track_script {
nginx
}
virtual_ipaddress {
192.168.200.200
}
}
#编写检查脚本
vim /etc/keepalived/check_nginx.sh
#!/bin/bash
a=$(ps -C nginx --no-header | wc -l)
if [ $a -eq 0 ];then
systemctl restart nginx
if [ `ps -C nginx --no-header | wc -l` -eq 0 ];then
systemctl stop keepalived
fi
fi
#给脚本加执行权限
chmod 755 /etc/keepalived/check_nginx.sh
五、nginx部署
#安装nginx
yum -y install nginx

#nginx1
cat >  /usr/share/nginx/html/index.html << EOF
113
EOF

#nginx2
cat > /usr/share/nginx/html/index.html
114
EOF

#启动服务
systemctl restart nginx
systemctl enable nginx
六、测试
1. 使用VIP访问网页
2. 关闭nginx测试keepalived健康检查脚本
3. 关闭keepalived测试VIP是否飘移
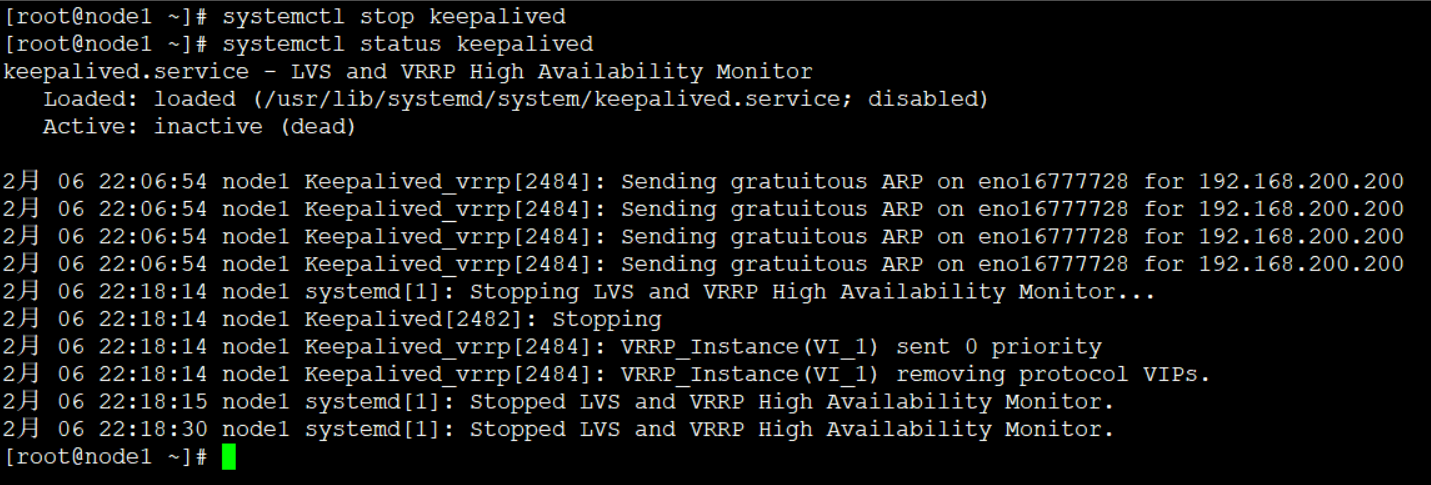
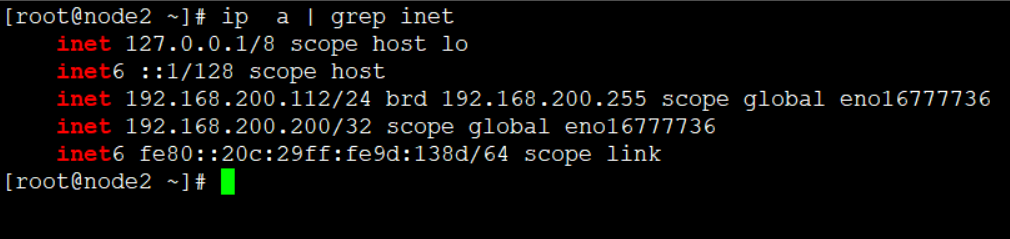
重新启动keepalived