jenkins 整合maven,svn(配置钩子程序实现提交代码自动构建),tomcat实现热部署(windows+linux分别实现)
springboot : https://blog.csdn.net/zjh_746140129/article/details/80904876
1 准备工作:
(1)运行jenkins的tomcat
(2)运行我们项目的tomcat
(3)SVN服务器
jenkins就是一个war包,相信大家都非常熟悉,扔在tomcat webapp下就能跑,具体操作步骤上网去搜一搜一大把,我们主要是来记录一下如何实现钩子程序,实现代码的动态部署。
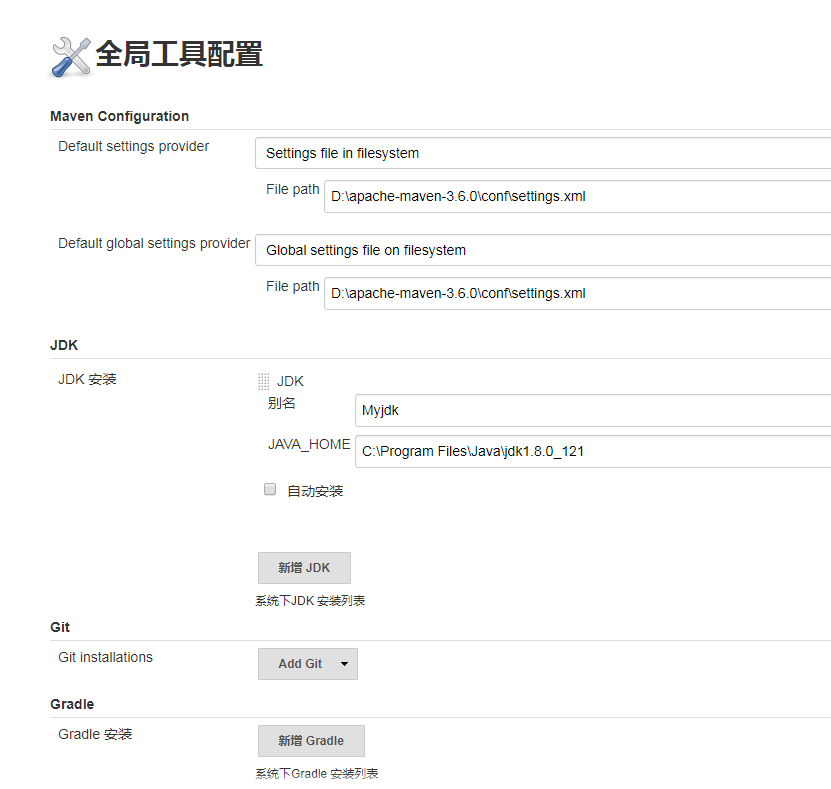
jenkins配置的话我们需要配置jdk,maven,maven的settings.xml,服务器的tomcat。
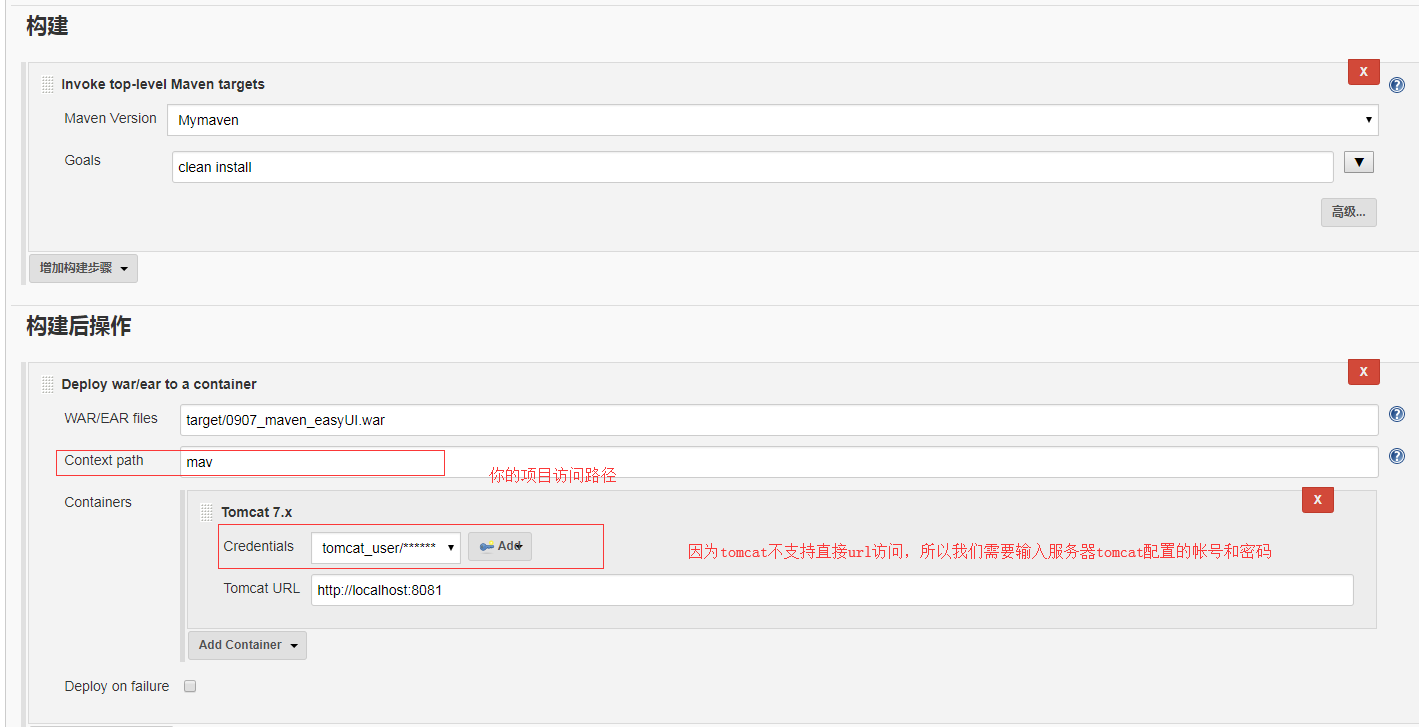
jenkins第一次进入后台会提示去下载插件,我们只要耐心等待一会儿就好,因为我们要实现热部署,所以需要另外手动去下载一个叫depoly to container 的插件, 直接ctrl+f全局搜索就行。

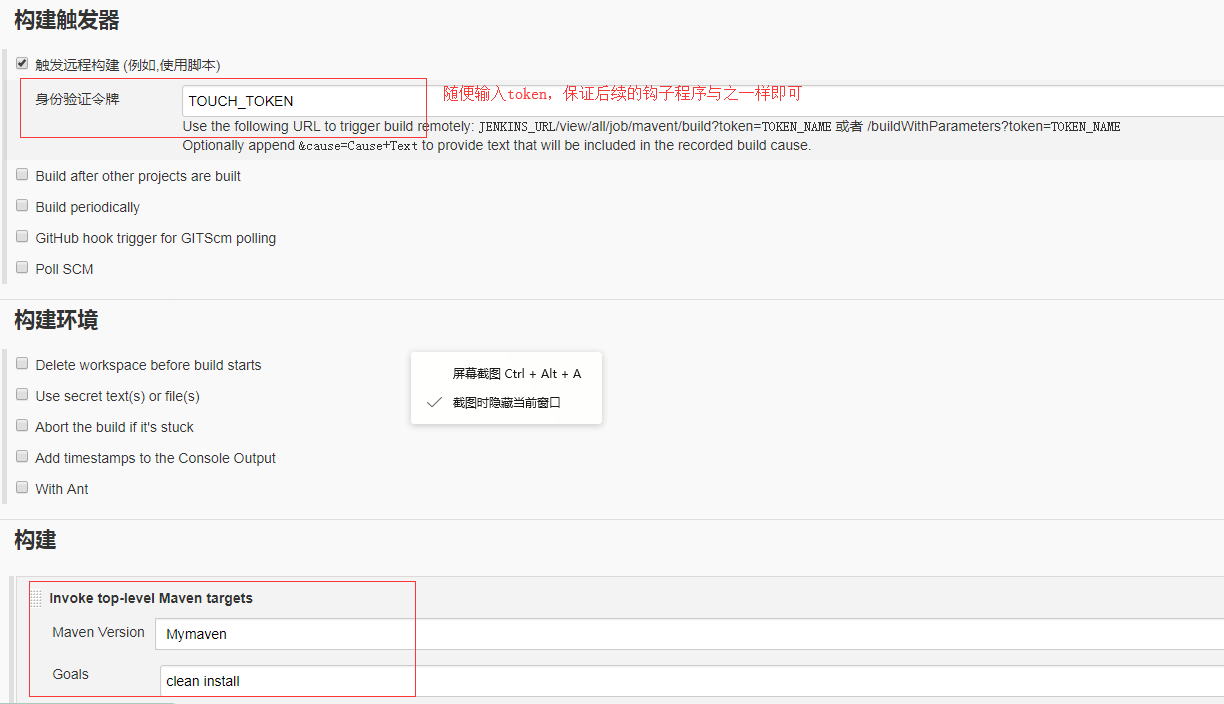
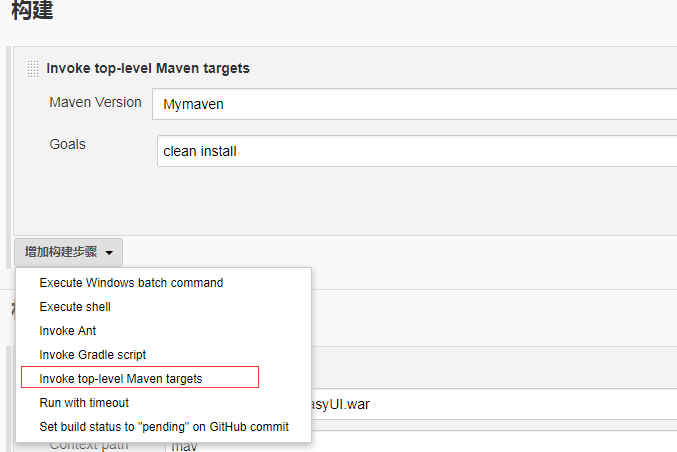
其余配置如下:过程太简单直接略过



maven 项目打包方法


<?xml version='1.0' encoding='utf-8'?>
<!--
  Licensed to the Apache Software Foundation (ASF) under one or more
  contributor license agreements.  See the NOTICE file distributed with
  this work for additional information regarding copyright ownership.
  The ASF licenses this file to You under the Apache License, Version 2.0
  (the "License"); you may not use this file except in compliance with
  the License.  You may obtain a copy of the License at

      http://www.apache.org/licenses/LICENSE-2.0

  Unless required by applicable law or agreed to in writing, software
  distributed under the License is distributed on an "AS IS" BASIS,
  WITHOUT WARRANTIES OR CONDITIONS OF ANY KIND, either express or implied.
  See the License for the specific language governing permissions and
  limitations under the License.
-->
<tomcat-users>
<!--
  NOTE:  By default, no user is included in the "manager-gui" role required
  to operate the "/manager/html" web application.  If you wish to use this app,
  you must define such a user - the username and password are arbitrary. It is
  strongly recommended that you do NOT use one of the users in the commented out
  section below since they are intended for use with the examples web
  application.
-->
<!--
  NOTE:  The sample user and role entries below are intended for use with the
  examples web application. They are wrapped in a comment and thus are ignored
  when reading this file. If you wish to configure these users for use with the
  examples web application, do not forget to remove the <!.. ..> that surrounds
  them. You will also need to set the passwords to something appropriate.
-->
<!--
  <role rolename="tomcat"/>
  <role rolename="role1"/>
  <user username="tomcat" password="<must-be-changed>" roles="tomcat"/>
  <user username="both" password="<must-be-changed>" roles="tomcat,role1"/>
  <user username="role1" password="<must-be-changed>" roles="role1"/>
-->
<role rolename="manager-gui"/>

<role rolename="manager-script"/>

<role rolename="manager-jmx"/>

<role rolename="manager-status"/>

<user username="tomcat_user" password="123456" roles="manager-gui,manager-script,manager-jmx,manager-status" />

</tomcat-users>
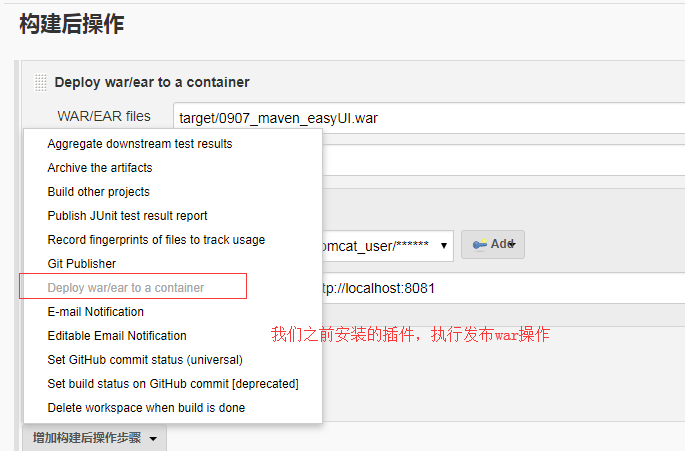

这样我们的项目就自动部署到服务器的tomcat上面了,接下来就该如何自动触发钩子程序,去实现自动构建了。
我们进入svn服务器根目录:
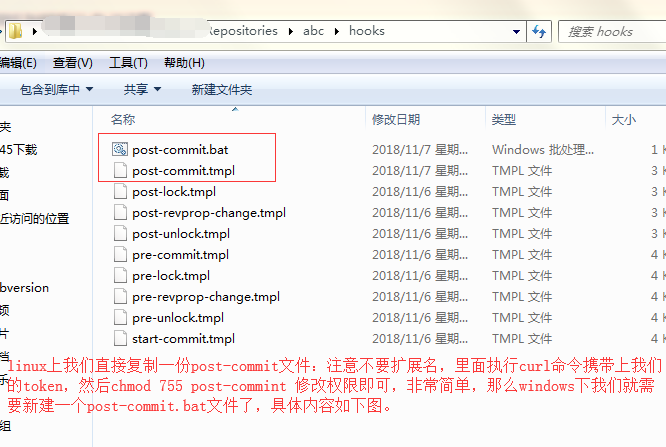
@echo off
start cmd /c "curl -X post -v -u admin:你的jenkins登录密码 http://127.0.0.1:8080/jenkins/view/all/job/mavent/build?token=TOUCH_TOKEN"
windows 上想要使用curl命令需要下载curl插件,然后配置环境变量后才能起作用。
最后我们修改svn的登录权限
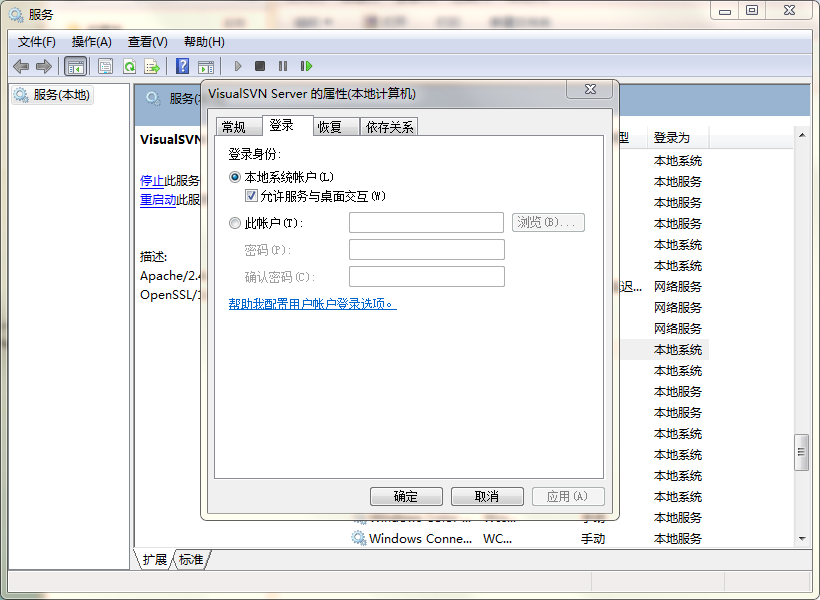
那么现在只要在本地电脑提交代码到svn服务器,即会自动触发构建了!
3.2 自动化部署
“自动化”的具体体现:向版本库提交新的代码后,应用服务器上自动部署,用户或测试人员使用的马上就是最新的应用程序。
4
更多 Java –大数据 –前端 –python 人工智能资料下载,可访问百度:尚硅谷官网
JavaEE 高级课程系列
搭建上述持续集成环境可以把整个构建、部署过程自动化,很大程度上减轻工作量。对于程序员的日常开发来说不会造成任何额外负担——自己把代码提交上去之后,服务器上运行的马上就是最新版本——一切都发生在无形中。
下面我们讲带领大家一步一步搭建整套持续集成环境,这个操作过程只需要细心认真即可,没有任何难度。但是需要优秀的你具备以下前置知识:
ü Linux 基本操作命令和 VIM 编辑器使用
ü Maven 的项目构建管理
ü GitHub 或 SVN 使用


