Redhat上为java Maven项目构建基于Jenkins + Github的持续集成环境
在Redhat enterprise 6.5 的服务器上,为在gutub 上的 java mvaen项目构建一个持续集成环境,用到了Jenkins。因公司的服务器在内网,访问外网时要通过代理,所以为maven加上了代理,如果你的服务器可以直接访问外网,则可以去掉代理。.net 项目可参考 《在Redhat上为.Net 项目构建基于Jenkins + Github + Mono 的持续集成环境》
1. 安装 maven
wget -e "http_proxy=http://web-proxy.corp.hp.com:8080"http://mirrors.gigenet.com/apache/maven/maven-3/3.0.5/binaries/apache-maven-3.0.5-bin.tar.gz
su -c "tar -zxvf apache-maven-3.0.5-bin.tar.gz -C /opt/" su -c "vi /etc/profile.d/maven.sh"
# Add the following lines to maven.sh
export M2_HOME=/opt/apache-maven-3.0.5
export M2=$M2_HOME/bin
PATH=$M2:$PATH
2. 设置代理
如果可以直接连外网,可以路过这步。
如果是公司内网,不设置maven proxy,会报下面的错误:
Waiting for Jenkins to finish collecting data[ERROR] Plugin org.apache.maven.plugins:maven-resources-plugin:2.5 or one of its dependencies could not be resolved: Failed to read artifact descriptor for org.apache.maven.plugins:maven-resources-plugin:jar:2.5: Could not transfer artifact org.apache.maven.plugins:maven-resources-plugin:pom:2.5 from/to central (
http://repo.maven.apache.org/maven2
): Connection to
http://repo.maven.apache.org
refused: Connection timed out -> [Help 1]
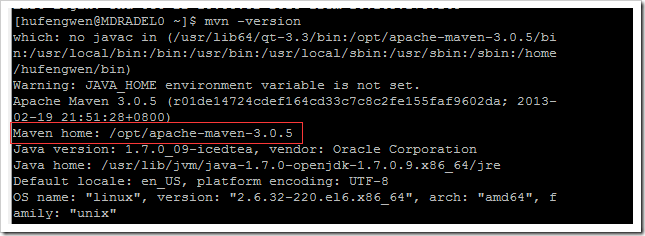
安装完后,用 mvn –version 查看安装信息:
然后进入到 maven 路径:
cd /opt/apache-maven-3.0.5/conf
修改设置:
sudo vi settings.xml
<proxy>
<id>optional</id>
<active>true</active>
<protocol>http</protocol>
<username>proxyuser</username>
<password>proxypass</password>
<host>web-proxy.corp.xx.com</host>
<port>8080</port>
<nonProxyHosts>127.0.0,1</nonProxyHosts>
</proxy>
3. Jenkins 里设置 mvaen
进入系统管理:
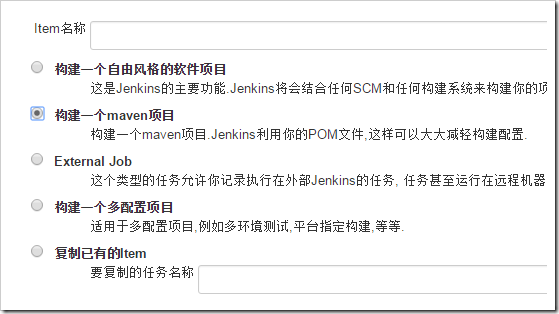
构建一个maven的项目:
设置build属性:
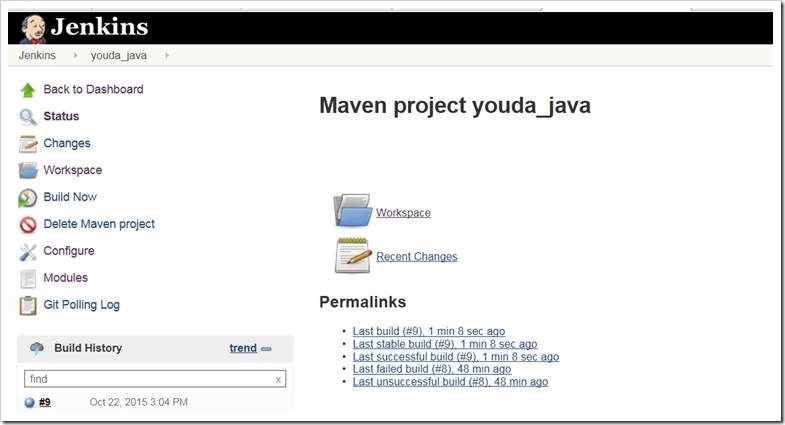
配置完成后,点击 “立即构建”,build 成功:
如果您觉得阅读本文对您有帮助,请点一下“推荐”按钮,您的“推荐”将是我最大的写作动力!欢迎各位转载,但必须在文章页面明显位置给出作者和原文连接,否则保留追究法律责任的权利。


【推荐】国内首个AI IDE,深度理解中文开发场景,立即下载体验Trae
【推荐】编程新体验,更懂你的AI,立即体验豆包MarsCode编程助手
【推荐】抖音旗下AI助手豆包,你的智能百科全书,全免费不限次数
【推荐】轻量又高性能的 SSH 工具 IShell:AI 加持,快人一步
· go语言实现终端里的倒计时
· 如何编写易于单元测试的代码
· 10年+ .NET Coder 心语,封装的思维:从隐藏、稳定开始理解其本质意义
· .NET Core 中如何实现缓存的预热?
· 从 HTTP 原因短语缺失研究 HTTP/2 和 HTTP/3 的设计差异
· 周边上新:园子的第一款马克杯温暖上架
· Open-Sora 2.0 重磅开源!
· 分享 3 个 .NET 开源的文件压缩处理库,助力快速实现文件压缩解压功能!
· Ollama——大语言模型本地部署的极速利器
· DeepSeek如何颠覆传统软件测试?测试工程师会被淘汰吗?