Mysql命令操作
1.重置密码
1.1假设我们使用的是root账户

1.2跳过mysql密码认证过程
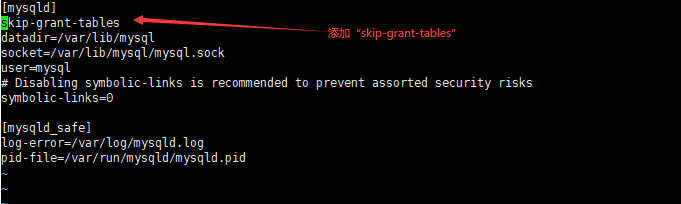
#vim /etc/my.cnf
在[mysqld]后面任意一行添加“skip-grant-tables”用来跳过密码验证的过程,如下图所示
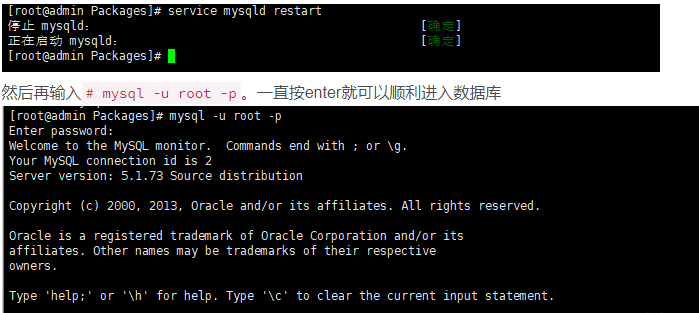
1.3接下来我们需要重启MySQL
# service mysqld restart
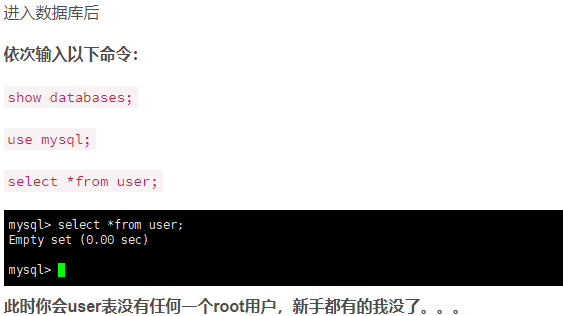
1.4创建root用户
mysql> create user 'root'@'localhost' identified by '123456';
1.5刷新配置
flush privileges;
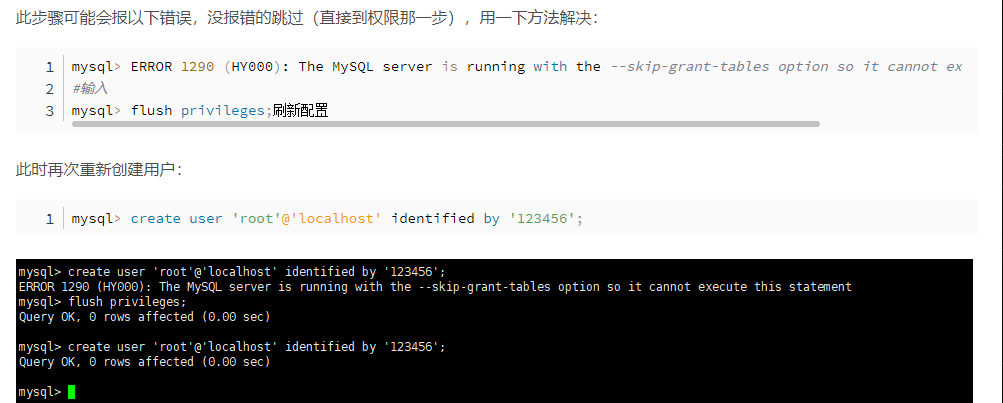
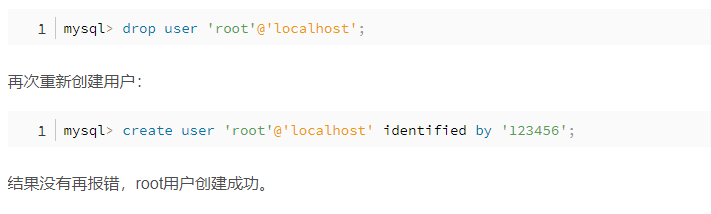
1.6在报错删除用户重新添加
mysql> drop user 'root'@'localhost';
mysql> create user 'root'@'localhost' identified by '123456';
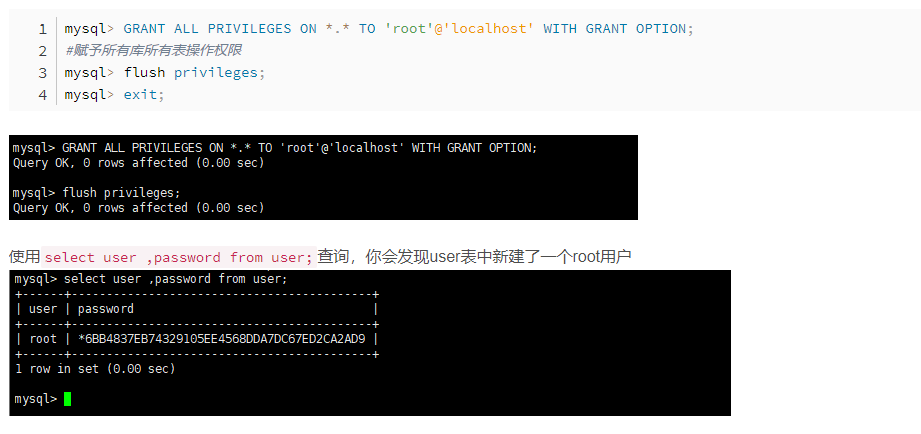
1.7赋予root用户权限
mysql> GRANT ALL PRIVILEGES ON *.* TO 'root'@'localhost' WITH GRANT OPTION;
#赋予所有库所有表操作权限
mysql> flush privileges;
mysql> exit;
1.8恢复之前的配置,并重启数据库,用新密码登录

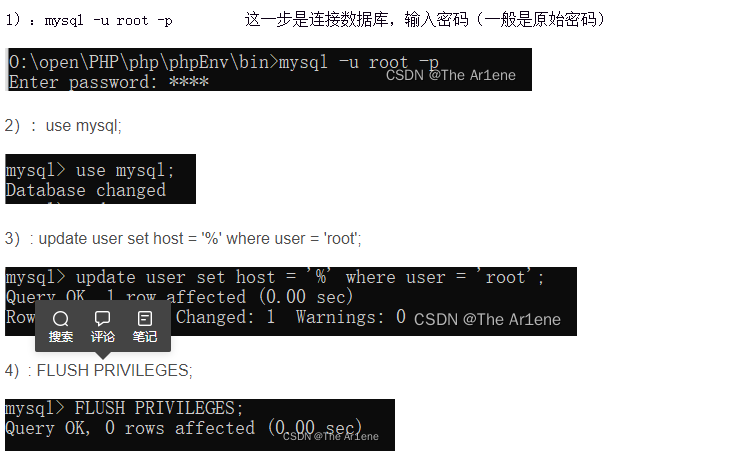
2.连接MySQL出现Host is not allowed to connect to this MySQL server
mysql -u root -p
use mysql;
update user set host = '%' where user = 'root';
FLUSH PRIVILEGES;
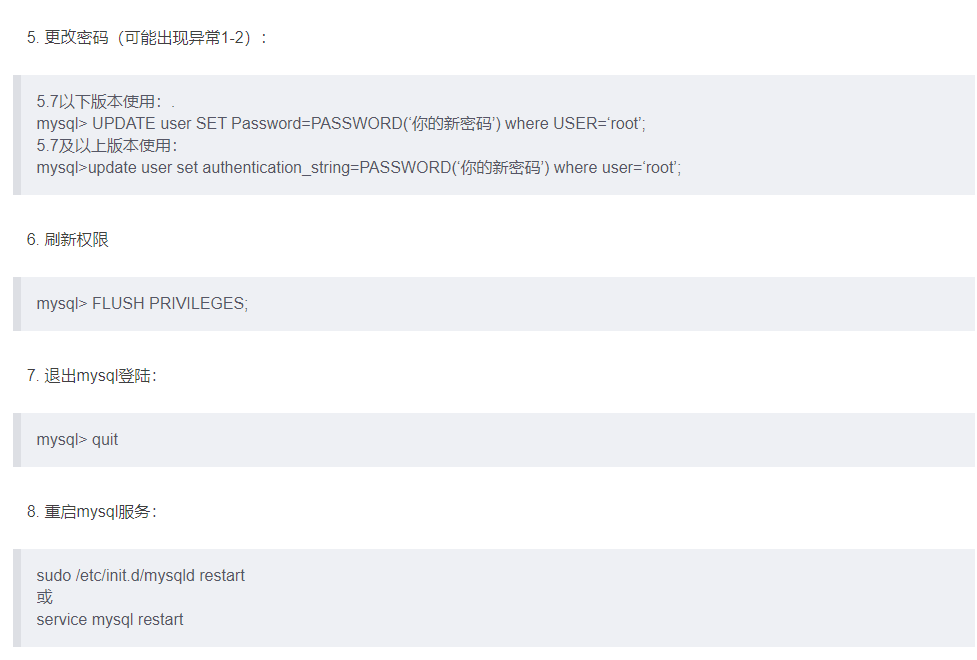
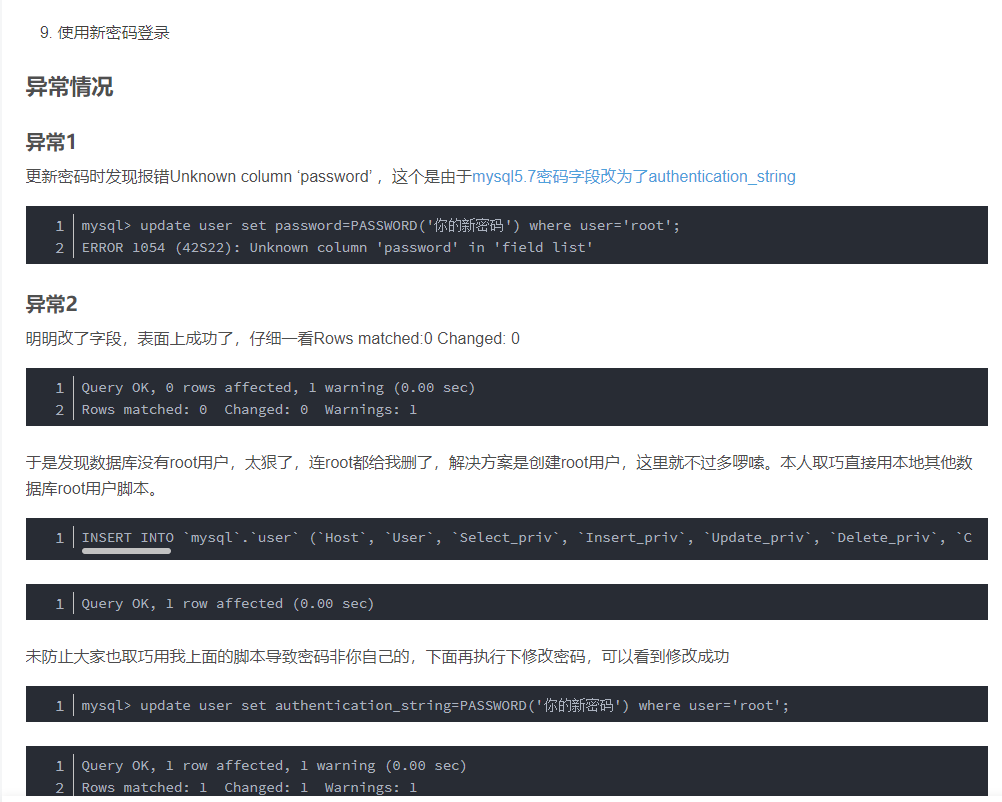
3.修改密码
5.7以下版本使用:.
mysql> UPDATE user SET Password=PASSWORD(‘你的新密码’) where USER=‘root’;
5.7及以上版本使用:
mysql>update user set authentication_string=PASSWORD(‘你的新密码’) where user=‘root’;

4.备份数据
4.1测试使用mysqldump进行数据库备份
mysqldump -h 127.0.0.1 -uroot -proot database tableName1 tableName2 > backup.sql

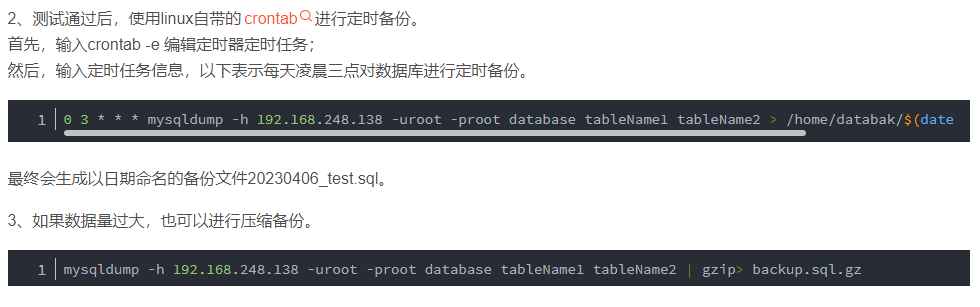
4.2Linux定时备份
输入crontab -e 编辑定时器定时任务
0 3 * * * mysqldump -h 127.0.0.1 -uroot -proot database tableName1 tableName2 > /home/databak/$(date +\%Y\%m\%d)_test.sql
mysqldump -h 192.168.248.138 -uroot -proot database tableName1 tableName2 | gzip> backup.sql.gz

 浙公网安备 33010602011771号