【08-01】创建私有CA并进行证书申请
创建私有CA并进行证书申请。
0.创建私有CA的准备
创建私有CA的过程:
- 创建私有CA
- 生成CA私钥
- 生成CA自签名证书
- 用户证书申请
- 生成用户私钥
- 生成用户证书申请文件
- 申请文件转化为证书文件
- 可用性验证
- 安装CA证书服务器的证书
- 安装用户证书
0.1 创建环境
CentOS8没有相应的文件所以需要手工创建
[root@rhel8 ~]# mkdir /etc/pki/CA/{certs,crl,newcerts,private} -pv   #创建相关文件夹
[root@rhel8 ~]# touch /etc/pki/CA/index.txt            #生成证书索引数据库文件
[root@rhel8 ~]# echo 01 > /etc/pki/CA/serial           #生成办法证书初始序号(16进制)
[root@rhel8 ~]# tree /etc/pki/CA/                   #查看生成的文件
/etc/pki/CA/
├── certs
├── crl
├── index.txt
├── newcerts
├── private
└── serial
0.2 配置文件
[root@rhel8 ~]# vim /etc/pki/tls/openssl.cnf
# CA相关设置
####################################################################
[ ca ]
default_ca      = CA_default            # The default ca section

####################################################################
[ CA_default ]

dir             = /etc/pki/CA           # 这个目录默认没有这个文件夹 需要手工创建,
certs           = $dir/certs            # 放颁发的证书
crl_dir         = $dir/crl              # 证书吊销列表
database        = $dir/index.txt        # 1.所有证书的索引 需要创建空文件
#unique_subject = no                    # Set to 'no' to allow creation of
                                        # several certs with same subject.
new_certs_dir   = $dir/newcerts         # 新证书存放位置

certificate     = $dir/cacert.pem       # 创建自签名证书(CA)
serial          = $dir/serial           # 2.证书编号 序列号 需要人为写个数据后才能自动增长N+1
crlnumber       = $dir/crlnumber        # 证书吊销列表编号
                                        # must be commented out to leave a V1 CRL
crl             = $dir/crl.pem          # 证书吊销列表文件
private_key     = $dir/private/cakey.pem# 私钥 (CA的私钥文件)
……………………………………………………………………………………………………………………………………………………………………………………………………………………………………………………
default_days    = 365                   # 证书默认有效期
default_crl_days= 30                    # 吊销时间 CRL
default_md      = sha256                # use SHA-256 by default
preserve        = no                    # keep passed DN ordering
……………………………………………………………………………………………………………………………………………………………………………………………………………………………………………………
# A few difference way of specifying how similar the request should look
# For type CA, the listed attributes must be the same, and the optional
# and supplied fields are just that :-)
policy      = policy_match   #这里为默认规则设置

[ policy_match ]      # For the CA policy 证书的匹配策略 match必须为一致 使用和签发的CA位置必须要在一起
countryName             = match          #国家
stateOrProvinceName     = match          #省份
organizationName        = match          #城市|州
organizationalUnitName  = optional          #组织
commonName              = supplied          #部门
emailAddress            = optional          #

[ policy_anything ]   # 该策略不受规则限制
countryName             = optional          #国家
stateOrProvinceName     = optional          #省份 州
localityName            = optional          #城市
organizationName        = optional          #组织名
organizationalUnitName  = optional          #部门名
commonName              = supplied          #
emailAddress            = optional          #
1.创建私有CA
1.1 生成CA私钥
[root@rhel8 ~]# (umask 077;openssl genrsa -out /etc/pki/CA/private/cakey.pem -des3 2048)
#Centos8不需要做umask权限操作 这里留底方便其他场景,防止忘记
#-des3为对称加密算法man genrsa 其实也可以不增加,但是为了安全考虑还是增加为好。还可以使用其他的算法
#[aes128|aes192|aes256|aria128|aria192|aria256|camellia128|camellia192|camellia256|-des|-des3|-idea]
1.2 生成CA自签名证书
[root@rhel8 ~]# openssl req -new -x509 -key /etc/pki/CA/private/cakey.pem -days 3650 -out /etc/pki/CA/cacert.pem   #根据私钥文件创建证书文件pem在win下面改后缀crt可用
Enter pass phrase for /etc/pki/CA/private/cakey.pem: #输入创建私钥的密码
You are about to be asked to enter information that will be incorporated
into your certificate request.
What you are about to enter is what is called a Distinguished Name or a DN.
There are quite a few fields but you can leave some blank
For some fields there will be a default value,
If you enter '.', the field will be left blank.
-----
Country Name (2 letter code) [XX]:CN                                     #国家编码
State or Province Name (full name) []:nmg                    #省|区
Locality Name (eg, city) [Default City]:baotou                 #市|城
Organization Name (eg, company) [Default Company Ltd]:FeiFa         #企业名称
Organizational Unit Name (eg, section) []:it                  #所在部门
Common Name (eg, your name or your server's hostname) []:ca.feifa.com  #域名
Email Address []:admin@feifa.com                        #邮箱
2.用户证书申请
2.1 生成用户私钥
[root@rhel8 ~]# mkdir -p /data/app1/
[root@rhel8 ~]# (umask 077;openssl genrsa -out /data/app1/app1.key 2048) #创建key文件 这次不加密
[root@rhel8 ~]# cat /data/app1/app1.key #查看文件
-----BEGIN RSA PRIVATE KEY-----
MIIEpAIBAAKCAQEAwkMoUonfvc71IMrYyxK+U73dILYwc8JvR15eyajKYk4cQyKT
……………………………………
I1PW47YUVMAWUdS82IFReYR1LOSxy2evAyf6moRcV+isMNtxpZTIO9rgkBb86NS0
JFbGYbsHC1sS/PbQamYmJ+AcS7jXKEtyWBkfSTcVHAK2AlP0+6aRJw==
-----END RSA PRIVATE KEY-----
2.2 生成用户证书申请文件
[root@rhel8 ~]# openssl req -new /data/app1/app1.key -out /data/app1/app1.csr #将key转换为csr的证书申请文件
You are about to be asked to enter information that will be incorporated
into your certificate request.
What you are about to enter is what is called a Distinguished Name or a DN.
There are quite a few fields but you can leave some blank
For some fields there will be a default value,
If you enter '.', the field will be left blank.
-----
Country Name (2 letter code) [XX]:CN                                        #* 国家 必须与自签的一致
State or Province Name (full name) []:nmg                        #* 省|区 必须与自签的一致
Locality Name (eg, city) [Default City]:alashan                 #城市
Organization Name (eg, company) [Default Company Ltd]:FeiFa                #* 企业名称 必须与自签的一致
Organizational Unit Name (eg, section) []:aa                               #部门名称
Common Name (eg, your name or your server's hostname) []:app.feifa.com     #域名
Email Address []:app@feifa.com                                             #邮箱

Please enter the following 'extra' attributes
to be sent with your certificate request
A challenge password []:
An optional company name []:
2.3 申请文件转化为证书文件
[root@rhel8 ~]# openssl ca -in /data/app1/app1.csr -out /etc/pki/CA/certs/app1.crt -days 1095 #生成的文件为crt文件
Using configuration from /etc/pki/tls/openssl.cnf
Enter pass phrase for /etc/pki/CA/private/cakey.pem:
Check that the request matches the signature
Signature ok
Certificate Details:
        Serial Number: 1 (0x1)
        Validity
            Not Before: Mar 22 01:52:52 2022 GMT
            Not After : Mar 21 01:52:52 2025 GMT
        Subject:
            countryName               = CN
            stateOrProvinceName       = nmg
            organizationName          = FeiFa
            organizationalUnitName    = aa
            commonName                = app.feifa.com
            emailAddress              = app@feifa.com
        X509v3 extensions:
            X509v3 Basic Constraints:
                CA:FALSE
            Netscape Comment:
                OpenSSL Generated Certificate
            X509v3 Subject Key Identifier:
                54:19:74:86:99:8C:D0:08:DF:3D:10:94:54:8D:62:C5:91:0D:E5:CA
            X509v3 Authority Key Identifier:
                keyid:7C:42:E1:68:86:92:D3:2A:4B:80:98:98:6C:9A:AB:1C:6E:F0:45:B9

Certificate is to be certified until Mar 21 01:52:52 2025 GMT (1095 days)
Sign the certificate? [y/n]:y


1 out of 1 certificate requests certified, commit? [y/n]y
Write out database with 1 new entries
Data Base Updated
3.可用性验证
3.1 导入私有CA证书
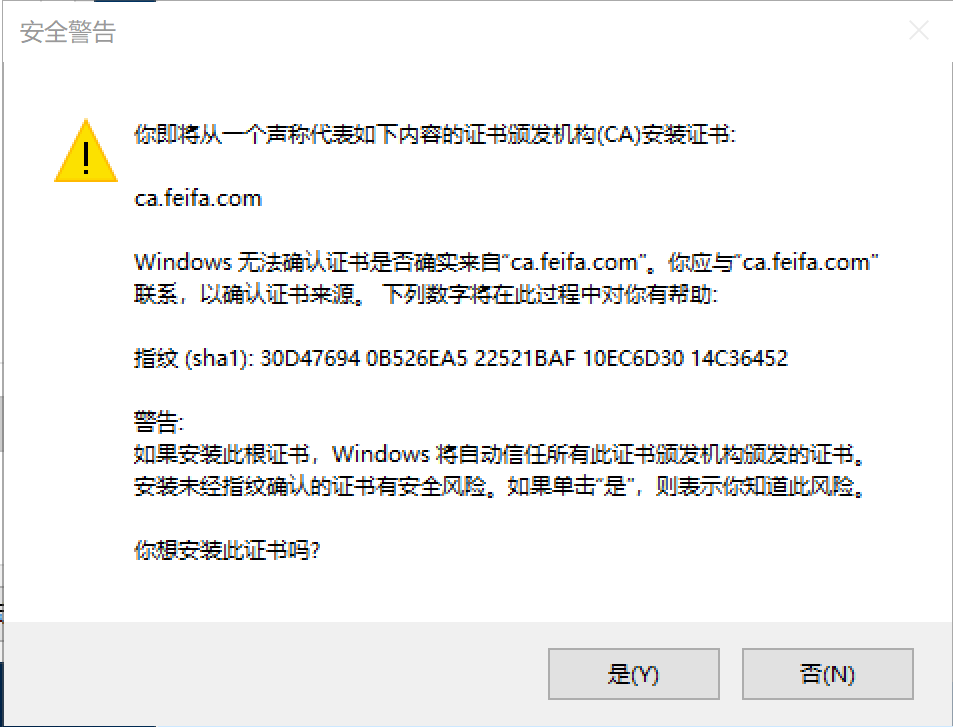
1.将/etc/pki/CA/cacert.pem文件放入windows中改扩展名为crt文件 双击运行
1.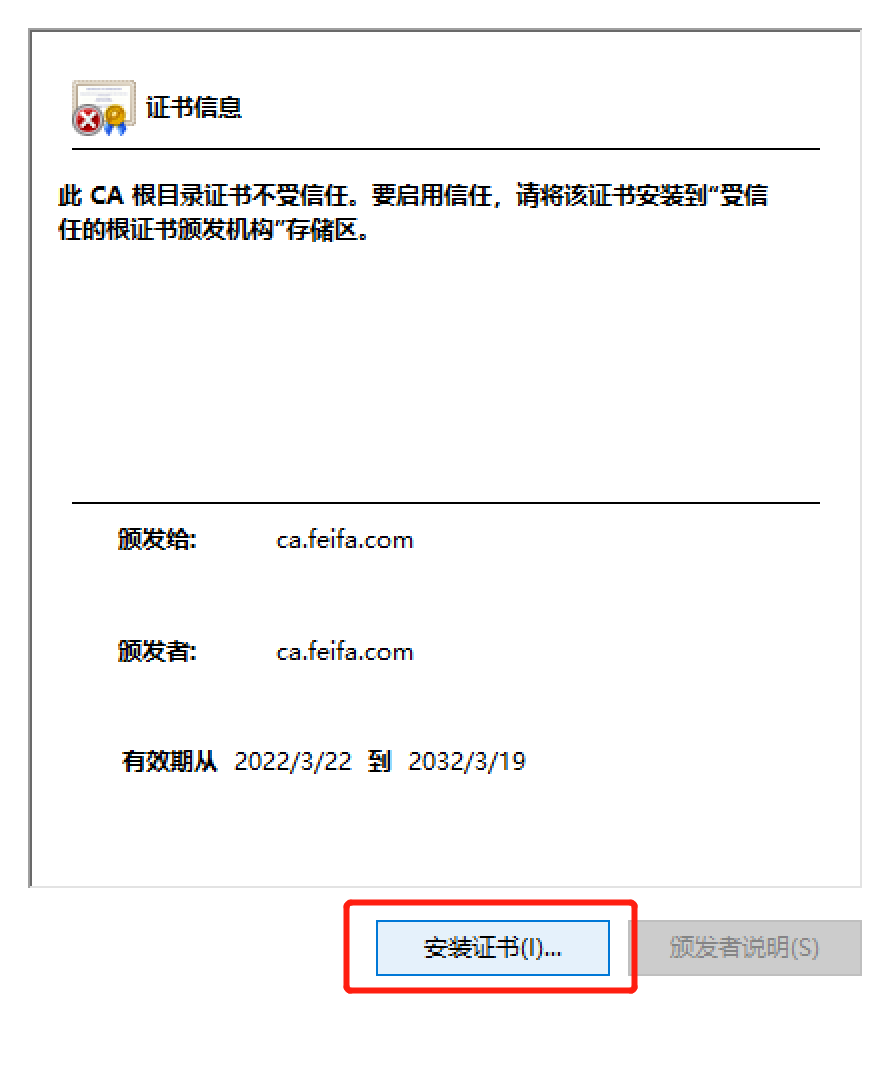 2.
2. 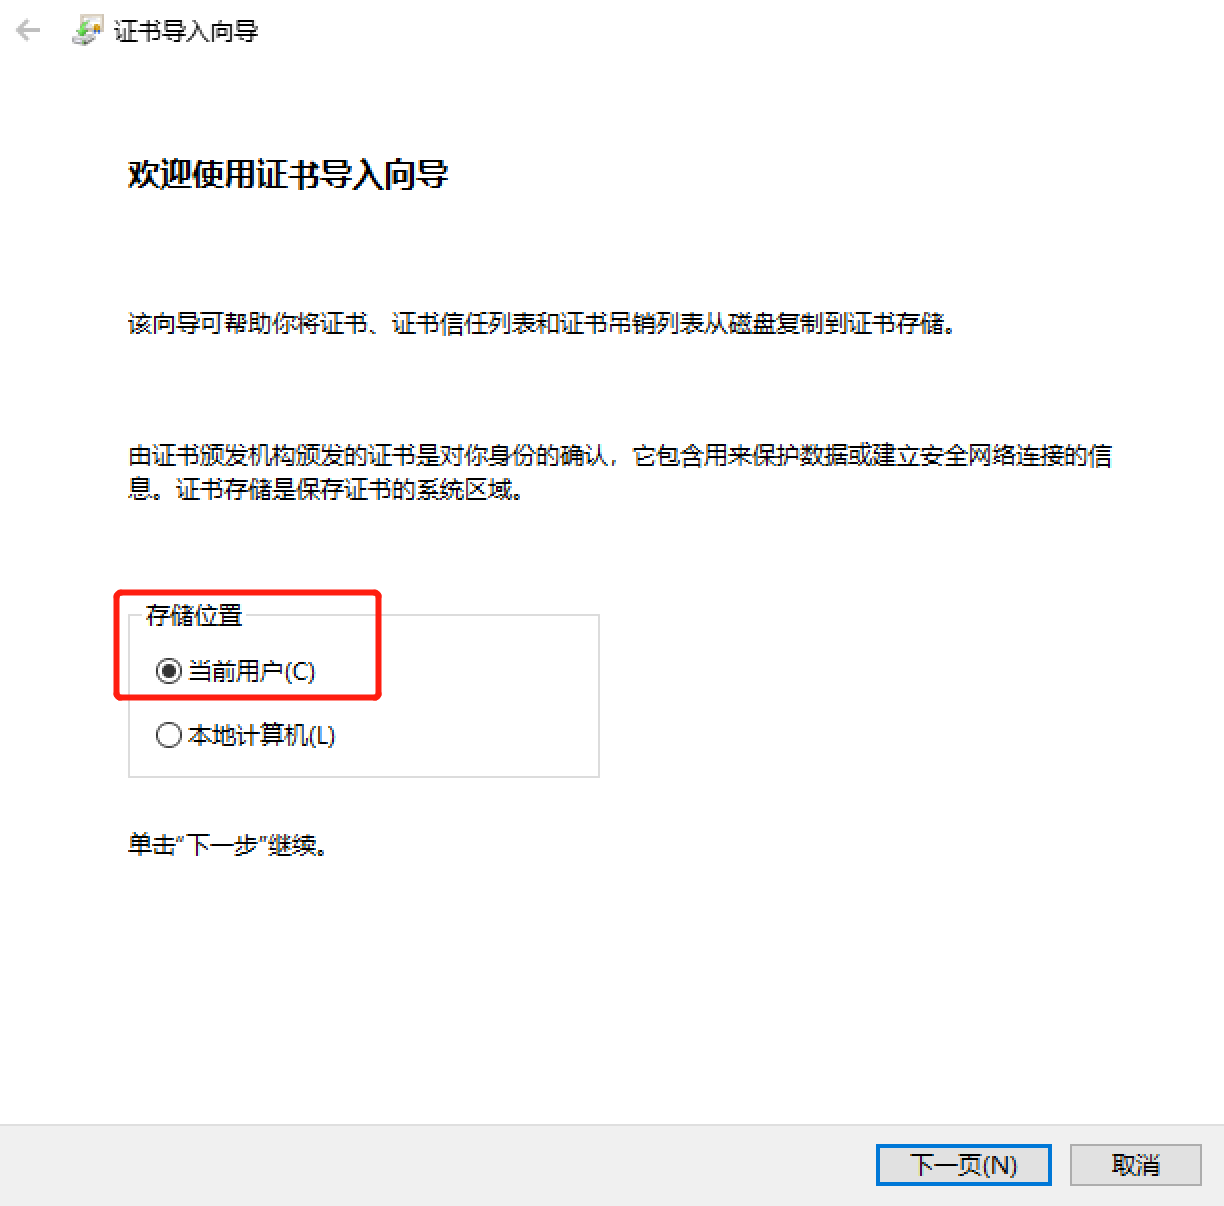 3.
3.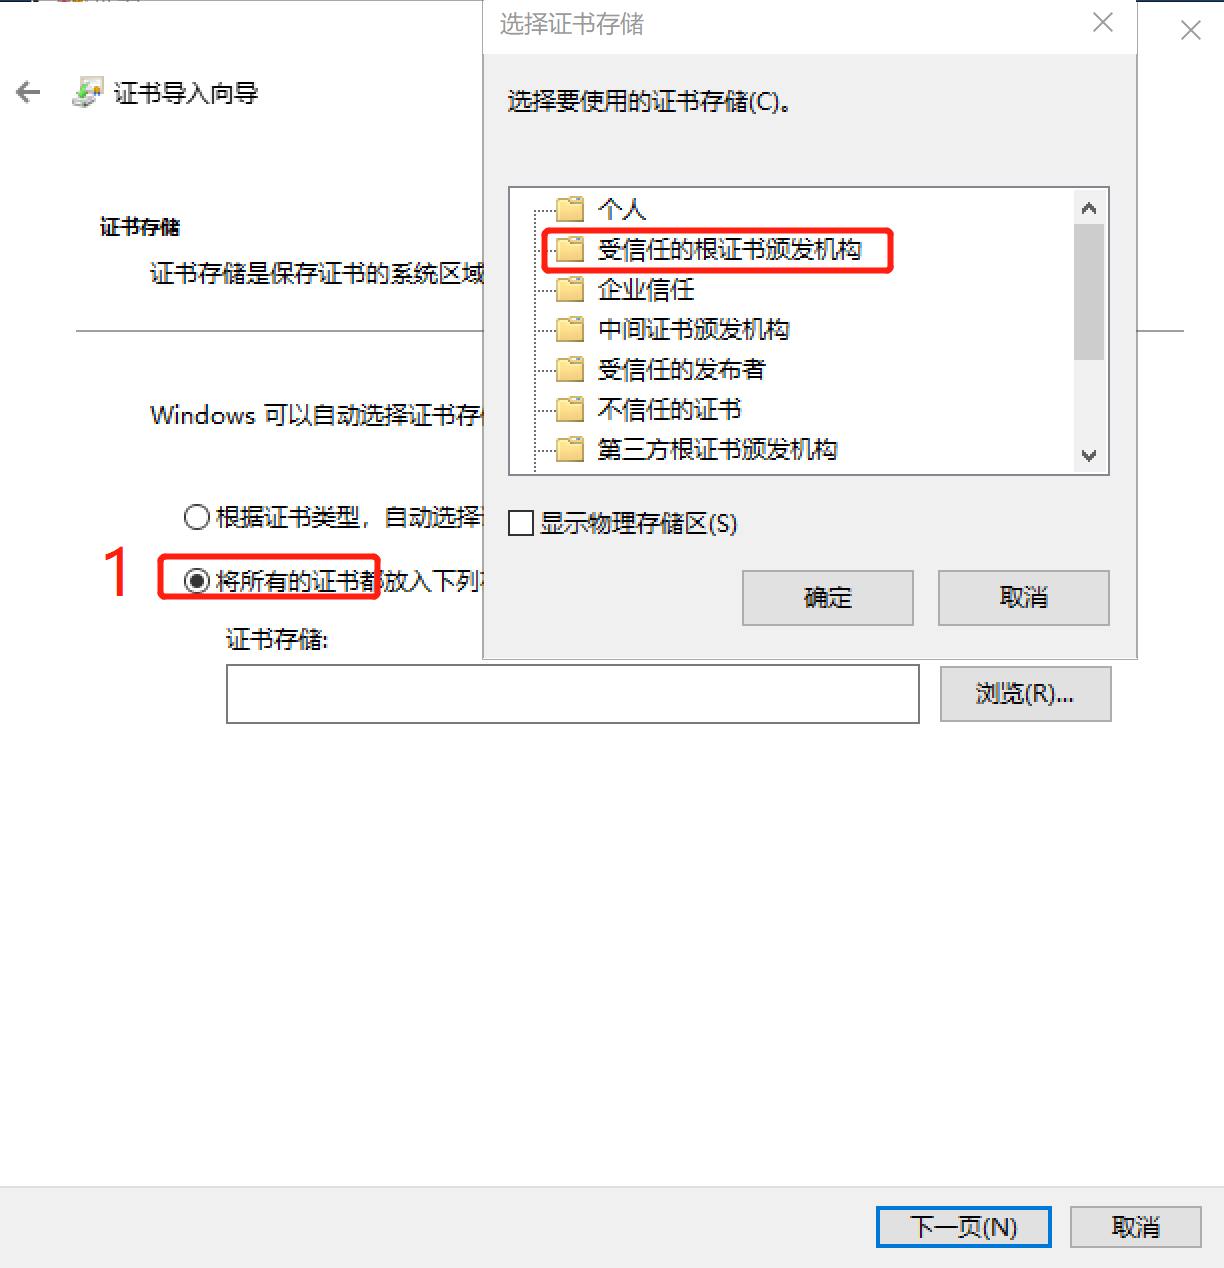 4.
4.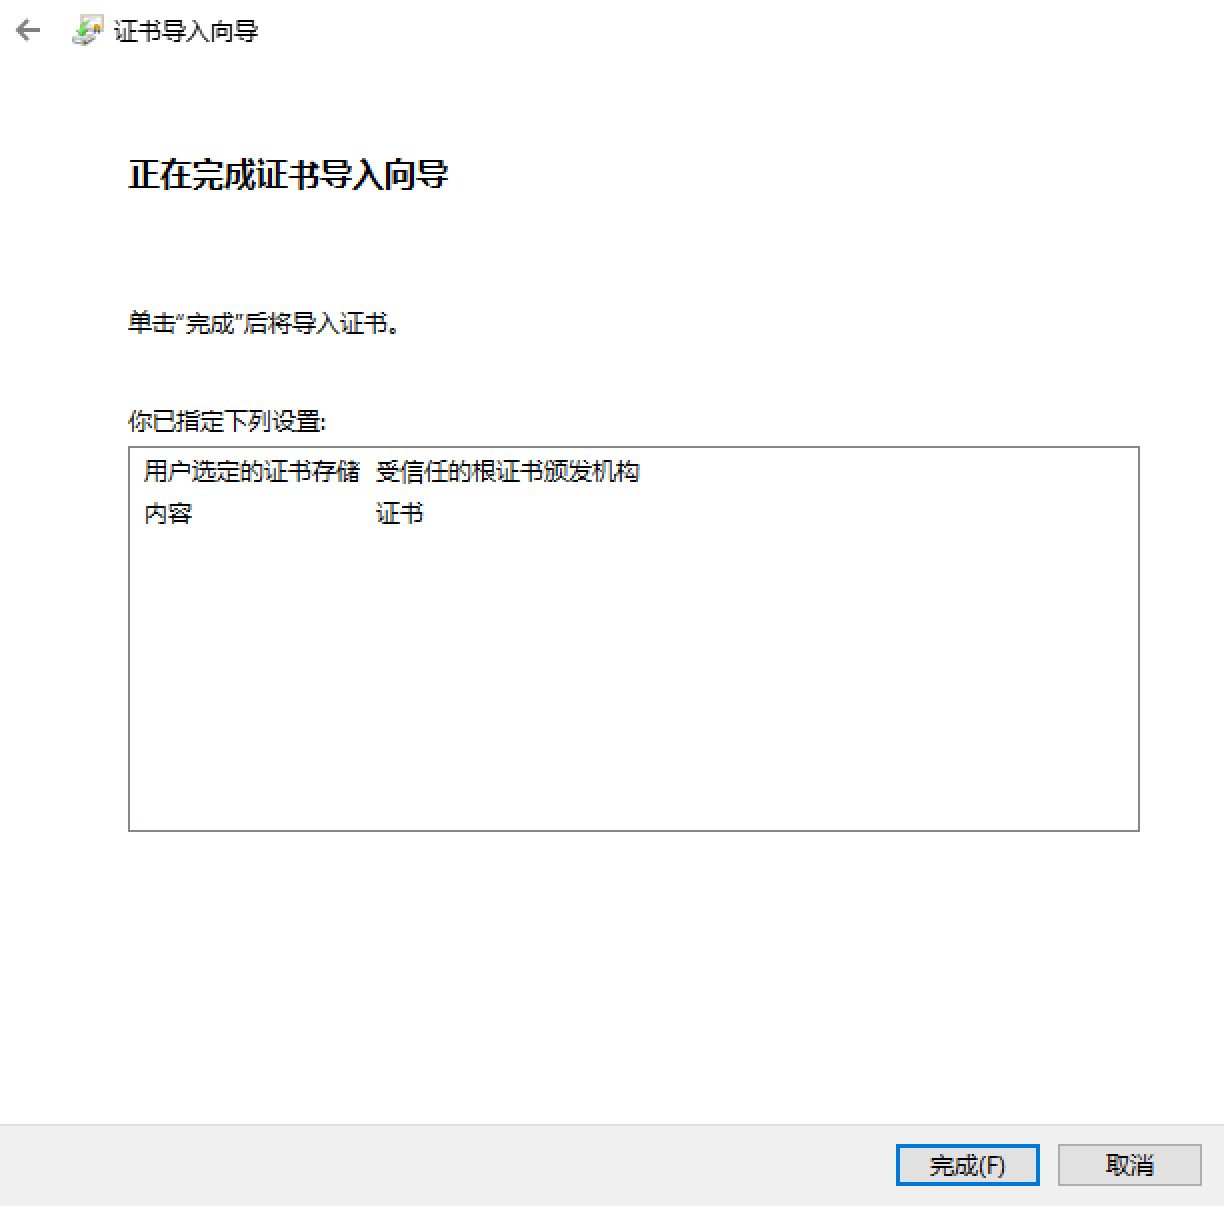
点击完成后 会提示安全警告 选择 是 即可 然后便导入成功
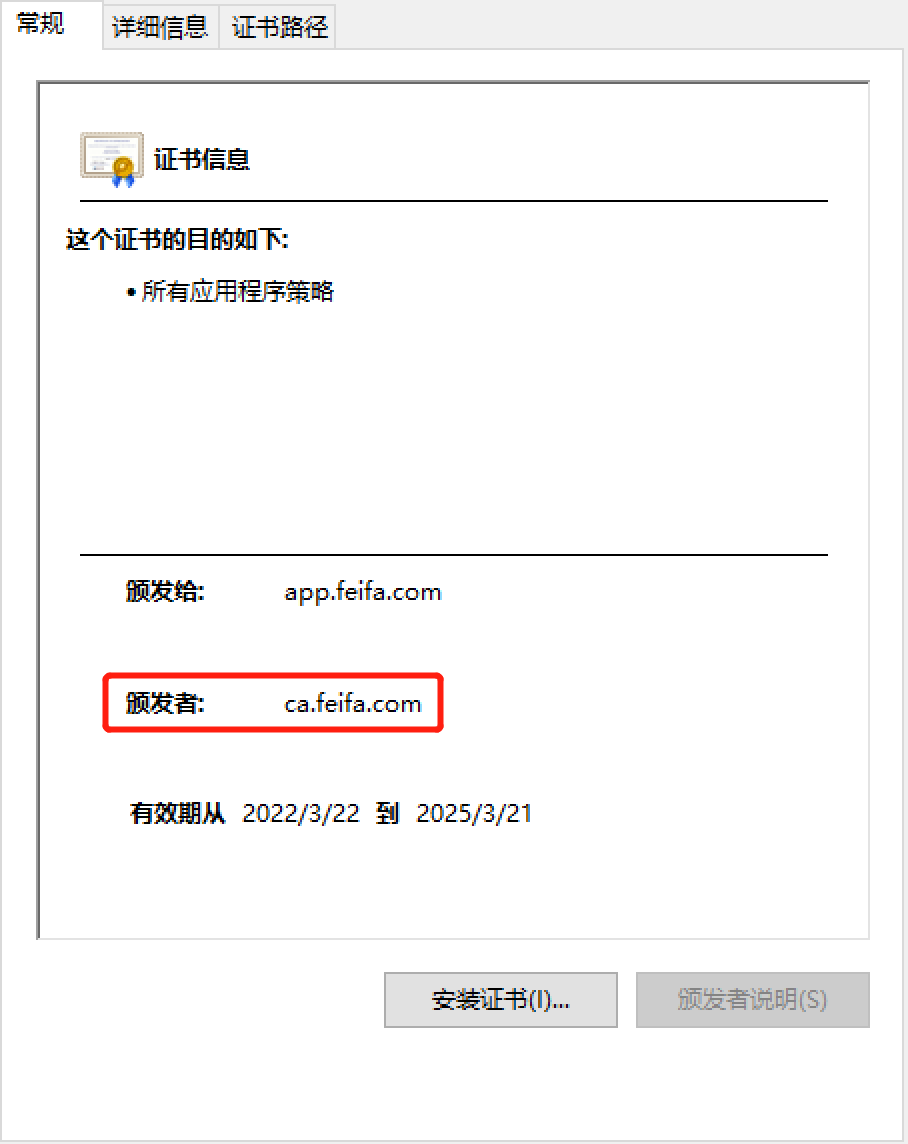
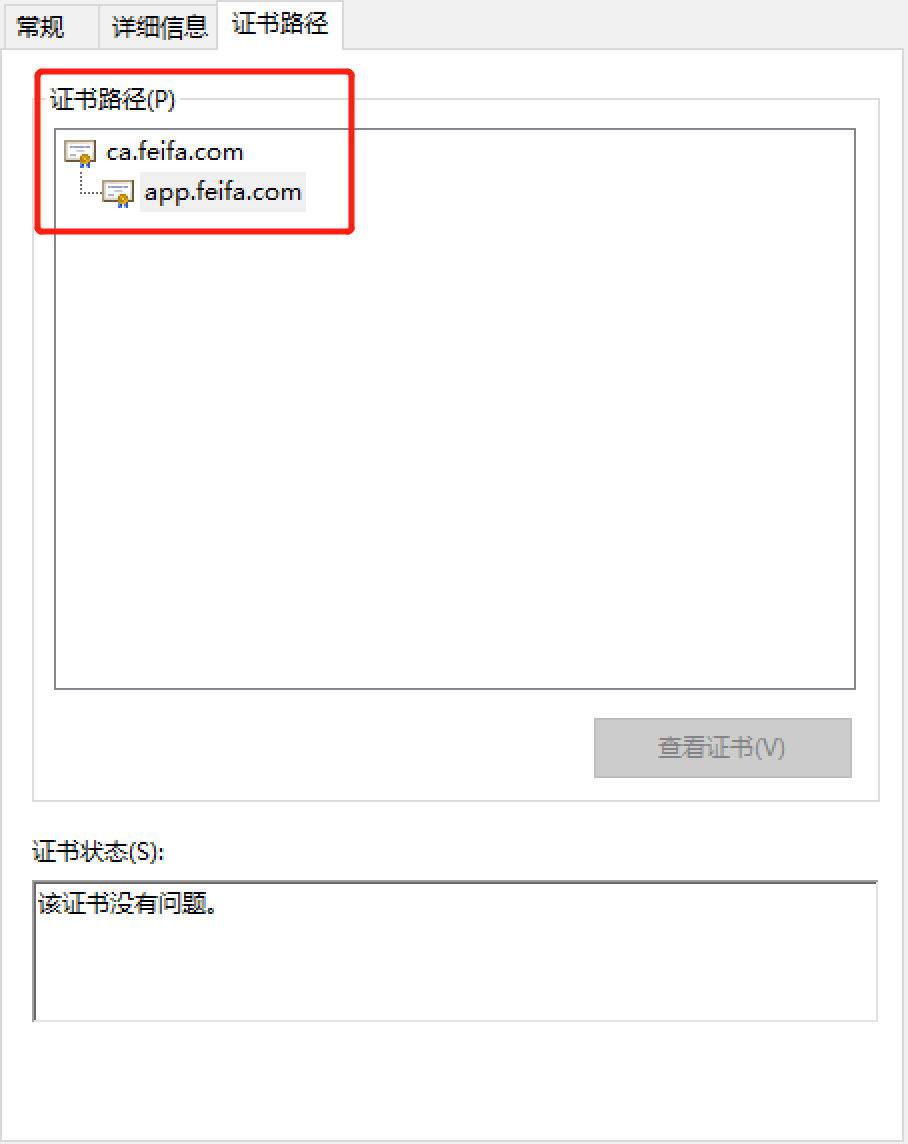
3.2 导入其他证书文件
当系统导入CA证书后再导入生成的其他证书便没有安全警告了
只要确认颁发者和证书路径是我们的ca服务器就行

 浙公网安备 33010602011771号