在CentOS7上部署.net core 控制台app为后台服务
原文链接:
https://www.cnblogs.com/2012-10-3/articles/8158837.html
环境安装:
centos 7.0+
https://docs.microsoft.com/zh-cn/dotnet/core/install/linux-package-manager-centos7
按照文档描述,安装net core SDK和运行时
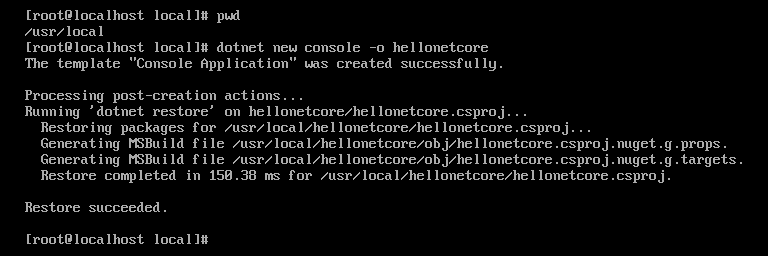
2. 新建.net core控制台项目
● dotnet new console -o hellonetcore
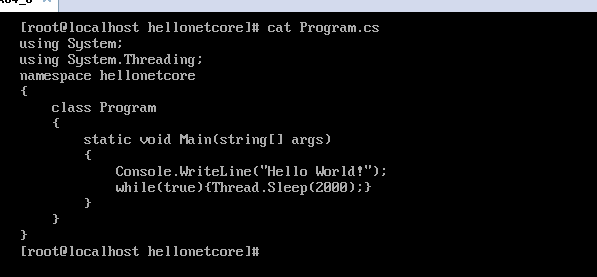
● 进入hellonetcore目录,编辑Program.cs
● 运行hellonetcore项目

● 发布hellonetcore项目

发布完后在Release目录生成发布publish目录。
3. 部署服务
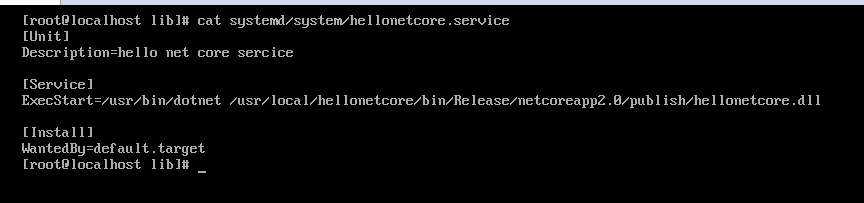
● 创建服务脚本并放在/lib/systemd/system 目录下
服务详细方式可参考:
https://www.cnblogs.com/fei686868/p/11234609.html
在记事本中写完,复制到命令行中即可。
● 使用systemctrl命令部署服务
systemctrl daemon-reload
systemctrl start hellonetcore
systemctrl status hellonetcore

到此一个完整的CentOS 系统服务部署完成。使用systemctrl is-active 命令查看服务是否运行状态:

4. 注意事项
● 对于console程序,需要客户端自己保障主程序不退出,本实例中采用while(true)方式,也可以仿照asp.net core中的ManualResetEventSlim方式。如果没有阻塞主程序退出,当执行systemctrl start hellonetcore命令时会是如下结果:
这个非常重要,若不处理,控制台部署上去后,一直是重启的状态。

5. 参考链接
● systemd教程 :http://www.ruanyifeng.com/blog/2016/03/systemd-tutorial-commands.html
● systemctrl教程:https://www.freedesktop.org/software/systemd/man/systemd.unit.html,
● dotnet 命令行教程: https://docs.microsoft.com/en-us/dotnet/core/tools/dotnet?tabs=netcore2x
● aspnet core在Linux部署教程: https://docs.microsoft.com/en-us/aspnet/core/publishing/linuxproduction?tabs=aspnetcore2x
另附:
ManualResetEvent 实现阻止控制台程序退出,效果和while一样。
https://blog.csdn.net/weixin_30826761/article/details/99235644
下面附 ManualResetEventSlim 阻止控制台退出的方法
using System;
using System.Collections.Generic;
using System.Configuration;
using System.Threading;

namespace Passport.DataSyn
{
    class Program
    {

        private static readonly ManualResetEventSlim _resetEvent = new ManualResetEventSlim();
        static void Main(string[] args)
        {

            Dictionary<string, object> arguments = new Dictionary<string, object>();
            arguments.Add("x-dead-letter-exchange", "ActionExchange.dlx");//DLX
            //KYSharpCore.RabbitMQ.Helper helperAction = new KYSharpCore.RabbitMQ.Helper("ActionExchange", "ActionQueue", "", "action", "fanout", arguments, ConfigurationManager.ConnectionStrings["rabbitmqconnection"].ToString());

            KYSharpCore.RabbitMQ.Helper helperAction = new KYSharpCore.RabbitMQ.Helper("user_change", "mongo", "", "bp", "topic", null, ConfigurationManager.ConnectionStrings["rabbitmqconnection"].ToString());
            helperAction.Subscribe(content =>
            {
                var mongoToMysqlMethod = new MongoToMysqlMethod();
                int result = mongoToMysqlMethod.Go(content);
            });

            //  while (true) { };

            Console.CancelKeyPress += Console_CancelKeyPress;
            AppDomain.CurrentDomain.ProcessExit += (sender, eventArgs) =>
            {
                //等待退出信号触发
                _resetEvent.Wait();
            };
            //Ctrl+C 退出程序

        }
        private static void Console_CancelKeyPress(object sender, ConsoleCancelEventArgs e)
        {
            e.Cancel = true;
            _resetEvent.Set();
        }
    }
}
这个同时也是 asp.net core 源码中使用的方法,见
https://github.com/dotnet/aspnetcore/blob/master/src/Hosting/Hosting/src/Internal/WebHostLifetime.cs

 浙公网安备 33010602011771号