Logstash:多个配置文件(conf)
在前面的一篇文章“Logstash:处理多个input”中,我们介绍了如何使用在同一个配置文件中处理两个input的情况。在今天这篇文章中,我们来介绍如何来处理多个配置文件的问题。对于多个配置的处理方法,有多个处理方法:

- 多个pipeline
- 一个pipleline处理多个配置文件
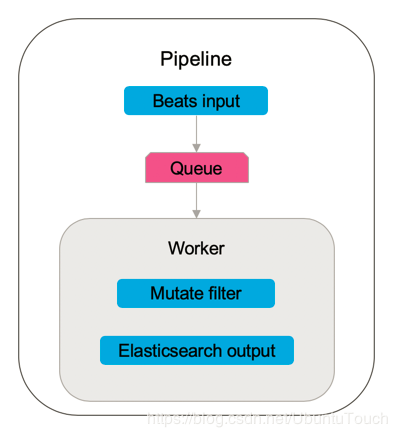
一个pipeline含有一个逻辑的数据流,它从input接收数据,并把它们传入到队列里,经过worker的处理,最后输出到output。这个output可以是Elasticsearch或其它。下面针对这两种情况,来分别进行描述。
多个pipeline

为了做这个练习,我创建了两个Logstash的配置文件。这两个配置文件可以在地址https://github.com/liu-xiao-guo/logstash_multi-pipeline进行下载。我们把文件下载下来后,把文件存于一个自己喜欢的目录里。根据这个路径修改下面.conf文件里的path里的路径。
apache.conf
input {
  file {
    path => "/Users/liuxg/data/multi-input/apache.log"
      start_position => "beginning"
    sincedb_path => "/dev/null"
    # ignore_older => 100000
    type => "apache"
  }
}

filter {
      grok {
        match => {
              "message" => '%{IPORHOST:clientip} %{USER:ident} %{USER:auth} \[%{HTTPDATE:timestamp}\] "%{WORD:verb} %{DATA:request} HTTP/%{NUMBER:httpversion}" %{NUMBER:response:int} (?:-|%{NUMBER:bytes:int}) %{QS:referrer} %{QS:agent}'
        }
      }
}


output {
    stdout {
        codec => rubydebug
    }

      elasticsearch {
        index => "apache_log"
        template => "/Users/liuxg/data/apache_template.json"
        template_name => "apache_elastic_example"
        template_overwrite => true
  }
}
这个配置文件非常简单。和之前的练习差不多。记得修改上面的path路径,并让它指向我们的log文件所在的路径。
daily.conf
input {
  file {
    path => "/Users/liuxg/data/multi-pipeline/apache-daily-access.log"
      start_position => "beginning"
    sincedb_path => "/dev/null"
    type => "daily"
  }
}

filter {
      grok {
        match => {
              "message" => '%{IPORHOST:clientip} %{USER:ident} %{USER:auth} \[%{HTTPDATE:timestamp}\] "%{WORD:verb} %{DATA:request} HTTP/%{NUMBER:httpversion}" %{NUMBER:response:int} (?:-|%{NUMBER:bytes:int}) %{QS:referrer} %{QS:agent}'
        }
      }
}


output {
    stdout {
        codec => rubydebug
    }

      elasticsearch {
        index => "apache_daily"
        template => "/Users/liuxg/data/multi-pipeline/apache_template.json"
        template_name => "apache_elastic_example"
        template_overwrite => true
  }
}
记得修改上面的path路径,并让它指向我们的log文件所在的路径。
接下来,我们修改我们的pipelines.yml文件。在logstash的安装目录下的config文件目录下,修改pipelines.yml文件。
pipelines.yml
 - pipeline.id: daily
   pipeline.workers: 1
   pipeline.batch.size: 1
   path.config: "/Users/liuxg/data/multi-pipeline/daily.conf"
  - pipeline.id: apache
   queue.type: persisted
   path.config: "/Users/liuxg/data/multi-pipeline/apache.conf"
在上面的配置中,我们把daily.conf和apache.conf分别置于两个不同的pipleline中。
这样,我们的配置已经完成了。进入到longstash的安装目录。我们通过如下的命令来运行:
bogon:logstash-7.3.0 liuxg$ pwd
/Users/liuxg/elastic/logstash-7.3.0
bogon:logstash-7.3.0 liuxg$ sudo ./bin/logstash
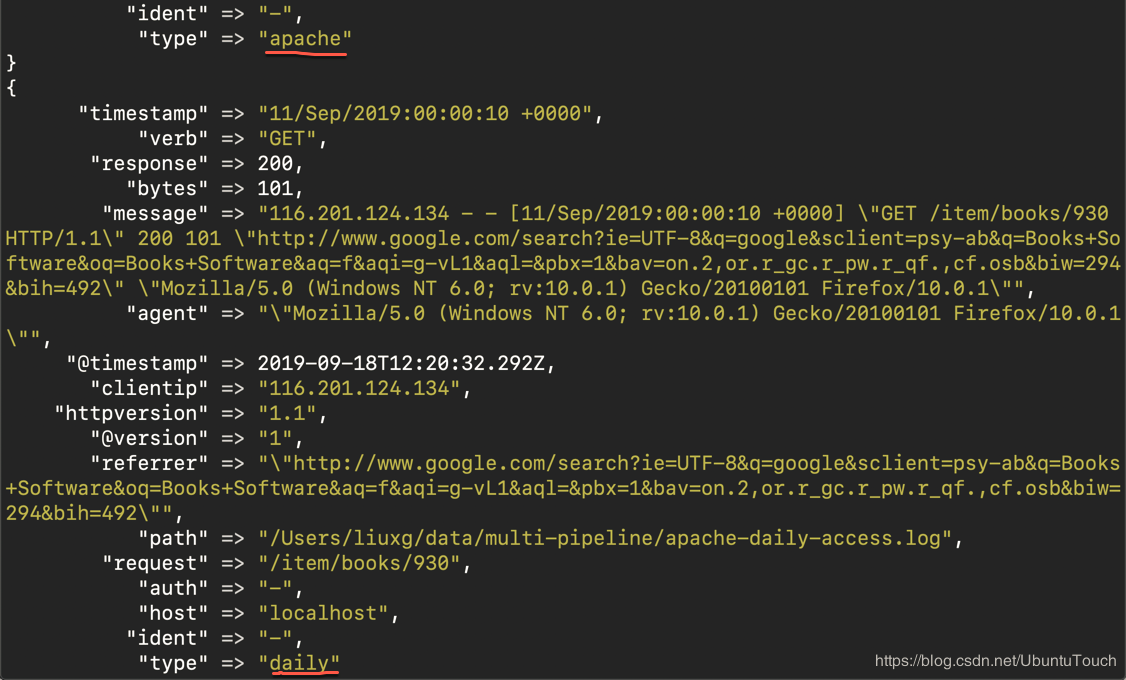
在terminal中,我们可以看到:

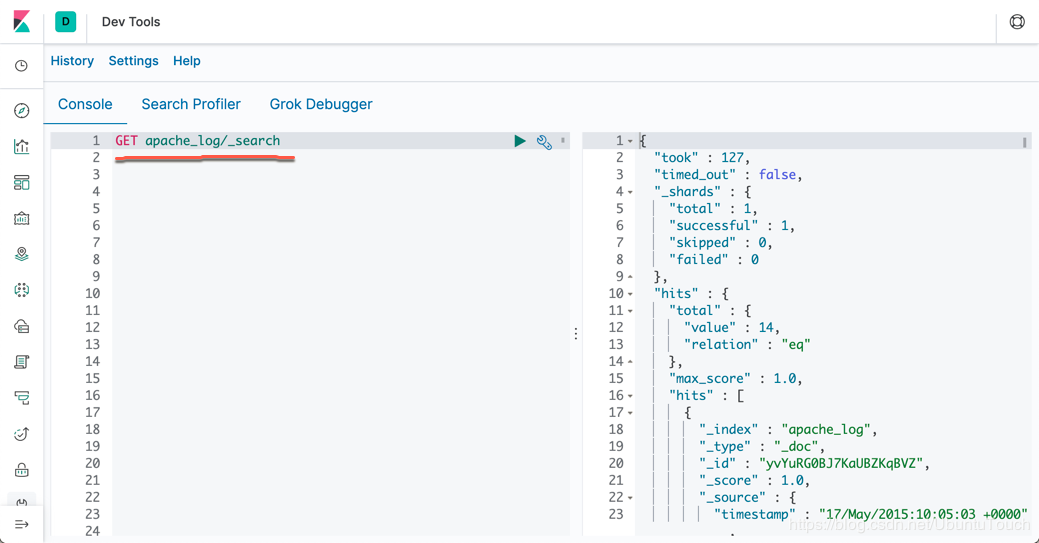
显然,有两个piple在同时运行。我们可以在Kibana中看到我们的index结果:

一个pipeline
我们同样可以修改位于Logstash安装目录下的config子目录里的pipleline.yml文件,并把它修改为:
pipelines.yml
 - pipeline.id: my_logs
   queue.type: persisted
   path.config: "/Users/liuxg/data/multi-pipeline/*.conf"
这里,我们把所有位于/Users/liuxg/data/multi-pipeline/下的所有的conf文件都放于一个pipeline里。
我们按照上面同样的方法来运行我们的应用:
    bogon:logstash-7.3.0 liuxg$ pwd
    /Users/liuxg/elastic/logstash-7.3.0
    bogon:logstash-7.3.0 liuxg$ sudo ./bin/logstash
运行的结果是:

在上面我们看到了两个同样的输出。这是为什么呢?这是因为我们把两个.conf文件放于一个pipleline里运行,那么我们有两个stdout的输出分别位于两个.conf文件了。
我们在Kibana里可以看到我们的最终的index数据:

我们可以看到在apache_log里有20条数据,它包括两个log文件里所有的事件,这是因为它们都是一个pipleline。同样我们可以在apache_daily看到同样的20条数据。
原文链接:https://blog.csdn.net/UbuntuTouch/java/article/details/100995868


【推荐】国内首个AI IDE,深度理解中文开发场景,立即下载体验Trae
【推荐】编程新体验,更懂你的AI,立即体验豆包MarsCode编程助手
【推荐】抖音旗下AI助手豆包,你的智能百科全书,全免费不限次数
【推荐】轻量又高性能的 SSH 工具 IShell:AI 加持,快人一步
· Linux系列:如何用heaptrack跟踪.NET程序的非托管内存泄露
· 开发者必知的日志记录最佳实践
· SQL Server 2025 AI相关能力初探
· Linux系列:如何用 C#调用 C方法造成内存泄露
· AI与.NET技术实操系列(二):开始使用ML.NET
· 被坑几百块钱后,我竟然真的恢复了删除的微信聊天记录!
· 没有Manus邀请码?试试免邀请码的MGX或者开源的OpenManus吧
· 【自荐】一款简洁、开源的在线白板工具 Drawnix
· 园子的第一款AI主题卫衣上架——"HELLO! HOW CAN I ASSIST YOU TODAY
· Docker 太简单,K8s 太复杂?w7panel 让容器管理更轻松!