Elasticsearch Alert配置邮件告警
情况说明:三台es集群,一台kibana
es版本要求白金版,基础版不行,可以试用30天白金版
1、三台es都需要配置,修改elasticsearch.yml配置文件
说明,使用QQ邮箱,163邮箱的话,需要注意,在配置发件箱中使用的密码不是登陆这个邮箱使用的密码,而是使用这个邮箱的邮箱授权码
xpack.notification.email.account:
    aliyun_account:  # 发件箱配置名称,可以随意指定,配置多个发件箱地址时会根据这个进行区分
        profile: standard # 采用默认的邮件模板
        email_defaults: # 设置默认发件箱
            from: elk@tongchuangkeji.net  # 发件箱
        smtp:
            auth: true # 开启账号验证
            starttls.enable: false # 关闭ssl
            starttls.required: false # 不要ssl
            host: smtp.qiye.aliyun.com # 阿里云企业邮箱smtp地址
            port: 25 # 端口
            user: elk@tongchuangkeji.net # 发件箱
2、设置发件箱密码
# 注意:aliyun_account要跟配置文件中的发件箱配置名称那个保持一致
# 设置邮箱密码
[root@bogon elasticsearch]# bin/elasticsearch-keystore add xpack.notification.email.account.aliyun_account.smtp.secure_password
# 输入密码
Enter value for xpack.notification.email.account.aliyun_account1.smtp.secure_password:
# 查看
[root@bogon elasticsearch]# bin/elasticsearch-keystore list
keystore.seed # 系统自带的
xpack.notification.email.account.aliyun_account.smtp.secure_password # 确保有这个
3、重启es集群
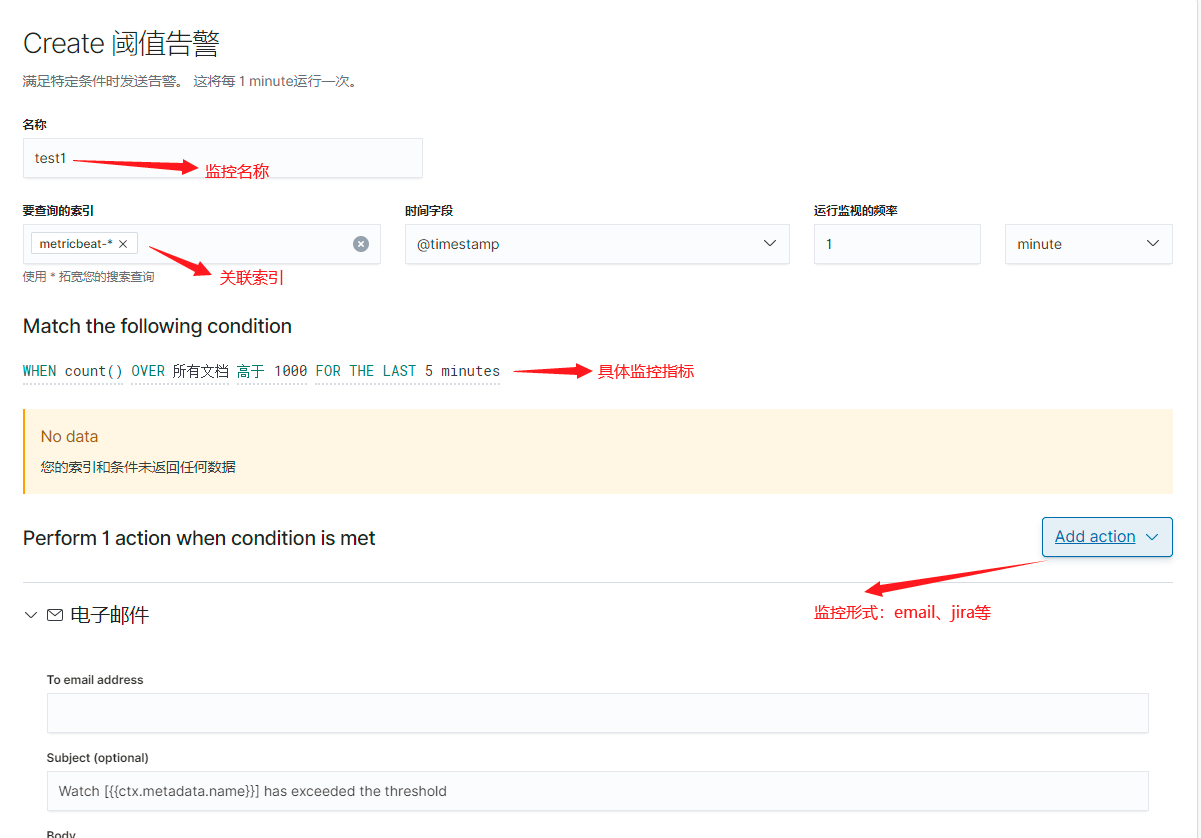
4、在kibana中配置Watcher


5.说明
该文档只是说明配置告警邮件,具体告警参数,邮件内容根据个人具体情况而定
官方关于邮件告警的设置
地址:https://www.elastic.co/guide/en/kibana/7.3/watcher-ui.html#_define_the_watch_input_and_schedule
1、.删除,修改等操作看官网文档
接下里说官方配置邮件的示例
地址:https://www.elastic.co/guide/en/elasticsearch/reference/7.3/actions-email.html
在es配置文件中进行修改
邮件模板有三个,standard (default), gmail, and outlook 。若发件箱不是gmail和outlook,则选择standard。后面会有说明
若是有多个发件箱的话,采用如下配置,只有一个的话不用配置
xpack.notification.email:
  default_account: team1
  account:
    team1:
      ...
    team2:
      ...
gmail发件箱设置
xpack.notification.email.account:
    gmail_account: # 注意这个名称,设置邮箱密码的时候用得着
        profile: gmail
        smtp:
            auth: true
            starttls.enable: true
            host: smtp.gmail.com
            port: 587
            user: <username> # 发件箱地址
设置发件箱密码
这个是执行命令,不是在es配置文件中修改
# 注意gmail_account要跟上面的保持一致
bin/elasticsearch-keystore add xpack.notification.email.account.gmail_account.smtp.secure_password
outlook配置
xpack.notification.email.account:
    exchange_account:
        profile: outlook
        email_defaults:
            from: <email address of service account>
        smtp:
            auth: true
            starttls.enable: true
            host: <your exchange server>
            port: 587
            user: <email address of service account>
设置发件箱密码
这个是执行命令,不是在es配置文件中修改
# 注意exchange_account要跟上面的保持一致
bin/elasticsearch-keystore add xpack.notification.email.account.exchange_account.smtp.secure_password
既不是gmail,也不是outlook,采取两者结合的方式,根据自己实际情况修改
xpack.notification.email.account:
    email_account:
        profile: standard
        email_defaults:
            from: xxxx@xx.com
        smtp:
            auth: true
            starttls.enable: false
            starttls.required: false
            host: smtp.qiye.aliyun.com
            port: 25
            user: xxxx@xx.com
# 设置密码
bin/elasticsearch-keystore add xpack.notification.email.account.email_account.smtp.secure_password
关于安全设置的官方地址:https://www.elastic.co/guide/en/elasticsearch/reference/7.3/secure-settings.html#
其他邮箱配置大致一样,看官方文档
邮件内容设置相关,是否允许发送html内容的配置等
# 关闭
xpack.notification.email.html.sanitization.enabled: false

# 开启
xpack.notification.email.html.sanitization.enabled: true

# 进一步限制html页面内容,哪些能发,哪些不能发
xpack.notification.email.html.sanitization:
    allow: _tables, _blocks
    disallow: h4, h5, h6


【推荐】国内首个AI IDE,深度理解中文开发场景,立即下载体验Trae
【推荐】编程新体验,更懂你的AI,立即体验豆包MarsCode编程助手
【推荐】抖音旗下AI助手豆包,你的智能百科全书,全免费不限次数
【推荐】轻量又高性能的 SSH 工具 IShell:AI 加持,快人一步
· Linux系列:如何用heaptrack跟踪.NET程序的非托管内存泄露
· 开发者必知的日志记录最佳实践
· SQL Server 2025 AI相关能力初探
· Linux系列:如何用 C#调用 C方法造成内存泄露
· AI与.NET技术实操系列(二):开始使用ML.NET
· 被坑几百块钱后,我竟然真的恢复了删除的微信聊天记录!
· 没有Manus邀请码?试试免邀请码的MGX或者开源的OpenManus吧
· 【自荐】一款简洁、开源的在线白板工具 Drawnix
· 园子的第一款AI主题卫衣上架——"HELLO! HOW CAN I ASSIST YOU TODAY
· Docker 太简单,K8s 太复杂?w7panel 让容器管理更轻松!