IdentityServer4隐藏模式
隐藏模式无需赘述。
1:新增client
1 2 3 4 5 6 7 8 9 10 11 12 13 14 15 16 | new Client() { //客户端Id ClientId="apiClientImpl", ClientName="ApiClient for Implicit", //客户端授权类型,Implicit:隐藏模式 AllowedGrantTypes=GrantTypes.Implicit, //允许登录后重定向的地址列表,可以有多个 RedirectUris = {"https://localhost:5004/auth.html" }, //允许访问的资源 AllowedScopes={ "secretapi" }, //允许将token通过浏览器传递 AllowAccessTokensViaBrowser=true }, |
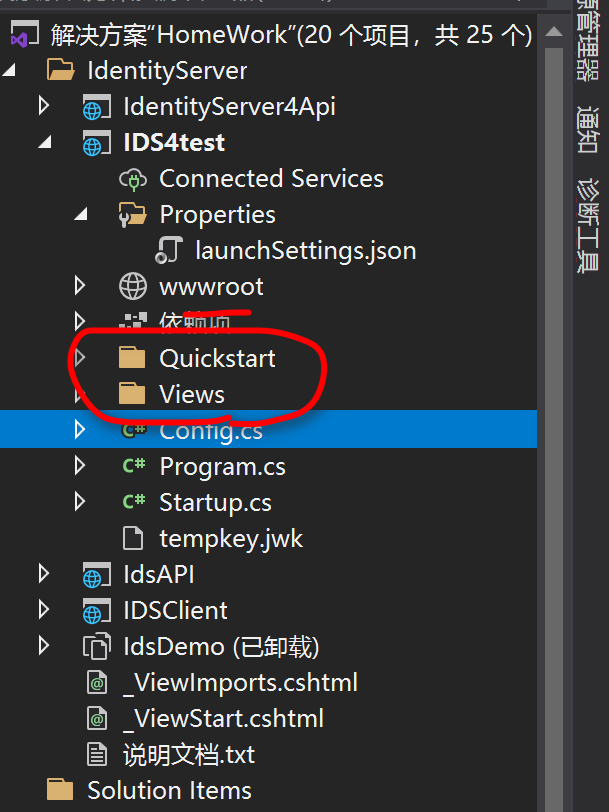
2:安装QuickStartUI
微软为IdentityServer4创建了一系列的模板,可以在命令行中使用dotnet new -i IdentityServer4.Templates安装。然后在IdentityServer项目根据目录下打开命令行,运行dotnet new is4ui 安装IdentityServer的ui模板。会自动添加Quickstart、wwwroot、Views三个文件夹到此目录。
修改StartUP.cs代码
services.AddMvc();
添加中间件
1 2 3 4 5 6 7 8 9 10 11 12 | app.UseRouting(); app.UseIdentityServer(); //访问wwwroot目录静态文件 app.UseStaticFiles(); app.UseAuthentication(); app.UseAuthorization(); app.UseEndpoints(endpoints => { endpoints.MapDefaultControllerRoute(); }); |
3:在客户端新增html网页
代码如下
1 2 3 4 5 6 7 8 9 10 11 12 13 14 15 16 17 18 19 20 21 22 | <!DOCTYPE html><html><head> <meta charset="utf-8" /> <title></title> <script type="text/javascript"> var token = null; window.onload = function () { var url = window.location.href; var array = url.split("#"); if (array.length > 1) { token = array[1]; document.getElementById("content").innerHTML = token; } } </script></head><body> <div id="content"></div></body></html> |
4:获取token。
接受参数的地址则是IdentityServer的Discover文档中的authorization_endpoint节点。把参数和地址拼接成以下地址:http://localhost:5000/connect/authorize?client_id=apiClientImpl&redirect_uri=https://localhost:5004/auth.html&response_type=token&scope=secretapi,直接访问,会跳转到用户登录页面

登录之后即可获取token
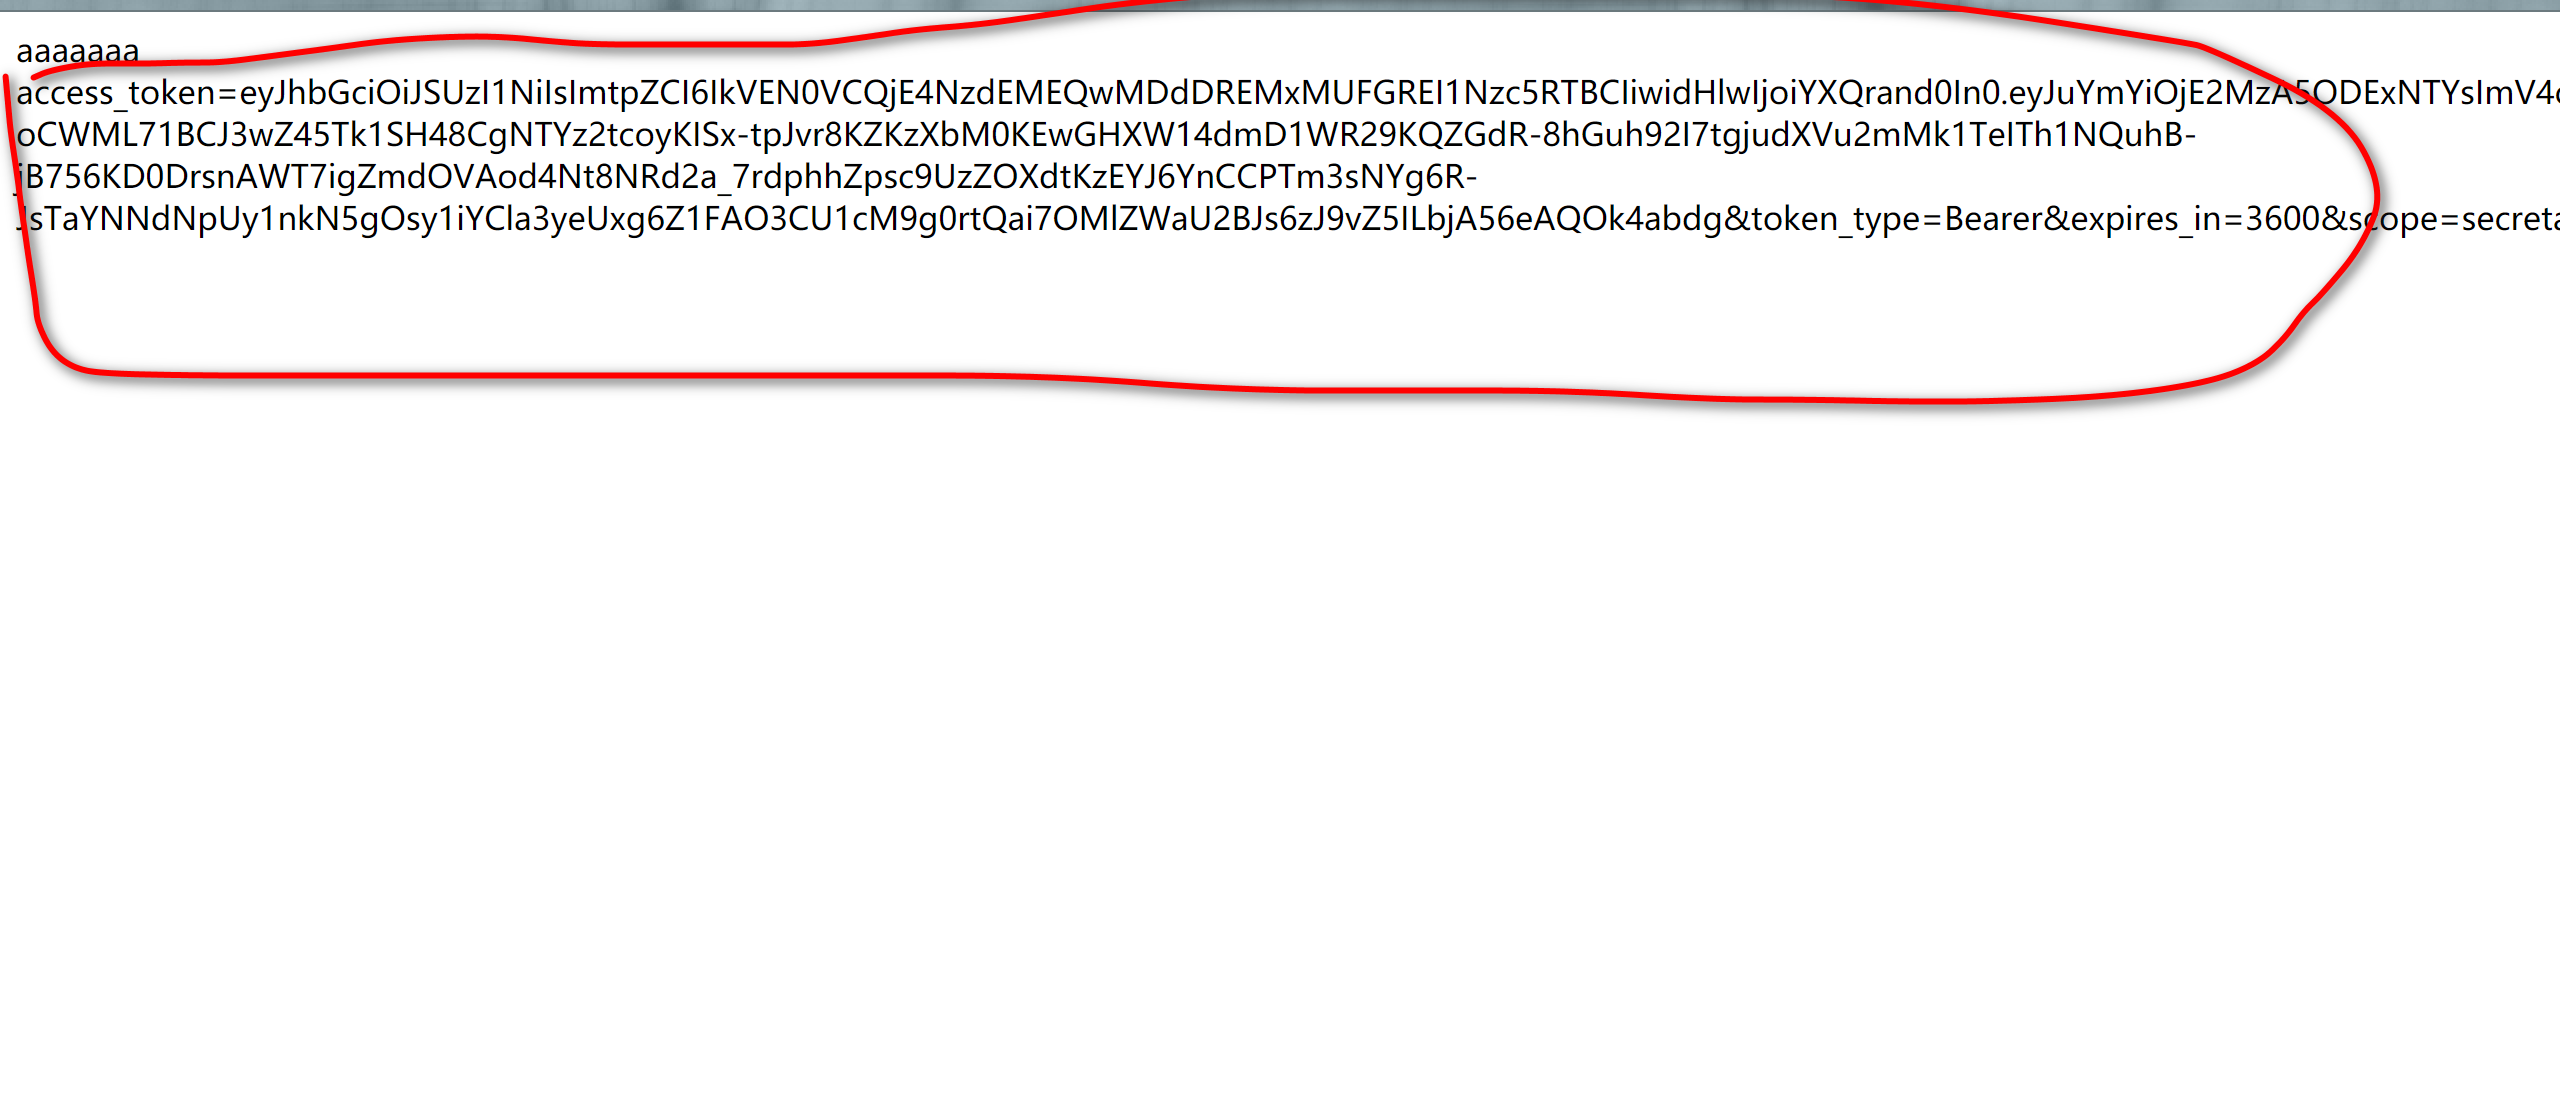
这个token就可以使用了。
参考文章:https://www.cnblogs.com/liujiabing/p/11474131.html
附:如果遇到登录不跳转的情况,可以通过F12查看。

我遇到的时候cookie设置的问题。
这种情况需要设置cookie
1 2 3 4 5 6 7 8 9 10 11 12 13 14 15 16 17 | public void ConfigureServices(IServiceCollection services) { services.AddControllersWithViews(); // 配置cookie策略 services.Configure<CookiePolicyOptions>(options => { //https://docs.microsoft.com/zh-cn/aspnet/core/security/samesite?view=aspnetcore-3.1&viewFallbackFrom=aspnetcore-3 options.MinimumSameSitePolicy = Microsoft.AspNetCore.Http.SameSiteMode.Lax; }); } public void Configure(IApplicationBuilder app, IWebHostEnvironment env) { .... app.UseCookiePolicy(); .... } |
参考文章:https://www.cnblogs.com/jellydong/p/13542474.html


【推荐】国内首个AI IDE,深度理解中文开发场景,立即下载体验Trae
【推荐】编程新体验,更懂你的AI,立即体验豆包MarsCode编程助手
【推荐】抖音旗下AI助手豆包,你的智能百科全书,全免费不限次数
【推荐】轻量又高性能的 SSH 工具 IShell:AI 加持,快人一步
· 基于Microsoft.Extensions.AI核心库实现RAG应用
· Linux系列:如何用heaptrack跟踪.NET程序的非托管内存泄露
· 开发者必知的日志记录最佳实践
· SQL Server 2025 AI相关能力初探
· Linux系列:如何用 C#调用 C方法造成内存泄露
· Manus爆火,是硬核还是营销?
· 终于写完轮子一部分:tcp代理 了,记录一下
· 别再用vector<bool>了!Google高级工程师:这可能是STL最大的设计失误
· 单元测试从入门到精通
· 震惊!C++程序真的从main开始吗?99%的程序员都答错了
2020-09-07 c#WebSocket