

Docker 部署 ElasticSearch 未授权访问 (已解决)
第一步 安装elasticsearch
1安装elasticsearch
2、新建目录/root/elasticsearch/config,/root/elasticsearch/data和/root/elasticsearch/plugins
在/root/elasticsearch/config目录下新建文件elasticsearch.yml,文件内容如下:
http.host: 0.0.0.0
cluster.name: "dokcer-cluster"
network.host: 0.0.0.0
3、运行 chmod -R 777 /root/elasticsearch/ 给目录授权
4、运行如下命令启动elasticsearch容器
|
1
2
3
4
5
6
7
8
|
docker run --name elasticsearch -p 9200:9200 \ -p 9300:9300 \ -e "discovery.type=single-node" \ -e ES_JAVA_OPTS="-Xms64m -Xmx128m" \ -v /root/elasticsearch/config/elasticsearch.yml:/usr/share/elasticsearch/config/elasticsearch.yml \ -v /root/elasticsearch/data:/usr/share/elasticsearch/data \ -v /root/elasticsearch/plugins:/usr/share/elasticsearch/plugins \ -d elasticsearch:7.10.1 |
5、运行docker ps查看是否启动成功
第二步 给elasticsearch设置账号密码
在Elasticsearch7.10.1,x-pack已经作为默认的插件集成在Elasticsearch里面了,所以无需在bin/elasticsearch-plugin install x-pack了,直接在配置文件中启用就可以了。
1 修改elasticsearch的配置文件为如下内容: 如果是允许postman测试时在header里面传递用户名和密码则需要添加如下信息:
http.cors.enabled: true
http.cors.allow-origin: "*"
http.cors.allow-headers: Authorization
# 停止xpack功能,暂停密码验证功能 # xpack.security.enabled: true # xpack.security.transport.ssl.enabled: true
|
1
2
3
4
5
6
7
8
9
10
11
12
|
http.host: 0.0.0.0cluster.name: "dokcer-cluster"network.host: 0.0.0.0http.cors.enabled: truehttp.cors.allow-origin: "*"http.cors.allow-headers: Authorization,X-Requested-With,Content-Length,Content-Typexpack.security.enabled: truexpack.security.audit.enabled: true#如果是basic类型,则需要添加下面这一句xpack.license.self_generated.type: basicxpack.security.transport.ssl.enabled: true |
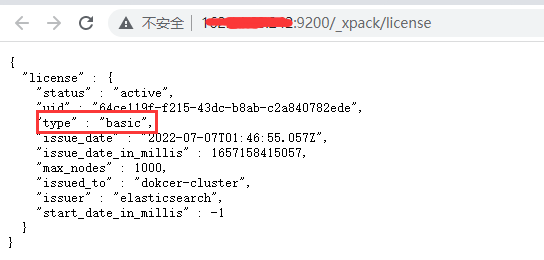
查看elasticsearch的类型
http://ip:9200/_xpack/license
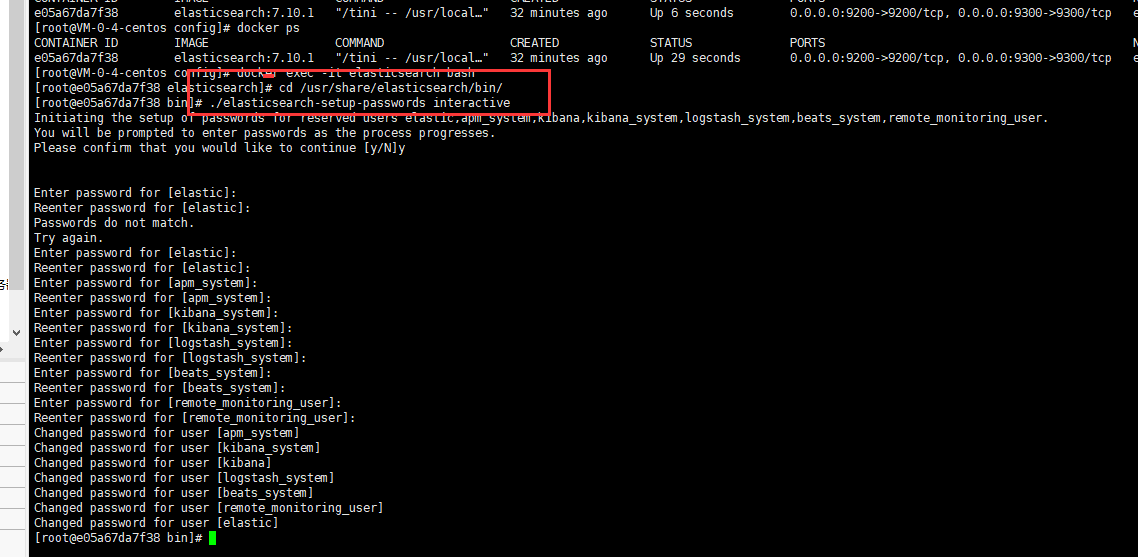
2 进入elasticsearch的容器里面,进入到bin目录(/usr/share/elasticsearch/bin/),并执行命令 ./elasticsearch-setup-passwords interactive,然后设置账号的密码
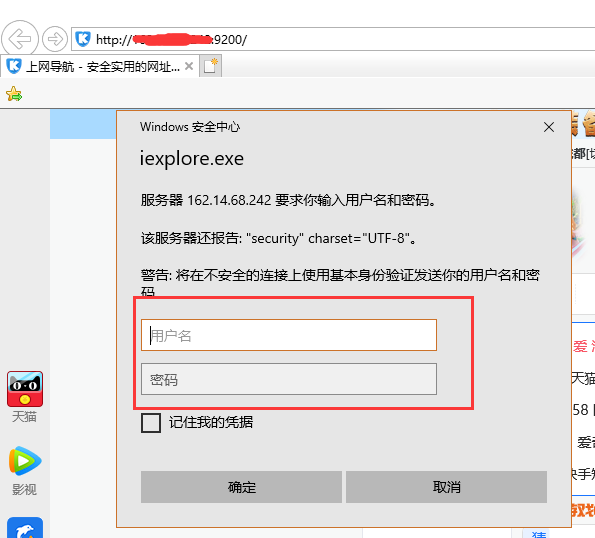
3 然后在浏览器里面输入 http://ip:9200 会提示输入用户名和密码。这样表示配置成功了
在elasticsearch里面添加中文分词
|
1
2
3
4
5
6
7
8
9
10
11
12
13
14
15
16
17
18
19
20
|
6、为elasticsearch安装中文分词将elasticsearch-analysis-ik-7.10.1.zip上传到/root目录,然后运行如下命令将文件上传到elasticsearch容器的目录里面docker cp /root/elasticsearch-analysis-ik-7.10.1.zip elasticsearch:/usr/share/elasticsearch/plugins进入容器:docker exec -it elasticsearch /bin/bash创建目录:mkdir /usr/share/elasticsearch/plugins/ik将文件压缩包移动到ik中:mv /usr/share/elasticsearch/plugins/elasticsearch-analysis-ik-7.10.1.zip /usr/share/elasticsearch/plugins/ik进入目录:cd /usr/share/elasticsearch/plugins/ik解压:unzip elasticsearch-analysis-ik-7.10.1.zip删除压缩包:rm -rf elasticsearch-analysis-ik-7.10.1.zip退出并重启镜像:exit重启镜像:docker restart elasticsearch验证分词是否安装成功:PostmanPost http://ip:9200/_analyze?pretty{ "analyzer": "ik_smart", "text":"中华人民共和国国歌"} |
当配置了密码后,springboot 配置elasticsearch
|
1
2
3
4
5
6
7
|
elasticsearch: host: 162.14.68.242:9200 schema: http username: elastic password: esri1234 maxConnectNum: 100 maxConnectPerRoute: 100 |
ElasticsearchConfig文件
|
1
2
3
4
5
6
7
8
9
10
11
12
13
14
15
16
17
18
19
20
21
22
23
24
25
26
27
28
29
30
31
32
33
34
35
36
37
38
39
40
41
42
43
44
45
46
47
48
49
50
51
52
53
54
55
56
57
58
59
60
61
62
63
64
65
66
67
68
69
70
71
72
73
74
75
76
77
78
79
80
81
82
83
84
85
86
87
88
89
90
91
92
93
94
95
96
97
98
99
100
101
102
103
|
package cn.com.es.config;import org.apache.http.HttpHost;import org.apache.http.auth.AuthScope;import org.apache.http.auth.UsernamePasswordCredentials;import org.apache.http.client.CredentialsProvider;import org.apache.http.impl.client.BasicCredentialsProvider;import org.elasticsearch.client.RequestOptions;import org.elasticsearch.client.RestClient;import org.elasticsearch.client.RestClientBuilder;import org.elasticsearch.client.RestHighLevelClient;import org.springframework.beans.factory.annotation.Value;import org.springframework.context.annotation.Bean;import org.springframework.context.annotation.Configuration;import java.util.ArrayList;import java.util.List;/** * @Author: luojie * @Date: 2021/3/2 15:55 */@Configurationpublic class ElasticsearchConfig { @Value("${elasticsearch.host}") private String host; @Value("${elasticsearch.username}") private String username; @Value("${elasticsearch.password}") private String password; /** * 最大连接数 */ @Value("${elasticsearch.maxConnectNum}") private int maxConnectNum; /** * 最大路由连接数 */ @Value("${elasticsearch.maxConnectPerRoute}") private int maxConnectPerRoute; //通用设置项 public static final RequestOptions COMMON_OPTIONS; static { RequestOptions.Builder builder = RequestOptions.DEFAULT.toBuilder(); // builder.addHeader("Authorization", "Bearer " + TOKEN); // builder.setHttpAsyncResponseConsumerFactory( // new HttpAsyncResponseConsumerFactory // .HeapBufferedResponseConsumerFactory(30 * 1024 * 1024 * 1024)); COMMON_OPTIONS = builder.build(); } // @Bean(name = "restHighLevelClient") @Bean public RestHighLevelClient restHighLevelClient() { // 拆分地址 List<HttpHost> hostLists = new ArrayList<>(); String[] hostList = host.split(","); for (String addr : hostList) { String host = addr.split(":")[0]; String port = addr.split(":")[1]; hostLists.add(new HttpHost(host, Integer.parseInt(port), "http")); } final CredentialsProvider credentialsProvider = new BasicCredentialsProvider(); credentialsProvider.setCredentials(AuthScope.ANY, new UsernamePasswordCredentials(username, password)); // 转换成 HttpHost 数组 HttpHost[] httpHost = hostLists.toArray(new HttpHost[]{}); // 构建连接对象 RestClientBuilder builder = RestClient.builder(httpHost);// // 异步连接延时配置// builder.setRequestConfigCallback(requestConfigBuilder -> {// requestConfigBuilder.setConnectTimeout(connectTimeout);// requestConfigBuilder.setSocketTimeout(socketTimeout);// requestConfigBuilder.setConnectionRequestTimeout(connectionRequestTimeout);// return requestConfigBuilder;// }); // 异步连接数配置 builder.setHttpClientConfigCallback(httpClientBuilder -> { httpClientBuilder.setMaxConnTotal(maxConnectNum); httpClientBuilder.setMaxConnPerRoute(maxConnectPerRoute); return httpClientBuilder.setDefaultCredentialsProvider(credentialsProvider); }); return new RestHighLevelClient(builder); } //项目主要使用RestHighLevelClient,对于低级的客户端暂时不用// @Bean// public RestClient restClient(){//// HttpHost httpHostArray = new HttpHost(host.split(":")[0], Integer.parseInt(host.split(":")[1]), "http");// return RestClient.builder(httpHostArray).build();// }} |
想通过java的httpClient调用elasticsearch的接口
http://user:password@192.168.1.2:9200/my_index
比如查询所有索引的接口 http://127.0.0.1:9200/_cat/indices?v 可以是 http://elastic:test1234@127.0.0.1:9200/_cat/indices?v
如果密码里面有特殊字符 则需要将特殊字符转义
参考 https://blog.csdn.net/p312011150/article/details/78928003
本篇文章转载:https://www.cnblogs.com/james-roger/p/16453855.html


【推荐】国内首个AI IDE,深度理解中文开发场景,立即下载体验Trae
【推荐】编程新体验,更懂你的AI,立即体验豆包MarsCode编程助手
【推荐】抖音旗下AI助手豆包,你的智能百科全书,全免费不限次数
【推荐】轻量又高性能的 SSH 工具 IShell:AI 加持,快人一步
· Manus重磅发布:全球首款通用AI代理技术深度解析与实战指南
· 被坑几百块钱后,我竟然真的恢复了删除的微信聊天记录!
· 没有Manus邀请码?试试免邀请码的MGX或者开源的OpenManus吧
· 园子的第一款AI主题卫衣上架——"HELLO! HOW CAN I ASSIST YOU TODAY
· 【自荐】一款简洁、开源的在线白板工具 Drawnix