
android打包持续集成
背景:
领导下发需求,要求客户端实现代码自动上传至github的需求,本来我这项目是使用jenkins实现自动化打包操作的,由于两端不统一,再加上如果需要公司所有人看到包,需要给所有人开账号有些许不切实际...好吧,就是领导要求两端统一,做就完事了。。。。因此半吊子的我开始了集成之旅。
实现效果:
androidStudio + fastline+github action+fir+gradle 实现push自动打包并上传至fir+版本号自增的功能
步骤:
一、fastlane集成
官方文档:http://docs.fastlane.tools/
1.下载fastlane/初始化fastlane,参考官方文档。操作完成显示如下文件。

二、运行项目,并自动上传至fir。
1.在Fastfile中添加如下命令,配置正式环境及测试环境执行命令。
2.配置firCI。其中api_token为fir中申请的用户token。
default_platform(:android)

platform :android do

lane :release do
  gradle(
    task: 'assemble',
    build_type: 'Release'
  )
  fir_cli(api_token: "*************", changelog: "Hello fir.im")
end

lane :test do
  gradle(
    task: 'assemble',
    build_type: 'Staging'
  )
  fir_cli(api_token: "*********", changelog: "test")
end

end
3.在Pluginfile中配置fastlane-fir插件。
# Autogenerated by fastlane
#
# Ensure this file is checked in to source control!

gem 'fastlane-plugin-fir_cli'
现在执行命令就可以自动打包上传至fir了。
fastlane android test
三、配置Github action
简单入门参考:http://www.ruanyifeng.com/blog/2019/09/getting-started-with-github-actions.html
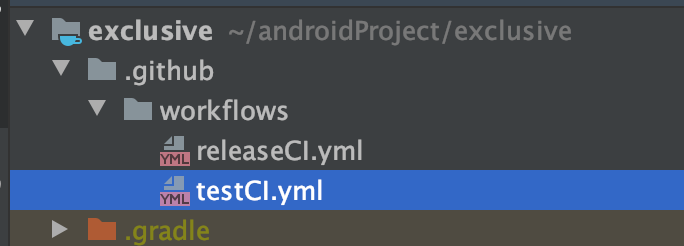
1.本地工程目录下,新建.github/workflows文件夹,并创建好需执行action的yml文件。
配置文件如下。
name: Test Build

on:
  push:
    branches: [ release/* ]

jobs:
  publish_apps:
#    runs-on: ubuntu-latest
    runs-on: self-hosted
#    runs-on: macOS-latest

    steps:
      - uses: actions/checkout@v2

      - uses: webfactory/ssh-agent@v0.4.0
        with:
          ssh-private-key: ${{ secrets.SSH_PRIVATE_KEY }}

#      - uses: ruby/setup-ruby@v1
#        with:
#          ruby-version: 2.7
      - name: Ruby cache
        uses: actions/cache@v1.2.0
        with:
          path: vendor/bundle
          key: ${{ runner.os }}-gems-${{ hashFiles('**/Gemfile.lock') }}
          restore-keys: |
            ${{ runner.os }}-gems-

      - name: Gradle cache
        uses: actions/cache@v1.2.0
        with:
          path: /root/.gradle
          key: ${{ runner.os }}-gradle-${{ hashFiles('**/*.gradle') }}
          restore-keys: |
            ${{ runner.os }}-gradle

      - name: Bundle install
        run: |
          bundle config path vendor/bundle
          bundle check || bundle install

      - name: Set up JDK 1.8
        uses: actions/setup-java@v1
        with:
          java-version: 1.8

      - name: Setup Android SDK
        uses: android-actions/setup-android@v1

      - name: Fastlane android test
        run: bundle exec fastlane android test
其中,
runs-on:表示当前运行的环境,此处使用的是自己本地服务器。ubuntu-latest表示github服务器。
secrets.SSH_PRIVATE_KEY:表示当前项目的签名key,在github project-Setting-Secrets中添加。
此处所做的操作为,当release/*分支push时,会触发github的action,依次执行命令,缓存,安装bundle、配置环境变量安装sdk等,最后fastlane打包命令进行自动化打包工作。
四、版本自增
方式一:
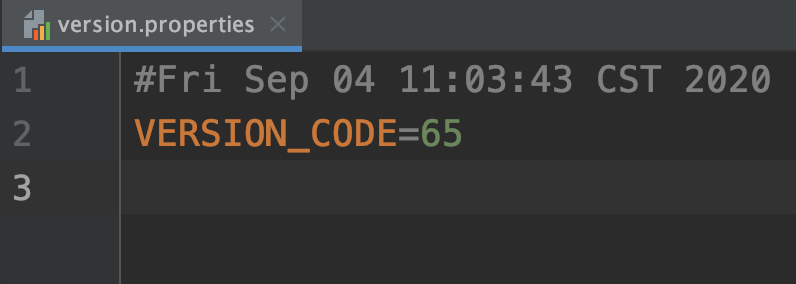
1.在App目录下,新建一个version.properties文件,写入版本号。
2.定义获取versionCode的方法。
def getVersionCode() {
    def versionFile = file('version.properties')
    if (versionFile.canRead()) {
        def Properties versionProps = new Properties()
        versionProps.load(new FileInputStream(versionFile))
        def versionCode = versionProps['VERSION_CODE'].toInteger()
        def runTasks = gradle.startParameter.taskNames        //仅在assembleRelease任务是增加版本号
        if ('assembleRelease' in runTasks || 'assembleStaging' in runTasks) {
            versionProps['VERSION_CODE'] = (++versionCode).toString()
            versionProps.store(versionFile.newWriter(), null)

        println("runTasks = ${runTasks} versionCode =   ${versionCode}")
        def showChange = "git status"
        def commitCmd = "git commit app/version.properties -m 'versionCode:${versionCode}'"
        def pushCmd = "git push"
        println(showChange.execute().text.trim())
        println(commitCmd.execute().text.trim())
        println(pushCmd.execute().text.trim())
        }
        return versionCode
    } else {
        throw new GradleException("Could not find version.properties!")
    }
}
方式二:
相比较方式一的好处是,不用修改文件,重新提交;根据fir上面的版本号进行自增,在正式包/热修复的时候不会自增
def getVersionCode() {
    def versionCode = 79
    def runTasks = gradle.startParameter.taskNames
    String id = rootProject.APPLICATION_ID
    HttpURLConnection conn = null
    try {
        URL url = new URL("http://api.bq04.com/apps/latest/${id}?api_token=${API_TOKEN}&type=android")
        conn = (HttpURLConnection) url.openConnection()
        conn.setRequestProperty("Accept-Charset", "UTF-8")
        conn.setRequestProperty("connection", "keep-Alive")
        conn.setRequestMethod("GET");
        conn.connect()
        if (conn.getResponseCode() == HttpURLConnection.HTTP_OK) {
            BufferedReader br = new BufferedReader(new InputStreamReader(conn.getInputStream(), "UTF-8"));
            String result = "";
            String tmp = "";
            while ((tmp = br.readLine()) != null) {
                result += tmp;
            }
            Gson gson = new GsonBuilder().create()
            Map map = gson.fromJson(result, Object.class)
            versionCode = Integer.parseInt(map.get("version"))
            println(" oldversionCode =   ${versionCode}")
            //仅在assembleStaging任务是增加版本号
            if ('assembleStaging' in runTasks) {
                ++versionCode
            }
            println("runTasks = ${runTasks}  id = ${id} versionCode =   ${versionCode}")

            if (br != null)
                br.close()
        }
    } catch (Exception e) {
        e.printStackTrace()
    } finally {
        if (conn != null) {
            conn.disconnect()
        }
    }

    return versionCode
}
这样在每次打包的时候就能进行版本自增,并push到线上了。
至此,android自动化打包持续集成完成,历时一周时间。彻底解放双手,懒人开发必备。

 浙公网安备 33010602011771号