k8s搭建-详情
本文详细部署参考 :使用kubeadm安装Kubernetes 1.13
环境准备,每个节点都需要:
centos7.5 4 、2G内存,cup个数>=2
1、时间同步(ntp5.aliyun.com),chronyc sources(查看是否同步)
2、主机名解析,互相免密登陆
3、关闭防火墙(firewall,iptables)
docker有些版本的filter 表,默认的FORWARD 链默认是 DROP ,需要修改 (可以不用修改,第六步,启用内核模块的forward功能后重启电脑就可以了)
iptables -t filter -P FORWARD ACCEPT (命令临时生效)
service iptables save (然后执行保存,永久生效,参考) 或者 iptables-save
4、禁用selinux
setenforce 0
sed -i "s/SELINUX=enforcing/SELINUX=disabled/g" /etc/selinux/config
5、禁用swap,/etc/fstable, swapoff -a,swapof -s(查看)
6、启用内核模块:
创建/etc/sysctl.d/k8s.conf文件,添加如下内容:
net.bridge.bridge-nf-call-ip6tables = 1
net.bridge.bridge-nf-call-iptables = 1
net.ipv4.ip_forward = 1

另一个人的配置(
net.bridge.bridge-nf-call-iptables = 1
net.bridge.bridge-nf-call-ip6tables = 1
net.ipv4.conf.all.rp_filter = 1
net.ipv4.ip_forward = 1
)

阿里k8s节点(
cat /etc/sysctl.d/99-k8s.conf
#sysctls for k8s node config
net.ipv4.tcp_slow_start_after_idle=0
net.core.rmem_max=16777216
fs.inotify.max_user_watches=524288
kernel.softlockup_all_cpu_backtrace=1
kernel.pid_max=4194303
kernel.softlockup_panic=1
fs.file-max=2097152
fs.inotify.max_user_instances=16384
fs.inotify.max_queued_events=16384
vm.max_map_count=262144
fs.may_detach_mounts=1
net.core.netdev_max_backlog=16384
net.ipv4.tcp_wmem=4096 12582912 16777216
net.core.wmem_max=16777216
net.core.somaxconn=32768
net.ipv4.ip_forward=1
net.ipv4.tcp_max_syn_backlog=8096
net.bridge.bridge-nf-call-iptables=1
net.ipv4.tcp_rmem=4096 12582912 16777216
cat /etc/sysctl.d/99-sysctl.conf
vm.swappiness = 0
kernel.sysrq=1
net.ipv4.neigh.default.gc_stale_time=120
# see details in https://help.aliyun.com/knowledge_detail/39428.html
net.ipv4.conf.all.rp_filter=0
net.ipv4.conf.default.rp_filter=0
net.ipv4.conf.default.arp_announce = 2
net.ipv4.conf.lo.arp_announce=2
net.ipv4.conf.all.arp_announce=2
# see details in https://help.aliyun.com/knowledge_detail/41334.html
net.ipv4.tcp_max_tw_buckets = 5000
net.ipv4.tcp_syncookies = 1
net.ipv4.tcp_max_syn_backlog = 1024
net.ipv4.tcp_synack_retries = 2
net.ipv6.conf.all.disable_ipv6 = 1
net.ipv6.conf.default.disable_ipv6 = 1
net.ipv6.conf.lo.disable_ipv6 = 1
)
执行命令使修改生效。
modprobe br_netfilter
sysctl -p /etc/sysctl.d/k8s.conf
7、开启ipvs,执行脚本(K8S集群优化之路由转发:使用IPVS替代iptables。kube-proxy的ipvs模式解读)
cat > /etc/sysconfig/modules/ipvs.modules <<EOF
#!/bin/bash
modprobe -- ip_vs
modprobe -- ip_vs_rr
modprobe -- ip_vs_wrr
modprobe -- ip_vs_sh
modprobe -- nf_conntrack_ipv4
EOF
chmod 755 /etc/sysconfig/modules/ipvs.modules && bash /etc/sysconfig/modules/ipvs.modules && lsmod | grep -e ip_vs -e nf_conntrack_ipv4
8、安装Docker
使用阿里云的源docker-ce
9、确认一下iptables filter表中FOWARD链的默认策略(pllicy)为ACCEPT。iptables -nvL
10、安装kubeadm和kubelet,使用阿里云源
11、拉取镜像
docker pull docker.io/fanever/k8scheduler
docker pull docker.io/fanever/k8proxy
docker pull docker.io/fanever/k8pause
docker pull docker.io/fanever/k8etcd
docker pull docker.io/fanever/k8coredns
docker pull docker.io/fanever/k8controller
docker pull docker.io/fanever/k8api
打标签
docker tag docker.io/fanever/k8coredns k8s.gcr.io/coredns:1.3.1
docker tag docker.io/fanever/k8etcd k8s.gcr.io/etcd:3.3.10
docker tag docker.io/fanever/k8pause k8s.gcr.io/pause:3.1
docker tag docker.io/fanever/k8proxy k8s.gcr.io/kube-proxy:v1.14.1
docker tag docker.io/fanever/k8scheduler k8s.gcr.io/kube-scheduler:v1.14.1
docker tag docker.io/fanever/k8controller k8s.gcr.io/kube-controller-manager:v1.14.1
docker tag docker.io/fanever/k8api k8s.gcr.io/kube-apiserver:v1.14.1
11、使用kubeadm init初始化集群
在各节点开机启动kubelet服务:systemctl enable kubelet.service
在master上使用kubeadm初始化集群:
kubeadm init --kubernetes-version=v1.14.0 --pod-network-cidr=10.244.0.0/16 --apiserver-advertise-address=192.168.61.11
根据提示,创建配置文件,和pod网络,选择flannel
kubectl apply -f https://raw.githubusercontent.com/coreos/flannel/master/Documentation/kube-flannel.yml
需要的镜像是:quay.io/coreos/flannel:v0.11.0-amd64在kube-flannel.yml中查看,可以先pull,镜像站在https://quay.io/repository/coreos/flannel?tab=tags
测试环境:
1 master
3nodes
所需软件:
kubeadm(部署工具)
kubelet(管理pod)
docker
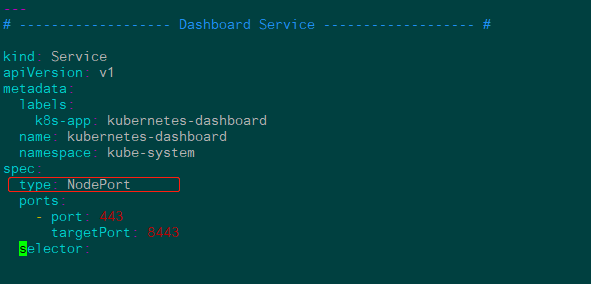
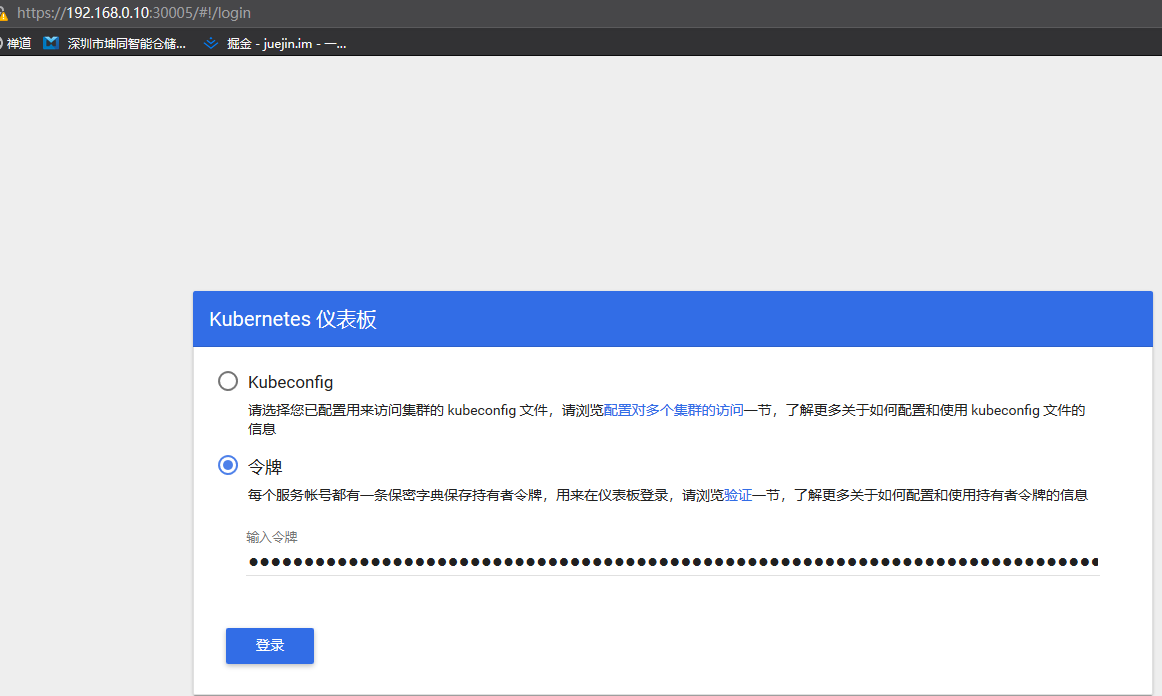
部署dashboard web图形界面
wget https://raw.githubusercontent.com/kubernetes/dashboard/v1.10.1/src/deploy/recommended/kubernetes-dashboard.yaml
更改镜像,加上type

kubectl apply -f kubernetes-dashboard.yaml      #kubectl delete  -f kubernetes-dashboard.yaml

743  kubectl create serviceaccount fang -n kube-system
  744  kubectl get serviceaccount
  745  kubectl get serviceaccount -a
  746  kubectl get serviceaccount -A
  748  kubectl create clusterrolebinding fang --clusterrole=cluster-admin --serviceaccount=kube-system:fang
  749  kubectl get secret -A
  750  kubectl describe secret fang-token-skvgq -n kube-system

 浙公网安备 33010602011771号