
Avalonia 的文件对话框和 MVVM 的结合
008 Avalonia 的文件对话框和 MVVM 的结合
0. 资料
1. 前言
我是因为跨平台特性而使用 Avalonia 的,如果唐突采用 Windows 上的文件系统来进行文件路径的选取,这会导致很多问题,为此本文将会简单介绍在 Avalonia 中是如何使用文件对话框进行文件的导出的。
2. 总之是简单调用
总之我们要创建一个 Avalonia 的项目,我们选择使用的 MVVM 框架是社区包,CommunityToolKit.MVVM,没有比社区包更加现代又低侵入性的 MVVM 包了,这是我最喜欢的 MVVM 包。
我们选择的平台是 Windows,如果别的平台有一些兼容性的问题,本文可能并不会对你有任何帮助。
在了解绑定前我们先来看看简单的事件驱动的打开文件对话框应该是怎样的。
我们在 MainView.xaml 的地方这么添加一个 Button_Click
<UserControl x:Class="Test2.Views.MainView"
             xmlns="https://github.com/avaloniaui"
             xmlns:x="http://schemas.microsoft.com/winfx/2006/xaml"
             xmlns:d="http://schemas.microsoft.com/expression/blend/2008"
             xmlns:mc="http://schemas.openxmlformats.org/markup-compatibility/2006"
             xmlns:vm="clr-namespace:Test2.ViewModels"
             d:DesignHeight="450"
             d:DesignWidth="800"
             x:DataType="vm:MainViewModel"
             mc:Ignorable="d">
    <Design.DataContext>
        <!--
            This only sets the DataContext for the previewer in an IDE,
            to set the actual DataContext for runtime, set the DataContext property in code (look at App.axaml.cs)
        -->
        <vm:MainViewModel />
    </Design.DataContext>

    <Button Width="100"
            Height="100"
            HorizontalAlignment="Center"
            VerticalAlignment="Center"
            HorizontalContentAlignment="Center"
            VerticalContentAlignment="Center"
            Click="Button_Click"
            Content="保存" />
</UserControl>
对应的 MainView.xaml.cs 的地方添加相关事件的实现。
using Avalonia.Controls;
using Avalonia.Platform.Storage;
using System.Collections.Generic;
using System.IO;

namespace Test2.Views;

public partial class MainView : UserControl
{
    public MainView()
    {
        InitializeComponent();
    }

    private async void Button_Click(object? sender, Avalonia.Interactivity.RoutedEventArgs e)
    {
        var topLevel = TopLevel.GetTopLevel(this);
        var storageProvider = topLevel.StorageProvider;

        // 异步的保存文件。
        var resultFile = await storageProvider.SaveFilePickerAsync(new FilePickerSaveOptions()
        {
            //DefaultExtension = ".txt",
            FileTypeChoices = new List<FilePickerFileType>() { FilePickerFileTypes.TextPlain },
            Title = "保存文件",
            SuggestedFileName = "output",
        });

        // 这是有可能为空的。
        if (resultFile == null) return;

        var text = "hello, fanbal!";

        using var stream = await resultFile.OpenWriteAsync();
        using var streamWritter = new StreamWriter(stream);
        await streamWritter.WriteLineAsync(text);

    }
}
截图?就只是一个文件导出,用得着截图吗hhh。
好吧,给看看界面和导出框的英姿吧。


3. 文件导出如何使用 MVVM?试试改造成全局单例
3.1 文件对话框需要控件,但是 ViewModel 和控件之间隔着厚厚的壁障,怎么办
和关闭窗口一样,你有没有发现,这个东西的前提是一定得从一个控件去找,然后找到TopLevel,最后使用StorageProvider进行文件对话框的相关操作。
有一种办法是将 StorageProvider 这个对象单独做一个引用。
我们在 App.xaml.cs 可以看到 MainView 的实例化,可以从这里取到视图对象然后拿到 TopLevel,再接着进行一系列操作。
我们先创建一个 GlobalSingletonHelper 静态类,开一个 IStorageProvider 类型的字段。
using Avalonia.Platform.Storage;

namespace Test2.Helpers
{
    internal static class GlobalSingletonHelper
    {
        public static IStorageProvider StorageProvider { get; set; }
    }
}
在 app.xaml.cs 中将内容改造成下面这样。
using Avalonia;
using Avalonia.Controls;
using Avalonia.Controls.ApplicationLifetimes;
using Avalonia.Data.Core.Plugins;
using Avalonia.Markup.Xaml;
using Test2.Helpers;
using Test2.ViewModels;
using Test2.Views;

namespace Test2;

public partial class App : Application
{
    public override void Initialize()
    {
        AvaloniaXamlLoader.Load(this);
    }

    public override void OnFrameworkInitializationCompleted()
    {
        // Line below is needed to remove Avalonia data validation.
        // Without this line you will get duplicate validations from both Avalonia and CT
        BindingPlugins.DataValidators.RemoveAt(0);

        if (ApplicationLifetime is IClassicDesktopStyleApplicationLifetime desktop)
        {
            var mainWindow = new MainWindow
            {
                DataContext = new MainViewModel()
            };
            desktop.MainWindow = mainWindow;

            var topLevel = TopLevel.GetTopLevel(mainWindow);
            GlobalSingletonHelper.StorageProvider = topLevel.StorageProvider;
        }
        else if (ApplicationLifetime is ISingleViewApplicationLifetime singleViewPlatform)
        {
            var mainView = new MainView
            {
                DataContext = new MainViewModel()
            };
            singleViewPlatform.MainView = mainView;

            var topLevel = TopLevel.GetTopLevel(mainView);
            GlobalSingletonHelper.StorageProvider = topLevel.StorageProvider;
        }

        base.OnFrameworkInitializationCompleted();
    }
}
简而言之就是将这个对象用我们自己的一个静态类对象存储起来。这样我们在工程的其它地方也可以用到了。
我们不妨将上面的事件方式的获取 StorageProvider 的这一步改成使用我们的静态类来获得存储对象。
private async void Button_Click(object? sender, Avalonia.Interactivity.RoutedEventArgs e)
{
    var storageProvider = GlobalSingletonHelper.StorageProvider; // 就改了这里
    var resultFile = await storageProvider.SaveFilePickerAsync(new FilePickerSaveOptions()
    {
        //DefaultExtension = ".txt",
        FileTypeChoices = new List<FilePickerFileType>() { FilePickerFileTypes.TextPlain },
        Title = "保存文件",
        SuggestedFileName = "output",
    });

    if (resultFile == null) return;

    var text = "hello, fanbal!";

    using var stream = await resultFile.OpenWriteAsync();
    using var streamWritter = new StreamWriter(stream);
    await streamWritter.WriteLineAsync(text);
}
3.2 既然脱离了控件,就可以在 ViewModel 中调用文件对话框了
我们在 MainViewModel 的基础上进行改造,最后我们写成这个样子:
using Avalonia.Platform.Storage;
using CommunityToolkit.Mvvm.Input;
using System.Collections.Generic;
using System.IO;
using System.Windows.Input;
using Test2.Helpers;

namespace Test2.ViewModels;

public partial class MainViewModel : ViewModelBase
{
    #region commands
    public ICommand ExportCommand { get; private set; }
    #endregion

    #region ctors
    public MainViewModel()
    {
        ExportCommand = new RelayCommand(Export);
    }
    #endregion

    #region methods
    private async void Export()
    {
        var storageProvider = GlobalSingletonHelper.StorageProvider;
        var resultFile = await storageProvider.SaveFilePickerAsync(new FilePickerSaveOptions()
        {
            //DefaultExtension = ".txt",
            FileTypeChoices = new List<FilePickerFileType>() { FilePickerFileTypes.TextPlain },
            Title = "保存文件",
            SuggestedFileName = "output",
        });

        if (resultFile == null) return;

        var text = "hello, fanbal!";

        using var stream = await resultFile.OpenWriteAsync();
        using var streamWritter = new StreamWriter(stream);
        await streamWritter.WriteLineAsync(text);
    }
    #endregion

}
随后对 MainView.xaml 的地方的 Button 改为绑定的形式。
<UserControl x:Class="Test2.Views.MainView"
             xmlns="https://github.com/avaloniaui"
             xmlns:x="http://schemas.microsoft.com/winfx/2006/xaml"
             xmlns:d="http://schemas.microsoft.com/expression/blend/2008"
             xmlns:mc="http://schemas.openxmlformats.org/markup-compatibility/2006"
             xmlns:vm="clr-namespace:Test2.ViewModels"
             d:DesignHeight="450"
             d:DesignWidth="800"
             x:DataType="vm:MainViewModel"
             mc:Ignorable="d">
    <Design.DataContext>
        <!--
            This only sets the DataContext for the previewer in an IDE,
            to set the actual DataContext for runtime, set the DataContext property in code (look at App.axaml.cs)
        -->
        <vm:MainViewModel />
    </Design.DataContext>

    <Button Width="100"
            Height="100"
            HorizontalAlignment="Center"
            VerticalAlignment="Center"
            HorizontalContentAlignment="Center"
            VerticalContentAlignment="Center"
            Command="{Binding ExportCommand}"
            Content="保存" />
</UserControl>
看出区别了吗?
啊对,其实就是开了一个 ExportCommand 命令而已hhh。
4. 依赖注入服务改造
我一直觉得依赖注入在桌面端开发中,特别是单模块的项目中,是一种很鸡肋的方式,因为它们最后的使用形式和我们在上面写的GlobalSingletonHelper无异。
依赖注入是有自动和手动两种,而自动的方式,也就意味着你必须要将所有涉及的模块先提前注入到容器中,这从某种意义上来说也并不自动。
但是依赖注入在多模块协同和组装的过程中确实能够起到非常重要的作用,我们的项目不能止步于静态类的调用,我们仍然要将这种调用进行依赖注入化的改造,为了各位在维护大项目的时候,能够留有改造的余地。
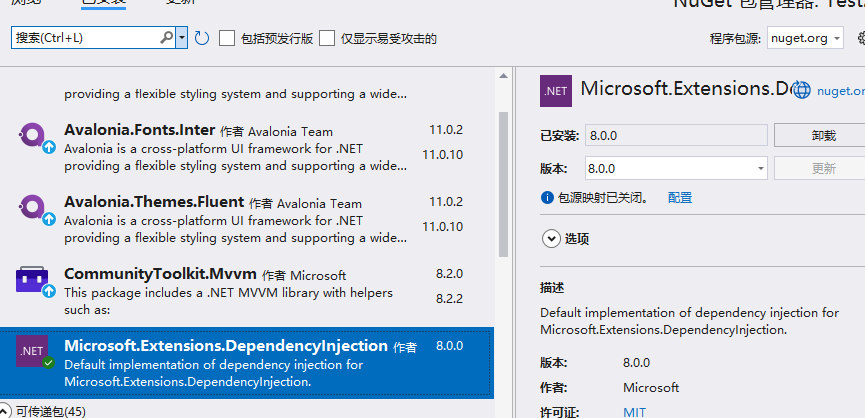
我们采用的是 CommunityToolkit.MVVM,它自带了依赖注入容器,我们会拜托它。
让我们先装一个库先:Microsoft.Extensions.DependencyInjection。
我们把目光转回 App.xaml.cs:
代码改成这样:
using Avalonia;
using Avalonia.Controls;
using Avalonia.Controls.ApplicationLifetimes;
using Avalonia.Data.Core.Plugins;
using Avalonia.Markup.Xaml;
using CommunityToolkit.Mvvm.DependencyInjection;
using Microsoft.Extensions.DependencyInjection;
using Test2.Helpers;
using Test2.ViewModels;
using Test2.Views;

namespace Test2;

public partial class App : Application
{
    public override void Initialize()
    {
        AvaloniaXamlLoader.Load(this);
    }

    public override void OnFrameworkInitializationCompleted()
    {
        // Line below is needed to remove Avalonia data validation.
        // Without this line you will get duplicate validations from both Avalonia and CT
        BindingPlugins.DataValidators.RemoveAt(0);

        var serviceCollection = new ServiceCollection();

        if (ApplicationLifetime is IClassicDesktopStyleApplicationLifetime desktop)
        {
            var mainWindow = new MainWindow
            {
                DataContext = new MainViewModel()
            };
            desktop.MainWindow = mainWindow;

            var topLevel = TopLevel.GetTopLevel(mainWindow);
            serviceCollection.AddSingleton(topLevel.StorageProvider);
        }
        else if (ApplicationLifetime is ISingleViewApplicationLifetime singleViewPlatform)
        {
            var mainView = new MainView
            {
                DataContext = new MainViewModel()
            };
            singleViewPlatform.MainView = mainView;

            var topLevel = TopLevel.GetTopLevel(mainView);
            serviceCollection.AddSingleton(topLevel.StorageProvider);
        }

        var serviceProvider = serviceCollection.BuildServiceProvider();
        Ioc.Default.ConfigureServices(serviceProvider);

        base.OnFrameworkInitializationCompleted();
    }
}
然后在 MainViewModel.cs 的地方使用 Ioc 的手动方式来获取 StorageProvider 示例:
using Avalonia.Platform.Storage;
using CommunityToolkit.Mvvm.DependencyInjection;
using CommunityToolkit.Mvvm.Input;
using System.Collections.Generic;
using System.IO;
using System.Windows.Input;
using Test2.Helpers;

namespace Test2.ViewModels;

public partial class MainViewModel : ViewModelBase
{
    #region commands
    public ICommand ExportCommand { get; private set; }
    #endregion

    #region ctors
    public MainViewModel()
    {
        ExportCommand = new RelayCommand(Export);
    }
    #endregion

    #region methods
    private async void Export()
    {
        var storageProvider = Ioc.Default.GetService<IStorageProvider>();
        var resultFile = await storageProvider.SaveFilePickerAsync(new FilePickerSaveOptions()
        {
            //DefaultExtension = ".txt",
            FileTypeChoices = new List<FilePickerFileType>() { FilePickerFileTypes.TextPlain },
            Title = "保存文件",
            SuggestedFileName = "output",
        });

        if (resultFile == null) return;

        var text = "hello, fanbal!";

        using var stream = await resultFile.OpenWriteAsync();
        using var streamWritter = new StreamWriter(stream);
        await streamWritter.WriteLineAsync(text);
    }
    #endregion

}
我的话会为了方便,又封装一个 IocHelper 来获得这些注册了的服务,这和静态类示例没有丝毫区别,但是和别人提起来说我用的依赖注入,会显得很装逼,有的朋友只知道所谓依赖注入而不知道这些很朴实等效的方法,会让我感觉到有些奇怪hhh。

using Avalonia.Platform.Storage;
using CommunityToolkit.Mvvm.DependencyInjection;

namespace Test2.Helpers
{
    internal static class IocHelper
    {
        public static IStorageProvider GetStorageProvider()
        {
            return Ioc.Default.GetService<IStorageProvider>();
        }
    }
}

 浙公网安备 33010602011771号