
Hexo的next主题安装
通过Git+Hexo搭建的个人博客地址:http://factory011.coding.me/factory011.github.io/
1、使用git克隆最新版本
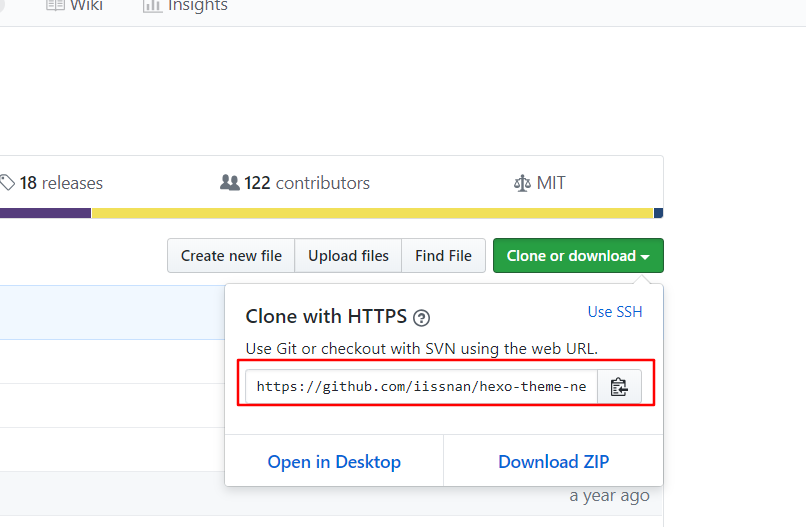
2、先在themes目录创建一个next文件夹,然后在hexo站点目录下右键打开Git Bash Here,输入命令 git clone https://github.com/iissnan/hexo-theme-next.git themes/next

3、将blog目录下_config.yml里theme的名称由landscape修改为next

4、清除hexo缓存使用命令:hexo clear,验证主题是否正确启用,命令为:hexo s --debug 回车后出现报错,
提示4000端口被占用,那就在blog目录的_config.yml内加上如下代码更改hexo-server运行时的端口号:
server:
port: 4001
compress: true
header: true

5、重新输入命令:hexo s --debug 开启服务

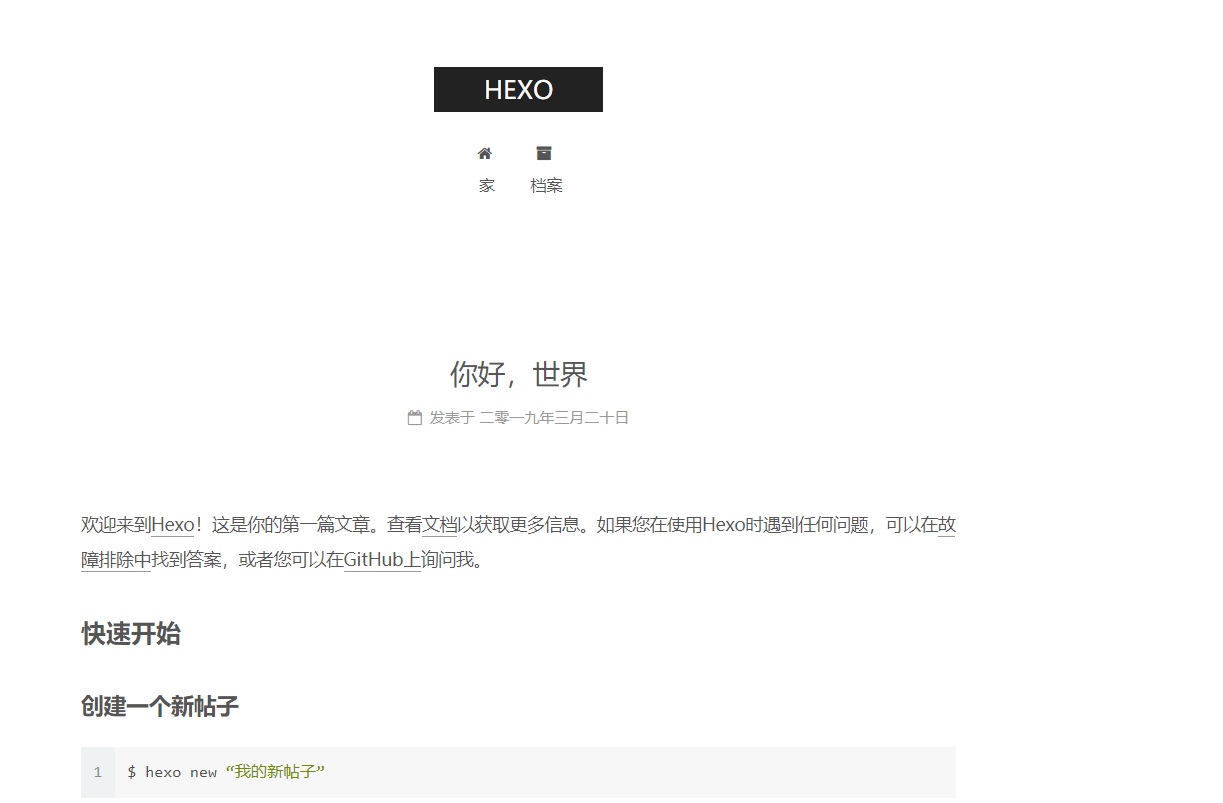
6、当看到Hexo is running at http://localhost:4001 说明已经启动成功,打开http://localhost:4001 ,
看到站点的外观与下图所示类似时即说明已成功安装 NexT 主题。

 浙公网安备 33010602011771号