matplotlib PyQt5 nivigationBar 中pan和zoom功能的探索
为matplotlib生成的图添加编辑条,我们导入NavigationToolbar2QT
from matplotlib.backends.backend_qt5agg import NavigationToolbar2QT
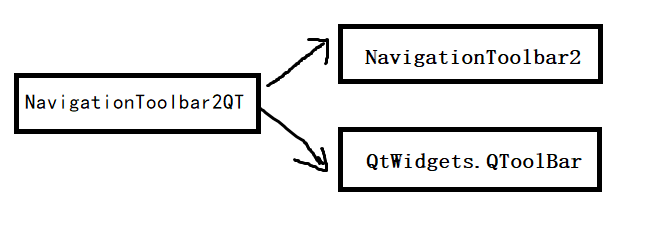
继承关系:

其中,NavigationToolbar2是实现NavigationToolbar2QT有关编辑条的主要实现类,下面对NavigationToolbar2进行详细分析。
涉及zoom功能的有四个函数: zoom(), press_zoom(), drag_zoom(), release_zoom()
涉及pan功能的四个函数与之类似.
-
zoom()
鼠标按下事件绑定 press_zoom(),鼠标释放事件绑定release_zoom()
-
press_zoom()
判断是鼠标左键还是右键触发的点击事件,存入self._button_pressed中(1: 左键;2: 右键)。
关键代码分析: 将鼠标点击的坐标(x, y)、figure中的axes对象,i(含义不明), axes对象的rect(xmin, xmax, ymin, ymax)append(添加)到self._xypress中,代码如下:
self._xypress.append((x, y, a, i, a._get_view()))
鼠标点击事件绑定_switch_on_zoom_mode()以确认zoom缩放模式(左键缩小/右键放大)
鼠标拖动事件绑定drag_zoom()
鼠标释放事件绑定_switch_off_zoom_mode()清除zoom缩放模式的设置
-
drag_zoom()
读取self._xypress中的记录(press_zoom中有详细参数介绍),限制绘制区域(不超出Axes对象)
根据读取的参数绘制矩形区域,
self.draw_rubberband(event, x1, y1, x2, y2)
-
release_zoom()
取消press_zoom()中注册的事件,移除drag_zoom()中绘制的矩形
添加功能: 无视5像素之下的zoom操作,检测共享xy轴的图形
根据self._button_pressed设置in/out(缩放/放大)
关键代码分析: 绘制一个指定的axes区域;参数: [lastx], [lasty]: press(按下)的坐标;[x], [y]: release(释放鼠标)的坐标;[direction]:‘in’: 左键,‘out’:右键;
[self._zoom_mode]: ‘x’:x方向,‘y’:y方向;[twinx], [twiny]: 关于共享坐标轴的图像显示(未深入研究)。
a._set_view_from_bbox((lastx, lasty, x, y), direction,self._zoom_mode, twinx, twiny)
Other method:
push_current(): Push the current view limits and position onto the stack
save_figure(): Save the current figure.(override require)
draw(): Redraw the canvases, update the locators.
set_message(): Display a message on toolbar or in status bar.
back(), forward(): move back/forward up the view lim stack
   home(): Restore the original view.

   set_history_buttons():  Enable or disable the back/forward button.
press(): Called whenever a mouse button is pressed.
draw_rubberband(self, event, x0, y0, x1, y1), remove_rubberband(): Draw/Remove a rectangle rubberband to indicate zoom limits (not guaranteed that ``x0 <= x1`` and ``y0 <= y1`)


