用观察者模式实现网页动画
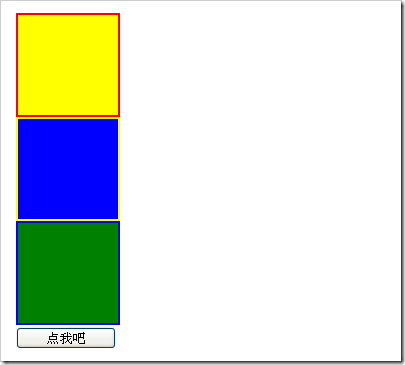
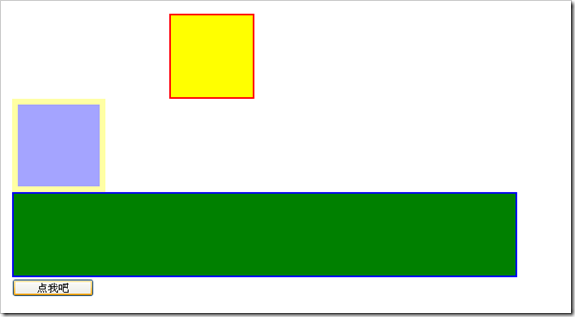
我觉得观察者模式是非常棒的模式,关于它的应用可谓非常之多啊,本着学习的态度,我用js进行了一次实践,做的一个观察者模式构建的网页动画,最后的效果是,点击按钮就会使得三个方块做各自的动画。如图:
初始状态
运动过程中截图
那么具体是怎样实现的呢?大致说一下思路吧:
1. 首先创建观察者和被观察者接口:
//被观察者接口function IObserverable()
{
}
IObserverable.prototype={
    addObserver:
        function(observer){},
    removeObserver:
        function(observer){},
    notify:
        function(){}
};
//观察者接口
function IObserver()
{
}
IObserver.prototype={
    update:
        function(){}
};
2. 然后分别建立按钮类这个被观察者和三个盒子对象作为观察者,
在这里,我使用了静态的简单工厂来创建按钮对象和盒子的jQuery对象,代码如下:
//简单工厂
function SimpleFactory()
{

}
SimpleFactory.createBox=function(id, jStyles){
    var $box=$("<div></div>");
    $box.attr("id",id);
    $box.css(jStyles);
    $(document.body).append($box);//自动加入到页面中,其实工厂是不应该负责页面显示的,但为了方便起见,暂时这样做喽
    return $box;
};
SimpleFactory.createButton=function(id, value, jStyle){
    var $button=$("<input type='button' />");
    $button.attr("id",id);
    $button.attr("value", value);
    $button.css(jStyle);
    $(document.body).append($button);
    return $button;
};
//创建jQuery对象的实例
    var $box1=SimpleFactory.createBox("box1",{
        border:"2px solid red",
        width:"100px",
        height:"100px",
        background:"yellow"
    });
    var $box2=SimpleFactory.createBox("box2",{
        border:"2px solid yellow",
        width:"100px",
        height:"100px",
        background:"blue"
    });
    var $box3=SimpleFactory.createBox("box3",{
        border:"2px solid blue",
        width:"100px",
        height:"100px",
        background:"green"
    });
    var $button=SimpleFactory.createButton(
        "button",
        "点我吧",
        {
            width:"100px"
        }
    );
而真正的观察者和被观察者创建过程如下:
var button=new Button();
var box1=new Box1($box1);
var box2=new Box2($box2);
var box3=new Box3($box3);
3. 创建完所需的对象之后,就要将观察者加入被观察者的引用集合之中了:
button.addObserver(box1);
button.addObserver(box2);
button.addObserver(box3);
4. 然后添加相应的点击事件即可:
$button.click(function(){
        button.notify();
});
以上只是个初步的骨架,因为观察者和被观察者的具体代码没有建立,所以不会造成任何影响,下面我就把具体的观察者和被观察者的代码贴出来,特别是观察者的update方法,每一个update方法都能使自身产生某种动画效果:
//按钮类(被观察者)
function Button($element)
{
    this.observers=new Array();
}
Button.prototype=new IObserverable();
Button.prototype.addObserver=function(observer){
    this.observers.push(observer);
};
Button.prototype.removeObserver=function(observer){
    this.observers.remove(observer);
};
Button.prototype.notify=function(){
    for(var i=0; i<this.observers.length; i++)
    {
        this.observers[i].update();
    }
};
//盒子类(观察者),Box1, Box2, Box3 extends IBox
function IBox()
{
}
IBox.prototype=new IObserver();

function Box1($element)
{
    this.$element=$element;
}
Box1.prototype=new IBox();
//这个update实现向右移动300像素然后回到原位的效果
Box1.prototype.update=function(){
    this.$element.animate(
    {
        marginLeft:"+300px"
    },1000)
    .animate(
    {
        marginLeft:"0px"
    }
    ,100);
};

function Box2($element)
{
    this.$element=$element;
}
Box2.prototype=new IBox();
//这个update实现忽隐忽现并移动的效果,同时边框大小也会变化
Box2.prototype.update=function(){
    this.$element.animate({
        opacity:"hide",
        borderWidth:"10px"
    },1000, "swing", function(){
        $(this).css({
            marginLeft:"100px"
        });
    });
    this.$element.animate({
        opacity:"show",
        borderWidth:"20px"
    },1000,"swing");
    this.$element.animate({
        opacity:"hide",
        borderWidth:"2px",
        marginLeft:"0px"
    },1000,"swing",function(){
        $(this).fadeIn(1000);
    });
};

function Box3($element)
{
    this.$element=$element;
}
Box3.prototype=new IBox();
//这个update实现宽度改变的效果,先变到900px,再变到100px
Box3.prototype.update=function(){
    this.$element.animate({
        width:"900px",
        height:"100px"
    },1000)
    .delay(500)
    .animate({
        width:"100px",
        height:"100px"
    },1000);
};
最后,将所有的代码组织起来用一个html显示,就能看到效果了,还不错啊:) ,(在chrome中测试),点击下方的按钮,所有方块开始运动了!哈哈。
其实做这个是有原因的,之前自己试着编写过一个动画引擎,但只能对一个元素应用动画效果,很挫啊,不过实现了变色的功能(jquery里面没有变色的API,不得不说有些遗憾),嘻嘻,蛮有趣的,所以我就想怎样实现一个多元素的共同进行的动画呢?学了观察者模式之后,终于找到了答案(不过其实也可以直接用jQuery绑定事件就行了,但本着学习的态度嘛,所以搞这么一个,:))
最后把我的代码打个包吧,大家有兴趣可以下载,直接运行其中的html文件查看效果(最好是在chrome下面运行)。
作者:everdom
出处:http://everdom.cnblogs.com/
本文版权归作者和博客园共有,欢迎转载,但未经作者同意必须保留此段声明,且在文章页面明显位置给出原文链接,否则保留追究法律责任的权利。


