Spring
概述
分析以下程序存在的问题:
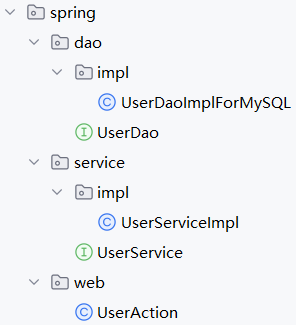
Web层:
public class UserAction {
    private UserService userService = new UserServiceImpl();

    public void deleteRequest(){
        userService.deleteUser();
    }
}
Service层:
public interface UserService {
    void deleteUser();
}
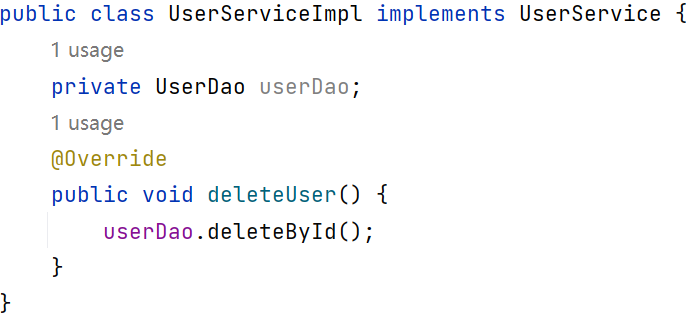
public class UserServiceImpl implements UserService {
    private UserDao userDao = new UserDaoImplForMySQL();
    @Override
    public void deleteUser() {
        userDao.deleteById();
    }
}
Dao层:
public interface UserDao {
    void deleteById();
}
public class UserDaoImplForMySQL implements UserDao {
    @Override
    public void deleteById() {
        System.out.println("MySQL delete user data");
    }
}
层与层间以接口衔接,程序可以正常执行
假设此时要改成Oracle数据库,就需要再提供一个UserDao的实现类UserDaoImplForOracle
public class UserDaoImplForOracle implements UserDao {
    @Override
    public void deleteById() {
        System.out.println("Oracle delete user data");
    }
}
此时需要修改UserServiceImpl:
public class UserServiceImpl implements UserService {
    //修改了这行代码
    //private UserDao userDao = new UserDaoImplForMySQL();
    private UserDao userDao = new UserDaoImplForOracle();
    @Override
    public void deleteUser() {
        userDao.deleteById();
    }
}
修改了就要重新进行测试,在扩展系统的功能时修改了之前运行良好的程序,这就违背了OCP开闭原则
OCP原则是最核心的原则,软件开发七大原则中的其他六个原则都是为这个原则服务的。
程序还违背了依赖倒置原则 DIP原则,在现有的程序架构中:
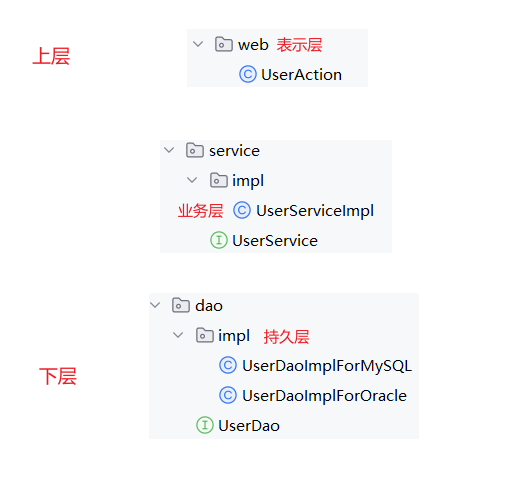
当前是上层模块依赖下层模块的,下层程序只要一变动就会影响上层模块:
- UserAction依赖了具体的UserServiceImpl
- UserServiceImpl依赖了具体的UserDaoImplForMySQL
这样是违背了依赖倒置原则,依赖倒置原则的核心:面向接口编程
这样就是完全抽象的,符合依赖倒置原则的。不new具体的实现类对象,就可以解耦合;(暂时忽略空指针异常)
这样设计确实可以保证耦合度最低,UserServiceImpl不必关心UserDao的具体实现类,把创建对象的权力和对象关系维护的权力交出去了,不在程序中硬编码实现
对象关系的维护:实现类具体是Oracle还是MySQL
这个过程就被称为 控制反转 :Inversion of Control
反转的是:
- 不在程序中使用硬编码方式new对象
- 不在程序中使用硬编码方法维护对象之间的关系
这两者的权力都交出去了,这就是控制反转的核心思想
控制反转是一种新型设计模式,没有被纳入GoF 23种设计模式范围之内
权力交给了Spring框架,Spring框架实现了控制反转IoC的思想,Spring是一个实现了IoC思想的容器
- Spring框架可以new对象
- Spring框架可以维护对象和对象之间的关系
控制反转的实现方式有多种,其中比较重要的是:依赖注入:Dependency Injection
控制反转IoC是一种思想,依赖注入DI是一种具体的实现方式
依赖注入有常见的两种注入方式:
- set注入
- 构造方法注入
也就是为private UserDao userDao 属性赋值的方法
依赖:A对象和B对象的关系
注入:让A对象和B对象产生关系的一种手段
Spring的8个模块

Spring是一个开源框架,它由Rod Johnson创建。它是为了解决企业应用开发的复杂性而创建的。
从简单性、可测试性和松耦合的角度而言,任何Java应用都可以从Spring中受益。
Spring是一个轻量级的控制反转(IoC)和面向切面(AOP)的容器框架。
Spring最初的出现是为了解决EJB(企业级JavaBean)臃肿的设计,以及难以测试等问题。
Spring为简化开发而生,让程序员只需关注核心业务的实现,尽可能的不再关注非业务逻辑代码(事务控制,安全日志等)。
Spring5之前是7大模块,Spring5新增了WebFlux模块
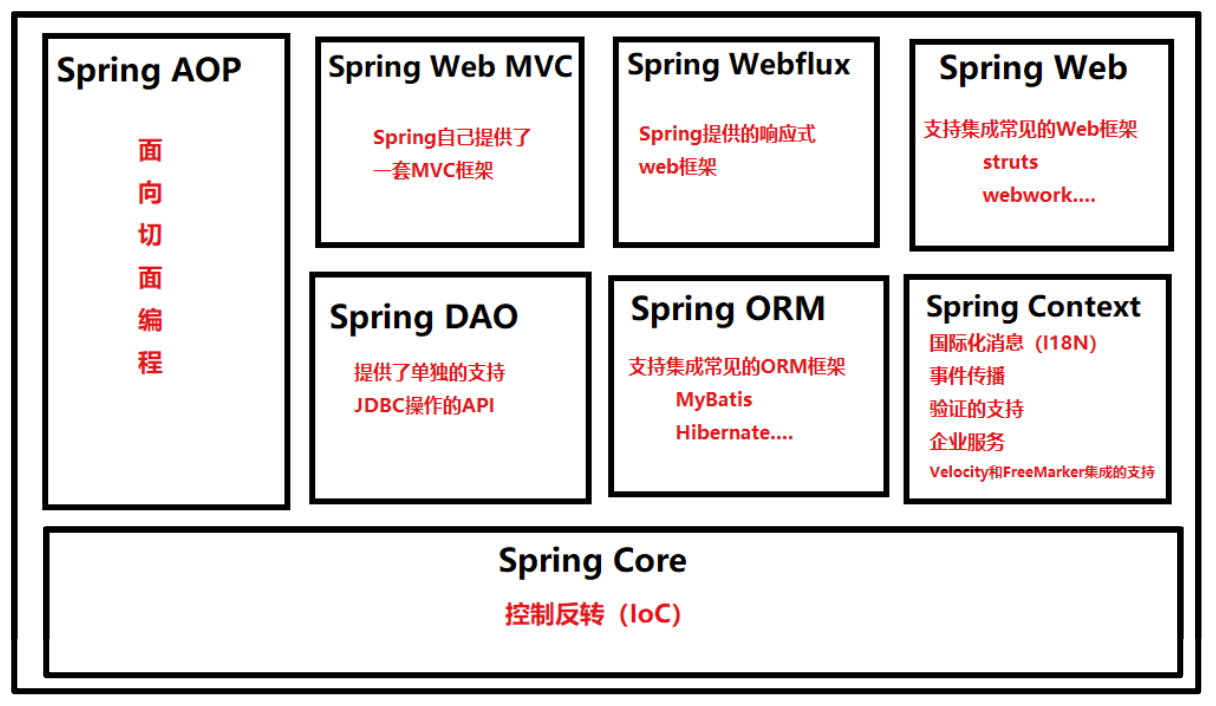
- Spring Core模块
这是Spring框架最基础的部分,它提供了依赖注入(Dependency Injection)特征来实现容器对Bean的管理。核心容器的主要组件是 BeanFactory,BeanFactory是工厂模式的一个实现,是任何Spring应用的核心。它使用IoC将应用配置和依赖从实际的应用代码中分离出来。
- Spring Context模块
如果说核心模块中的BeanFactory使Spring成为容器的话,那么上下文模块就是Spring成为框架的原因。
这个模块扩展了BeanFactory,增加了对国际化(I18N)消息、事件传播、验证的支持。另外提供了许多企业服务,例如电子邮件、JNDI访问、EJB集成、远程以及时序调度(scheduling)服务。也包括了对模版框架例如Velocity和FreeMarker集成的支持
- Spring AOP模块
Spring在它的AOP模块中提供了对面向切面编程的丰富支持,Spring AOP 模块为基于 Spring 的应用程序中的对象提供了事务管理服务。通过使用 Spring AOP,不用依赖组件,就可以将声明性事务管理集成到应用程序中,可以自定义拦截器、切点、日志等操作。
- Spring DAO模块
提供了一个JDBC的抽象层和异常层次结构,消除了烦琐的JDBC编码和数据库厂商特有的错误代码解析,用于简化JDBC。
- Spring ORM模块
Spring提供了ORM模块。Spring并不试图实现它自己的ORM解决方案,而是为几种流行的ORM框架提供了集成方案,包括Hibernate、JDO和iBATIS SQL映射,这些都遵从 Spring 的通用事务和 DAO 异常层次结构。
- Spring Web MVC模块
Spring为构建Web应用提供了一个功能全面的MVC框架。虽然Spring可以很容易地与其它MVC框架集成,例如Struts,但Spring的MVC框架使用IoC对控制逻辑和业务对象提供了完全的分离。
- Spring WebFlux模块
Spring Framework 中包含的原始 Web 框架 Spring Web MVC 是专门为 Servlet API 和 Servlet 容器构建的。反应式堆栈 Web 框架 Spring WebFlux 是在 5.0 版的后期添加的。它是完全非阻塞的,支持反应式流(Reactive Stream)背压,并在Netty,Undertow和Servlet 3.1+容器等服务器上运行。
- Spring Web模块
Web 上下文模块建立在应用程序上下文模块之上,为基于 Web 的应用程序提供了上下文,提供了Spring和其它Web框架的集成,比如Struts、WebWork。还提供了一些面向服务支持,例如:实现文件上传的multipart请求。
Spring的特点:
-
轻量
-
从大小与开销两方面而言Spring都是轻量的。完整的Spring框架可以在一个大小只有1MB多的JAR文件里发布。并且Spring所需的处理开销也是微不足道的。
-
Spring是非侵入式的:Spring应用中的对象不依赖于Spring的特定类,Spring的运行不需要依赖其他东西。
假如某个框架中有一个类,该类的方法上有一个参数HttpServletRequest,这时无法对该类进行单元测试,这个参数在Tomcat服务器当中,这就是侵入式的设计,离不开Tomcat服务器的支持
-
-
控制反转
- Spring通过一种称作控制反转(IoC)的技术促进了松耦合。当应用了IoC,一个对象依赖的其它对象会通过被动的方式传递进来,而不是这个对象自己创建或者查找依赖对象。你可以认为IoC与JNDI相反——不是对象从容器中查找依赖,而是容器在对象初始化时不等对象请求就主动将依赖传递给它。
-
面向切面
- Spring提供了面向切面编程的丰富支持,允许通过分离应用的业务逻辑与系统级服务(例如审计(auditing)和事务(transaction)管理)进行内聚性的开发。应用对象只实现它们应该做的——完成业务逻辑——仅此而已。它们并不负责(甚至是意识)其它的系统级关注点,例如日志或事务支持。
-
容器
- Spring包含并管理应用对象的配置和生命周期,在这个意义上它是一种容器,你可以配置你的每个bean如何被创建——基于一个可配置原型(prototype),你的bean可以创建一个单独的实例或者每次需要时都生成一个新的实例——以及它们是如何相互关联的。然而,Spring不应该被混同于传统的重量级的EJB容器,它们经常是庞大与笨重的,难以使用。
-
框架
- Spring可以将简单的组件配置、组合成为复杂的应用。在Spring中,应用对象被声明式地组合,典型地是在一个XML文件里。Spring也提供了很多基础功能(事务管理、持久化框架集成等等),将应用逻辑的开发留给了你。
所有Spring的这些特征使你能够编写更干净、更可管理、并且更易于测试的代码。它们也为Spring中的各种模块提供了基础支持。
Spring下载
官网:https://spring.io/ 中文网:http://spring.p2hp.com/projects/spring-framework.html
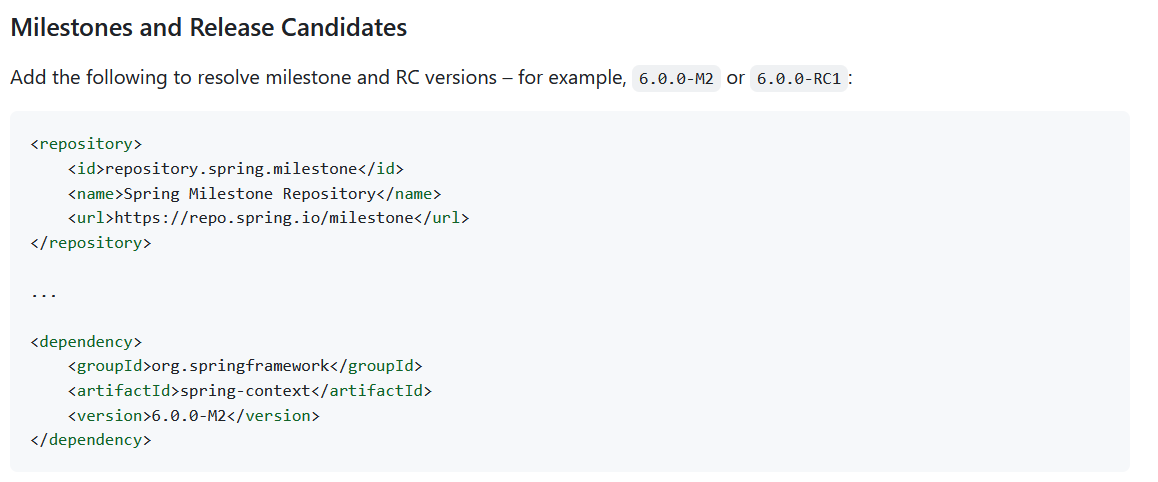
pom文件:
<repository>
<id>repository.spring.milestone</id>
<name>Spring Milestone Repository</name>
<url>https://repo.spring.io/milestone</url>
</repository>
...
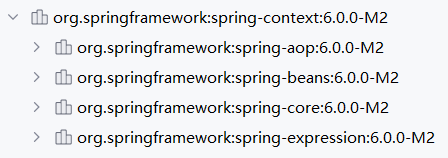
<dependency>
<groupId>org.springframework</groupId>
<artifactId>spring-context</artifactId>
<version>6.0.0-M2</version>
</dependency>
需要关联内部仓库,因为Spring6还没有正式发布
Spring的jar包
打开libs目录,会看到很多jar包:
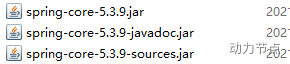
spring-core-5.3.9.jar:字节码(这个是支撑程序运行的jar包)
spring-core-5.3.9-javadoc.jar:代码中的注释
spring-core-5.3.9-sources.jar:源码
spring的jar包:

| JAR文件 | 描述 |
|---|---|
| spring-aop.jar | 这个jar 文件包含在应用中使用Spring 的AOP 特性时所需的类 |
| spring-aspects.jar | 提供对AspectJ的支持,以便可以方便的将面向切面的功能集成进IDE中 |
| spring-beans.jar | 这个jar 文件是所有应用都要用到的,它包含访问配置文件、创建和管理bean 以及进行Inversion ofControl / Dependency Injection(IoC/DI)操作相关的所有类。如果应用只需基本的IoC/DI 支持,引入spring-core.jar 及spring-beans.jar 文件就可以了。 |
| spring-context.jar | 这个jar 文件为Spring 核心提供了大量扩展。可以找到使用Spring ApplicationContext特性时所需的全部类,JDNI 所需的全部类,instrumentation组件以及校验Validation 方面的相关类。 |
| spring-context.jar | 虽然类路径扫描非常快,但是Spring内部存在大量的类,添加此依赖,可以通过在编译时创建候选对象的静态列表来提高大型应用程序的启动性能。 |
| spring-context.jar | 用来提供Spring上下文的一些扩展模块,例如实现邮件服务、视图解析、缓存、定时任务调度等 |
| spring-core.jar | Spring 框架基本的核心工具类。Spring 其它组件要都要使用到这个包里的类,是其它组件的基本核心,当然你也可以在自己的应用系统中使用这些工具类。 |
| spring-expression.jar | Spring表达式语言。 |
| spring-instrument.jar | Spring3.0对服务器的代理接口。 |
| spring-jcl.jar | Spring的日志模块。JCL,全称为"Jakarta Commons Logging",也可称为"Apache Commons Logging"。 |
| spring-jdbc.jar | Spring对JDBC的支持。 |
| spring-jms.jar | 这个jar包提供了对JMS 1.0.2/1.1的支持类。JMS是Java消息服务。属于JavaEE规范之一。 |
| spring-messaging.jar | 为集成messaging api和消息协议提供支持 |
| spring-orm.jar | Spring集成ORM框架的支持,比如集成hibernate,mybatis等。 |
| spring-oxm.jar | 为主流O/X Mapping组件提供了统一层抽象和封装,OXM是Object Xml Mapping。对象和XML之间的相互转换。 |
| spring-r2dbc.jar | Reactive Relational Database Connectivity (关系型数据库的响应式连接) 的缩写。这个jar文件是Spring对r2dbc的支持。 |
| spring-test.jar | 对Junit等测试框架的简单封装。 |
| spring-tx.jar | 为JDBC、Hibernate、JDO、JPA、Beans等提供的一致的声明式和编程式事务管理支持。 |
| spring-web.jar | Spring集成MVC框架的支持,比如集成Struts等。 |
| spring-webflux.jar | WebFlux是 Spring5 添加的新模块,用于 web 的开发,功能和 SpringMVC 类似的,Webflux 使用当前一种比较流程响应式编程出现的框架。 |
| spring-webmvc.jar | SpringMVC框架的类库 |
| spring-websocket.jar | Spring集成WebSocket框架时使用 |
注意:
如果只是想用Spring的IoC功能,仅需要引入:spring-context即可。将这个jar包添加到classpath当中。
如果采用maven只需要引入context的依赖即可。
Spring入门程序
演示Spring是如何创建对象的,不演示维护对象间的关系
<repositories>
        <repository>
            <id>repository.spring.milestone</id>
            <name>Spring Milestone Repository</name>
            <url>https://repo.spring.io/milestone</url>
        </repository>
    </repositories>


    <dependencies>
        <!--引入Spring基础依赖-->
        <!--如果想使用Spring的jdbc、事务tx 还需要添加其他的依赖-->
        <dependency>
            <groupId>org.springframework</groupId>
            <artifactId>spring-context</artifactId>
            <version>6.0.0-M2</version>
        </dependency>

        <dependency>
            <groupId>junit</groupId>
            <artifactId>junit</artifactId>
            <version>4.13.2</version>
        </dependency>

        <!--log4j2的依赖-->
        <dependency>
            <groupId>org.apache.logging.log4j</groupId>
            <artifactId>log4j-core</artifactId>
            <version>2.19.0</version>
        </dependency>
        <dependency>
            <groupId>org.apache.logging.log4j</groupId>
            <artifactId>log4j-slf4j2-impl</artifactId>
            <version>2.19.0</version>
        </dependency>
    </dependencies>
想让Spring帮我们创建对象,需要写配置文件
<?xml version="1.0" encoding="UTF-8"?>
<beans xmlns="http://www.springframework.org/schema/beans"
       xmlns:xsi="http://www.w3.org/2001/XMLSchema-instance"
       xsi:schemaLocation="http://www.springframework.org/schema/beans http://www.springframework.org/schema/beans/spring-beans.xsd">

    <!--配置bean,spring才能帮我们管理这个对象-->
    <!--
        bean的两个重要属性:
            id: bean的唯一标识
            class:类的全限定名
    -->
    <bean id="userBean" class="com.eun.spring.bean.User" />
</beans>
spring.xml一般放在类的根路径下
    @Test
    public void firstSpringTest(){
        //1. 获取Spring容器
        // 应用上下文 Spring容器
        //ApplicationContext接口 下很多实现类,其中ClassPathXmlApplicationContext从类路径下加载Spring上下文对象
        //这行代码只要一执行,立刻启动Spring容器,解析xml配置文件,将实例化所有bean对象放在容器中
        ApplicationContext applicationContext = new ClassPathXmlApplicationContext("spring.xml");

        //2. 根据bean Id从Spring容器中获取这个对象
        Object userBean = applicationContext.getBean("userBean");
        System.out.println(userBean);//com.eun.spring.bean.User@6572421
    }
- bean的id不能重复
org.springframework.beans.factory.parsing.BeanDefinitionParsingException: Configuration problem: Bean name 'userBean' is already used in this <beans> element
Offending resource: class path resource [spring.xml]
- 默认情况下通过反射机制调用无参数构造方法实例化对象
Class.forName()传入class属性值,获取constructor再newInstance
public class User {
    public User() {
        System.out.println("User constructor executed");
    }
}
/**
User constructor executed
com.eun.spring.bean.User@6572421
*/
所以如果只提供一个有参构造,默认情况下会报错(无参构造不再提供):
Exception encountered during context initialization - cancelling refresh attempt: org.springframework.beans.factory.BeanCreationException: Error creating bean with name 'userBean' defined in class path resource [spring.xml]: Instantiation of bean failed; nested exception is org.springframework.beans.BeanInstantiationException: Failed to instantiate [com.eun.spring.bean.User]: No default constructor found; nested exception is java.lang.NoSuchMethodException: com.eun.spring.bean.User.<init>()
无参构造会在创建ClassPathXmlApplicationContext时立刻被调用,不是在调用getBean()时创建对象
- 创建好的bean放在Map集合中了
| key | value |
|---|---|
| bean的id | bean对象 |
- 可以有多个spring.xml配置文件
//可变长参数
ApplicationContext applicationContext = new ClassPathXmlApplicationContext("spring.xml","spring6.xml");
//                                                                         "xml/beans.xml"
- 配置文件中的类也可以是JDK中的类,只要有无参数构造方法
<bean id="nowTime" class="java.util.Date" />
        ApplicationContext applicationContext = new ClassPathXmlApplicationContext("spring.xml");

        Object nowTime = applicationContext.getBean("nowTime");
        String now = new SimpleDateFormat("yyyy-MM-dd HH:mm:ss SSS").format(nowTime);
        System.out.println(now); //2023-06-25 19:09:35 910
- 如果
getBean()方法指定的bean的id不存在,不会返回null而是直接报错:
	org.springframework.beans.factory.NoSuchBeanDefinitionException: No bean named 'nowTime2' available

	@Override
	public BeanDefinition getBeanDefinition(String beanName) throws NoSuchBeanDefinitionException {
		BeanDefinition bd = this.beanDefinitionMap.get(beanName);
		if (bd == null) {
			if (logger.isTraceEnabled()) {
				logger.trace("No bean named '" + beanName + "' found in " + this);
			}
			throw new NoSuchBeanDefinitionException(beanName);
		}
		return bd;
	}
getBean()方法获取的是Object类型,如果访问子类特有的方法还需要向下转型,有没有其他的方法解决这个问题?
Date nowTime = applicationContext.getBean("nowTime", Date.class);
ClassPathXmlApplicationContext是从类路径中加载配置文件,如果没有在类路径当中,又应该如何加载配置文件呢?
ApplicationContext applicationContext2 = new FileSystemXmlApplicationContext("d:/spring6.xml");
FileSystemXmlApplicationContext从系统中加载配置文件
-
ApplicationContext的超级父接口是BeanFactory,是能够生产Bean对象的一个工厂对象BeanFactory是IoC容器的顶级接口Spring的IoC容器实际上使用了工厂模式,IoC实现:
xml解析 + 工厂模式 + 反射机制
        BeanFactory applicationContext = new ClassPathXmlApplicationContext("spring.xml");
        User user = applicationContext.getBean("
                                               userBean", User.class);
        System.out.println(user);
启用log4j2日志框架
Spring5之后,Spring框架支持集成的日志框架是Log4j2
- 引入Log4j2的依赖
<!--log4j2的依赖-->
<dependency>
  <groupId>org.apache.logging.log4j</groupId>
  <artifactId>log4j-core</artifactId>
  <version>2.19.0</version>
</dependency>
<dependency>
  <groupId>org.apache.logging.log4j</groupId>
  <artifactId>log4j-slf4j2-impl</artifactId>
  <version>2.19.0</version>
</dependency>
- 在类的根路径下提供log4j2.xml配置文件(文件名固定为:log4j2.xml,文件必须放到类根路径下。)
<?xml version="1.0" encoding="UTF-8"?>

<configuration>

    <loggers>
        <!--
            level指定日志级别,从低到高的优先级:
                ALL < TRACE < DEBUG < INFO < WARN < ERROR < FATAL < OFF
        -->
        <root level="DEBUG">
            <appender-ref ref="spring6log"/>
        </root>
    </loggers>

    <appenders>
        <!--输出日志信息到控制台-->
        <console name="spring6log" target="SYSTEM_OUT">
            <!--控制日志输出的格式-->
            <PatternLayout pattern="%d{yyyy-MM-dd HH:mm:ss SSS} [%t] %-3level %logger{1024} - %msg%n"/>
        </console>
    </appenders>
</configuration>
启用完毕
- 如果在自己的项目中想使用日志框架
        //创建某个类的日志记录器对象
        //参数:记录哪个类的日志
        //只要是SpringTest类中的代码执行记录日志的话,就输出相关的日志信息
        Logger logger = LoggerFactory.getLogger(SpringTest.class);

        //根据不同的日志级别输出信息
        logger.debug("我是一条调试信息");
        logger.info("我是一条日志消息");
        logger.error("我是一条错误信息");
/*
2023-06-25 19:30:06 045 [main] INFO com.eun.spring.test.SpringTest - 我是一条日志消息
2023-06-25 19:30:06 047 [main] DEBUG com.eun.spring.test.SpringTest - 我是一条调试信息
2023-06-25 19:30:06 047 [main] ERROR com.eun.spring.test.SpringTest - 我是一条错误信息
*/
此时的日志级别是DEBUG,这三条消息都会输出,如果将日志级别设置为ERROR:
2023-06-25 19:31:32 100 [main] ERROR com.eun.spring.test.SpringTest - 我是一条错误信息
只会输出 >= ERROR级的信息
Spring对IoC的实现
控制反转是一种思想,是为了降低程序耦合度,提高程序扩展力,达到OCP、DIP原则
控制反转,反转的是什么?
- 将对象创建的权利交出去,交给第三方容器负责
- 将对象和对象之间的关系的维护权交出去,交给第三方容器负责
控制反转的实现:DI
Spring通过依赖注入的方式来完成Bean管理,Bean管理指的是:
- Bean对象的创建(Spring容器启动时创建,在上文中已经演示)
- Bean对象中属性的赋值(Bean对象之间关系的维护,set/constructor注入)
依赖注入:
- 依赖是对象与对象之间的关联关系
- 注入是一种数据传递行为,通过注入行为来让对象和对象之间产生关系
依赖注入常用的两种方式:
- set注入
- 构造方法注入
set注入
通过set方法进行依赖注入,需要保证set方法存在
public class UserService {
    //对userDao进行set注入,需要提供set方法
    private UserDao userDao;

    //必须以set开始
    public void setUserDao(UserDao userDao) {
        this.userDao = userDao;
    }

    public void saveUser(){
        userDao.insert();
    }
}
在spring.xml文件中进行配置:
    <bean id="userDaoBean" class="com.eun.spring.dao.UserDao" />

    <bean id="userServiceBean" class="com.eun.spring.service.UserService" >
        <!--
            name :  set方法名 去掉set后首字母小写
            ref  : userDaoBean的id
        -->
        <property name="userDao" ref="userDaoBean" />
    </bean>
property标签可以让spring调用set方法,ref指定要注入的bean的id
ref可以看作属性名,获取到属性名就可以获取到该属性的类型:
        Class<?> clazz = Class.forName(user);
        Class<?> paramType = clazz.getDeclaredField(field).getType();
        Method setAgeMethod = clazz.getDeclaredMethod("set" + field.toUpperCase().charAt(0)
                                                      + field.substring(1),paramType);
        Object obj = clazz.getConstructor().newInstance();
        setAgeMethod.invoke(obj,20);
构造注入
通过构造方法来给属性赋值
这种方法是有区别的,set注入是先创建对象后调用set方法为属性赋值;构造注入是创建对象的同时给属性赋值,也就是注入时机不同
public class CustomerService {
    private UserDao userDao;
    private VipDao vipDao;

    public CustomerService(UserDao userDao, VipDao vipDao) {
        this.userDao = userDao;
        this.vipDao = vipDao;
    }
    public void save(){
        userDao.insert();
        vipDao.insert();
    }
}
    <bean id="userDaoBean" class="com.eun.spring.dao.UserDao" />
    <bean id="vipDaoBean" class="com.eun.spring.dao.VipDao" />
    <bean id="customerServiceBean" class="com.eun.spring.service.CustomerService" >
        <!--
            constructor-arg:构造方法注入
                index: 指定参数下标
                ref: 指定注入Bean的id
        -->
        <constructor-arg index="0" ref="userDaoBean" />
        <constructor-arg index="1" ref="vipDaoBean" />
    </bean>
或者可以根据参数的名字进行注入:
    <bean id="userDaoBean" class="com.eun.spring.dao.UserDao" />
    <bean id="vipDaoBean" class="com.eun.spring.dao.VipDao" />
    <bean id="customerServiceBean" class="com.eun.spring.service.CustomerService" >
        <!--
            constructor-arg:构造方法注入
                name: 指定参数的名字
                ref: 指定注入Bean的id
        -->
        <constructor-arg name="userDao" ref="userDaoBean" />
        <constructor-arg name="vipDao" ref="vipDaoBean" />
    </bean>
反射可以获取到参数的名字吗?
或者不指定name或index,Spring会进行类型匹配:
    <bean id="userDaoBean" class="com.eun.spring.dao.UserDao" />
    <bean id="vipDaoBean" class="com.eun.spring.dao.VipDao" />
    <bean id="customerServiceBean" class="com.eun.spring.service.CustomerService" >
        <constructor-arg ref="userDaoBean" />
        <constructor-arg ref="vipDaoBean" />
    </bean>
这种方式是根据类型进行注入的,类型不同时顺序不会影响结果
    public void testConstructorDI(){
        ApplicationContext applicationContext = new ClassPathXmlApplicationContext("beans.xml");
        applicationContext.getBean(CustomerService.class).save();
    }
set注入专题
注入外部bean
    <!--声明Bean-->
    <bean id="orderDaoBean" class="com.eun.spring.dao.OrderDao" />

    <bean id="orderServiceBean" class="com.eun.spring.service.OrderService" >
        <!--注入外部Bean:使用ref引入-->
        <property name="orderDao" ref="orderDaoBean" />
    </bean>
    @Test
    public void testSetDI(){
        ApplicationContext applicationContext = new ClassPathXmlApplicationContext("set-di.xml");
        OrderService orderServiceBean = applicationContext.getBean("orderServiceBean",
                                                                   OrderService.class);
        orderServiceBean.generator();//order is inserting
    }
注入内部bean
    <bean id="orderServiceBean" class="com.eun.spring.service.OrderService" >
        <!--注入内部bean-->
        <property name="orderDao">
            <bean class="com.eun.spring.dao.OrderDao" />
        </property>
    </bean>
property标签中嵌套使用bean标签就是注入内部bean
注入内部bean不需要指定id属性
注入简单类型
上文中的OrderDao是引用数据类型,如果是基本数据类型如何注入?
- set注入:
public class User {
    private String name;
    private String password;
    private int age;

    public void setName(String name) {
        this.name = name;
    }

    public void setPassword(String password) {
        this.password = password;
    }

    public void setAge(int age) {
        this.age = age;
    }
}
    <!--注入简单类型-->
    <bean id="userBean" class="com.eun.spring.bean.User" >
        <!--简单类型使用value赋值-->
        <property name="userName" value="zhangsan"/>
        <property name="password" value="123" />
        <property name="age" value="20" />
    </bean>
Spring中有一个工具类:BeanUtils
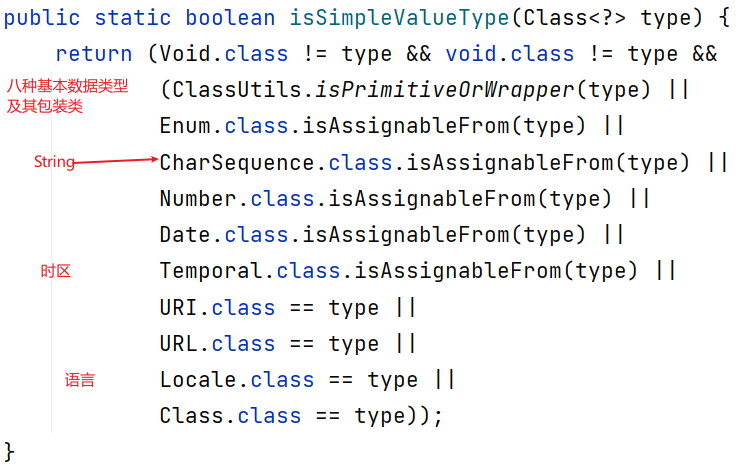
这些都是简单类型,对这些类型进行测试:
public class SimpleValueType {
    private int age;
    private Integer ageWrapper;
    private boolean flag;
    private Boolean flagWrapper;
    private char c;
    private Character cWrapper;
    private Season season;
    private String username;
    private Class clazz;
}
    <bean id="svt" class="com.eun.spring.bean.SimpleValueType" >
        <property name="age" value="20"/>
        <property name="ageWrapper" value="20"/>
        <property name="username" value="zhangsan"/>
        <property name="season" value="SPRING"/>
        <property name="flag" value="false"/>
        <property name="flagWrapper" value="true"/>
        <property name="c" value="M"/>
        <property name="cWrapper" value="F"/>
        <property name="clazz" value="java.lang.String"/>
    </bean>
SimpleValueType{age=20, ageWrapper=20, flag=false, flagWrapper=true, c=M, cWrapper=F, season=SPRING, username='zhangsan', clazz=class java.lang.String}
测试Date:
    private Date birth;

    public void setBirth(Date birth) {
        this.birth = birth;
    }
    <bean id="svt" class="com.eun.spring.bean.SimpleValueType" >
        <property name="birth" value="1970-10-11"/>
    </bean>
但是这样就会报错:
org.springframework.beans.ConversionNotSupportedException: Failed to convert property value of type 'java.lang.String' to required type 'java.util.Date' for property 'birth';
#实例化失败,对于属性birth,无法将给定String类型参数转化为需要的Date类型参数
因为spring将value="1970-10-11" 看作字符串,无法转换为java.util.Date
如果将Date作为简单类型注入,使用value赋值的日期字符串格式是规定的
    public static void main(String[] args) {
        System.out.println(new Date());
        //Mon Jun 26 09:15:38 CST 2023
    }
<property name="birth" value="Mon Jun 26 09:15:38 CST 2023"/>
这样赋值就可以成功了:
SimpleValueType{age=20, ageWrapper=20, flag=false, flagWrapper=true, c=M, cWrapper=F, season=SPRING, username='zhangsan', clazz=class java.lang.String, birth=Mon Jun 26 23:15:38 CST 2023}
但是这样赋值太麻烦了,实际开发中不将Date看作简单类型
    <bean id="date" class="java.util.Date"/>

    <bean id="svt" class="com.eun.spring.bean.SimpleValueType" >
        <property name="birth" ref="date"/>
    </bean>
但是目前只能将new Date()也就是容器启动时创建的时间赋值给birth属性,因为此时无法对bean的创建进行操作
经典应用
/**
 * @author LiuYiBo
 * @ClassName MyDataSource
 * @description: 所有数据源都要实现javax.sql.DataSource规范
 *              数据源:提供Connection对象
 * @date 2023/06/26
 * @version: 1.0
 */
public class MyDataSource implements DataSource {
    private String driver;
    private String url;
    private String username;
    private String password;

    @Override
    public Connection getConnection() throws SQLException {
        Connection connection = null;
        try {
            Class.forName(driver);
            connection = DriverManager.getConnection(url, username, password);
        } catch (ClassNotFoundException e) {
            e.printStackTrace();
        }
        return connection;
    }
}
    <bean id="myDataSourceBean" class="com.eun.spring.jdbc.MyDataSource" >
        <property name="driver" value="com.mysql.cj.jdbc.Driver"/>
        <property name="url" value="jdbc:mysql://localhost:3306/mybatis_db"/>
        <property name="username" value="root"/>
        <property name="password" value=""/>
    </bean>
    @Test
    public void MyDataSourceTest() throws SQLException {
        ApplicationContext context = new ClassPathXmlApplicationContext("set-di.xml");
        MyDataSource myDataSourceBean = context.getBean("myDataSourceBean", MyDataSource.class);
        DataSource dataSource = context.getBean(DataSource.class);
        Connection connection = myDataSourceBean.getConnection();
        System.out.println(connection);
        //com.mysql.cj.jdbc.ConnectionImpl@2228db21
    }
级联属性赋值
public class Clazz {
    private String cname;

    public void setCname(String cname) {
        this.cname = cname;
    }

    @Override
    public String toString() {
        return "Clazz{" +
                "cname='" + cname + '\'' +
                '}';
    }
}
public class Student {
    private String sname;
    private Clazz clazz;

    public void setClazz(Clazz clazz) {
        this.clazz = clazz;
    }

    public void setSname(String sname) {
        this.sname = sname;
    }

    @Override
    public String toString() {
        return "Student{" +
                "sname='" + sname + '\'' +
                ", clazz=" + clazz +
                '}';
    }
}
Student类有一个clazz属性
- 注入外部Bean赋值:
    <bean id="studentBean" class="com.eun.spring.bean.Student" >
        <property name="sname" value="zhangsan"/>
        <property name="clazz" ref="clazzBean"/>
    </bean>
    <bean id="clazzBean" class="com.eun.spring.bean.Clazz" >
        <property name="cname" value="class101"/>
    </bean>
打印Student信息:
Student{sname='zhangsan', clazz=Clazz{cname='class101'}}
- 级联属性赋值:
    <bean id="studentBean" class="com.eun.spring.bean.Student" >
        <property name="sname" value="zhangsan"/>
        <property name="clazz" ref="clazzBean"/>
        <property name="clazz.cname" value="class101"/>  <!--级联属性赋值-->
    </bean>
    <bean id="clazzBean" class="com.eun.spring.bean.Clazz" />
这样做必须为clazz属性提供一个get方法,这里的clazz.cname实际上是getClazz().setCname("")
级联属性的两个顺序不能颠倒
注入数组
- 数组中的元素是简单类型
public class ArrayValueType {
    private String[] hobbies;

    public void setHobbies(String[] hobbies) {
        this.hobbies = hobbies;
    }

    @Override
    public String toString() {
        return "ArrayValueType{" +
                "hobbies=" + Arrays.toString(hobbies) +
                '}';
    }
}
    <bean id="avt" class="com.eun.spring.bean.ArrayValueType" >
        <!--String数组注入-->
        <property name="hobbies">
            <array>
                <value>smoke</value>
                <value>drink</value>
                <value>fire</value>
            </array>
        </property>
    </bean>
- 数组中的元素是引用类型
public class Friend {
    private String name;
    public Friend(String name) {
        this.name = name;
    }
    @Override
    public String toString() {
        return "Friend{" +
                "name='" + name + '\'' +
                '}';
    }
}
public class ArrayValueType {
    private Friend[] friends;
    public void setFriends(Friend[] friends) {
        this.friends = friends;
    }
    @Override
    public String toString() {
        return "ArrayValueType{" +
                "friends=" + Arrays.toString(friends) +
                '}';
    }
}
<bean id="f1" class="com.eun.spring.bean.Friend" > <constructor-arg value="f1"/> </bean>
<bean id="f2" class="com.eun.spring.bean.Friend" > <constructor-arg value="f2"/> </bean>
<bean id="f3" class="com.eun.spring.bean.Friend" > <constructor-arg value="f3"/> </bean>

<bean id="avt" class="com.eun.spring.bean.ArrayValueType" >
    <!--String数组注入-->
    <property name="friends">
        <array>
            <ref bean="f1"/>
            <ref bean="f2"/>
            <ref bean="f3"/>
        </array>
    </property>
</bean>
或者可以注入内部bean:
<property name="friends">
            <array>
                <bean class="com.eun.spring.bean.Friend" >
                    <constructor-arg value="f1"/>
                </bean>
                <bean class="com.eun.spring.bean.Friend" >
                    <constructor-arg value="f2"/>
                </bean>
                <bean class="com.eun.spring.bean.Friend" >
                    <constructor-arg value="f3"/>
                </bean>
            </array>
</property>
注入List和Set
public class Person {
    private List<String> names;
    private Set<String> address;

    public void setNames(List<String> names) {
        this.names = names;
    }

    public void setAddress(Set<String> address) {
        this.address = address;
    }

    @Override
    public String toString() {
        return "Person{" +
                "names=" + names +
                ", address=" + address +
                '}';
    }
}
    <bean id="personBean" class="com.eun.spring.bean.Person" >
        <property name="names">
            <list>
                <value>zhangsan</value>
                <value>lisi</value>
                <value>wangwu</value>
            </list>
        </property>

        <property name="address">
            <!--set集合无序不可重复-->
            <set>
                <value>BeiJing</value>
                <value>BeiJing</value>
                <value>TianJin</value>
                <value>ShangHai</value>
            </set>
        </property>
    </bean>
    @Test
    public void testCollectionDI() {
        ApplicationContext context = new ClassPathXmlApplicationContext("collection-di.xml");
        Person personBean = context.getBean("personBean", Person.class);
        System.out.println(personBean);
        //Person{names=[zhangsan, lisi, wangwu], address=[BeiJing, TianJin, ShangHai]}
    }
注入Map集合
private Map<Integer,String> phones;

public void setPhones(Map<Integer, String> phones) {
    this.phones = phones;
}
        <property name="phones">
            <map>
                <entry key="1" value="12345"/>
                <entry key="2" value="23456"/>
                <entry key="3" value="34567"/>
                <!--<entry key-ref= value-ref= />-->
            </map>
        </property>


            <map>
                <entry key="threadScope">
                    <bean class="org.springframework.context.support.SimpleThreadScope" />
                </entry>
            </map>
注入Properties
properties的key和value只能是字符串
    private Properties properties;

    public void setProperties(Properties properties) {
        this.properties = properties;
    }
    <property name="properties">
        <props>
            <prop key="driver">com.mysql.cj.jdbc.Driver</prop>
            <prop key="url">jdbc:mysql://localhost:3306/mybatis_db</prop>
            <prop key="user">root</prop>
            <!--   <prop key = "" value = "" />   -->
        </props>
    </property>
注入null和空字符串
public class Cat {
    private String name;
    private int age;

    public void setName(String name) {
        this.name = name;
    }

    public void setAge(int age) {
        this.age = age;
    }
}
注入null:不给这个属性赋值
    <bean id="catBean" class="com.eun.spring.bean.Cat" >
        <property name="age" value="2"/>
    </bean>
因为String类的默认值就是null
不能写value="null" ,这是注入了一个字符串
或者可以使用null标签:
    <bean id="catBean" class="com.eun.spring.bean.Cat" >
        <property name="name">
            <null/>
        </property>
        <property name="age" value="2"/>
    </bean>
注入空字符串:
    <bean id="catBean" class="com.eun.spring.bean.Cat" >
        <property name="name" value=""/>
        <property name="age" value="2"/>
    </bean>
Cat{name='', age=2}
或者使用value的自闭合标签:
    <bean id="catBean" class="com.eun.spring.bean.Cat" >
        <property name="name">
            <value/>
        </property>
        <property name="age" value="2"/>
    </bean>
注入特殊符号
XML语法中有5个特殊字符:< > ‘ “ &,这5个特殊符号会当作XML语法的一部分
public class MathBean {
    private String result;
    public void setResult(String result) {
        this.result = result;
    }
    @Override
    public String toString() {
        return "MathBean{" +
                "result='" + result + '\'' +
                '}';
    }
}

<就会报错:
org.springframework.beans.factory.xml.XmlBeanDefinitionStoreException: Line 49 in XML document from class path resource [collection-di.xml] is invalid; nested exception is org.xml.sax.SAXParseException; lineNumber: 49; columnNumber: 42; 与元素类型 "property" 相关联的 "value" 属性值不能包含 '<' 字符。
第一种解决方案:使用实体符号代替特殊符号
<bean id="mathBean" class="com.eun.spring.bean.MathBean" >
<property name="result" value="2 < 3"/>
</bean>
| 特殊字符 | 转义字符 |
|---|---|
| > | > |
| < | < |
| ' | ' |
| " | " |
| & | & |
第二种方案:<![CDATA[]]>,CDATA区中的数据不会被XML文件解析器解析,有特殊符号也当作普通字符串处理。
    <bean id="mathBean" class="com.eun.spring.bean.MathBean" >
        <property name="result">
            <value> <![CDATA[2 < 3]]> </value>
        </property>
    </bean>
但是此处必须使用value标签,不能使用value属性(因为CDATA只能放在两个标签当中)
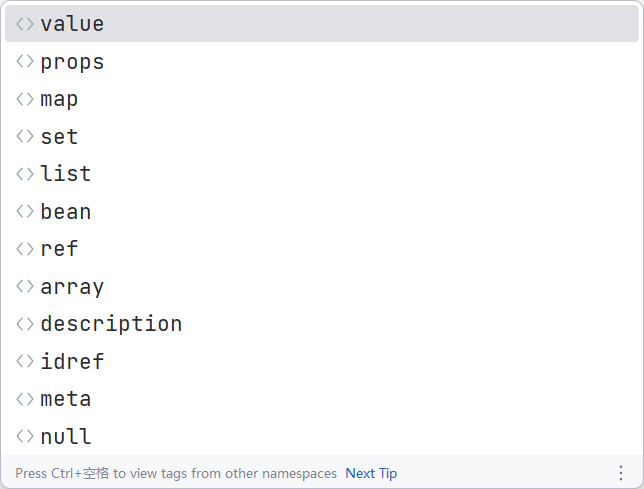
set注入总结:
property标签指明使用set注入,必须包含的属性:name,可以使用的属性:value(简单数据类型)、ref(复杂数据类型)
可选嵌套的子标签:
基于p命名空间的注入
目的:简化配置。
- 第一:在XML头部信息中添加p命名空间的配置信息:
xmlns:p="http://www.springframework.org/schema/p" - 第二:p命名空间注入是基于setter方法的,所以需要对应的属性提供setter方法。
public class Dog {
    private String name;
    private int age;

    //一般将Date看作非简单类型
    private Date birth;

    public void setName(String name) {
        this.name = name;
    }

    public void setAge(int age) {
        this.age = age;
    }

    public void setBirth(Date birth) {
        this.birth = birth;
    }
}
<beans xmlns="http://www.springframework.org/schema/beans"
       xmlns:xsi="http://www.w3.org/2001/XMLSchema-instance"
       xmlns:p="http://www.springframework.org/schema/p"
       xsi:schemaLocation="http://www.springframework.org/schema/beans http://www.springframework.org/schema/beans/spring-beans.xsd">

    <bean id="nowTime" class="java.util.Date" />

    <bean id="dogBean" class="com.eun.spring.bean.Dog" p:name="popi" p:age="3" p:birth-ref="nowTime"/>
</beans>
基于c命名空间的注入
c命名空间注入是简化构造方法注入的
使用c命名空间的两个前提条件:
第一:需要在xml配置文件头部添加信息:xmlns:c="http://www.springframework.org/schema/c"
第二:需要提供构造方法。
public class People {
    private String name;
    private int age;
    private boolean sex;

    //c命名空间是基于构造方法的
    public People(String name, int age, boolean sex) {
        this.name = name;
        this.age = age;
        this.sex = sex;
    }
}
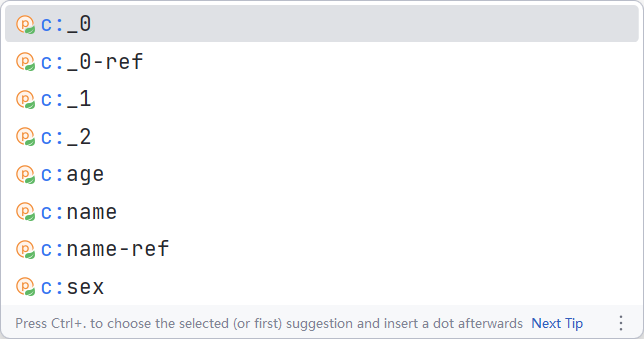
<bean id="peopleBean" class="com.eun.spring.bean.People" c:_0="zhangsan" c:_1="30" c:_2="true"/>
util命名空间
目的:配置复用
使用util命名空间的前提是:在spring配置文件头部添加配置信息。如下:

假如系统集成多个数据库连接池,或者要配置多个数据源:
也可以把这些信息都放在Properties属性类集合中:
public class MyDataSource implements DataSource {
/*    private String driver;
    private String url;
    private String username;
    private String password;*/
    private Properties properties;

    public void setProperties(Properties properties) {
        this.properties = properties;
    }

    @Override
    public Connection getConnection() throws SQLException {
        return null;
    }

    @Override
    public String toString() {
        return "MyDataSource{" +
                "properties=" + properties +
                '}';
    }
}
public class MyOtherDataSource implements DataSource {
    private Properties properties;

    public void setProperties(Properties properties) {
        this.properties = properties;
    }

    @Override
    public Connection getConnection() throws SQLException {
        return null;
    }
}
让spring管理数据源:
    <bean id="myDataSource" class="com.eun.spring.jdbc.MyDataSource" >
        <property name="properties">
            <props>
                <prop key="driver">com.mysql.cj.jdbc.Driver"</prop>
                <prop key="url">jdbc:mysql://localhost:3306/mybatis_db</prop>
                <prop key="username">root</prop>
                <prop key="password"></prop>
            </props>
        </property>
    </bean>

    <bean id="myOtherDataSource" class="com.eun.spring.jdbc.MyOtherDataSource" >
        <property name="properties">
            <props>
                <prop key="driver">com.mysql.cj.jdbc.Driver"</prop>
                <prop key="url">jdbc:mysql://localhost:3306/mybatis_db</prop>
                <prop key="username">root</prop>
                <prop key="password"></prop>
            </props>
        </property>
    </bean>
配置信息都是相同的,可以使用util命名空间简化:
<?xml version="1.0" encoding="UTF-8"?>
<beans xmlns="http://www.springframework.org/schema/beans"
       xmlns:xsi="http://www.w3.org/2001/XMLSchema-instance"
       xmlns:util="http://www.springframework.org/schema/util"
       xsi:schemaLocation="http://www.springframework.org/schema/beans http://www.springframework.org/schema/beans/spring-beans.xsd
                           http://www.springframework.org/schema/util  http://www.springframework.org/schema/util/spring-util.xsd">

    <!--引入util命名空间-->
    <util:properties id="prop" >
        <prop key="driver">com.mysql.cj.jdbc.Driver"</prop>
        <prop key="url">jdbc:mysql://localhost:3306/mybatis_db</prop>
    </util:properties>

    <bean id="myDataSource" class="com.eun.spring.jdbc.MyDataSource" >
        <property name="properties" ref="prop"/>
    </bean>

    <bean id="myOtherDataSource" class="com.eun.spring.jdbc.MyOtherDataSource" >
        <property name="properties" ref="prop"/>
    </bean>
</beans>
引入外部属性配置文件
<?xml version="1.0" encoding="UTF-8"?>
<beans xmlns="http://www.springframework.org/schema/beans"
       xmlns:context="http://www.springframework.org/schema/context"
       xmlns:util="http://www.springframework.org/schema/util"
       xmlns:xsi="http://www.w3.org/2001/XMLSchema-instance"
       xsi:schemaLocation="http://www.springframework.org/schema/beans http://www.springframework.org/schema/beans/spring-beans.xsd
                          http://www.springframework.org/schema/util   http://www.springframework.org/schema/util/spring-util.xsd
                          http://www.springframework.org/schema/context   http://www.springframework.org/schema/context/spring-context.xsd">

    <!--
        引入外部properties文件
        第一步:引入context命名空间
        第二步:使用context:property-placeholder 的 location 指明配置文件路径
        第三步:需要使用的地方使用${key}取值
    -->
    <context:property-placeholder location="jdbc.properties"/>

    <util:properties id="prop">
        <prop key="driver">${jdbc.driver}</prop>
        <prop key="url">${jdbc.url}</prop>
        <prop key="username">${jdbc.username}</prop>
        <prop key="password">${jdbc.password}</prop>
    </util:properties>

    <bean id="dataSource" class="com.eun.spring.jdbc.MyDataSource" >
        <property name="properties" ref="prop" />
    </bean>
</beans>

-----------------------------------------------------------------------------------------------------
    <context:property-placeholder location="jdbc.properties" />


    <bean id="myDataSource" class="com.eun.spring.jdbc.MyDataSource">
        <property name="properties" >
            <props>
                <prop key="driver">${jdbc.driver}</prop>
                <prop key="username">${jdbc.username}</prop>
                <prop key="password">${jdbc.password}</prop>
            </props>
        </property>
    </bean>
这样做是没有问题的,但是如果在属性配置文件中将用户名写为username就会出现问题:
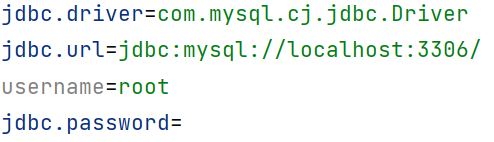
2023-06-26 14:10:45 136 [main] DEBUG org.springframework.beans.factory.support.DefaultListableBeanFactory - Creating shared instance of singleton bean 'dataSource'
MyDataSource{properties={password=, driver=com.mysql.cj.jdbc.Driver, url=jdbc:mysql://localhost:3306/, username=bike1}}
用户名竟然是Windows系统的用户名,因为Spring中使用${}加载内容时默认先加载Windows系统的环境变量
其实只使用util命名空间也可以达到相同的效果:
<beans xmlns="http://www.springframework.org/schema/beans"
       xmlns:xsi="http://www.w3.org/2001/XMLSchema-instance"
       xmlns:util="http://www.springframework.org/schema/util"
       xsi:schemaLocation="http://www.springframework.org/schema/beans http://www.springframework.org/schema/beans/spring-beans.xsd
                           http://www.springframework.org/schema/util  http://www.springframework.org/schema/util/spring-util.xsd">

    <util:properties id="props" location="jdbc.properties" />

    <bean id="myDataSource" class="com.eun.spring.jdbc.MyDataSource" >
        <property name="properties" ref="props" />
    </bean>
    <bean id="myOtherDataSource" class="com.eun.spring.jdbc.MyOtherDataSource" >
        <property name="properties" ref="props" />
    </bean>
</beans>
使用util的id和location属性
基于XML的自动装配
Spring可以完成自动化的注入,自动化注入又被称为 自动装配,可以根据名字进行自动装配,也可以根据类型进行自动装配
自动装配也是基于set方法的
- 根据名字进行自动装配:被注入对象的id是注入类中属性的set方法去掉方法名后首字母小写的字符串
以OrderService、OrderDao为例:
    <bean id="orderService" class="com.eun.spring.service.OrderService" >
        <property name="orderDao" ref="orderDao" />
    </bean>
    <bean id="orderDao" class="com.eun.spring.dao.OrderDao" />
这是之前的写法,没有问题
自动装配:
    <!--根据名字进行自动装配-->
    <bean id="orderService" class="com.eun.spring.service.OrderService" autowire="byName" />
    <!--被注入bean的id要和注入类中属性的set方法去掉方法名后首字母小写的字符串相等-->
    <bean id="orderDao" class="com.eun.spring.dao.OrderDao" />
- 根据类型进行自动装配
以CustomerDao为例:
public class CustomerService {
    private UserDao userDao;
    private VipDao vipDao;

    public void setUserDao(UserDao userDao) {
        this.userDao = userDao;
    }

    public void setVipDao(VipDao vipDao) {
        this.vipDao = vipDao;
    }

    public void save(){
        userDao.insert();
        vipDao.insert();
    }
}
    <bean id="userDao" class="com.eun.spring.dao.UserDao" />
    <bean id="vipDao" class="com.eun.spring.dao.VipDao" />
    <bean id="customerService" class="com.eun.spring.service.CustomerService" autowire="byType"/>
但是依据类型进行自动装配时有效的配置文件中必须有且仅有一个符合的类型,否则会报错:
NoUniqueBeanDefinitionException: No qualifying bean of type 'com.eun.spring.dao.UserDao' available: expected single matching bean but found 2:
Bean的作用域
singleton
默认情况下,Spring的IoC容器创建的Bean对象是单例的,测试:
    @Test
    public void testBeanScope(){
        ApplicationContext applicationContext = new ClassPathXmlApplicationContext("spring-scope.xml");
        SpringBean springBean = applicationContext.getBean("springBean", SpringBean.class);
        System.out.println(springBean); //com.eun.spring.bean.SpringBean@38234a38

        SpringBean springBean2 = applicationContext.getBean("springBean", SpringBean.class);
        System.out.println(springBean2); //com.eun.spring.bean.SpringBean@38234a38

        SpringBean springBean3 = applicationContext.getBean("springBean", SpringBean.class);
        System.out.println(springBean3); //com.eun.spring.bean.SpringBean@38234a38
    }
public class SpringBean {
    private static final Logger logger = LoggerFactory.getLogger(SpringBean.class);
    public SpringBean() {
        logger.info("SpringBean的无参构造方法执行了");
    }
}
如果将三个创建对象的代码注释,观察构造方法执行:
    public void testBeanScope(){
        ApplicationContext applicationContext = new ClassPathXmlApplicationContext("spring-scope.xml");
       //2023-06-26 15:09:59 076 [main] INFO com.eun.spring.bean.SpringBean - SpringBean的无参构造方法执行了

/*        SpringBean springBean = applicationContext.getBean("springBean", SpringBean.class);
        System.out.println(springBean); //com.eun.spring.bean.SpringBean@38234a38

        SpringBean springBean2 = applicationContext.getBean("springBean", SpringBean.class);
        System.out.println(springBean2); //com.eun.spring.bean.SpringBean@38234a38

        SpringBean springBean3 = applicationContext.getBean("springBean", SpringBean.class);
        System.out.println(springBean3); //com.eun.spring.bean.SpringBean@38234a38*/
    }
说明默认情况下在初始化Spring上下文时实例化bean对象,每次getBean方法执行时获得到的都是相同的对象
如果希望调用getBean()方法获取的是不同的对象,也就是不希望在初始化Spring上下文时实例化bean对象,可以使用scope属性设置bean的作用域:
<bean id="springBean" class="com.eun.spring.bean.SpringBean" scope="prototype"/>
    @Test
    public void testBeanScope(){
        ApplicationContext applicationContext = new ClassPathXmlApplicationContext("spring-scope.xml");

        SpringBean springBean = applicationContext.getBean("springBean", SpringBean.class);
        //SpringBean的无参构造方法执行了
        System.out.println(springBean); //com.eun.spring.bean.SpringBean@59f63e24

        SpringBean springBean2 = applicationContext.getBean("springBean", SpringBean.class);
        //SpringBean的无参构造方法执行了
        System.out.println(springBean2); //com.eun.spring.bean.SpringBean@61f05988

        SpringBean springBean3 = applicationContext.getBean("springBean", SpringBean.class);
        //SpringBean的无参构造方法执行了
        System.out.println(springBean3); //com.eun.spring.bean.SpringBean@7ca33c24
    }
当bean的scope属性被设置为prototype时:
- bean是多例的
- spring上下文初始化时,并不会初始化这些prototype的bean
- 每一次调用
getBean方法就会实例化
scope
在web项目中,scope还有其他选项:
- request:一次请求中一个bean
- session:一次会话中一个bean
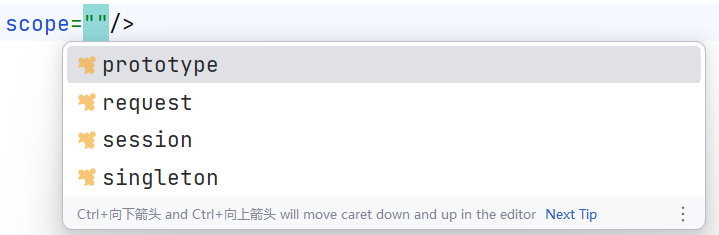
scope属性的值一共有8个:
- singleton:默认的,单例。
- prototype:原型。每调用一次getBean()方法则获取一个新的Bean对象。或每次注入的时候都是新对象。
- request:一个请求对应一个Bean。仅限于在WEB应用中使用。
- session:一个会话对应一个Bean。仅限于在WEB应用中使用。
- global session:portlet应用中专用的。如果在Servlet的WEB应用中使用global session的话,和session一个效果。(portlet和servlet都是规范。servlet运行在servlet容器中,例如Tomcat。portlet运行在portlet容器中。)
- application:一个应用对应一个Bean。仅限于在WEB应用中使用。
- websocket:一个websocket生命周期对应一个Bean。仅限于在WEB应用中使用。
- 自定义scope:很少使用。
自定义scope:定义一个线程级别的Scope,在同一个线程中,获取的Bean都是同一个,跨线程则是不同的对象
-
自定义scope需要实现scope接口,spring内置了线程范围的类:
org.springframework.context.support.SimpleThreadScope,可以直接使用 -
将自定义的Scope注册到Spring容器中
    <!--使用自定义作用域配置器指定scope范围-->
    <bean class="org.springframework.beans.factory.config.CustomScopeConfigurer" >
        <property name="scopes">
            <map> <!--map集合可以指定多个范围-->
                <entry key="threadScope"> <!--作用域的名字-->
                    <!--注入内部bean-->
                    <bean class="org.springframework.context.support.SimpleThreadScope" />
                </entry>
            </map>
        </property>
    </bean>
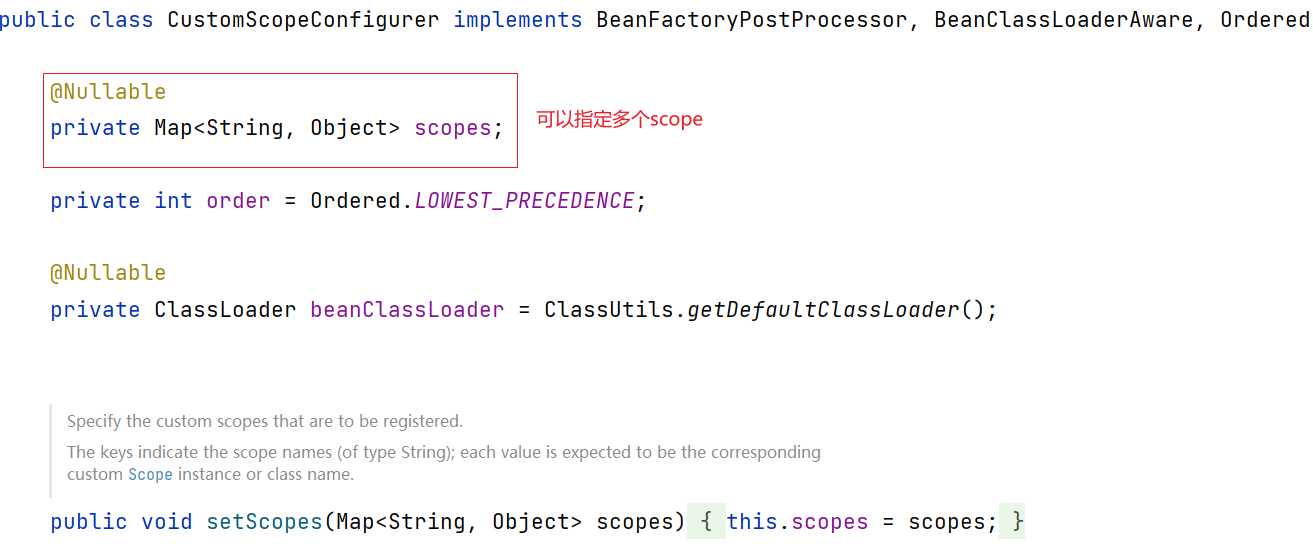
将SimpleThreadScope对象放在了CustomScopeConfigurer的scopes集合中
- 使用自定义scope
<bean id="springBean" class="com.eun.spring.bean.SpringBean" scope="threadScope" />
        ApplicationContext applicationContext = new ClassPathXmlApplicationContext("spring-scope.xml");
        SpringBean bean_1InThread_1 = applicationContext.getBean("springBean", SpringBean.class);
        SpringBean bean_2InThread_1 = applicationContext.getBean("springBean", SpringBean.class);
        System.out.println("bean_1InThread_1 = " + bean_1InThread_1);
		//bean_1InThread_1 = com.eun.spring.bean.SpringBean@37ddb69a
        System.out.println("bean_2InThread_1 = " + bean_2InThread_1);
		//bean_2InThread_1 = com.eun.spring.bean.SpringBean@37ddb69a

		new Thread(()->{
            SpringBean bean_1InThread_2 = applicationContext.getBean("springBean", SpringBean.class);
            SpringBean bean_2InThread_2 = applicationContext.getBean("springBean", SpringBean.class);

            System.out.println("bean_1InThread_2 = " + bean_1InThread_2);
            //bean_1InThread_2 = com.eun.spring.bean.SpringBean@449b3217
            System.out.println("bean_2InThread_2 = " + bean_2InThread_2);
            //bean_2InThread_2 = com.eun.spring.bean.SpringBean@449b3217
        }).start();
GoF 工厂模式
设计模式:一种可以被重复利用的解决方案。
《Design Patterns: Elements of Reusable Object-Oriented Software》(即《设计模式》一书),1995年由 Erich Gamma、Richard Helm、Ralph Johnson 和 John Vlissides 合著。这几位作者常被称为"四人组(Gang of Four)"
不过除了GoF23种设计模式之外,还有其它的设计模式,比如:JavaEE的设计模式(DAO模式、MVC模式等)
GoF23种设计模式可分为三大类:
- 创建型(5个):解决对象创建问题。
- 单例模式
- 工厂方法模式
- 抽象工厂模式
- 建造者模式
- 原型模式
- 结构型(7个):一些类或对象组合在一起的经典结构。
- 代理模式
- 装饰模式
- 适配器模式
- 组合模式
- 享元模式
- 外观模式
- 桥接模式
- 行为型(11个):解决类或对象之间的交互问题。
- 策略模式
- 模板方法模式
- 责任链模式
- 观察者模式
- 迭代子模式
- 命令模式
- 备忘录模式
- 状态模式
- 访问者模式
- 中介者模式
- 解释器模式
工厂模式
工厂模式是解决对象创建问题的,所以工厂模式属于创建型设计模式。
- 第一种:简单工厂模式(Simple Factory):不属于23种设计模式之一。简单工厂模式又叫做:静态 工厂方法模式。简单工厂模式是工厂方法模式的一种特殊实现。
- 第二种:工厂方法模式(Factory Method):是23种设计模式之一。
- 第三种:抽象工厂模式(Abstract Factory):是23种设计模式之一。
简单工厂模式
角色:
- 抽象产品
- 具体产品
- 工厂类
public class WeaponFactory {
    public static Weapon getWeapon(WeaponEnum weaponEnum){
        Weapon weapon = null;
        switch (weaponEnum){
            case DAGGER -> weapon = new Dagger();
            case FIGHTER -> weapon = new Fighter();
            case TANK -> weapon = new Tank();
            default -> throw new RuntimeException("no such weapon");
        }
        return weapon;
    }
}
对于客户端程序来说,不需要关心具体产品的生产细节,只需要向工厂索要即可
简单工厂模式初步达成了 “职责分离 ” :工厂类负责生产,客户端负责消费,生产者和消费者分离。
        Weapon dagger = WeaponFactory.getWeapon(WeaponEnum.DAGGER);
        Weapon tank = WeaponFactory.getWeapon(WeaponEnum.TANK);
        Weapon fighter = WeaponFactory.getWeapon(WeaponEnum.FIGHTER);
简单工厂模式的缺点:
- 缺点1:工厂类集中了所有产品的创造逻辑,形成一个无所不知的全能类,有人把它叫做上帝类。显然工厂类非常关键,不能出问题,一旦出问题,整个系统瘫痪。
- 缺点2:不符合OCP开闭原则,在进行系统扩展时,需要修改工厂类。
Spring中的BeanFactory就使用了简单工厂模式。
工厂方法模式
对简单工厂模式进行改进:之前多个产品对应一个工厂,修改一处就牵一发而动全身,现在将每个产品都单独对应一个工厂,一个工厂对应生产一种产品,工厂就不是全能类了
工厂方法模式既保留了简单工厂模式的优点,同 时又解决了简单工厂模式的缺点。
工厂方法模式的角色包括:
- **抽象工厂角色 ** WeaponFactory
- 具体工厂角色 DaggerFactory
- 抽象产品角色 Weapon
- 具体产品角色 Dagger
public abstract class WeaponFactory {
    public abstract Weapon getWeapon(); // 实例方法
}
这样在扩展时符合OCP,新增Fighter类时只需要1. 定义Fitghter集成Weapon 2. 定义FighterFactory继承WeaponFactory
工厂方法模式的优点:
-
一个调用者想创建一个对象,只要知道其名称就可以了。
Weapon dagger = new DaggerFactory().getWeapon(); -
扩展性高,如果想增加一个产品,只要扩展一个工厂类就可以。
-
屏蔽产品的具体实现,调用者只关心产品的接口。
工厂方法模式的缺点:
- 每次增加一个产品时,都需要增加一个具体类和对象实现工厂,使得系统中类的个数成倍增加,在一定程度上增加了系统的复杂度,同时也增加了系统具体类的依赖。这并不是什么好事。
抽象工厂模式
Bean的获取方式
Spring为Bean提供了多种获取方式,通常有四种:
- 构造方法实例化
- 简单工厂模式获取
- factory-bean获取
- FactoryBean接口获取
构造方法实例化
默认情况下就是调用Bean的构造方法进行实例化
简单工厂模式实例化
public class Star {
    private static final Logger logger = LoggerFactory.getLogger(Star.class);
    public Star() {
        logger.info("Star constructor executed");
    }
}
工厂模式,就需要提供一个工厂类:
public class StarFactory {
    public static Star getStar(){
        //在静态方法中new对象返回
        Star star = new Star();
        return star;
    }
}
在spring配置文件中配置工厂类:
    <!--告知Spring框架,通过哪个类的哪个方法获取Bean-->
    <!-- factory-method指定工厂类中的静态方法 -->
    <bean id="starBean" class="com.eun.bean.StarFactory" factory-method="getStar"/>
factory-bean 工厂方法模式实例化
public class Gun {
    public Gun() {
        System.out.println("Gun constructor execute");
    }
}
/**
	工厂方法模式的方法是实例方法
*/
public class GunFactory {
    public Gun getGun(){
        return new Gun();
    }
}
如果想调用这个实例方法,spring框架就要先创建出GunFactory对象,创建这个对象就是将这个对象交给spring框架进行管理
    <!-- 工厂方法模式,通过factory-bean属性 + factory-method属性共同完成 -->
    <!-- 告诉spring框架,调用哪个对象的哪个方法来获取bean-->
    <bean id="gunFactory" class="com.eun.bean.GunFactory" />
    <bean id="gun" factory-bean="gunFactory" factory-method="getGun"/> <!--不需要指定class-->
FactoryBean接口
如果工厂类直接实现FactoryBean接口后,factory-bean就不需要指定了,factory-method也不需要指定了
factory-bean会自动指向实现FactoryBean接口的类,factory-method会自动指向getObject()方法
定义工厂类,实现FactoryBean接口:
public class PersonFactory implements FactoryBean<Person> {
    @Override
    public Person getObject() throws Exception {
        return new Person();
    }

    @Override
    public Class<?> getObjectType() {
        return Person.class;
    }
}
默认是单例的,如果想多例就重写默认方法isSingleton
PersonFactory是一个特殊的Bean:工厂Bean,通过工厂Bean这个特殊的Bean可以获取一个普通的Bean
后三种方式与第一种方式不同的是,可以经过工厂的加工再将Bean对象交给Spring容器,给了程序员操作的机会
<!--通过特殊的工厂Bean返回普通Bean-->
<bean id="personBean" class="com.eun.bean.PersonFactory" />
主要目的是通过factory-bean对普通bean进行加工处理
BeanFactory和FactoryBean有何区别
BeanFactory
Spring IoC容器的顶级对象,BeanFactory被翻译为“Bean工厂”,在Spring的IoC容器中,“Bean工厂”负责创建Bean对象。
BeanFactory是工厂。
FactoryBean
FactoryBean:它是一个Bean,是一个能够辅助Spring实例化其它Bean对象的一个Bean。
在Spring中,Bean可以分为两类:
- 第一类:普通Bean
- 第二类:工厂Bean(记住:工厂Bean也是一种Bean,只不过这种Bean比较特殊,它可以辅助Spring实例化其它Bean对象。)
注入自定义Date
java.util.Date在Spring中被当作简单类型,简单类型在注入的时候可以直接使用value属性或value标签,但是我们之前也测试过了,对于Date类型,如果使用value进行注入,对字符串的格式有要求:Mon Oct 10 14:30:26 CST 2022,其他的格式是不会被识别的
在这种情况下,我们就可以通过FactoryBean接口介入Date对象的创建过程,获得指定时间的Date对象
对Student类型的birth属性进行注入:
public class Student {
    private Date birth;

    public void setBirth(Date birth) {
        this.birth = birth;
    }

    @Override
    public String toString() {
        return "Student{" +
                "birth=" + birth +
                '}';
    }
}
要求:根据指定的时间获取Date对象,比如:1999-10-11,得到对应的Date对象并注入
这就不能将Date作为简单类型进行注入了,只能将Date作为引用类型,并且根据传入的参数返回指定时间的Date对象
可以借助FactoryBean介入Date对象的创建过程:
public class DateFactoryBean implements FactoryBean<Date> {
    private String birth;

    public DateFactoryBean(String birth) {
        this.birth = birth;
    }

    @Override
    public Date getObject() throws Exception {
        return new SimpleDateFormat("yyyy-MM-dd").parse(birth);
    }

    @Override
    public Class<?> getObjectType() {
        return null;
    }

    @Override
    public boolean isSingleton() {
        return false;
    }
}
<?xml version="1.0" encoding="UTF-8"?>
<beans xmlns="http://www.springframework.org/schema/beans"
       xmlns:c="http://www.springframework.org/schema/c"
       xmlns:p="http://www.springframework.org/schema/p"
       xmlns:xsi="http://www.w3.org/2001/XMLSchema-instance"
       xsi:schemaLocation="http://www.springframework.org/schema/beans http://www.springframework.org/schema/beans/spring-beans.xsd">

    <bean id="dateBean" class="com.eun.bean.DateFactoryBean" c:_0="1980-10-11"/>

    <bean id="studentBean" class="com.eun.bean.Student" p:birth-ref="dateBean"/>
</beans>
在创建Date对象时,通过构造方法注入为其传递字符串时间,获得指定的Date对象,再将Date对象注入给Student对象
DateFactory中也可以使用set注入
工厂Bean可以协助Spring创建普通Bean对象
如果此处使用自动装配,不管是byName还是byType都是null:
    <bean id="birth" class="com.eun.bean.DateFactoryBean" c:time="1970-1-1"/>
    <bean id="studentBean" class="com.eun.bean.Student" autowire="byName"/>
Bean的生命周期
Spring就是一个管理Bean对象的容器,负责对象的创建、对象的销毁等
生命周期:从创建到销毁的整个过程
- 为什么要学习生命周期?
其实生命周期的本质是:在哪个时间节点上调用了哪个类的哪个方法。
我们需要充分的了解在这个生命线上,都有哪些特殊的时间节点。
只有我们知道了特殊的时间节点都在哪,到时我们才可以确定代码写到哪。
我们可能需要在某个特殊的时间点上执行一段特定的代码,这段代码就可以放到这个节点上。当生命线走到这里的时候,自然会被调用。
5步生命周期
- 第一步:实例化Bean,调用无参数构造方法
- 第二步:Bean属性赋值,调用set方法
- 第三步:初始化Bean,调用Bean的init方法(需要自己写)
- 第四步:使用Bean
- 第五步:销毁Bean,调用Bean的destroy方法(需要自己写)

AbstractAutowireCapableBeanFactory类的doCreateBean()方法
public class User {
    private String name;
    public User() {
        System.out.println("第一步:无参数构造方法执行");
    }

    public void setName(String name) {
        System.out.println("第二步:给对象的属性赋值");
        this.name = name;
    }
    public void initBean(){
        System.out.println("第三步:初始化Bean");
    }
    public void destroyBean(){
        System.out.println("第五步:销毁Bean");
    }
}
配置initBean()、destroyBean():
<?xml version="1.0" encoding="UTF-8"?>
<beans xmlns="http://www.springframework.org/schema/beans"
       xmlns:p="http://www.springframework.org/schema/p"
       xmlns:xsi="http://www.w3.org/2001/XMLSchema-instance"
       xsi:schemaLocation="http://www.springframework.org/schema/beans http://www.springframework.org/schema/beans/spring-beans.xsd">

    <bean id="user" class="com.eun.bean.User"
          init-method="initBean" destroy-method="destroyBean" p:name="zhangsan"/>
</beans>
使用bean:
    @Test
    public void testBeanLifeCycle(){
        ApplicationContext applicationContext = new ClassPathXmlApplicationContext("spring.xml");
        User user = applicationContext.getBean("user", User.class);
        System.out.println("第四步:使用bean " + user);

        //必须手动关闭Spring容器才会销毁Bean
        ((ClassPathXmlApplicationContext) applicationContext).close();
    }

/*
第一步:无参数构造方法执行
第二步:给对象的属性赋值
第三步:初始化Bean
第四步:使用bean User{name='zhangsan'}
2023-06-26 21:23:49 957 [main] DEBUG org.springframework.context.support.ClassPathXmlApplicationContext - Closing org.springframework.context.support.ClassPathXmlApplicationContext@6cd24612, started on Mon Jun 26 21:23:49 CST 2023
第五步:销毁Bean
*/
close()是ClassPathXmlApplicationContext 的方法,在ApplicationContext类中没有
prototype的bean销毁?
7步生命周期
在初始化Bean的前后还有两个阶段,被称为 “初始化前” 和 “初始化后”,如果想在这两个阶段操作需要定义一个Bean后处理器
- 第一步:实例化Bean,调用无参数构造方法
- 第二步:Bean属性赋值,调用set方法
- 第三步:调用Bean后处理器的
before()方法 - 第四步:初始化Bean,调用Bean的init方法(需要自己写)
- 第五步:调用Bean后处理器的
after()方法 - 第六步:使用Bean
- 第七步:销毁Bean,调用Bean的destroy方法(需要自己写)
定义日志Bean后处理器,继承BeanPostProcessor接口,并重写before()和after()方法,在初始化前后都记录日志:
public class LogBeanPostProcessor implements BeanPostProcessor {
    private static final Logger logger = LoggerFactory.getLogger(LogBeanPostProcessor.class);

    /**
     *
     * @param bean 刚创建的bean对象
     * @param beanName bean对象的名字
     * @return
     * @throws BeansException
     */
    @Override
    public Object postProcessBeforeInitialization(Object bean, String beanName) throws BeansException {
        logger.info("Bean后处理器的before方法");
        return BeanPostProcessor.super.postProcessBeforeInitialization(bean, beanName);
    }

    /**
     *
     * @param bean 刚创建的bean对象
     * @param beanName bean对象的名字
     * @return
     * @throws BeansException
     */
    @Override
    public Object postProcessAfterInitialization(Object bean, String beanName) throws BeansException {
        logger.info("Bean后处理器的after方法");
        return BeanPostProcessor.super.postProcessAfterInitialization(bean, beanName);
    }
}
配置Bean后处理器:
<?xml version="1.0" encoding="UTF-8"?>
<beans xmlns="http://www.springframework.org/schema/beans"
       xmlns:p="http://www.springframework.org/schema/p"
       xmlns:xsi="http://www.w3.org/2001/XMLSchema-instance"
       xsi:schemaLocation="http://www.springframework.org/schema/beans http://www.springframework.org/schema/beans/spring-beans.xsd">

    <!--配置Bean后处理器-->
    <bean class="com.eun.bean.LogBeanPostProcessor" />

    <bean id="user" class="com.eun.bean.User"
          init-method="initBean" destroy-method="destroyBean" p:name="zhangsan"/>
</beans>
Bean后处理器将作用于当前的配置文件中所有的Bean

第一步:无参数构造方法执行
第二步:给对象的属性赋值
第三步:Bean后处理器的before方法
第四步:初始化Bean
第五步:Bean后处理器的after方法
第六步:使用bean User{name='zhangsan'}
2023-06-27 08:45:26 125 [main] DEBUG org.springframework.context.support.ClassPathXmlApplicationContext - Closing org.springframework.context.support.ClassPathXmlApplicationContext@6cd24612, started on Tue Jun 27 08:45:25 CST 2023
第五步:销毁Bean
10步生命周期
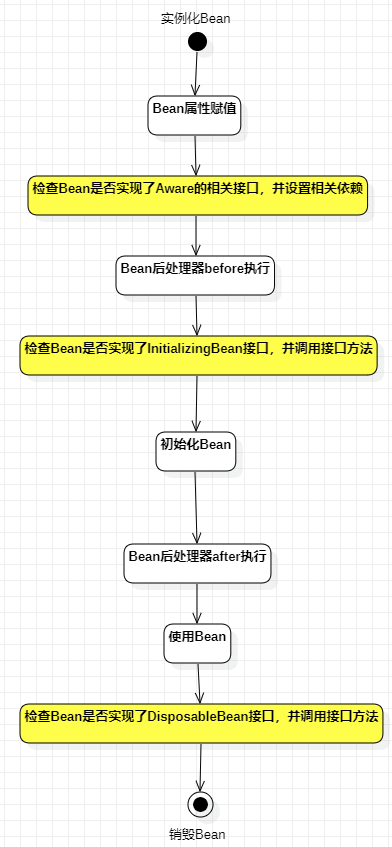
添加的三步:
点位1:在bean后处理器before方法之前,检查是否实现Aware相关接口
Aware相关的接口包括:BeanNameAware、BeanClassLoaderAware、BeanFactoryAware
-
当Bean实现了
BeanNameAware,Spring会将Bean的名字传递给Bean。![Snipaste_2023-06-27_08-50-00]()
-
当Bean实现了
BeanClassLoaderAware,Spring会将加载该Bean的类加载器传递给Bean。![image-20230627085014532]()
-
当Bean实现了
BeanFactoryAware,Spring会将Bean工厂对象传递给Bean。![image-20230627085026611]()


点位2:在bean后处理器before方法之后,检查Bean是否实现了InitializingBean接口
点位3: 销毁bean之前,检查Bean是否实现了DisposableBean接口

接口中的destroy()方法是在我们定义的destroy-method执行之前执行的
- InitializingBean的方法早于init-method的执行。
- DisposableBean的方法早于destroy-method的执行。
不同作用域的管理方式
Spring会根据Bean的作用域选择管理方式
- singleton:Spring精确的知道该Bean何时被创建,何时初始化完成,何时被销毁,Spring进行完整生命周期管理
- prototype:Spring只负责创建,创建之后就将Bean交给客户端代码管理,Spring不再追踪其生命周期
只负责创建:创建阶段的几个生命周期也是会执行的
将上文中示例改为prototype
第一步:无参数构造方法执行
第二步:给对象的属性赋值
第三步:检查是否实现BeanNameAware接口 user
第三步:检查是否实现BeanClassLoaderAware接口 jdk.internal.loader.ClassLoaders$AppClassLoader@63947c6b
第三步:检查是否实现BeanFactoryAware接口 org.springframework.beans.factory.support.DefaultListableBeanFactory@31dadd46: defining beans [com.eun.bean.LogBeanPostProcessor#0,user]; root of factory hierarchy
第四步:Bean后处理器的before方法
第五步:检查是否实现InitializingBean接口
第六步:初始化Bean
第七步:Bean后处理器的after方法
第八步:使用bean User{name='zhangsan'}
最终销毁前、销毁时这两个阶段没有执行
自己new的对象交给Spring管理
    @Test
    public void testRegisterBean(){
        //自己new对象
        Student student = new Student();
        System.out.println(student);

        //注册
        DefaultListableBeanFactory factory = new DefaultListableBeanFactory();
        factory.registerSingleton("studentBean",student);

        //从Spring容器中获取
        Student studentBean = factory.getBean("studentBean", Student.class);
        System.out.println(studentBean);
    }
Bean的循环依赖
A对象中有B属性,B对象中有A属性,这就是循环依赖;比如:丈夫类Husband,妻子类Wife。Husband中有Wife的引用。Wife中有Husband的引用。
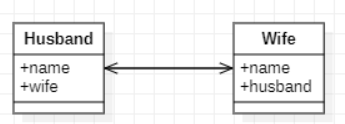
public class Wife {
    private String name;
    private Husband husband;
}
public class Husband {
    private String name;
    private Wife wife;
}
在生成toString方法时注意:
在Wife中生成toString,输出时会调用Husband的toString方法,Husband中的toString方法还会调用Wife中的toString方法;所以在Wife中输出时要调用husband.getName()
singleton下的set注入产生的循环依赖
添加set方法并测试:
<?xml version="1.0" encoding="UTF-8"?>
<beans xmlns="http://www.springframework.org/schema/beans"
       xmlns:p="http://www.springframework.org/schema/p"
       xmlns:xsi="http://www.w3.org/2001/XMLSchema-instance"
       xsi:schemaLocation="http://www.springframework.org/schema/beans http://www.springframework.org/schema/beans/spring-beans.xsd">
    <bean id="husbandBean" class="com.eun.spring.bean.Husband" p:wife-ref="wifeBean" p:name="zhangsan"/>
    <bean id="wifeBean" class="com.eun.spring.bean.Wife" p:husband-ref="husbandBean" p:name="lisi"/>

</beans>
    @Test
    public void testSingletonSetter(){
        ApplicationContext applicationContext = new ClassPathXmlApplicationContext("spring.xml");
        Wife wife = applicationContext.getBean("wifeBean", Wife.class);
        Husband husband = applicationContext.getBean("husbandBean", Husband.class);
        System.out.println(wife); //Wife{name='lisi', husband=zhangsan}
        System.out.println(husband); //Husband{name='zhangsan', wife=lisi}
    }
这样做是没有问题的,因为singleton下基于set方法的注入是事先创建对象,再通过set方法进行赋值,实例化对象和对象属性赋值的操作分离了
singleton是事先创建好所有的bean,将这些bean存储在Spring容器中
在这种模式下,Spring对Bean的创建分为两个阶段:
第一阶段:在Spring容器加载的时候,实例化Bean,只要其中任意一个Bean实例化之后,立刻曝光(未进行属性赋值)
第二阶段:Bean曝光之后再进行属性的赋值
第二阶段结束才完成了Spring容器的初始化
核心解决方案:实例化和对象的属性赋值分为两个阶段来完成
Bean创建完毕后,对属性进行赋值,husband的p:wife-ref属性赋值wifeBean,这个赋值操作是可以成功的,因为在上一个阶段中wifeBean创建成功后就进行曝光了。
注意:只有在scope是singleton的情况下才会进行提前曝光的操作,因为这个对象是要事先创建好的
prototype下的set注入产生的循环依赖
    <bean id="husbandBean" class="com.eun.spring.bean.Husband"
          p:wife-ref="wifeBean" p:name="zhangsan" scope="prototype"/>
    <bean id="wifeBean" class="com.eun.spring.bean.Wife"
          p:husband-ref="husbandBean" p:name="lisi" scope="prototype"/>
    @Test
    public void testSingletonSetter(){
        ApplicationContext applicationContext = new ClassPathXmlApplicationContext("spring.xml");
        Wife wife = applicationContext.getBean("wifeBean", Wife.class);
        //Husband husband = applicationContext.getBean("husbandBean", Husband.class);

    }
如果是prototype,在初始化容器时并不会对其进行创建和赋值的操作,创建这个Bean时会进行初始化、属性赋值、初始化,创建好直接交给客户端程序使用;在创建wife的时候,根据配置信息会对wifeBean的husband属性赋值,赋值内容为husbandBean对应的bean,而husbandBean在创建时需要对其wife属性进行赋值,根据配置信息会将wifeBean赋值给它(这里并不会将第一步的wifeBean赋值给它,因为没有存储在map集合中),但是对于prototype作用域的bean来说,创建的bean不会被加入Spring存储Bean的map集合中,也就是每次使用到这个bean,都会创建出新的对象使用,所以对于当前要给husbandBean的wife属性赋值,一定会创建一个新的Wife对象,而创建这个Wife对象根据配置信息会对他的husband属性赋值,也就是:
- 第四行代码要获取一个wife对象,根据配置文件需要对Wife类的husband属性进行赋值,会创建一个新的Husband对象
- 创建Husband对象要对wife属性进行赋值,根据配置文件新建一个Wife对象
- 新建Wife对象时,Spring某种机制检测到这和第一步重复了,报错:当前的Bean正在创建中
org.springframework.beans.factory.BeanCreationException: Error creating bean with name 'wifeBean' defined in class path resource [spring.xml]: Cannot resolve reference to bean 'husbandBean' while setting bean property 'husband';
nested exception is org.springframework.beans.factory.BeanCreationException: Error creating bean with name 'husbandBean' defined in class path resource [spring.xml]: Cannot resolve reference to bean 'wifeBean' while setting bean property 'wife';
nested exception is org.springframework.beans.factory.BeanCurrentlyInCreationException: Error creating bean with name 'wifeBean': Requested bean is currently in creation: Is there an unresolvable circular reference? #当前的Bean正在创建中
原因在于:
- prototype的Bean创建和赋值是不可分隔的,没有提前曝光,必须将这两个操作都完成才能返回这个对象给客户端
- 第二步中,创建Husband对象时要对Wife属性进行赋值,检测到Wife是prototype就会创建一个新的对象
prototype + setter下的循环依赖就会出现异常BeanCurrentlyInCreationException 当前的Bean正在创建中
只要其中一个是Singleton就没有问题,对于当前的Wife对象的创建来说:
-
WifeBean是Singleton:Spring容器最开始就创建WifeBean,创建完毕进行属性的赋值,在给husband属性赋值时创建Husband对象时就会将单例的Wife赋值给Husband,Husband创建完毕赋值给WifeBean的husband属性,WifeBean初始化完成
-
HusbandBean是Singleton:Spring容器最开始就会创建Husband,创建完毕对Wife属性赋值,新建Wife对象,将单例的Husband赋值给Wife对象,Wife对象创建完毕赋值给Husband,Husband完成初始化存贮在map集合中,在程序中创建Wife对象时直接将单例的Husband赋值给husband属性,完成Wife的创建
但是这样做,Wife对象中的Husband属性都是同一个
构造注入
singleton模式:
    <bean id="husbandBean" class="com.eun.spring.bean.Husband"
          c:name="zhangsan" c:wife-ref="wifeBean" scope="singleton"/>
    <bean id="wifeBean" class="com.eun.spring.bean.Wife"
          c:name="lisi" c:husband-ref="husbandBean" scope="singleton"/>
构造注入在创建对象时就需要进行赋值,也就是没有提前曝光的操作了,对于husbandBean和wifeBean来说,都是在Spring容器启动时创建并初始化,假设先创建husbandBean对象,需要对构造方法进行wife-ref注入,这样会使用wifeBean对象,这个对象是单例的,对这个对象的创建需要使用husband对象,而第一步的husband对象还未创建完毕,此时再创建husband对象也是出错:当前Bean正在创建中
prototype模式:也无法解决这个问题
构造注入的循环依赖是无法解决的
循环依赖的源码
为什么set + singleton模式下的循环依赖可以解决?
根本的原因在于:这种方式可以做到将“实例化Bean”和“给Bean属性赋值”这两个动作分开去完成。
实例化Bean的时候:调用无参数构造方法来完成。此时可以先不给属性赋值,可以提前将该Bean对象“曝光”给外界。
给Bean属性赋值的时候:调用setter方法来完成。
两个步骤是完全可以分离开去完成的,并且这两步不要求在同一个时间点上完成。
也就是说,Bean都是单例的,我们可以先把所有的单例Bean实例化出来,放到一个集合当中(我们可以称之为缓存),所有的单例Bean全部实例化完成之后,以后再的调用setter方法给属性赋值。这样就解决了循环依赖的问题。
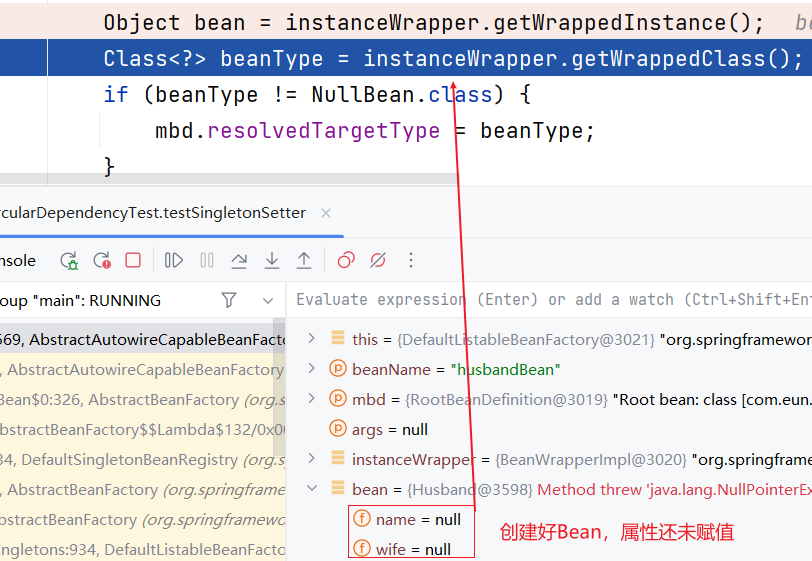
protected Object doCreateBean(String beanName, RootBeanDefinition mbd, @Nullable Object[] args)
throws BeanCreationException {
// Instantiate the bean.
BeanWrapper instanceWrapper = null;
if (mbd.isSingleton()) {
instanceWrapper = this.factoryBeanInstanceCache.remove(beanName);
}
if (instanceWrapper == null) {
instanceWrapper = createBeanInstance(beanName, mbd, args);
}
/*创建Bean*/
Object bean = instanceWrapper.getWrappedInstance();
Class<?> beanType = instanceWrapper.getWrappedClass();
if (beanType != NullBean.class) {
mbd.resolvedTargetType = beanType;
}
// Allow post-processors to modify the merged bean definition.
synchronized (mbd.postProcessingLock) {
if (!mbd.postProcessed) {
try {
applyMergedBeanDefinitionPostProcessors(mbd, beanType, beanName);
}
catch (Throwable ex) {
throw new BeanCreationException(mbd.getResourceDescription(), beanName,
"Post-processing of merged bean definition failed", ex);
}
mbd.postProcessed = true;
}
}
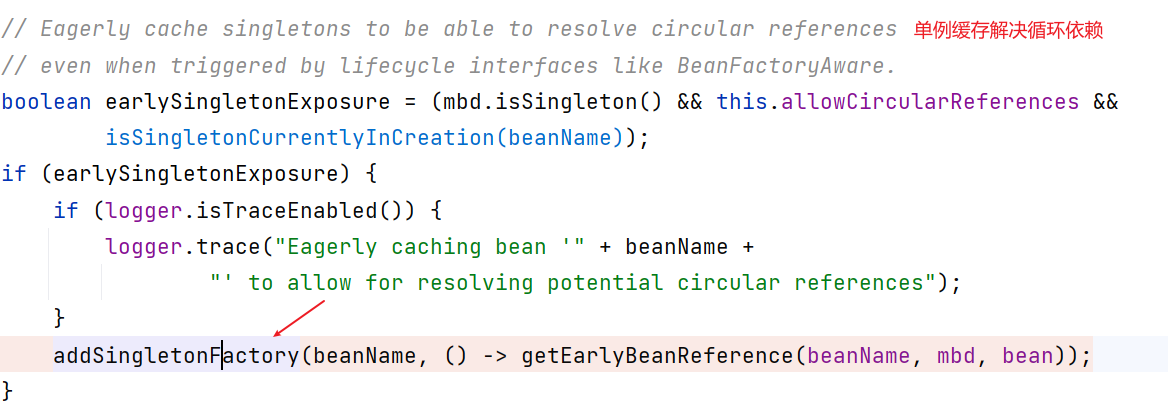
//急切缓存bean可以解决循环引用
// Eagerly cache singletons to be able to resolve circular references
// even when triggered by lifecycle interfaces like BeanFactoryAware.
boolean earlySingletonExposure = (mbd.isSingleton() && this.allowCircularReferences &&
isSingletonCurrentlyInCreation(beanName));
if (earlySingletonExposure) {
if (logger.isTraceEnabled()) {
logger.trace("Eagerly caching bean '" + beanName +
"' to allow for resolving potential circular references");
}
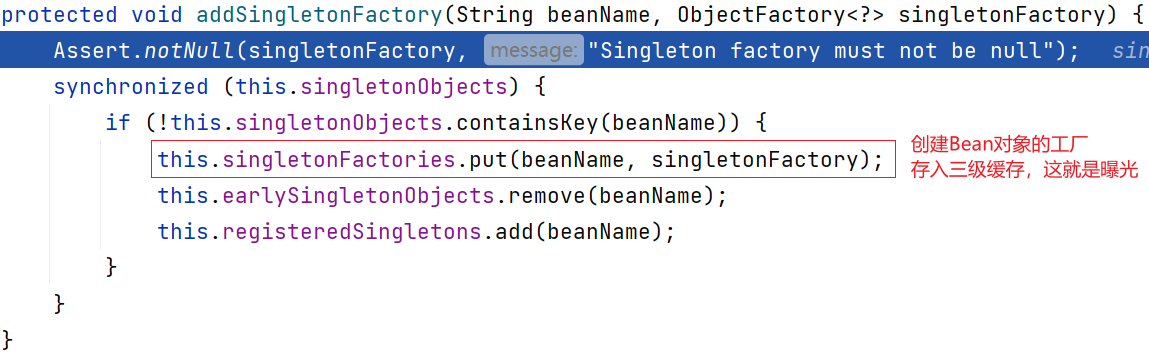
/*加入缓存,提前曝光*/
addSingletonFactory(beanName, () -> getEarlyBeanReference(beanName, mbd, bean));
}
// Initialize the bean instance.
Object exposedObject = bean;
try {
/*填充bean:给Bena的属性赋值*/
populateBean(beanName, mbd, instanceWrapper);
exposedObject = initializeBean(beanName, exposedObject, mbd);
}
catch (Throwable ex) {
if (ex instanceof BeanCreationException && beanName.equals(((BeanCreationException) ex).getBeanName())) {
throw (BeanCreationException) ex;
}
else {
throw new BeanCreationException(
mbd.getResourceDescription(), beanName, "Initialization of bean failed", ex);
}
}
- 创建Bean,未进行赋值:
- 将Bean加入缓存,提前曝光
进入这个方法,进入了DefaultSingletonBeanRegistry类,该类有三个重要的属性:
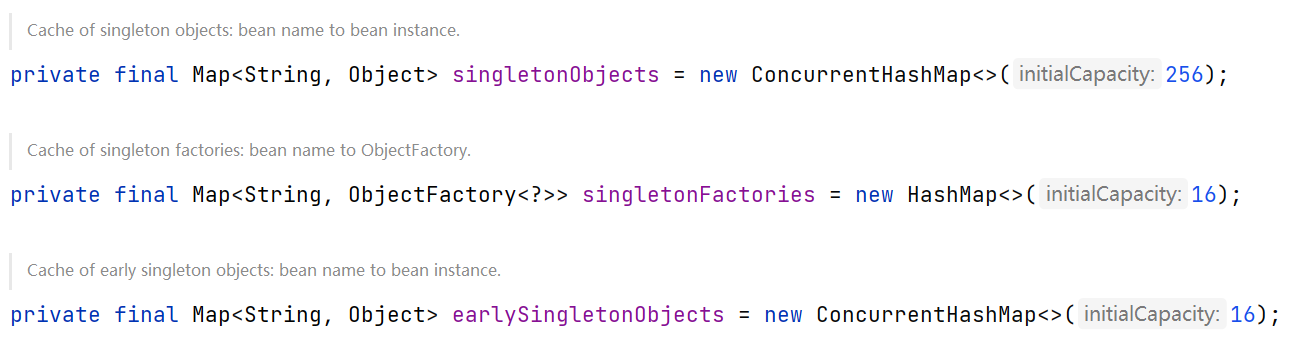
/** Cache of singleton objects: bean name to bean instance. */
private final Map<String, Object> singletonObjects = new ConcurrentHashMap<>(256); //一级缓存

/** Cache of early singleton objects: bean name to bean instance. */
private final Map<String, Object> earlySingletonObjects = new ConcurrentHashMap<>(16); //二级缓存

/** Cache of singleton factories: bean name to ObjectFactory. */
private final Map<String, ObjectFactory<?>> singletonFactories = new HashMap<>(16);  //三级缓存
这三个缓存都是Map集合,Map集合的key存储的都是Bean的id
-
一级缓存:存储完整的单例Bean对象,这个缓存中的Bean对象属性已经完成赋值了
-
二级缓存:存储早期单例Bean对象,这个缓存中的单例Bean对象的属性没有赋值
-
三级缓存:单例工厂集合对象,存储的是工厂对象,每一个单例Bean都会对应一个工厂对象
这个集合中存储的是创建该对象时对应的单例工厂对象
在该方法中:
最终在获取这个bean对象时:
	@Nullable
	protected Object getSingleton(String beanName, boolean allowEarlyReference) {
		// Quick check for existing instance without full singleton lock
        //尝试从一级缓存中获取
		Object singletonObject = this.singletonObjects.get(beanName);
		if (singletonObject == null && isSingletonCurrentlyInCreation(beanName)) {
			singletonObject = this.earlySingletonObjects.get(beanName);
			if (singletonObject == null && allowEarlyReference) {
                //两层判断防抖
				synchronized (this.singletonObjects) {
					// Consistent creation of early reference within full singleton lock
					singletonObject = this.singletonObjects.get(beanName);
                    //判断能否从一级缓存中获取到
					if (singletonObject == null) {
						singletonObject = this.earlySingletonObjects.get(beanName);
                        //判断能否从二级缓存中获取到
						if (singletonObject == null) {
							ObjectFactory<?> singletonFactory = this.singletonFactories.get(beanName);
                            //如果工厂存在
							if (singletonFactory != null) {
								singletonObject = singletonFactory.getObject();
                                //将Bean对象放入二级缓存
								this.earlySingletonObjects.put(beanName, singletonObject);
                                //将工厂从三级缓存中移除
								this.singletonFactories.remove(beanName);
							}
						}
					}
				}
			}
		}
		return singletonObject;
	}
myspring
准备工作:
使用者提供bean类:
public class User {
    private String name;
    private int age;

    public User() {
    }
    public User(String name, int age) {
        this.name = name;
        this.age = age;
    }
    public void setName(String name) {
        this.name = name;
    public void setAge(int age) {
        this.age = age;
    }
}
public class UserDao {
    public void insert(){
        System.out.println("mysql database saving data");
    }
}
public class UserService {
    private UserDao userDao;

    public UserService() {
    }
    public UserService(UserDao userDao) {
        this.userDao = userDao;
    }
    public void save(){
        userDao.insert();
    }
    public void setUserDao(UserDao userDao) {
        this.userDao = userDao;
    }
}
使用者提供配置文件:
<?xml version="1.0" encoding="UTF-8" ?>
<beans>
    <bean id="user" class="com.eun.myspring.bean.User" >
        <property name = "name" value="zhangsan"/>
        <property name = "age" value="30"/>
    </bean>

    <bean id="userDao" class="com.eun.myspring.bean.UserDao" />

    <bean id="userService" class="com.eun.myspring.bean.UserService" >
        <property name="userDao" ref="userDao"/>
    </bean>
</beans>
myspring:
public class ClassPathXMLApplicationContext implements ApplicationContext {
    private final Map<String,Object> earlySingletonObjects = new HashMap<>();
    private final Map<String, Object> singletonObjects = new HashMap<>();
	private static final Logger logger = LoggerFactory.getLogger(ClassPathXMLApplicationContext.class);

    /**
     * 解析myspring配置文件,初始化所有的bean对象
     * @param configLocation
     */
    public ClassPathXMLApplicationContext(String configLocation) {
        try {
            InputStream is = ClassLoader.getSystemClassLoader().getResourceAsStream(configLocation);
            Document document = new SAXReader().read(is);
            initEarlySingletonObjects(document);
            initSingletonObjects(document);
            System.out.println("singletonObjects = " + singletonObjects);
            System.out.println("earlySingletonObjects = " + earlySingletonObjects);
        } catch (Exception e) {
            e.printStackTrace();
        }
    }

    /**
     * 提前曝光
     * @param document
     */
    private void initEarlySingletonObjects(Document document) {
        List<Node> nodes = document.selectNodes("//bean");
        nodes.stream().map(node -> (Element) node).forEach(element -> {
            try {
                String idValue = element.attributeValue(Constant.ID);
                String classValue = element.attributeValue(Constant.CLASS);
                Class<?> clazz = Class.forName(classValue);
                Object bean = clazz.getConstructor().newInstance();
                earlySingletonObjects.put(idValue,bean);
            } catch (Exception e) {
                e.printStackTrace();
            }
        });
    }

    private void initSingletonObjects(Document document){
        document.selectNodes("//bean").stream().map(node -> (Element) node).forEach(element -> {
            try {
                String id = element.attributeValue(Constant.ID);
                List<Element> properties = element.elements();
                Object bean = earlySingletonObjects.get(id);
                Class<?> clazz = Class.forName(element.attributeValue(Constant.CLASS));
                if (properties.size() != 0){
                    properties.stream().forEach(propertyElement -> {
                        String fieldName = propertyElement.attributeValue(Constant.NAME);
                        String simpleValue = propertyElement.attributeValue(Constant.VALUE);
                        String refValue = propertyElement.attributeValue(Constant.REF);
                        if (simpleValue != null){
                            setSimpleValue(bean, clazz, fieldName, simpleValue);
                        }else {
                            setRefValue(bean, clazz, fieldName, refValue);
                        }
                    });
                }
                earlySingletonObjects.remove(id);
                singletonObjects.put(id,bean);
            } catch (Exception e) {
                e.printStackTrace();
            }
        });
    }
    public static String getSetMethodName(String fieldName){
        return Constant.SET + fieldName.toUpperCase().charAt(0) + fieldName.substring(1);
    }

    private void setRefValue(Object bean, Class<?> clazz, String fieldName, String refValue){
        try {
            Object refObj = earlySingletonObjects.get(refValue);
            if (refObj == null){
                refObj = singletonObjects.get(refValue);
            }
            Class<?> fieldType = clazz.getDeclaredField(fieldName).getType();
            String setMethodName = getSetMethodName(fieldName);
            Method setMethod = clazz.getDeclaredMethod(setMethodName,fieldType);
            setMethod.invoke(bean,refObj);
        } catch (Exception e) {
            e.printStackTrace();
        }
    }

    private void setSimpleValue(Object bean, Class<?> clazz, String fieldName, String simpleValue) {
        try {
            Class<?> fieldType = clazz.getDeclaredField(fieldName).getType();
            String setMethodName = getSetMethodName(fieldName);
            Method setMethod = clazz.getDeclaredMethod(setMethodName,fieldType);
            setMethod.invoke(bean,getPropertyVal(fieldType.getSimpleName(), simpleValue));
        } catch (Exception e) {
            e.printStackTrace();
        }
    }

    private Object getPropertyVal(String simpleName, String valueStr) {
    Object propertyVal = null;
        switch (simpleName) {
            case "byte": case "Byte":
                propertyVal = Byte.valueOf(valueStr);
                break;
            case "short": case "Short":
                propertyVal = Short.valueOf(valueStr);
                break;
            case "int": case "Integer":
                propertyVal = Integer.valueOf(valueStr);
                break;
            case "long": case "Long":
                propertyVal = Long.valueOf(valueStr);
                break;
            case "float": case "Float":
                propertyVal = Float.valueOf(valueStr);
                break;
            case "double": case "Double":
                propertyVal = Double.valueOf(valueStr);
                break;
            case "boolean": case "Boolean":
                propertyVal = Boolean.valueOf(valueStr);
                break;
            case "char": case "Character":
                propertyVal = valueStr.charAt(0);
                break;
            case "String":
                propertyVal = valueStr;
                break;
        }
        return propertyVal;
    }


    @Override
    public Object getBean(String beanName) {
        Object bean = singletonObjects.get(beanName);
        if (bean == null) {
            throw new RuntimeException("bean doesn't exists");
        }
        return bean;
    }

    @Override
    public <T> T getBean(String beanName, Class<T> beanType) {
        Object bean = getBean(beanName);
        return (T) bean;
    }
}
Spring IoC注解式开发
注解是为了简化XML的配置,Spring6倡导全注解开发
需求:给定包名,扫描包下所有的.java文件,只要有Component注解就创建对象
- 获取包下所有文件需要使用
File类的list方法,生成File对象需要将包名转换为绝对路径,如何转换?
        String packageName = "com.eun.myspring.bean";
        String packagePath = packageName.replaceAll("\\.", "/");
        URL resource = ClassLoader.getSystemClassLoader().getResource(packagePath);

        //获取绝对路径
        String path = resource.getPath();
        File f = new File(path);
        String[] files = f.list();
        Arrays.stream(files).map(clazzPath -> packageName + "." + clazzPath.split("\\.")[0])
            .forEach(clazzPath -> {
            System.out.println(clazzPath);
			/**
				com.eun.myspring.bean.User
                com.eun.myspring.bean.UserDao
                com.eun.myspring.bean.UserService
			*/
        });
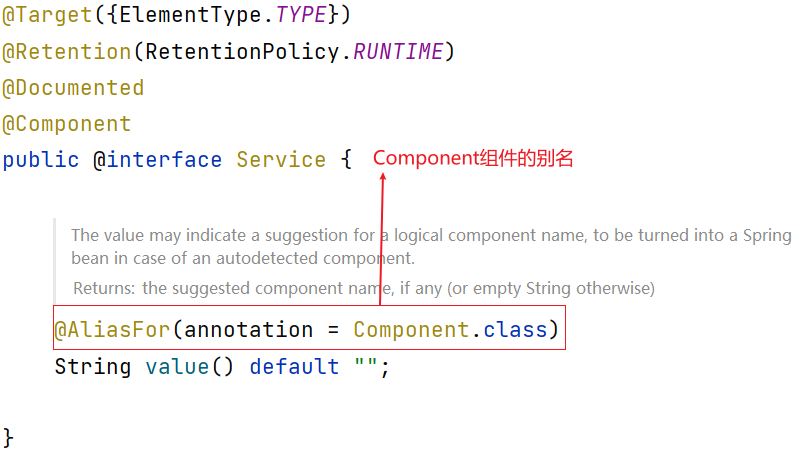
声明Bean的注解
Component组件Controller控制器Service业务RepositoryDAO
源码如下:
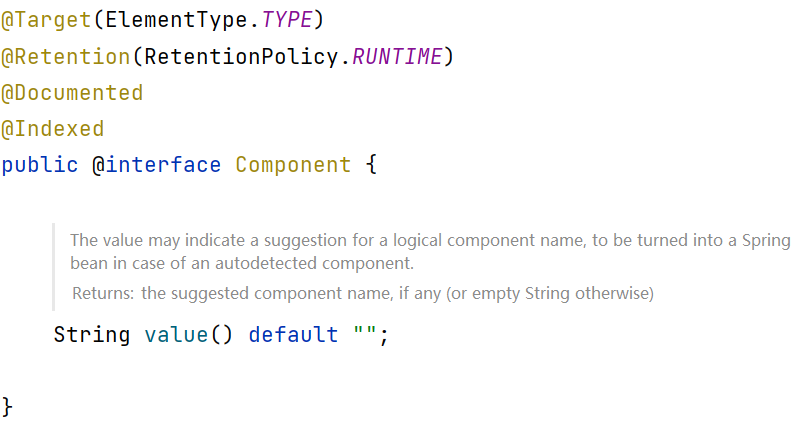
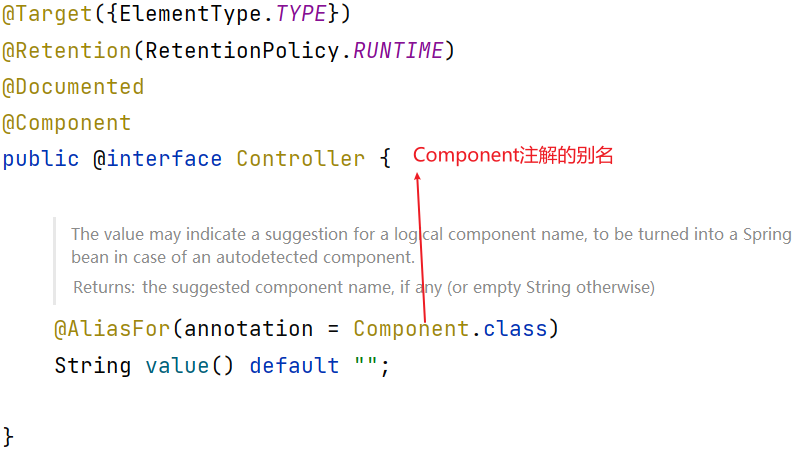
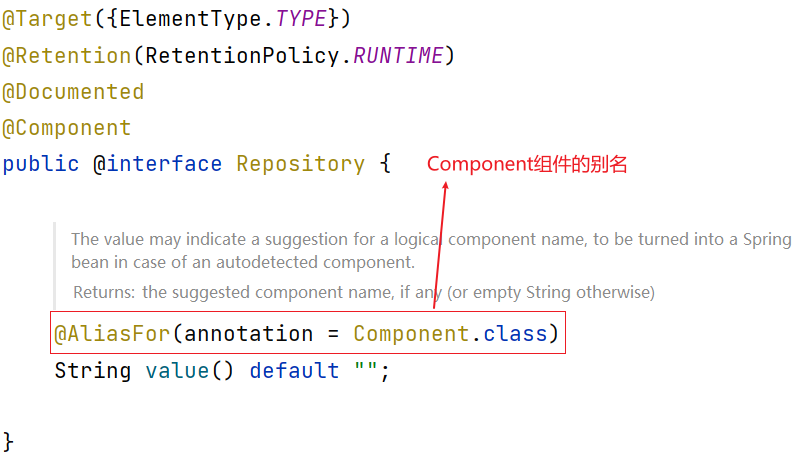
Controller、Service、Repository都是Component注解的别名,为了增强程序的可读性
注解的使用
-
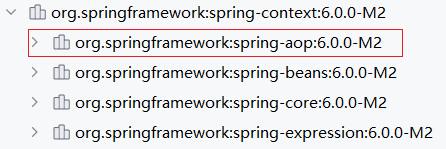
加入aop依赖(包含在spring-context中)
![image-20230627184107776]()
-
配置文件上添加context命名空间
<?xml version="1.0" encoding="UTF-8"?> <beans xmlns="http://www.springframework.org/schema/beans" xmlns:context="http://www.springframework.org/schema/context" xmlns:xsi="http://www.w3.org/2001/XMLSchema-instance" xsi:schemaLocation="http://www.springframework.org/schema/beans http://www.springframework.org/schema/beans/spring-beans.xsd http://www.springframework.org/schema/context http://www.springframework.org/schema/context/spring-context.xsd"> </beans> -
配置文件中指定扫描的包
类似于上文中的练习,至少告知包名才能进扫描
<!--指定要扫描的包--> <context:component-scan base-package="com.eun.spring.bean"/> -
Bean上使用注解
@Repository("studentBean")
public class Student {

}
Student studentBean = applicationContext.getBean("studentBean", Student.class);
上面的源码可以看到这些注解都是有默认值的:
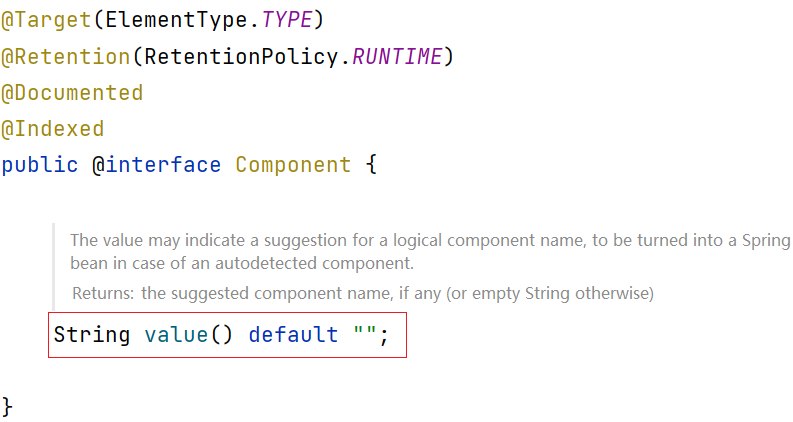
可以省略为 Component ,默认的名称是类名首字母的小写
@Repository
public class Student {

}
Student student = applicationContext.getBean("student",Student.class);
//com.eun.spring.bean.Student@b78a709
多个包的扫描问题
- 第一种解决办法:在配置文件中指定多个包,用
,隔开
    <!--指定要扫描的包-->
    <context:component-scan base-package="com.eun.spring.bean,com.eun.spring.dao"/>
- 第二种解决办法:指定多个包的共同父包(牺牲一定效率)
    <!--指定要扫描的包-->
    <context:component-scan base-package="com.eun.spring"/>
选择化实例bean
假设在某个包下有很多Bean,有的Bean上标注了Component,有的标注了Controller,有的标注了Service,有的标注了Repository,现在由于某种特殊业务的需要,只允许其中所有的Controller参与Bean管理,其他的都不实例化。这应该怎么办呢?
@Component
public class A {
    public A() {
        System.out.println("A的无参数构造方法执行");
    }
}

@Controller
class B {
    public B() {
        System.out.println("B的无参数构造方法执行");
    }
}

@Service
class C {
    public C() {
        System.out.println("C的无参数构造方法执行");
    }
}

@Repository
class D {
    public D() {
        System.out.println("D的无参数构造方法执行");
    }
}

@Controller
class E {
    public E() {
        System.out.println("E的无参数构造方法执行");
    }
}

@Controller
class F {
    public F() {
        System.out.println("F的无参数构造方法执行");
    }
}
- 第一种解决方案:
use-default-filters="false"让指定包下所有声明bean的注解全部失效
<!--让指定包下声明Bean的注解全部失效-->
<context:component-scan base-package="com.eun.spring.bean" use-default-filters="false">
    <!--使用include指定可以生效的注解-->
    <context:include-filter type="annotation" expression="org.springframework.stereotype.Repository"/>
    <context:include-filter type="annotation" expression="org.springframework.stereotype.Service"/>
</context:component-scan>
此时只有@Repository、@Service可以生效,对应C、D类:
2023-06-27 19:31:36 104 [main] DEBUG org.springframework.beans.factory.support.DefaultListableBeanFactory - Creating shared instance of singleton bean 'c'
C的无参数构造方法执行
2023-06-27 19:31:36 107 [main] DEBUG org.springframework.beans.factory.support.DefaultListableBeanFactory - Creating shared instance of singleton bean 'd'
D的无参数构造方法执行
- 第二种解决方案:
use-default-filters="true"让指定包下声明Bean的注解全部生效
<!--让指定包下声明Bean的注解全部生效-->
<context:component-scan base-package="com.eun.spring.bean" use-default-filters="true">
    <!--使用exclude指定不包含的注解-->
    <context:exclude-filter type="annotation" expression="org.springframework.stereotype.Repository"/>
    <context:exclude-filter type="annotation" expression="org.springframework.stereotype.Service"/>
</context:component-scan>
此时A、B、E、F是有效的
注意:Component注解不能排除掉,排除Component所有声明注解都会失效
注入注解
声明Bean后进行实例化,需要对属性进行注入:
@Value注入简单类型@Autowired@Qualifier@Resource
简单类型 @Value
@Component
public class MyDataSource implements DataSource {
    @Value("com.mysql.cj.jdbc.Driver")
    private String driver;
    @Value("jdbc:mysql://localhost:3306/mybatis_db")
    private String url;
    @Value("root")
    private String username;
    @Value("root")
    private String password;
}
    @Test
    public void testDIByAnnotation(){
        ApplicationContext applicationContext = new ClassPathXmlApplicationContext("spring.xml");
        MyDataSource myDataSource = applicationContext.getBean("myDataSource", MyDataSource.class);
        System.out.println(myDataSource);
        /**
2023-06-27 19:43:31 795 [main] DEBUG org.springframework.beans.factory.support.DefaultListableBeanFactory - Creating shared instance of singleton bean 'myDataSource'
MyDataSource{driver='com.mysql.cj.jdbc.Driver', url='jdbc:mysql://localhost:3306/mybatis_db', username='root', password='root'}
         */
    }
使用@value注解属性可以不写set方法,靠反射注入(默认就是反射注入)
@Value也可以写在set方法上:
public class MyDataSource implements DataSource {

    private String driver;

    private String url;

    private String username;

    private String password;

    @Value("com.mysql.cj.jdbc.Driver")
    public void setDriver(String driver) {
        System.out.println("setDriver method");
        this.driver = driver;
    }
    @Value("jdbc:mysql://localhost:3306/mybatis_db")
    public void setUrl(String url) {
        System.out.println("setUrl method");
        this.url = url;
    }
    @Value("root")
    public void setUsername(String username) {
        System.out.println("setUsername method");
        this.username = username;
    }
    @Value("root")
    public void setPassword(String password) {
        System.out.println("setPassword method");
        this.password = password;
    }
}
setDriver method
setPassword method
setUrl method
setUsername method
MyDataSource{driver='com.mysql.cj.jdbc.Driver', url='jdbc:mysql://localhost:3306/mybatis_db', username='root', password='root'}
使用@Value注解set方法是依靠set方法注入
@Value 注解也可以用在构造方法上:
public class MyDataSource implements DataSource {

    private String driver;

    private String url;

    private String username;

    private String password;

    public MyDataSource(@Value("com.mysql.cj.jdbc.Driver")String driver,
                        @Value("jdbc:mysql://localhost:3306/mybatis_db")String url,
                        @Value("root") String username,
                        @Value("root") String password) {
        this.driver = driver;
        this.url = url;
        this.username = username;
        this.password = password;
    }
使用@Value注解构造方法是依靠构造方法注入
- 使用在属性上:调用无参构造创建对象,使用反射注入
- 使用在set方法上:调用无参构造创建对象,使用set方法注入
- 使用在有参构造上:使用构造注入
非简单类型 @Autowired @Qualifier
@Autowired可以注入非简单类型,翻译为:自动装配
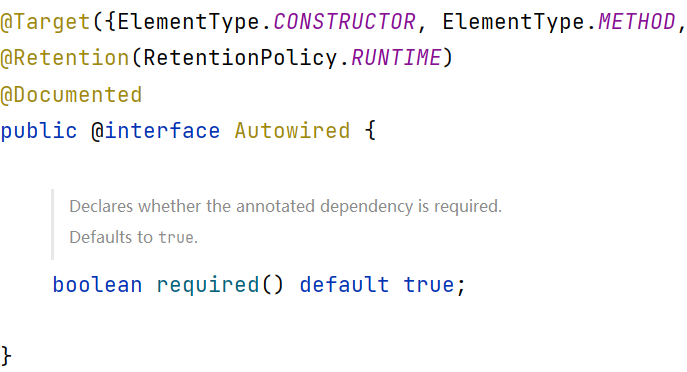
单独使用@Autowired注解,是基于类型进行自动装配 byType,如果想使用基于名称by Name的自动装配需要配合@Qualifier
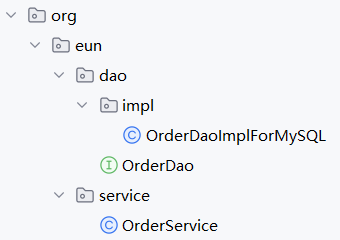
<?xml version="1.0" encoding="UTF-8"?>
<beans xmlns="http://www.springframework.org/schema/beans"
       xmlns:xsi="http://www.w3.org/2001/XMLSchema-instance"
       xmlns:context="http://www.springframework.org/schema/context"

       xsi:schemaLocation="http://www.springframework.org/schema/beans http://www.springframework.org/schema/beans/spring-beans.xsd
                     http://www.springframework.org/schema/context http://www.springframework.org/schema/context/spring-context.xsd">
    <context:component-scan base-package="org.eun" />
</beans>
@Repository
public class OrderDaoImplForMySQL implements OrderDao {
    @Override
    public void insert() {
        System.out.println("MySQL database saving order info");
    }
}
@Service
public class OrderService {
    //根据类型进行自动装配
    @Autowired
    private OrderDao orderDao;
    public void generate(){
        orderDao.insert();
    }
}
测试:
    @Test
    public void testDIByAnnotation(){
        ApplicationContext applicationContext = new ClassPathXmlApplicationContext("spring-choose.xml");
        OrderService orderService = applicationContext.getBean("orderService", OrderService.class);
        orderService.generate(); //MySQL database saving order info
    }
这时是没有问题的,但是如果接口下有两个实现类就不能根据类型进行装配了:
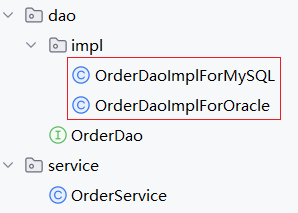
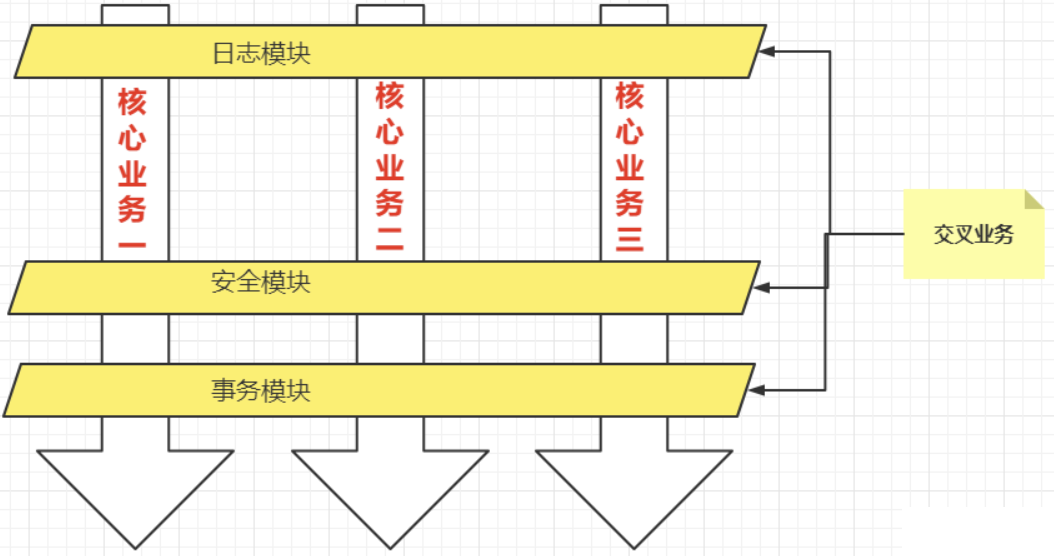
exception is org.springframework.beans.factory.NoUniqueBeanDefinitionException: No qualifying bean of type 'org.eun.dao.OrderDao' available: expected single matching bean but found 2: orderDaoImplForMySQL,orderDaoImplForOracle
根据类型进行自动装配时,当前有效的配置文件中只能有且仅有一个匹配的类型
想解决这个问题,只能根据名字进行装配
@Service
public class OrderService {
    //根据类型进行自动装配
    @Autowired
    @Qualifier("orderDaoImplForOracle")
    private OrderDao orderDao;
    public void generate(){
        orderDao.insert();
    }
}
使用@Autowired没有提供set方法,所以set方法也不是必须的
使用@Autowired注解set方法:
public class OrderService {

    private OrderDao orderDao;

    @Autowired
    public void setOrderDao(OrderDao orderDao) {
        System.out.println("setOrderDao executed");
        this.orderDao = orderDao;
    }

    public void generate(){
        orderDao.insert();
    }
}
/**
setOrderDao executed
MySQL database saving order info */
说明@Autowired可以使用set方法进行自动装配
使用@Autowired注解构造方法:
@Service
public class OrderService {

    private OrderDao orderDao;

    @Autowired
    public OrderService(OrderDao orderDao) {
        System.out.println("constructor");
        this.orderDao = orderDao;
    }

    public void setOrderDao(OrderDao orderDao) {
        System.out.println("setOrderDao executed");
        this.orderDao = orderDao;
    }

    public void generate(){
        orderDao.insert();
    }
}
/**
constructor
MySQL database saving order info
*/
说明@Autowired可以使用构造方法进行自动装配
使用@Autowired注解构造方法的参数:
@Service
public class OrderService {

    private OrderDao orderDao;

    public OrderService(@Autowired OrderDao orderDao) {
        System.out.println("constructor");
        this.orderDao = orderDao;
    }

    public void setOrderDao(OrderDao orderDao) {
        System.out.println("setOrderDao executed");
        this.orderDao = orderDao;
    }

    public void generate(){
        orderDao.insert();
    }
}
/**
constructor
MySQL database saving order info
*/
说明@Autowired可以使用构造方法的参数进行自动装配
省略Autowired
@Service
public class OrderService {

    private OrderDao orderDao;

    public OrderService(OrderDao orderDao) {
        System.out.println("constructor");
        this.orderDao = orderDao;
    }

    public void generate(){
        orderDao.insert();
    }
}
/**
constructor
MySQL database saving order info
*/
要求:构造方法必须有且仅有一个,并且构造方法的参数和类中的非简单类型相同,这时就可以省略(最好不要省略)
-
使用在属性上:(默认)无参构造创建对象,反射注入
但是使用反射是不推荐的
![image-20230809214220733]()
如果没有无参构造,会使用有参构造创建对象(并可能进行反射赋值)
-
使用在set方法上:(默认)无参构造创建对象,set注入
如果使用在set方法上,并且没有无参构造,会使用有参构造创建对象(此时已赋值),并且执行set方法
-
使用在构造方法/参数上:构造注入
-
autowired省略:只能有一个构造方法,并且参数列表和实例变量类型相同
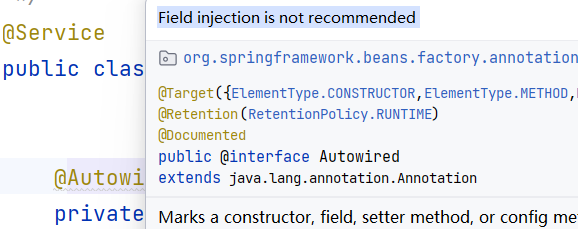
单独使用Autowired是根据类型进行自动装配,如果接口下有多个实现类就无法完成装配,必须联合Qualifier使用
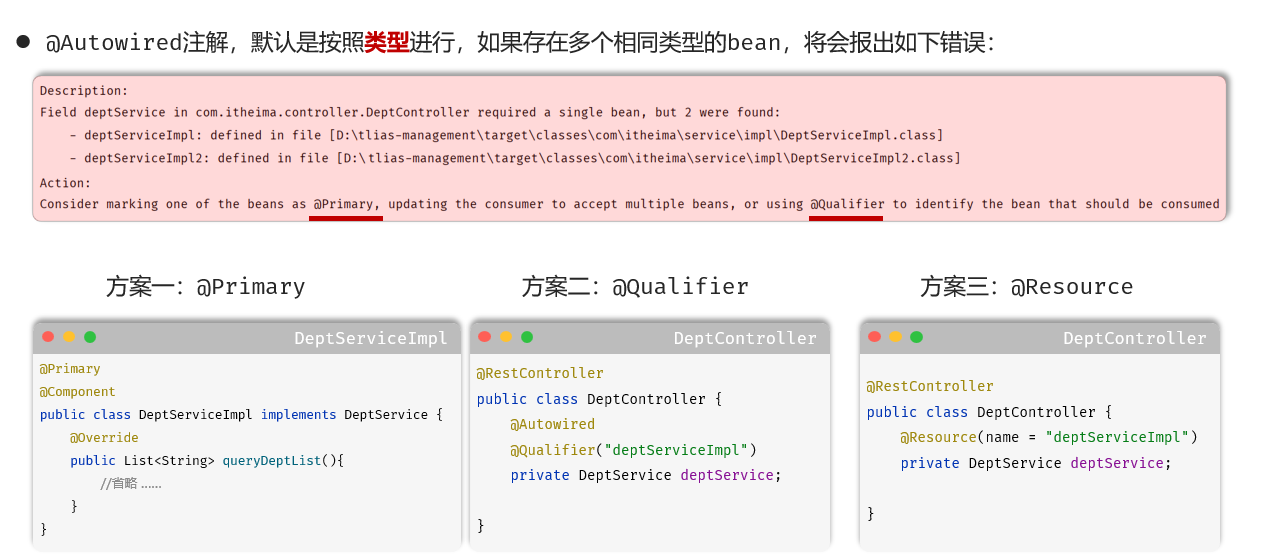
非简单类型 @Resource
@Resource注解也可以完成非简单类型注入。那它和@Autowired注解有什么区别?
@Resource注解是JDK扩展包中的,也就是说属于JDK的一部分。所以该注解是标准注解,更加具有通用性。(JSR-250标准中制定的注解类型。JSR是Java规范提案。);@Autowired注解是Spring框架自己的。@Resource注解默认根据名称装配byName,未指定name时,使用属性名作为name。通过默认的name找不到的话会自动启动通过类型byType装配。@Autowired注解默认根据类型装配byType,如果想根据名称装配,需要配合@Qualifier注解一起用。@Resource注解用在属性上、setter方法上。@Autowired注解用在属性上、setter方法上、构造方法上、构造方法参数上。
@Resource注解属于JDK扩展包,所以不在JDK当中,需要额外引入以下依赖:【如果是JDK8的话不需要额外引入依赖。高于JDK11或低于JDK8需要引入以下依赖。】
<dependency>
  <groupId>jakarta.annotation</groupId>
  <artifactId>jakarta.annotation-api</artifactId>
  <version>2.1.1</version>
</dependency>
Spring6不支持JavaEE,支持JakartaEE9;Spring5及以下版本使用javax
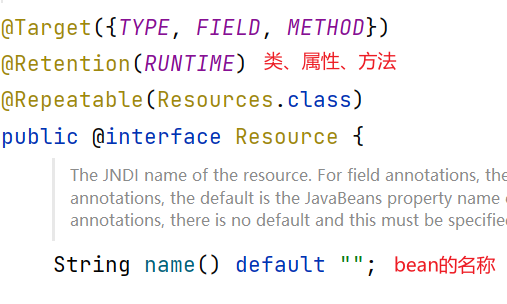
属性上:
@Service
public class OrderService {

    //@Resource 默认name找不到 使用类型装配
    @Resource(name = "orderDaoImplForMySQL")
    private OrderDao orderDao;

    public void generate(){
        orderDao.insert();
    }
}
如果不指定name,会使用属性名orderDao作为name,但是默认的name找不到对应的bean,所以自动使用类型装配,如果此时有两个OrderDao的实现类就会报错
NoUniqueBeanDefinitionException: No qualifying bean of type 'org.eun.dao.OrderDao' available: expected single matching bean but found 2: orderDaoImplForMySQL,orderDaoImplForOracle
set方法上:
@Service
public class OrderService {

    private OrderDao orderDao;

    @Resource(name = "orderDaoImplForMySQL")
    public void setOrderDao(OrderDao orderDao) {
        this.orderDao = orderDao;
    }

    public void generate(){
        orderDao.insert();
    }
}
全注解式开发
<?xml version="1.0" encoding="UTF-8"?>
<beans xmlns="http://www.springframework.org/schema/beans"
       xmlns:xsi="http://www.w3.org/2001/XMLSchema-instance"
       xmlns:context="http://www.springframework.org/schema/context"

       xsi:schemaLocation="http://www.springframework.org/schema/beans http://www.springframework.org/schema/beans/spring-beans.xsd
                     http://www.springframework.org/schema/context http://www.springframework.org/schema/context/spring-context.xsd">
    <context:component-scan base-package="org.eun" />
</beans>
现在的配置文件中只有组件扫描的内容,可以不写这个配置文件了,使用配置类代替:
@Configuration
@ComponentScan("org.eun")
public class SpringConfig {

}
@Configuration:指明是配置类@ComponentScan("org.eun")组件扫描范围
在获取bean实例的时候:
@Test
public void testDIByAnnotation(){
    ApplicationContext applicationContext = new AnnotationConfigApplicationContext(SpringConfig.class);
	OrderService orderService = applicationContext.getBean("orderService", OrderService.class);
    orderService.generate();
}
Jdbc Template
Jdbc Template是Spring提供的一个JDBC模板类,封装了JDBC的代码
        <!--新增的依赖:mysql驱动-->
        <dependency>
            <groupId>mysql</groupId>
            <artifactId>mysql-connector-java</artifactId>
            <version>8.0.30</version>
        </dependency>
        <!--新增的依赖:spring jdbc,这个依赖中有JdbcTemplate-->
        <dependency>
            <groupId>org.springframework</groupId>
            <artifactId>spring-jdbc</artifactId>
            <version>6.0.0-M2</version>
        </dependency>
通过JdbcTemplate对象进行CRUD,Spring容器管理JdbcTemplate对象:
    <bean id="jdbcTemplate" class="org.springframework.jdbc.core.JdbcTemplate">
        <property name="dataSource" />
    </bean>
需要指定数据源,可以使用Druid、c3p0、dbcp等数据库连接池,也可以使用自定义数据库连接池
public class MyDataSource implements DataSource {

    private Properties properties;
    @Override
    public Connection getConnection() throws SQLException {
        Connection connection = null;
        try {
            Class.forName(properties.getProperty("driver"));
            connection = DriverManager.getConnection(properties.getProperty("url"),
                    properties.getProperty("username"),
                    properties.getProperty("password"));
        } catch (Exception e) {
            e.printStackTrace();
        }
        return connection;
    }

    public MyDataSource(Properties properties) {
        this.properties = properties;
    }
}
<?xml version="1.0" encoding="UTF-8"?>
<beans xmlns="http://www.springframework.org/schema/beans"
       xmlns:xsi="http://www.w3.org/2001/XMLSchema-instance"
       xmlns:util="http://www.springframework.org/schema/util"
       xmlns:p="http://www.springframework.org/schema/p"
       xmlns:context="http://www.springframework.org/schema/context"
       xsi:schemaLocation="http://www.springframework.org/schema/beans http://www.springframework.org/schema/beans/spring-beans.xsd
                           http://www.springframework.org/schema/util http://www.springframework.org/schema/util/spring-util.xsd
                          http://www.springframework.org/schema/context   http://www.springframework.org/schema/context/spring-context.xsd">

    <context:property-placeholder location="jdbc.properties"/>

    <bean id="myDataSource" class="com.eun.bean.MyDataSource" p:properties-ref="prop"/>
    <bean id="jdbcTemplate" class="org.springframework.jdbc.core.JdbcTemplate"
          p:dataSource-ref="myDataSource"/>
</beans>
    @Test
    public void test() throws SQLException {
        ApplicationContext applicationContext = new ClassPathXmlApplicationContext("spring.xml");
        JdbcTemplate jdbcTemplate = applicationContext.getBean("jdbcTemplate", JdbcTemplate.class);
        System.out.println(jdbcTemplate);
        //org.springframework.jdbc.core.JdbcTemplate@178213b
    }
环境配置成功
另一种配置方法:
    <context:component-scan base-package="com.eun.bean" />
    <util:properties id="props" location="jdbc.properties" />
引入外部配置文件,开启componentScan,使用注解注入:
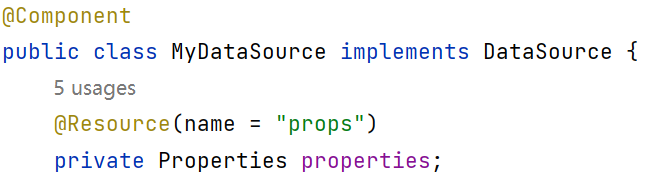
手动创建JdbcTemplate对象,纳入Spring容器的管理中:
        ApplicationContext applicationContext = new ClassPathXmlApplicationContext("spring.xml");
        JdbcTemplate jdbcTemplate = new JdbcTemplate(applicationContext
                                                     .getBean("myDataSource", MyDataSource.class));
        DefaultListableBeanFactory factory = new DefaultListableBeanFactory();
        factory.registerSingleton("jdbcTemplate",jdbcTemplate);

        JdbcTemplate template = factory.getBean("jdbcTemplate", JdbcTemplate.class);
        System.out.println(template);
insert
        JdbcTemplate jdbcTemplate = applicationContext.getBean("jdbcTemplate", JdbcTemplate.class);
        String sql = "insert into t_user(real_name,age) values(?,?)";

        int updateCount = jdbcTemplate.update(sql,"王五",20); //可变长参数 给 ? 传值
        System.out.println(updateCount);
update
        JdbcTemplate jdbcTemplate = applicationContext.getBean("jdbcTemplate", JdbcTemplate.class);
        String sql = "update t_user set real_name = ? where id = ?";
        int updateCount = jdbcTemplate.update(sql,"张三丰",1);
        System.out.println(updateCount);
delete
        JdbcTemplate jdbcTemplate = applicationContext.getBean("jdbcTemplate", JdbcTemplate.class);
        String sql = "delete from t_user where id = ?";
        int updateCount = jdbcTemplate.update(sql,1);
        System.out.println(updateCount);
selectOne
        ApplicationContext applicationContext = new ClassPathXmlApplicationContext("spring.xml");
        JdbcTemplate jdbcTemplate = applicationContext.getBean("jdbcTemplate", JdbcTemplate.class);
        String sql = "select * from t_user where id = ?";
        User u = jdbcTemplate.queryForObject(sql,new BeanPropertyRowMapper<>(User.class),2);
        System.out.println(u);
queryForObject方法三个参数:
- 第一个参数:sql语句
- 第二个参数:Bean属性值和数据库记录行的映射对象。在构造方法中指定映射的对象类型。
- 第三个参数:可变长参数,给sql语句的占位符问号传值。
数据库中的字段名和Java Bean都要符合各自的命名规范
selectAll
        JdbcTemplate jdbcTemplate = applicationContext.getBean("jdbcTemplate", JdbcTemplate.class);
        String sql = "select * from t_user";
        List<User> users = jdbcTemplate.query(sql,new BeanPropertyRowMapper<>(User.class));
        System.out.println(users);
        //[User{id = 2, realName = 李四, age = 33}, User{id = 3, realName = 王五, age = 20}]
查一个值
        JdbcTemplate jdbcTemplate = applicationContext.getBean("jdbcTemplate", JdbcTemplate.class);
        String sql = "select count(*) from t_user";
        Integer total = jdbcTemplate.queryForObject(sql, int.class);
        System.out.println(total);
批量添加
        JdbcTemplate jdbcTemplate = applicationContext.getBean("jdbcTemplate", JdbcTemplate.class);
        String sql = "insert into t_user(id,real_name,age) values(?,?,?)";
        Object[] objs1 = {null, "小花", 20};
        Object[] objs2 = {null, "小明", 21};
        Object[] objs3 = {null, "小刚", 22};
        List<Object[]> list = new ArrayList<>();
        list.add(objs1);
        list.add(objs2);
        list.add(objs3);
		//batchUpdate
        int[] count = jdbcTemplate.batchUpdate(sql, list);
        System.out.println(Arrays.toString(count));//[1, 1, 1]
批量更新
        JdbcTemplate jdbcTemplate = applicationContext.getBean("jdbcTemplate", JdbcTemplate.class);
        // 批量修改
        String sql = "update t_user set real_name = ?, age = ? where id = ?";
        Object[] objs1 = {"小花11", 10, 2};
        Object[] objs2 = {"小明22", 12, 3};
        Object[] objs3 = {"小刚33", 9, 4};
        List<Object[]> list = new ArrayList<>();
        list.add(objs1);
        list.add(objs2);
        list.add(objs3);

        int[] count = jdbcTemplate.batchUpdate(sql, list);
        System.out.println(Arrays.toString(count));//[1, 1, 1]
批量删除
    JdbcTemplate jdbcTemplate = applicationContext.getBean("jdbcTemplate", JdbcTemplate.class);
    // 批量删除
    String sql = "delete from t_user where id = ?";
    Object[] objs1 = {2};
    Object[] objs2 = {3};
    Object[] objs3 = {4};
    List<Object[]> list = new ArrayList<>();
    list.add(objs1);
    list.add(objs2);
    list.add(objs3);
    int[] count = jdbcTemplate.batchUpdate(sql, list);
    System.out.println(Arrays.toString(count));
回调函数
    @Test
    public void testCallback(){
        ApplicationContext applicationContext = new ClassPathXmlApplicationContext("spring.xml");
        JdbcTemplate jdbcTemplate = applicationContext.getBean("jdbcTemplate", JdbcTemplate.class);
        String sql = "select id,real_name,age from t_user where id = ?";
        //当execute方法执行的时候,回调函数中doInPreparedStatement会被调用
        jdbcTemplate.execute(sql, new PreparedStatementCallback<User>() {
            @Override
            public User doInPreparedStatement(PreparedStatement ps) throws Exception{
                ps.setInt(1,2);
                ResultSet rs = ps.executeQuery();
                User user = null;
                if (rs.next()) {
                    user = new User();
                    user.setId(rs.getInt("id"));
                    user.setRealName(rs.getString("real_name"));
                    user.setAge(rs.getInt("age"));
                }
                return user;
            }
        });
    }
使用druid连接池
<dependency>
  <groupId>com.alibaba</groupId>
  <artifactId>druid</artifactId>
  <version>1.1.8</version>
</dependency>
将druid数据源配置到配置文件中:
    <context:property-placeholder location="jdbc.properties"/>

    <bean id="druidDataSource" class="com.alibaba.druid.pool.DruidDataSource">
        <!--根据源码得知set方法名称-->
        <property name="driverClassName" value="${jdbc.driver}"/>
        <property name="url" value="${jdbc.url}"/>
        <property name="username" value="${jdbc.username}"/>
        <property name="password" value="${jdbc.password}"/>
    </bean>
    <bean id="jdbcTemplate" class="org.springframework.jdbc.core.JdbcTemplate"
          p:dataSource-ref="druidDataSource"/>
GoF代理模式
- 当一个对象需要保护时
- 给某个对象进行功能增强时
- A和B对象无法直接交互时
可以考虑使用代理模式,代理模式属于结构性设计模式
代理模式的作用是:为其他对象提供一种代理以控制对这个对象的访问。在某些情况下,一个客户不想或者不能直接引用一个对象,此时可以通过一个称之为“代理”的第三者来实现间接引用。代理对象可以在客户端和目标对象之间起到中介的作用,并且可以通过代理对象去掉客户不应该看到的内容和服务或者添加客户需要的额外服务。 通过引入一个新的对象来实现对真实对象的操作或者将新的对象作为真实对象的一个替身,这种实现机制即为代理模式,通过引入代理对象来间接访问一个对象,这就是代理模式的模式动机。客户端程序无法察觉使用代理对象或者目标对象。
代理模式在代码实现上有两种方式:
- 静态代理
- 动态代理
public interface OrderService {
    /**
     * 生成订单信息
     */
    void generate();

    /**
     * 修改订单信息
     */
    void modify();

    /**
     * 查看订单信息
     */
    void detail();
}
业务需求:统计所有业务类中业务方法的耗时
- 解决方案一:硬编码添加统计耗时的程序
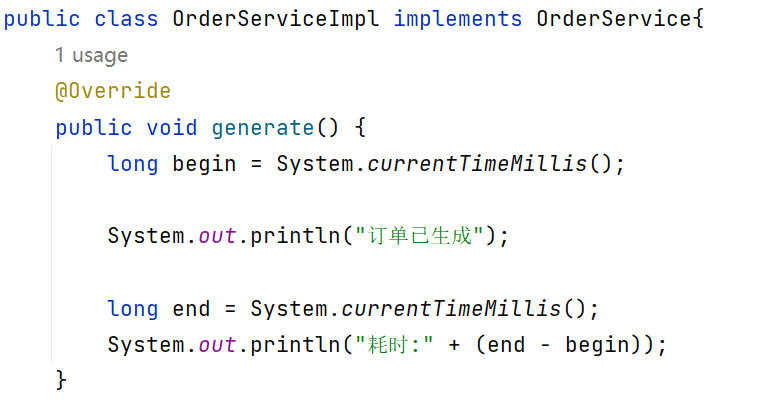
缺点:
- 违背OCP
- 代码没有复用
- 业务类很多时,太麻烦,去掉这个代码也是很麻烦
静态代理
代理是一种模式,提供了目标对象的间接访问方式,通过代理对象可以访问目标对象,以便于在实现目标的基础上增加额外的功能操作,例如前拦截、后拦截等
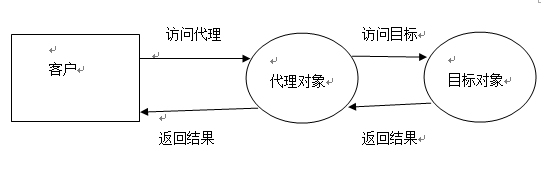
静态代理:编写一个代理类,实现和目标对象相同的接口,并在内部维护一个目标对象的引用。通过构造器注入目标对象,在代理对象中调用目标对象的同名方法,添加前后拦截等业务功能

- 解决方案二:静态代理
加入代理类:OrderServiceProxy
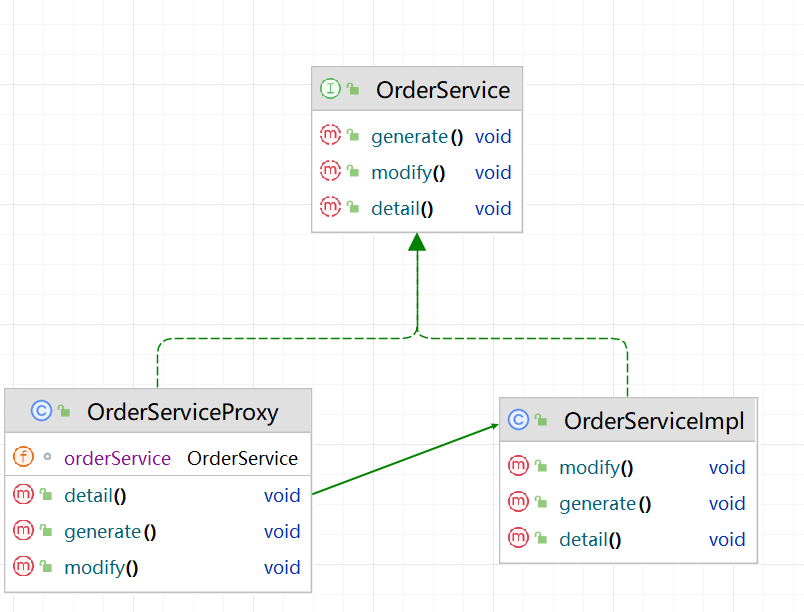
public class OrderServiceProxy implements OrderService{
    OrderService target;

    public OrderServiceProxy(OrderService target) {
        this.target = target;
    }

    @Override
    public void generate() {
        long begin = System.currentTimeMillis();

        target.generate();

        long end = System.currentTimeMillis();
        System.out.println("耗时:" + (end - begin));
    }
//....
}
调用:
        OrderService target = new OrderServiceImpl();
        OrderService orderServiceProxy = new OrderServiceProxy(target);

        orderServiceProxy.generate();
        orderServiceProxy.detail();
        orderServiceProxy.modify();
关联的耦合度比继承低,但是会导致“类爆炸”问题,一百个接口就要写一百个代理类
可以使用字节码生成技术生成代理类对象,也就是动态代理
动态代理
程序运行阶段在内存中动态生成代理类,被称为动态代理,目的是为了减少代理类的数量,解决代码复用
动态代理技术:
- JDK动态代理:只能代理接口
- CGLIB:Code Generation Library,开源、高质量、高性能的Code生成类库,可以在运行期间扩展Java类和接口,既可以代理接口,又可以代理类,通过继承的方式实现,性能比JDK动态代理好,底层有一个字节码处理框架ASM
- Javassist:开源的分析、编辑、创建Java字节码的类库,为JBoss应用服务器实现动态AOP
JDK动态代理
    OrderService target = new OrderServiceImpl();
    OrderService orderServiceProxy = (OrderService) Proxy.
            /*
            * newProxyInstance:新建代理对象,通过调用这个方法在内存中创建代理对象
            *   这个方法
            *       1.在内存中动态生成一个代理类的字节码Class对象
            *       2. 根据Class对象创建了代理对象实例并返回
            *   参数一:类加载器 内存中生成的字节码也是class文件,要执行也要加载到内存中
            *                加载类就需要类加载器相同,并且JDK要求代理类的类加载器必须和目标类的类加载器相同
            *   参数二:代理类要实现的接口:代理类要和目标类实现同一组接口,代理类实现了这组接口就可以向下转型
            *   参数三:调用处理器 :当代理对象调用代理方法的时候,注册在调用处理器中的invoke方法被调用
            * */
            newProxyInstance(target.getClass().getClassLoader(),
                            target.getClass().getInterfaces(),
                    /**
                     * 参数一:代理对象
                     * 参数二:目标对象的目标方法
                     * 参数三:调用代理方法时传递的参数
                     */
                    (proxy,method,argvs) -> {
                                System.out.println("advance");
                                return method.invoke(target,argvs);
                            });
    orderServiceProxy.detail();
    orderServiceProxy.modify();
    orderServiceProxy.generate();
public class ProxyUtil {
    public static <T> T newProxyInstance(T t, InvocationHandler handler) {
        return (T) Proxy.newProxyInstance(t.getClass().getClassLoader(),
                t.getClass().getInterfaces(),
                handler);
    }
}
CGLIB动态代理
CGLIB既可以代理接口,又可以代理类,底层使用继承方式实现,所以被代理的类不能用final修饰
<dependency>
  <groupId>cglib</groupId>
  <artifactId>cglib</artifactId>
  <version>3.3.0</version>
</dependency>
public class UserService {
    //目标方法
    public boolean login(String username,String password){
        System.out.println("系统正在退出");
        return "admin".equals(username) && "123".equals(password);
    }
    //目标方法
    public void logout(){
        System.out.println("系统正在退出");
    }
}
CGLIB可以在内存中直接生成代理:
        //创建字节码增强器对象,依靠它生成代理类
        Enhancer enhancer = new Enhancer();

        //告知CGLIB父类 目标类是谁
        enhancer.setSuperclass(UserService.class);

        //设置回调  MethodInterceptor 等同于 InvocationHandler
        enhancer.setCallback(new MethodInterceptor() {
            /**
             *  函数式接口
             * @param target 目标对象
             * @param method
             * @param objects 方法实参
             * @param methodProxy 方法
             * @return
             * @throws Throwable
             */
            @Override
            public Object intercept(Object target, Method method,
                                    Object[] objects, MethodProxy methodProxy) throws Throwable {
                long begin = System.currentTimeMillis();
                Object retVal = methodProxy.invokeSuper(target, objects);
                long end = System.currentTimeMillis();
                System.out.println("duration : " + (end - begin) + "ms");
                return retVal;
            }
        });

        //创建代理对象
        //1. 在内存中生成UserService类的子类 也就是代理类的字节码
        //2. 创建代理对象
        // 父类是UserService,子类也是UserService
        UserService userServiceProxy = (UserService) enhancer.create();

        boolean success = userServiceProxy.login("admin", "123");
        System.out.println(success ? "成功" : "失败");
        userServiceProxy.logout();
需要添加两个运行时参数:
- --add-opens java.base/java.lang=ALL-UNNAMED
- --add-opens java.base/sun.net.util=ALL-UNNAMED
CGLIB生成的代理对象的名字:
com.eun.service.UserService$$EnhancerByCGLIB$$51285760@63d4e2ba
面向切面AOP
IoC使组件松耦合,AOP能够让我们捕捉程序中经常使用的功能,将其转化为组件
AOP:Aspect Orientend Programming 面向切面编程;AOP是对OOP的补充延申;AOP底层就是动态代理实现的
切面:程序中和业务逻辑无关的通用代码,比如事务控制
Spring的AOP使用的动态代理是:JDK动态代理 + CGLIB动态代理技术;Spring在这两种动态代理中灵活切换,如果是代理接口,默认使用JDK动态代理,如果代理某个类,该类没有实现接口,就会使用CGLIB;也可以通过某些配置让Spring只使用CGLIB
AOP
一般一个系统当中都会有一些系统服务,例如:日志、事务管理、安全等。这些系统服务被称为:交叉业务
这些交叉业务几乎是通用的,不管你是做银行账户转账,还是删除用户数据。日志、事务管理、安全,这些都是需要做的。
如果在每一个业务处理过程当中,都掺杂这些交叉业务代码进去的话,存在两方面问题:
- 第一:交叉业务代码在多个业务流程中反复出现,显然这个交叉业务代码没有得到复用。并且修改这些交叉业务代码的话,需要修改多处。
- 第二:程序员无法专注核心业务代码的编写,在编写核心业务代码的同时还需要处理这些交叉业务。
解决办法:切面编程,使用动态代理将与业务逻辑无关的切面代码单独提取出来放在调用处理器InvocationHandler中,只要在调用处理器中写一次就可以了,单独提取出来形成的东西就是切面;切面一旦形成在业务层就不需要写与业务逻辑无关的代码了
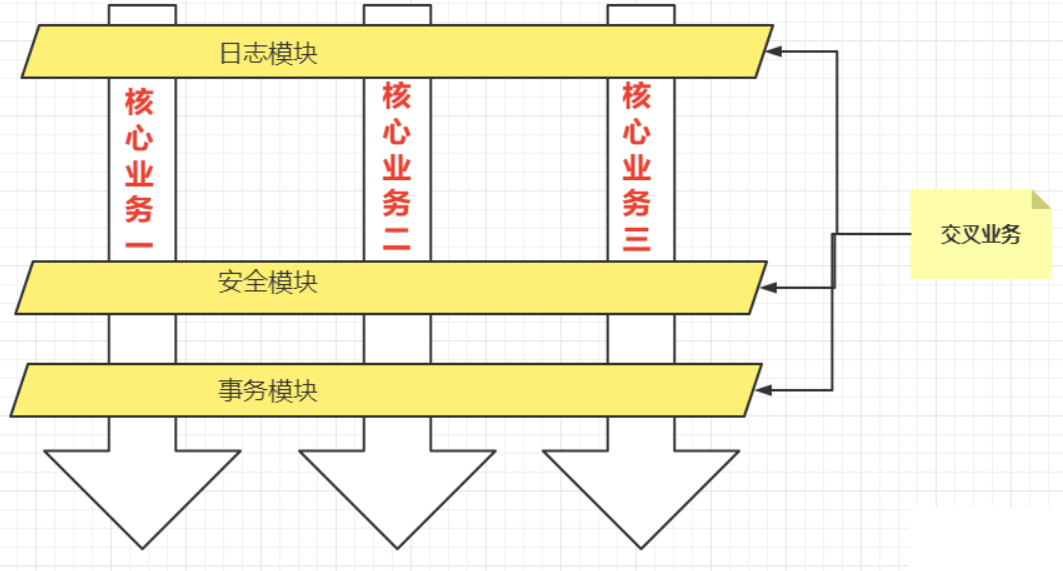
总结:将与核心业务无关的代码独立的抽取出来,形成一个独立的组件(切面),然后以横向交叉的方式应用到业务流程当中的过程被称为AOP
之前的动态代理就是AOP的体现。
AOP的优点:
- 第一:代码复用性增强。
- 第二:代码易维护。
- 第三:使开发者更关注业务逻辑。
七大术语
public class UserService{
    public void do1(){
        System.out.println("do 1");
    }
    public void do2(){
        System.out.println("do 2");
    }
    public void do3(){
        System.out.println("do 3");
    }
    public void do4(){
        System.out.println("do 4");
    }
    public void do5(){
        System.out.println("do 5");
    }
    // 核心业务方法
    public void service(){
        do1();
        do2();
        do3();
        do5();
    }
}
-
连接点 Joinpoint
-
在程序的整个执行流程中,可以织入切面的位置。方法的执行前后,异常抛出之后等位置。
    public void service(){
        try{
            //JoinPoint 连接点
            do1();
            //JoinPoint
            do2();
            //JoinPoint
            do3();
            //JoinPoint
            do5();
            //JoinPoint
        } catch (Exception e){
            //JoinPoint
        }
    }
连接点描述的是位置
-
-
切点 Pointcut
-
在程序执行流程中,真正织入切面的方法。(一个切点对应多个连接点)
![image-20230628211008487]()
切点描述的是方法
-
-
通知 Advice
-
通知又叫增强,就是具体你要织入的代码
-
通知包括:
-
前置通知:代码织入在切点的前一个连接点位置
-
后置通知:代码织入在切点的后一个连接点位置
-
环绕通知:代码织入在切点的前后两个连接点位置
-
异常通知:代码织入在catch语句块中的连接点位置
-
最终通知:代码织入在finally语句块中的连接点位置
-
-
通知就是具体的事务、日志、安全代码
-
-
切面 Aspect
-
切点 + 通知就是切面
![image-20230628211558915]()
-
-
织入 Weaving
- 把通知应用到目标对象上的过程。
-
代理对象 Proxy
- 一个目标对象被织入通知后产生的新对象。
-
目标对象 Target
- 被织入通知的对象。
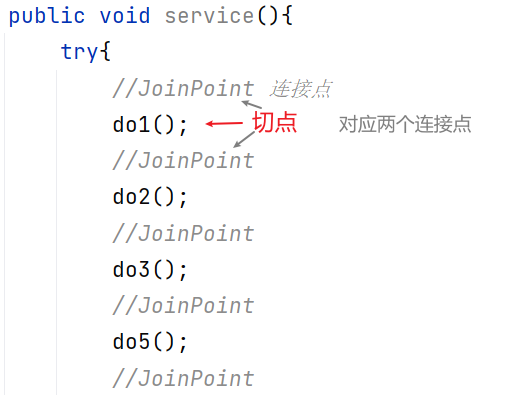
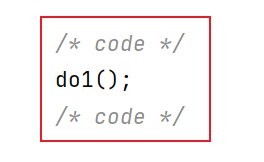
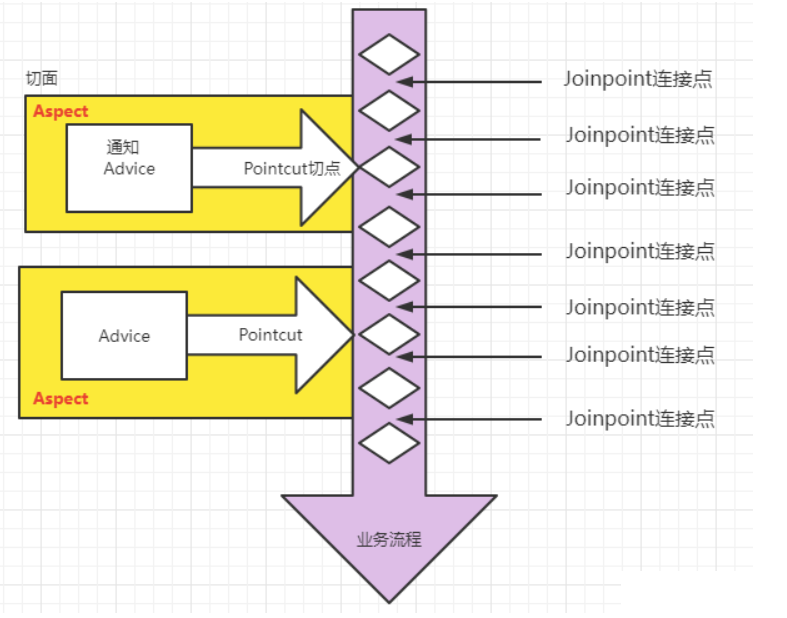
切点表达式
切点:某一个方法
切点表达式:匹配某些方法的表达式,用来定义通知 织入 哪些 切点
切点表达式的语法格式:
execution([访问控制权限修饰符] 返回值类型 [全限定类名]方法名(形式参数列表)[异常])
访问权限修饰符:
- 可选项
- 缺省就是包括4个权限
- public 就是只匹配公开的方法
返回值类型:
- 必填
*代表任意
全限定类名:
- 可选项
..代表当前包以及子包下所有的类 例如com..- 缺省代表所有的类
方法名:
- 必填
*代表所有方法,例如set*表示所有set方法
形式参数列表:
- 必填
()表示没有参数的方法(..)参数类型和个数随意(*)只有一个参数的方法(*,String)第一个类型随意,第二个类型是String
异常:
- 可选项
- 省略时表示任意异常类型
execution(public * com.eun.mall.service..delete*(..))
//com.eun.mall.service包下所有类中方法名以delete开始,返回值类型、个数随意,返回值类型随意的公开方法
execution(* com.eun.mall..*(..))
//com.eun.mall下所有类中的所有方法
execution(* *(..))
//所有方法
Spring AOP
Spring使用AOP包括以下三种方式:
-
第一种方式:Spring框架结合Aspectj框架实现AOP,基于注解方式
-
第二种方式:Spring框架结合Aspectj框架实现AOP,基于XML方式
-
第三种方式:Spring框架自己实现的AOP,基于XML配置方式
实际开发中,都是Spring框架结合Aspectj框架基于注解实现AOP
Aspectj:Eclipse组织的一个支持AOP的框架。AspectJ框架是独立于Spring框架之外的一个框架,Spring框架使用了AspectJ框架
<!--spring aspects依赖-->
<dependency>
  <groupId>org.springframework</groupId>
  <artifactId>spring-aspects</artifactId>
  <version>6.0.0-M2</version>
</dependency>
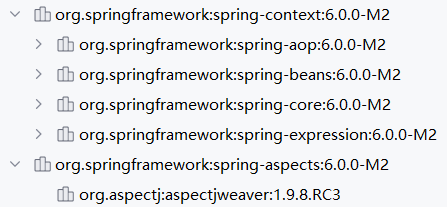
<?xml version="1.0" encoding="UTF-8"?>
<beans xmlns="http://www.springframework.org/schema/beans"
       xmlns:xsi="http://www.w3.org/2001/XMLSchema-instance"
       xmlns:context="http://www.springframework.org/schema/context"
       xmlns:aop="http://www.springframework.org/schema/aop"
       xsi:schemaLocation="http://www.springframework.org/schema/beans http://www.springframework.org/schema/beans/spring-beans.xsd
                           http://www.springframework.org/schema/context http://www.springframework.org/schema/context/spring-context.xsd
                           http://www.springframework.org/schema/aop http://www.springframework.org/schema/aop/spring-aop.xsd">
    <context:component-scan base-package="com.eun.service" />

    <aop:aspectj-autoproxy />
</beans>
目标类:
@Service
public class UserService {
    //目标方法
    public void login(){
        System.out.println("系统正在进行身份认证");
    }
}
对于没有实现接口的类,会使用CGLIB动态代理
切面类:
@Aspect //切面类需要使用这个注解进行标注
@Component
public class LogAspect {
    //切面 = 通知 + 切点
    //通知以方法的形式出现
    //Before注解标注的是前置通知,value是切点表达式
    //@Before("execution(public void com.eun.service.UserService.login(..))")
    @Before("execution(* com.eun.service.UserService.*(..))")
    public void beforeAdvice(){
        System.out.println("这是一段前置通知");
    }
}
切面 = 通知 + 切点
    <context:component-scan base-package="com.eun.service" />

    <!--
        开启aspectj的自动代理
        spring容器在扫描类的时候会查看是否有@Aspect注解,如果有就根据该类中的信息生成代理对象
        proxy-target-class="true"  : 必须使用CGLIB
    -->
    <aop:aspectj-autoproxy proxy-target-class="true"/>
测试程序:
    @Test
    public void testBeforeAdvice(){
        ApplicationContext applicationContext = new ClassPathXmlApplicationContext("spring.xml");
        UserService userService = applicationContext.getBean("userService", UserService.class);
        userService.login();
        /**
         * 这是一段前置通知
         * 系统正在进行身份认证
         */
    }
通知是动态织入的,说明getBean()获取的是Proxy实例
通知类型:
-
前置通知:@Before 目标方法执行之前的通知
@Before("execution(* com.eun.service..*(..))") public void beforeAdvice(){ System.out.println("这是一段前置通知"); } -
后置通知:@AfterReturning 目标方法执行之后的通知
@AfterReturning("execution(* com.eun.service..*(..))") public void afterReturning(){ System.out.println("这是一段后置通知"); } -
环绕通知:@Around 目标方法之前添加通知,同时目标方法执行之后添加通知。
    @Around("execution(* com.eun.service..*(..))")
    public void around(ProceedingJoinPoint joinPoint) throws Throwable {
        System.out.println("前环绕");
        //执行目标
        joinPoint.proceed();

        System.out.println("后环绕");
    }
    /*
    *   前环绕
        这是一段前置通知
        生成订单
        这是一段后置通知
        后环绕
    * */
环绕通知是最大的范围,在前置之前,后置(最终)之后
-
异常通知:@AfterThrowing 发生异常之后执行的通知
后置通知 后环绕都没有了
    @AfterThrowing("execution(* com.eun.service..*(..))")
    public void afterThrowing(){
        System.out.println("异常通知");
    }
public void generate(){ if (1 == 1){ throw new RuntimeException(); } System.out.println("生成订单"); } /** 前环绕 这是一段前置通知 异常通知 最终通知 */public void generate(){ System.out.println("生成订单"); if (1 == 1){ throw new RuntimeException(); } } /** 前环绕 这是一段前置通知 生成订单 异常通知 最终通知 */ -
最终通知:@After 放在finally语句块中的通知
@After("execution(* com.eun.service..*(..))") public void finalAfter(){ System.out.println("最终通知"); } /** 前环绕 这是一段前置通知 生成订单 这是一段后置通知 最终通知 后环绕 */
前环绕 Around
前置通知 Before
method
后置通知 AfterReturning
最终通知 After
后环绕 Around
业务方法在执行过程:
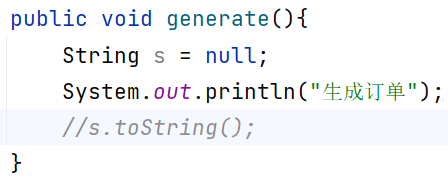
#没有异常 #业务方法出现异常
前环绕 前环绕
前置通知 前置通知
生成订单 生成订单
后置通知 异常通知
最终通知 最终通知
后环绕 NullPointerException
出现了异常就没有执行后置通知和后环绕,说明前后置通知、环绕通知在代理对象中的形式应该是
public final void generate() {
try {
this.h.invoke(this, m3, null);
return;
}
catch (Error | RuntimeException throwable) {
throw throwable;
}
catch (Throwable throwable) {
throw new UndeclaredThrowableException(throwable);
}
}
//而在invoke方法当中:
@Test
public void aTest(){
try{
System.out.println("前环绕");
System.out.println("前置通知");
System.out.println("生成订单");
String s = null;
s.toString();
System.out.println("后置通知");
}catch (Exception e){
System.out.println("异常通知");
throw e;
} finally {
System.out.println("最终通知");
}
System.out.println("后环绕");
}
因为方法最终执行失败,并且异常信息是在最终通知之后显示的,而最终通知是方法结束时执行,所以此处一定是将异常上抛了
代理对象的代理方法中发现异常才会执行失败
如果在环绕通知中添加try-catch:
public void aroundAdvice(ProceedingJoinPoint joinPoint) throws Throwable {
System.out.println("前环绕");
try {
joinPoint.proceed();
} catch (Throwable e) {
//throw e;
e.printStackTrace();
}
System.out.println("后环绕");
}
选择阻止上抛,方法会打印出异常信息但是执行成功,输出结果:
前环绕
前置通知
生成订单
异常通知
最终通知
NullPointerException #e.printStackTrace()
后环绕
说明添加的try-catch一定是包含了原有的try-catch(因为异常并没有抛给代理方法,并且内层try-catch触发了异常通知和最终通知),后环绕可以正常的执行
对应的invoke:
@Test
public void aTest() {
try {
try {
System.out.println("前环绕");
System.out.println("前置通知");
System.out.println("生成订单");
String s = null;
s.toString();
System.out.println("后置通知");
} catch (Exception e) {
System.out.println("异常通知");
throw e;
} finally {
System.out.println("最终通知");
}
} catch (Exception e) {
e.printStackTrace();
//throw e;
}
System.out.println("后环绕");
}
基于注解的切面顺序
如果还有其他的交叉业务,怎么控制切面的执行顺序
@Aspect
@Component
@Order(1)
public class SecurityAspect {
@Before("execution(* com.eun.service..*(..))")
public void beforeAdvice(){
System.out.println("安全前置通知");
}
}
@Aspect
@Component
@Order(2)
public class LogAspect {
@Before("execution(* com.eun.service..*(..))")
public void beforeAdvice(){
System.out.println("日志前置通知");
}
指定这两个切面的顺序:安全通知先执行,日志通知后执行
@Order(number) number数字越小优先级越高
通用切点

这三个通知要织入给相同的方法,切点表达式都是一样的,但是现在没有代码复用
解决:@PointCut 通用切点
@Pointcut("execution(* com.eun.service..*(..))")
public void commonPointCut(){
}
@Before("commonPointCut()")
public void beforeAdvice(){
System.out.println("日志前置通知");
}
@AfterReturning("commonPointCut()")
public void afterReturning(){
System.out.println("这是一段后置通知");
}
@Around("commonPointCut()")
public void around(ProceedingJoinPoint joinPoint) throws Throwable {
System.out.println("前环绕");
joinPoint.proceed();
System.out.println("后环绕");
}
但是这是在LogAspect中定义的,如果想在SecurityAspect中使用:
@Aspect
@Component
@Order(1)
public class SecurityAspect {
@Before("com.eun.service.LogAspect.commonPointCut()")
public void beforeAdvice(){
System.out.println("安全前置通知");
}
}
连接点
在环绕通知中使用过连接点:
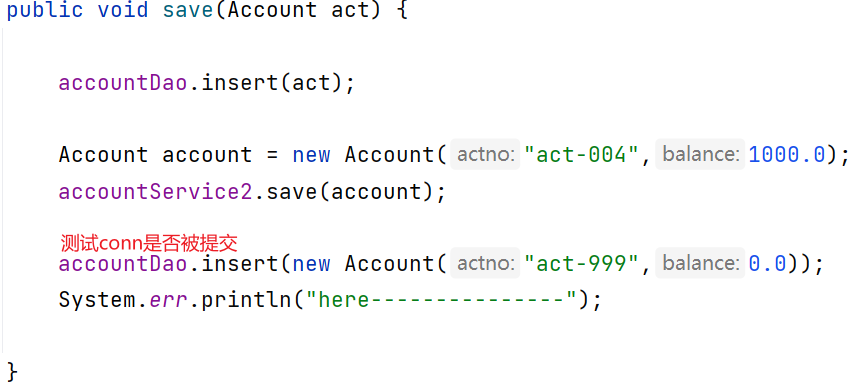
其实在其他的通知中都有连接点参数:
@Before("commonPointCut()")
public void beforeAdvice(JoinPoint point){
System.out.println("日志前置通知");
Signature signature = point.getSignature();
System.out.print(Modifier.toString(signature.getModifiers()) + " ");
System.out.print(signature.getName() + " (");
System.out.println(signature.getDeclaringTypeName() + ")");
//public generate (com.eun.service.OrderService)
}
getSignature()作用是获取目标方法签名
AOP全注解开发
<?xml version="1.0" encoding="UTF-8"?>
<beans xmlns="http://www.springframework.org/schema/beans"
xmlns:xsi="http://www.w3.org/2001/XMLSchema-instance"
xmlns:context="http://www.springframework.org/schema/context"
xmlns:aop="http://www.springframework.org/schema/aop"
xsi:schemaLocation="http://www.springframework.org/schema/beans http://www.springframework.org/schema/beans/spring-beans.xsd
http://www.springframework.org/schema/context http://www.springframework.org/schema/context/spring-context.xsd
http://www.springframework.org/schema/aop http://www.springframework.org/schema/aop/spring-aop.xsd">
<context:component-scan base-package="com.eun.service" />
<aop:aspectj-autoproxy proxy-target-class="true"/>
</beans>
不写配置文件
@Configuration
@ComponentScan("com.eun.service")
/*启用CGLIB自动代理*/
@EnableAspectJAutoProxy(proxyTargetClass = true)
public class SpringConfig {
}
测试:
@Test
public void testBeforeAdvice(){
ApplicationContext applicationContext = new AnnotationConfigApplicationContext(SpringConfig.class);
OrderService orderService = applicationContext.getBean("orderService", OrderService.class);
orderService.generate();
}
AOP XML开发
第一步:编写目标类
// 目标类
public class VipService {
public void add(){
System.out.println("保存vip信息。");
}
}
第二步:编写切面类,并且编写通知
// 负责计时的切面类
public class TimerAspect {
public void time(ProceedingJoinPoint proceedingJoinPoint) throws Throwable {
long begin = System.currentTimeMillis();
//执行目标
proceedingJoinPoint.proceed();
long end = System.currentTimeMillis();
System.out.println("耗时"+(end - begin)+"毫秒");
}
}
第三步:编写spring配置文件
<?xml version="1.0" encoding="UTF-8"?>
<beans xmlns="http://www.springframework.org/schema/beans"
xmlns:xsi="http://www.w3.org/2001/XMLSchema-instance"
xmlns:context="http://www.springframework.org/schema/context"
xmlns:aop="http://www.springframework.org/schema/aop"
xsi:schemaLocation="http://www.springframework.org/schema/beans http://www.springframework.org/schema/beans/spring-beans.xsd
http://www.springframework.org/schema/context http://www.springframework.org/schema/context/spring-context.xsd
http://www.springframework.org/schema/aop http://www.springframework.org/schema/aop/spring-aop.xsd">
<!--纳入spring bean管理-->
<bean id="vipService" class="com.powernode.spring6.service.VipService"/>
<bean id="timerAspect" class="com.powernode.spring6.service.TimerAspect"/>
<!--aop配置-->
<aop:config>
<!--切点表达式-->
<aop:pointcut id="p" expression="execution(* com.powernode.spring6.service.VipService.*(..))"/>
<!--切面-->
<aop:aspect ref="timerAspect">
<!--切面=通知 + 切点-->
<aop:around method="time" pointcut-ref="p"/>
</aop:aspect>
</aop:config>
</beans>
编程式事务解决方案
项目中的事务控制是在所难免的。在一个业务流程当中,可能需要多条DML语句共同完成,为了保证数据的安全,这多条DML语句要么同时成功,要么同时失败。这就需要添加事务控制的代码。例如以下伪代码:
class 业务类1{
public void 业务方法1(){
try{
// 开启事务
startTransaction();
// 执行核心业务逻辑
step1();
step2();
step3();
....
// 提交事务
commitTransaction();
}catch(Exception e){
// 回滚事务
rollbackTransaction();
}
}
public void 业务方法2(){
try{
// 开启事务
startTransaction();
// 执行核心业务逻辑
step1();
step2();
step3();
....
// 提交事务
commitTransaction();
}catch(Exception e){
// 回滚事务
rollbackTransaction();
}
}
}
class 业务类2{
public void 业务方法1(){
try{
// 开启事务
startTransaction();
// 执行核心业务逻辑
step1();
step2();
step3();
....
// 提交事务
commitTransaction();
}catch(Exception e){
// 回滚事务
rollbackTransaction();
}
}
public void 业务方法2(){
try{
// 开启事务
startTransaction();
// 执行核心业务逻辑
step1();
step2();
step3();
....
// 提交事务
commitTransaction();
}catch(Exception e){
// 回滚事务
rollbackTransaction();
}
}
}
可以看到,这些业务类中的每一个业务方法都是需要控制事务的,而控制事务的代码又是固定的格式,都是:
try{
// 开启事务
startTransaction();
// 执行核心业务逻辑
//......
// 提交事务
commitTransaction();
}catch(Exception e){
// 回滚事务
rollbackTransaction();
}
这个控制事务的代码就是和业务逻辑没有关系的“交叉业务”。以上伪代码当中可以看到这些交叉业务的代码没有得到复用,并且如果这些交叉业务代码需要修改,那必然需要修改多处,难维护,怎么解决?可以采用AOP思想解决。可以把以上控制事务的代码作为环绕通知,切入到目标类的方法当中。
目标类:
@Service
public class AccountService {
public void transfer(){
System.out.println("银行账户正在完成转账操作");
throw new RuntimeException();
}
public void withdraw(){
System.out.println("银行账户正在取款");
}
}
@Service
public class OrderService {
public void generate(){
System.out.println("生成订单");
}
public void cancel(){
System.out.println("订单已取消");
}
}
切面:
@Aspect
@Component
public class TransactionAspect {
@Around("execution(* com.eun.service..*(..))")
public void aroundAdvice(ProceedingJoinPoint point){
try {
System.out.println("transaction begin");
point.proceed();
System.out.println("commit");
} catch (Throwable e) {
System.err.println("error");
System.out.println("rollback");
} finally {
System.out.println("============");
}
}
}
测试:
transaction begin
银行账户正在完成转账操作
error
rollback
============
transaction begin
银行账户正在取款
commit
============
安全日志解决方案
凡是在系统中进行修改操作的,删除操作的,新增操作的,都要把用户记录下来。因为这几个操作是属于危险行为。例如有业务类和业务方法:
@Service
public class UserService {
public void getUser(){
System.out.println("获取用户信息");
}
public void saveUser(){
System.out.println("保存用户");
}
public void deleteUser(){
System.out.println("删除用户");
}
public void modifyUser(){
System.out.println("修改用户");
}
}
@Service
public class VipService {
public void getVip(){
System.out.println("获取会员信息");
}
public void saveVip(){
System.out.println("保存会员");
}
public void deleteVip(){
System.out.println("删除会员");
}
public void modifyVip(){
System.out.println("修改会员");
}
}
注意:只需要对save delete modify 方法进行记录日志的操作
也就是说要将通知织入到这三簇方法上
@Aspect
@Component
public class SecurityAspect {
@Pointcut("execution(* com.eun.biz..*delete*(..))")
public void deleteMethod(){}
@Pointcut("execution(* com.eun.biz..*save*(..))")
public void saveMethod(){}
@Pointcut("execution(* com.eun.biz..*modify*(..))")
public void modifyMethod(){}
@Before("deleteMethod()||saveMethod()||modifyMethod()")
public void beforeAdvice(JoinPoint joinPoint){
System.out.println("某用户正在操作:" + joinPoint.getSignature().getName() + "方法");
}
}
Spring对事务的支持
上文中的事务控制是通过代码进行控制,是编程式的,Spring推出了声明式事务解决方案
Spring-tx底层也是基于AOP进行事务控制的
-
什么是事务
- 在一个业务流程当中,通常需要多条DML(insert delete update)语句共同联合才能完成,这多条DML语句必须同时成功,或者同时失败,这样才能保证数据的安全。
- 多条DML要么同时成功,要么同时失败,这叫做事务。
- 事务:Transaction(tx)
-
事务的四个处理过程:
- 第一步:开启事务 (start transaction)
- 第二步:执行核心业务代码
- 第三步:提交事务(如果核心业务处理过程中没有出现异常)(commit transaction)
- 第四步:回滚事务(如果核心业务处理过程中出现异常)(rollback transaction)
-
事务的四个特性:
- A 原子性:事务是最小的工作单元,不可再分。
- C 一致性:事务要求要么同时成功,要么同时失败。事务前和事务后的总量不变。
- I 隔离性:事务和事务之间因为有隔离性,才可以保证互不干扰。
- D 持久性:持久性是事务结束的标志。
<!--仓库-->
<repositories>
<!--spring里程碑版本的仓库-->
<repository>
<id>repository.spring.milestone</id>
<name>Spring Milestone Repository</name>
<url>https://repo.spring.io/milestone</url>
</repository>
</repositories>
<!--依赖-->
<dependencies>
<!--spring context-->
<dependency>
<groupId>org.springframework</groupId>
<artifactId>spring-context</artifactId>
<version>6.0.0-M2</version>
</dependency>
<!--spring jdbc-->
<dependency>
<groupId>org.springframework</groupId>
<artifactId>spring-jdbc</artifactId>
<version>6.0.0-M2</version>
</dependency>
<!--mysql驱动-->
<dependency>
<groupId>mysql</groupId>
<artifactId>mysql-connector-java</artifactId>
<version>8.0.30</version>
</dependency>
<!--德鲁伊连接池-->
<dependency>
<groupId>com.alibaba</groupId>
<artifactId>druid</artifactId>
<version>1.2.13</version>
</dependency>
<!--@Resource注解-->
<dependency>
<groupId>jakarta.annotation</groupId>
<artifactId>jakarta.annotation-api</artifactId>
<version>2.1.1</version>
</dependency>
<!--junit-->
<dependency>
<groupId>junit</groupId>
<artifactId>junit</artifactId>
<version>4.13.2</version>
<scope>test</scope>
</dependency>
</dependencies>
<properties>
<maven.compiler.source>17</maven.compiler.source>
<maven.compiler.target>17</maven.compiler.target>
</properties>
</project>
事务场景:银行转账
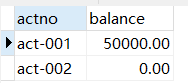
<?xml version="1.0" encoding="UTF-8"?>
<beans xmlns="http://www.springframework.org/schema/beans"
xmlns:xsi="http://www.w3.org/2001/XMLSchema-instance"
xmlns:context="http://www.springframework.org/schema/context"
xmlns:p="http://www.springframework.org/schema/p"
xsi:schemaLocation="http://www.springframework.org/schema/beans http://www.springframework.org/schema/beans/spring-beans.xsd
http://www.springframework.org/schema/context http://www.springframework.org/schema/context/spring-context.xsd">
<context:component-scan base-package="com.eun" />
<context:property-placeholder location="jdbc.properties" />
<bean id="dataSource" class="com.alibaba.druid.pool.DruidDataSource"
p:driverClassName="${jdbc.driver}" p:url="${jdbc.url}"
p:username="${jdbc.username}" p:password="${jdbc.password}" />
<bean id="jdbcTemplate" class="org.springframework.jdbc.core.JdbcTemplate"
p:dataSource-ref="dataSource"/>
</beans>
@Service("accountService")
public class AccountServiceImpl implements AccountService {
@Resource
private AccountDao accountDao;
@Override
public void transfer(String fromActno, String toActno, double money) {
Account fromAct = accountDao.selectByActno(fromActno);
if (fromAct.getBalance() < money){
throw new MoneyNotEnoughException("money not enough");
}
Account toAct = accountDao.selectByActno(toActno);
fromAct.setBalance(fromAct.getBalance() - money);
toAct.setBalance(toAct.getBalance() + money);
int count = accountDao.update(fromAct);
count += accountDao.update(toAct);
if (count != 2){
throw new UnknownException("unknown exception");
}
System.out.println("转账成功");
}
public void setAccountDao(AccountDao accountDao) {
this.accountDao = accountDao;
}
}
@Repository("accountDao")
public class AccountDaoImpl implements AccountDao {
@Resource
private JdbcTemplate jdbcTemplate;
@Override
public Account selectByActno(String actno) {
String sql = "select * from t_act where actno = ?";
Account account = jdbcTemplate.queryForObject(sql, new BeanPropertyRowMapper<>(Account.class), actno);
return account;
}
@Override
public int update(Account account) {
String sql = "update t_act set balance = ? where actno = ?";
int update = jdbcTemplate.update(sql, account.getBalance(), account.getActno());
return update;
}
}
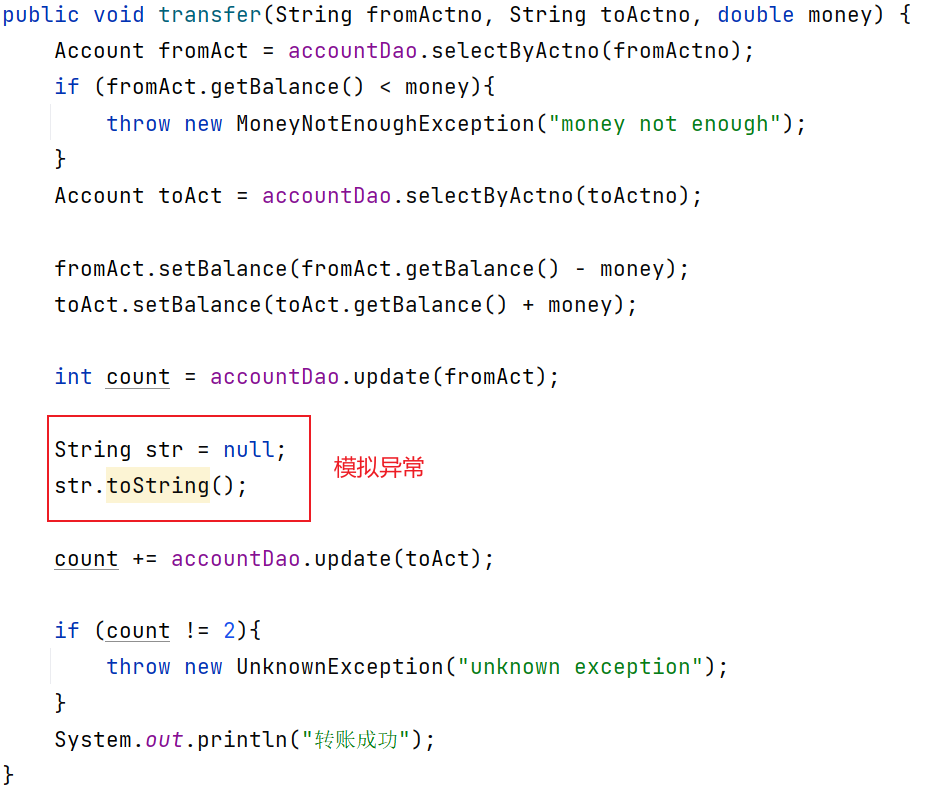
此时转出账户的钱就会丢失,解决:
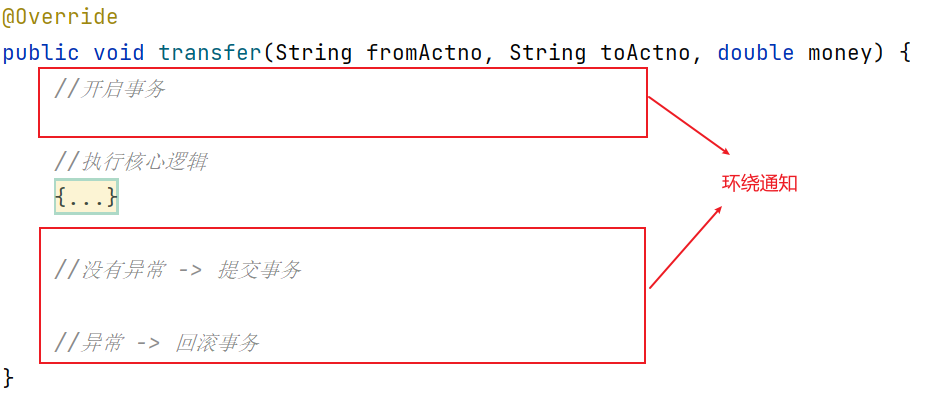
通知:
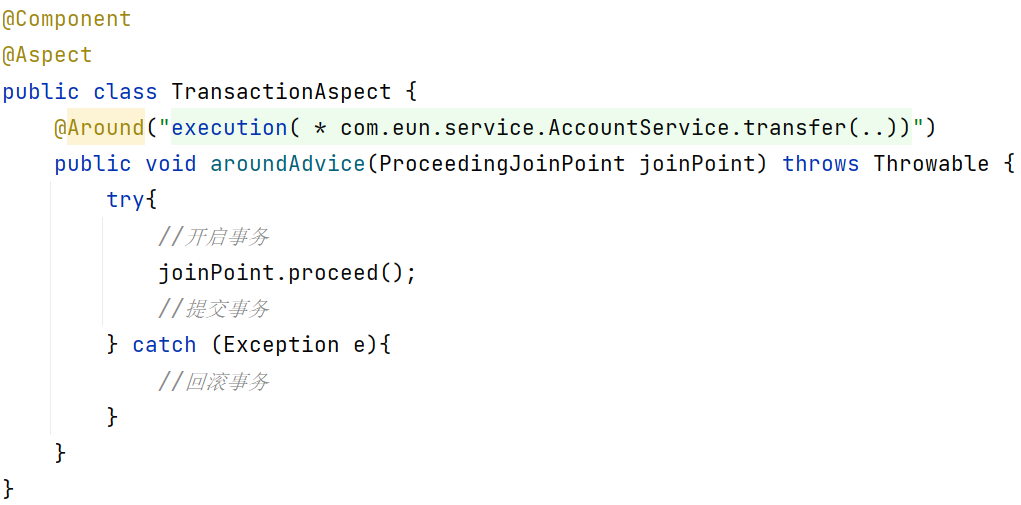
需要获取到事务对象,使用Spring对事务的封装
Spring实现事务的两种方式:
- 编程式事务
- 通过编写代码实现事务的管理
- 声明式事务
- 基于注解方式
- 基于XML方式
声明式事务
- 基于注解方式
- 基于XML注解方式
Spring对事务的管理底层实现方式是基于AOP实现的,采用AOP的方式进行了封装,所以Spring专门针对事务开发了一套API,API核心接口:
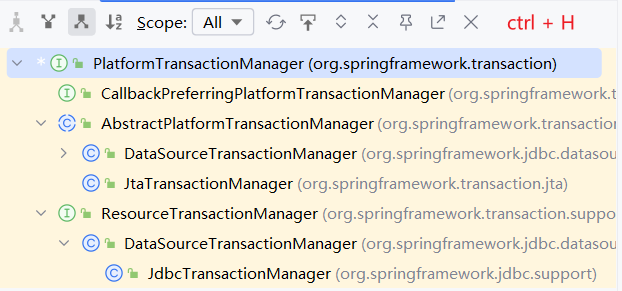
PlatformTransactionManager:spring事务管理器核心接口,Spring6中有两个实现:
DataSourceTransactionManager: 支持JdbcTemplate、Mybatis、Hibernate等事务管理,给其他ORM框架集成的机会JtaTransactionManager:支持分布式事务管理
如果要在Spring6中使用JdbcTemplate,就要使用DataSourceTransactionManager来管理事务
配置事务管理器:
<!--配置事务管理器-->
<bean id="transactionManager" class="org.springframework.jdbc.datasource.DataSourceTransactionManager"
p:dataSource-ref="dataSource"/>
事务管理本质上就是:
conn.setAutoCommit(false);
所以事务管理器需要获取到connection对象,数据源提供connection对象
<?xml version="1.0" encoding="UTF-8"?>
<beans xmlns="http://www.springframework.org/schema/beans"
xmlns:xsi="http://www.w3.org/2001/XMLSchema-instance"
xmlns:tx="http://www.springframework.org/schema/tx"
xsi:schemaLocation="http://www.springframework.org/schema/beans http://www.springframework.org/schema/beans/spring-beans.xsd
http://www.springframework.org/schema/tx http://www.springframework.org/schema/tx/spring-tx.xsd">
<!--配置事务管理器-->
<bean id="transactionManager" class="org.springframework.jdbc.datasource.DataSourceTransactionManager" p:dataSource-ref="dataSource"/>
<!--开启事务注解驱动器 使用注解方式控制事务-->
<tx:annotation-driven transaction-manager="transactionManager" />
</beans>
声明式事务的注解实现
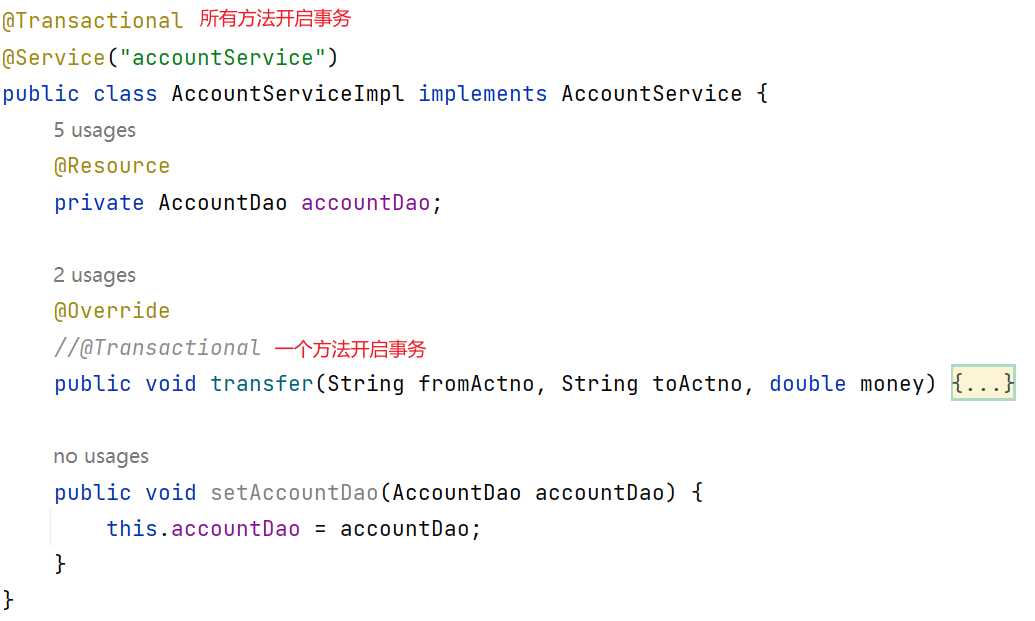
此时事务成功开启,在程序执行的过程中遇到异常就进行回滚:
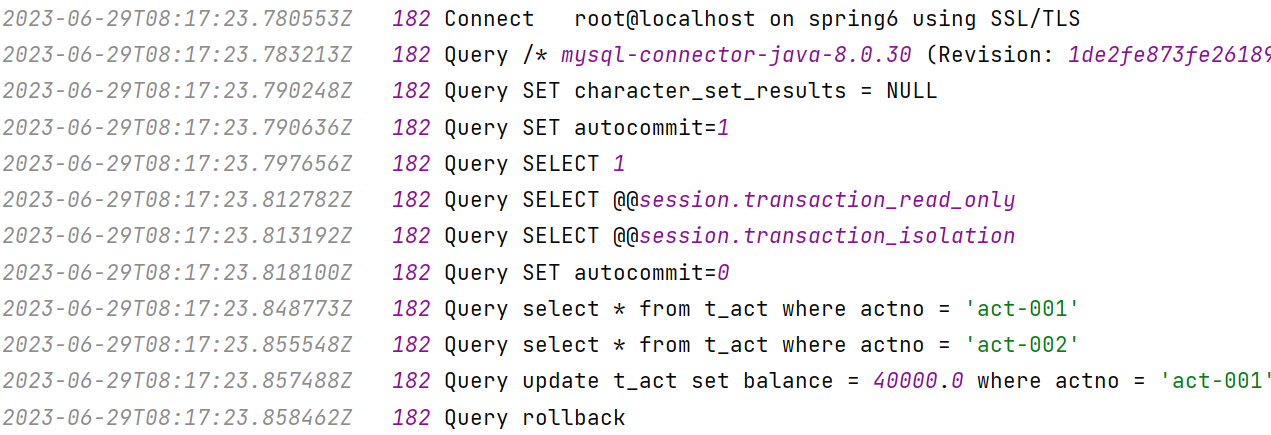
可以看到,第一条sql语句结束就发生了异常,直接进行了rollback
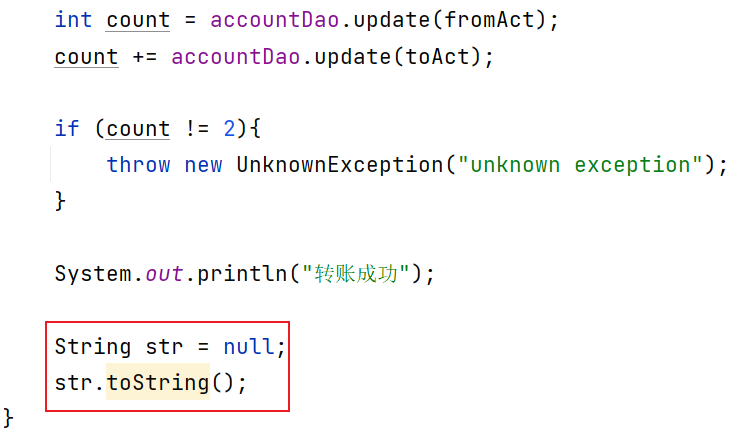
如果在转账成功之后发生了异常:

也是会进行回滚的,因为核心业务都被包含在代理对象的try之内,在任何时候发生异常都会被catch捕捉,进而回滚并上抛
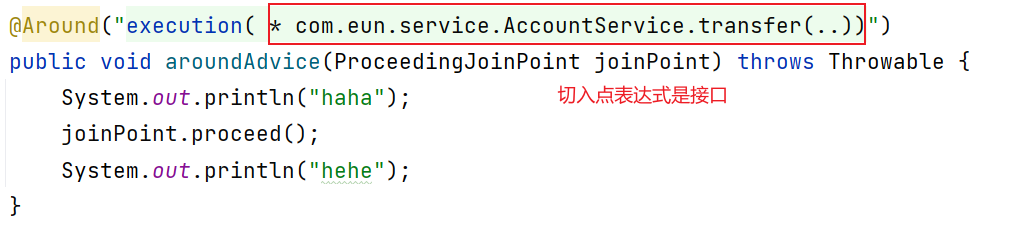
但是会织入具体的实现类:

@Transactional的属性
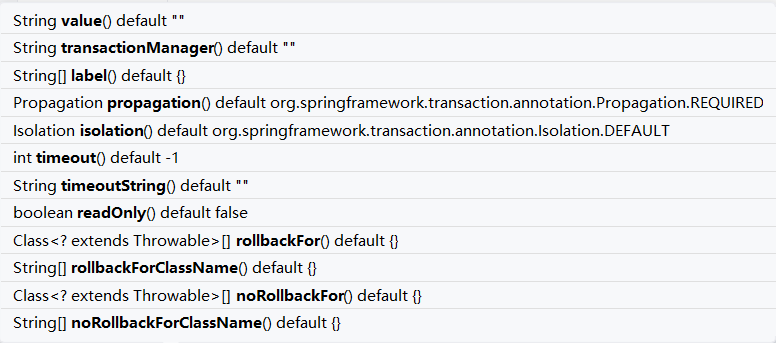
其中:
事务的传播行为
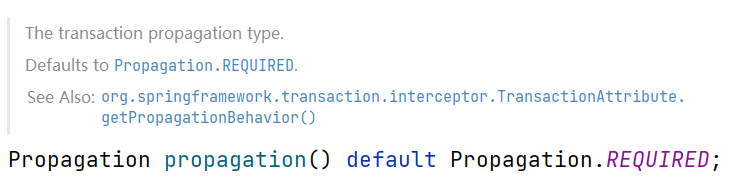
propagation是事务的传播行为:
在service类中有a()方法和b()方法,a()方法上有事务,b()方法上也有事务,当a()方法执行过程中调用了b()方法,事务是如何传递的?合并到一个事务里?还是开启一个新的事务?这就是事务传播行为。
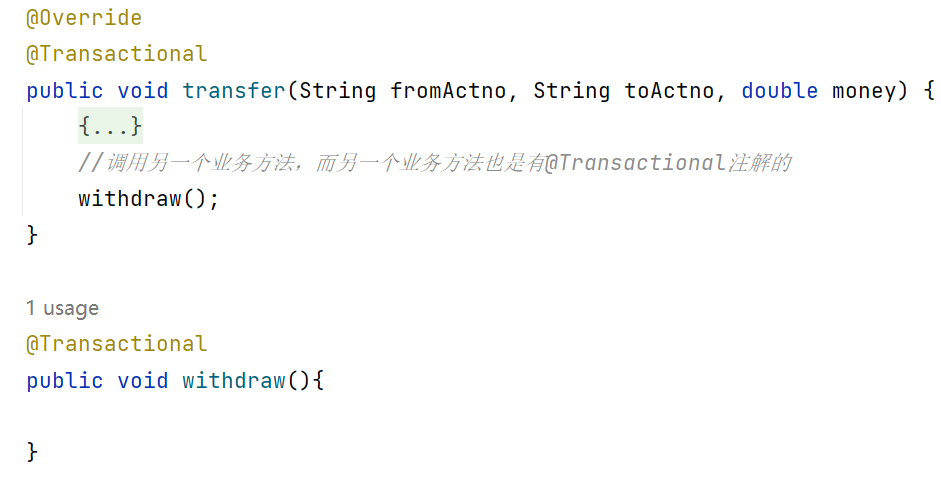
事务传播简介
有如下代码:
@Service
public class AService{
@Autowired
private BService bService;
public void order(){
yy();
bService.xx();
zz();
}
}
此时bService中的事务传播到了aService中,可能生成的SQL语句如下:
BEGIN:
update yy;
-------事务分界线-------
begin:
update xx;
commit;
----------------------
update zz;
COMMIT;
MYSQL是不支持的
但是这里很明显是存在问题的,第二个begin执行时,对同一个Connection调用begin(setAutoCommit)等方法,会开启一个新的事务,也就会隐式的将第一个事务直接提交,从而导致AService的部分事务失效
所以 B事务 传播到 A事务 中,B事务需要进行一些调整,无外乎以下几种情况:
- 当AService中有事务:
第一种情况:融入A事务(干掉B的事务),也就是保证两个事务同时成功或失败
形成的sql如下:
BEGIN:
update yy;
-------事务分界线-------
update xx;
----------------------
COMMIT;
融入外界事务:两个事务使用同一个Connection连接
第二种情况:挂起A事务,让B事务独立于A事务运行:不希望B的异常导致A回滚
需要两个Connection连接,A事务执行到B事务的代码时停止执行,从数据源中再获取一个Connection对象,执行B事务,B事务执行完毕触发之前的连接继续执行,两个连接各自做各自的事情,互不干涉;但是两个连接有同步的机制:B事务执行完后唤醒A事务
ThreadLocal<Thread,Connection>
//A执行到B的代码,将当前的Connection对象从ThreadLocal中拿出来,保存在某个地方
//再从DataSource中获取一个Connection,将这个Connection绑定当前线程,使用这个Connection继续执行B事务的代码
//执行完毕将原来的Connection替换ThreadLocal,继续执行A的代码
//实际上就是线程绑定的切换,实现了挂起和恢复的过程
第三种情况:嵌套事务
MySQL其实不支持嵌套事务,但是mybatis可以通过保存点模拟,通过设置保存点,将内部的事务转化为通过保存点和回滚至保存点,实现类似两个事务的操作
begin:
update ...;
SAVEPOINT a;
update ...;
update ...;
-- 以上代码出错会回滚至保存点
ROLLBACK to a;
-- 后续的事务不会受到影响
update ..
commit;
内部SAVEPOINT a后的代码如果有问题则直接回滚至保存点
整个事务的提交不受内部 伪事务 的影响
七种传播行为:
-
REQUIRED:B方法必须运行在事务中,如果外界存在事务,B方法融入外界事务,否则会启动一个新的事务 (原子性的查询)
-
SUPPORTS:如果外界有事务,就融入外界事务,如果没有事务就以非事务的方式运行(只读或查询)
-
MANDATORY(强制的):B必须在事务中运行,如果外界无事务就抛异常
-
REQUIRES_NEW:当前方法必须运行在它自己的事务中,一个新的事务被启动,挂起外界事务
-
NOT_SUPPORTED:当前方法不能运行在事务中;如果存在事务,挂起外界事务,非事务的方式运行当前方法(两个Connection的切换和同步)
-
NEVER:B必须在无事务的环境中运行,如果外界有事务就抛异常
-
NESTED:嵌套的,如果当前存在事务,B方法会在嵌套的事务中运行,嵌套事务可以独立于当前事务进行单独的提交或者回滚,如果当前事务不存在,行为与REQUIRED相同
测试REQUIRE:被调用方法必须运行在事务中;如果外界存在事务,B方法融入外界事务,否则会启动一个新的事务
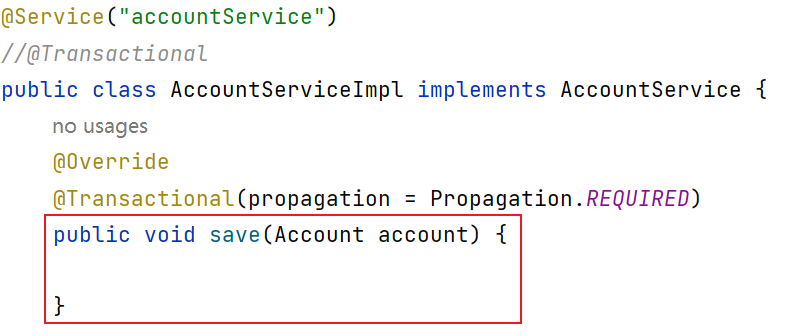

在Service中调用Service2的save方法

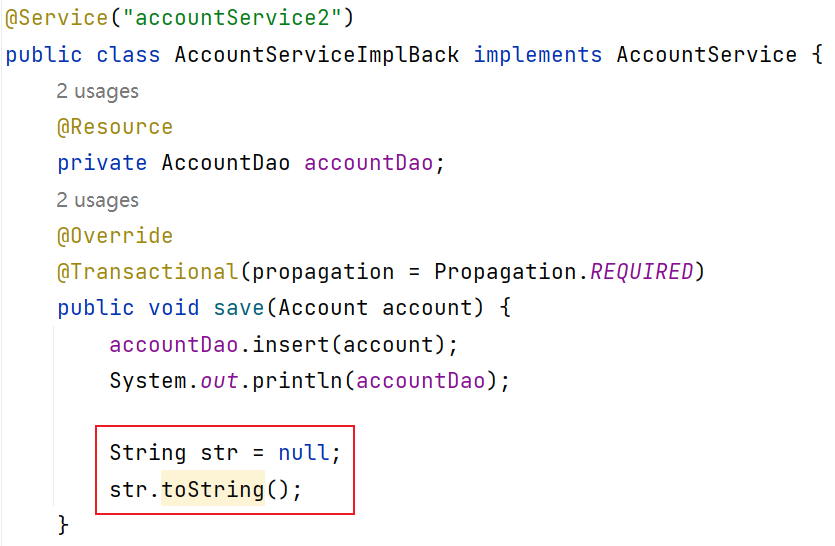
在service的save方法中保存act-003,调用service2的save方法,其中保存act-004
测试思路:如果service2的save方法出现异常,事务回滚是否会影响service的save方法中act-004的保存?
@Test
public void testSpringTx(){
ApplicationContext applicationContext = new ClassPathXmlApplicationContext("spring.xml");
AccountService accountService =
applicationContext.getBean("accountService", AccountService.class);
Account account = new Account("act-003", 100000.0);
accountService.save(account);
}
结果:

说明REQUIRE会将被调用的方法和上下文方法的事务合并
如果在上下文方法中调用service2的save方法之后输出内容:
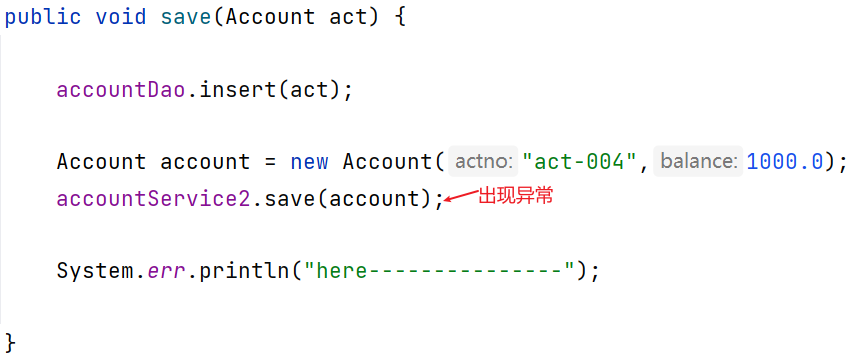
后面的内容并不会被输出,所以invoke中的内容应该是:
public void save(Account act){
Connection conn;
try{
accountDao.insert(act_1);
try{
accountDao.insert(act_2);
}catch(Exception e){
conn.commit();
throw e;
}
System.err.println("here---------------");
}catch(Exception e){
conn.commit();
throw e;
}
}
问题是:在第九行是否进行了commit?
可以在输出语句之前进行测试:
结果:
2023-08-12T19:15:52.505756Z 24 Query SET autocommit=0
2023-08-12T19:15:52.517993Z 24 Query insert into t_act values('act-003',0.0)
2023-08-12T19:15:52.520608Z 24 Query insert into t_act values('act-004',1000.0)
2023-08-12T19:15:52.521097Z 24 Query rollback
2023-08-12T19:15:52.521675Z 24 Query SET autocommit=1
说明在b事务的执行过程中一旦出现异常会立刻提交
思考1:
如果删除上下文方法的@Transactional(propagation = Propagation.*REQUIRED*),只保留被调方法的事务控制注解:

上下文方法没有开启事务,被调方法在单独的事务中运行
思考2:
在service的上下文方法中捕捉是否能避免事务回滚?
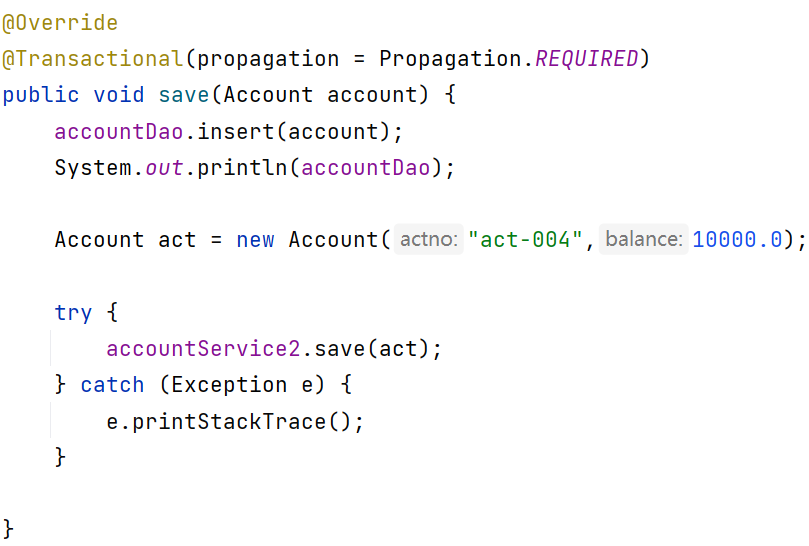
public void save(){
Connection conn;
try{
accountDao.insert(act_1);
//自行添加的try
try{
//service2的save方法
try{
accountDao.insert(act_2);
}catch(Exception e){
conn.commit();
throw e;
}
}catch(Exception e){
e.printStackTrace();
}
System.err.println("here---------------");
}catch(Exception e){
conn.commit();
throw e;
}
}
在service2的save方法中一旦出现异常就会立刻提交,但是外层的try会将异常捕捉,也就是在service中的save里调用save方法之后的内容还可以正常执行
如果在上文中21行后进行数据库操作,在内层try中的异常已经被18行捕捉,这次操作是否可以被commit?
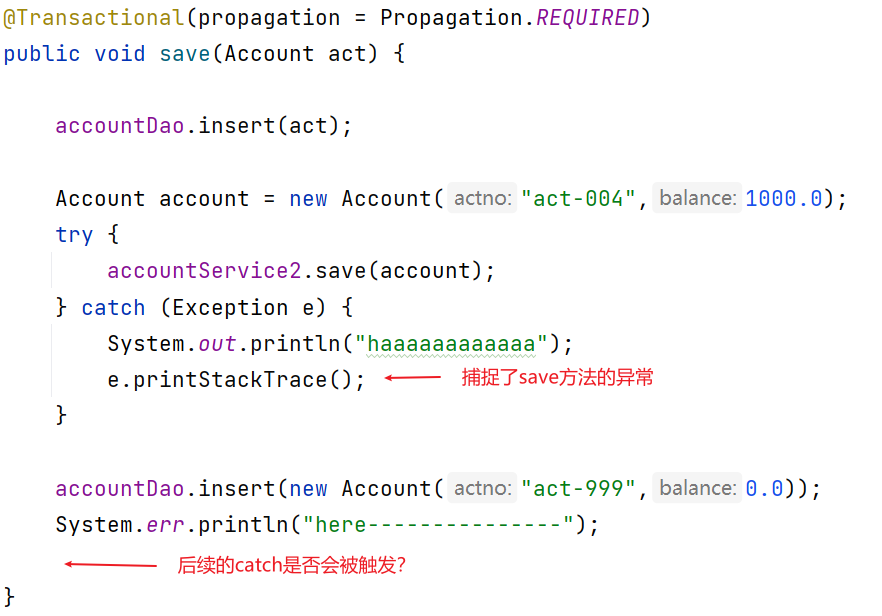
是会被触发的,报错信息:
org.springframework.transaction.UnexpectedRollbackException: Transaction rolled back because it has been marked as rollback-only
事务回滚因为已经被标记为只回滚
测试REQUIRE_NEW:开启新事务,将原事务挂起,不存在嵌套关系
没有异常时:
//调用service1的save方法
2023-06-29T11:39:00.303882Z 188 Query SET autocommit=1
2023-06-29T11:39:00.331996Z 188 Query SET autocommit=0
2023-06-29T11:39:00.348431Z 188 Query insert into t_act values('act-003',100000.0)
//调用service2的save方法,暂停当前的事务,开启新的事务
2023-06-29T11:39:00.365806Z 189 Query SET autocommit=1
2023-06-29T11:39:00.367289Z 189 Query SET autocommit=0
2023-06-29T11:39:00.371201Z 189 Query insert into t_act values('act-004',10000.0)
2023-06-29T11:39:00.371948Z 189 Query commit
2023-06-29T11:39:00.372975Z 189 Query SET autocommit=1
//提交、回滚、关闭后新事务执行完毕,执行原先的事务
2023-06-29T11:39:00.373614Z 188 Query commit
2023-06-29T11:39:00.374360Z 188 Query SET autocommit=1
2023-08-13 03:51:25 394 Creating new transaction with name
2023-08-13 03:51:25 436 INFO com.alibaba.druid.pool.DruidDataSource - {dataSource-1} inited
2023-08-13 03:51:25 732 Acquired Connection [com.mysql.cj.jdbc.ConnectionImpl@d2387c8] for JDBC transaction
2023-08-13 03:51:25 734 Switching JDBC Connection [com.mysql.cj.jdbc.ConnectionImpl@d2387c8] to manual commit
2023-08-13 03:51:25 735 Executing prepared SQL update
2023-08-13 03:51:25 736 Executing prepared SQL statement [insert into t_act values(?,?)]
2023-08-13 03:51:25 748 Suspending current transaction, creating new transaction with name [com.eun.spring.service.impl.AccountServiceImpl2.save]
2023-08-13 03:51:25 765 Acquired Connection [com.mysql.cj.jdbc.ConnectionImpl@78dc4696] for JDBC transaction
2023-08-13 03:51:25 766 Switching JDBC Connection [com.mysql.cj.jdbc.ConnectionImpl@78dc4696] to manual commit
2023-08-13 03:51:25 766 Executing prepared SQL update
2023-08-13 03:51:25 766 Executing prepared SQL statement [insert into t_act values(?,?)]
2023-08-13 03:51:25 767 Initiating transaction commit
2023-08-13 03:51:25 767 Committing JDBC transaction on Connection [com.mysql.cj.jdbc.ConnectionImpl@78dc4696]
2023-08-13 03:51:25 779 Releasing JDBC Connection [com.mysql.cj.jdbc.ConnectionImpl@78dc4696] after transaction
2023-08-13 03:51:25 779 Resuming suspended transaction after completion of inner transaction
here---------------
2023-08-13 03:51:25 780 Initiating transaction commit
2023-08-13 03:51:25 780 Committing JDBC transaction on Connection [com.mysql.cj.jdbc.ConnectionImpl@d2387c8]
2023-08-13 03:51:25 781 Releasing JDBC Connection [com.mysql.cj.jdbc.ConnectionImpl@d2387c8] after transaction
如果出现异常:
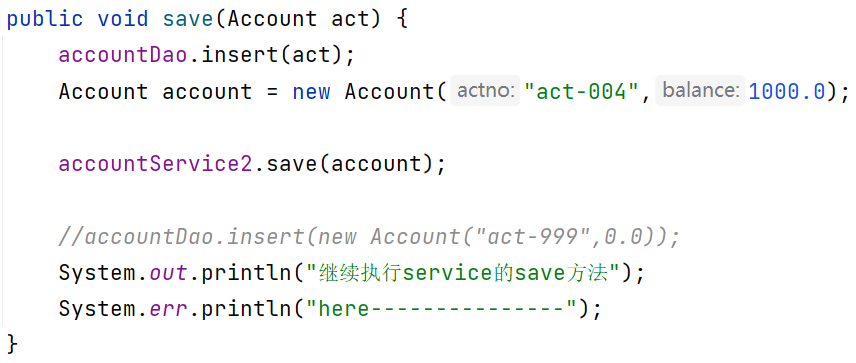

在service2的save方法中出现异常,理应不应该影响service的save提交,但是两个事务都会回滚:
2023-08-12T20:00:55.020219Z 40 Query SET autocommit=0
2023-08-12T20:00:55.032610Z 40 Query insert into t_act values('act-003',0.0)
2023-08-12T20:00:55.049942Z 41 Query SET autocommit=0
2023-08-12T20:00:55.050511Z 41 Query insert into t_act values('act-004',1000.0)
2023-08-12T20:00:55.051224Z 41 Query rollback
2023-08-12T20:00:55.051686Z 41 Query SET autocommit=1
2023-08-12T20:00:55.052561Z 40 Query rollback
2023-08-12T20:00:55.062901Z 40 Query SET autocommit=1
Creating new transaction with name [com.eun.spring.service.impl.AccountServiceImpl.save]: PROPAGATION_REQUIRED,ISOLATION_DEFAULT
{dataSource-1} inited
Acquired Connection [com.mysql.cj.jdbc.ConnectionImpl@3003697] for JDBC transaction
Switching JDBC Connection [com.mysql.cj.jdbc.ConnectionImpl@3003697] to manual commit
Executing prepared SQL update
Executing prepared SQL statement [insert into t_act values(?,?)]
Suspending current transaction, creating new transaction with name [com.eun.spring.service.impl.AccountServiceImpl2.save]
Acquired Connection [com.mysql.cj.jdbc.ConnectionImpl@7dc51783] for JDBC transaction
Switching JDBC Connection [com.mysql.cj.jdbc.ConnectionImpl@7dc51783] to manual commit
Executing prepared SQL update
Executing prepared SQL statement [insert into t_act values(?,?)]
Initiating transaction rollback
Rolling back JDBC transaction on Connection [com.mysql.cj.jdbc.ConnectionImpl@7dc51783]
Releasing JDBC Connection [com.mysql.cj.jdbc.ConnectionImpl@7dc51783] after transaction
Resuming suspended transaction after completion of inner transaction
Initiating transaction rollback
Rolling back JDBC transaction on Connection [com.mysql.cj.jdbc.ConnectionImpl@3003697]
Releasing JDBC Connection [com.mysql.cj.jdbc.ConnectionImpl@3003697] after transaction
因为service2的save方法的异常上抛到了service的save方法中,如果在service的save方法中捕捉就不会影响本方法的提交:
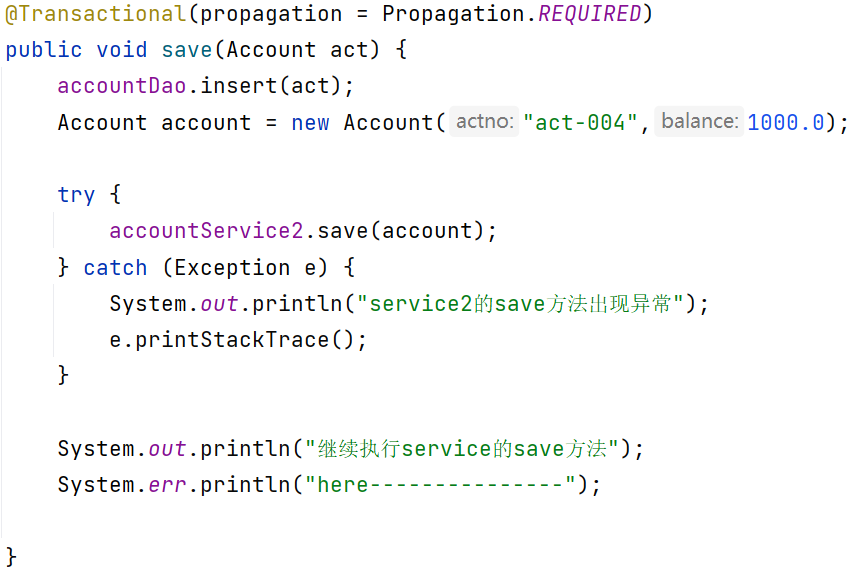
2023-08-12T20:25:39.852814Z 42 Query SET autocommit=0
2023-08-12T20:25:39.864387Z 42 Query insert into t_act values('act-003',0.0)
2023-08-12T20:25:39.882583Z 43 Query SET autocommit=0
2023-08-12T20:25:39.883186Z 43 Query insert into t_act values('act-004',1000.0)
2023-08-12T20:25:39.883930Z 43 Query rollback
2023-08-12T20:25:39.884430Z 43 Query SET autocommit=1
2023-08-12T20:25:39.886346Z 42 Query commit
2023-08-12T20:25:39.897324Z 42 Query SET autocommit=1
事务的隔离级别 Isolation
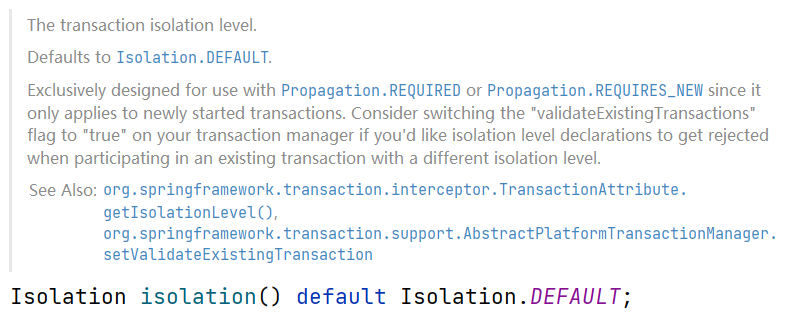
防止事务A和事务B的互相干扰,两个事务访问同一张表类似于多线程并发访问临界资源
数据库读取数据的三大问题:
- 脏读:读取到没有提交到数据库的数据(缓存中的数据)
- 不可重复读:同一个事务中,第一次和第二次读取的数据不同
- 幻读:读到的数据是假的
public enum Isolation {
DEFAULT(TransactionDefinition.ISOLATION_DEFAULT),
//读未提交 最低级别
READ_UNCOMMITTED(TransactionDefinition.ISOLATION_READ_UNCOMMITTED),
//二级:读已提交(Oracle的默认级别)
READ_COMMITTED(TransactionDefinition.ISOLATION_READ_COMMITTED),
//可重复读(MySQL的默认级别)
REPEATABLE_READ(TransactionDefinition.ISOLATION_REPEATABLE_READ),
//序列化 最高级别
SERIALIZABLE(TransactionDefinition.ISOLATION_SERIALIZABLE);
}
事务隔离级别包含四个:
READ_UNCOMMITTED:读未提交- 存在脏读(dirty read)问题,脏读:能够读取到其他事务未提交的数据
READ_COMMITTED:读已提交- 解决了脏读问题,其他事务提交之后才能读到,存在不可重复读的问题(其他事务多次提交就会不可重复)
REPEATABLE_READ:可重复读- 解决了不可重复读,达到可重复读效果,只要当前事务不结束,读取到的数据都是一样的,但是存在幻读问题
SERIALIZABLE:序列化- 解决了幻读问题,事务排队执行,不支持并发
| 隔离级别 | 脏读 | 不可重复读 | 幻读 |
|---|---|---|---|
| 读未提交 | 有 | 有 | 有 |
| 读提交 | 无 | 有 | 有 |
| 可重复读 | 无 | 无 | 有 |
| 序列化 | 无 | 无 | 无 |
读未提交问题:
Iso1的事务查询,Iso2的事务提交;需要保证Iso2的事务提交在在Iso1执行完毕之后执行:
Iso2 -> 事务开启
Iso2 -> insert(Account);
Iso1 -> 查询
Iso2 -> 提交
这样才能确保读到未提交的数据:
@Service("iso2")
public class IsolationService2 {
@Resource
private AccountDao accountDao;
@Transactional
public void save(Account account) throws Exception {
accountDao.insert(account);
Thread.sleep(1000 * 20); // 保证iso1读到的是未提交的数据
}
}
@Service("iso1")
public class IsolationService1 {
@Resource
private AccountDao accountDao;
//iso1 查询
@Transactional(isolation = Isolation.READ_UNCOMMITTED)
public void getByActno(String actno){
Account account = accountDao.selectByActno(actno);
System.out.println("查询到的账户信息:" + account);
}
}
@Test //先执行
public void isolation1Test() throws Exception {
ApplicationContext applicationContext = new ClassPathXmlApplicationContext("spring.xml");
IsolationService2 iso2 = applicationContext.getBean("iso2", IsolationService2.class);
iso2.save(new Account("act-999",0.0));
}
@Test
public void isolation2Test() throws Exception {
ApplicationContext applicationContext = new ClassPathXmlApplicationContext("spring.xml");
IsolationService1 iso1 = applicationContext.getBean("iso1", IsolationService1.class);
iso1.getByActno("act-999"); //查询到的账户信息:Account{actno = act-999, balance = 0.0}
}
如果改为读提交:

就无法读取到iso1的数据了,但是在以上方法中account会被赋值null吗?
org.springframework.dao.EmptyResultDataAccessException: Incorrect result size: expected 1, actual 0
JdbcTemplate会直接报错:希望查到一条记录,但是没有查到
事务超时
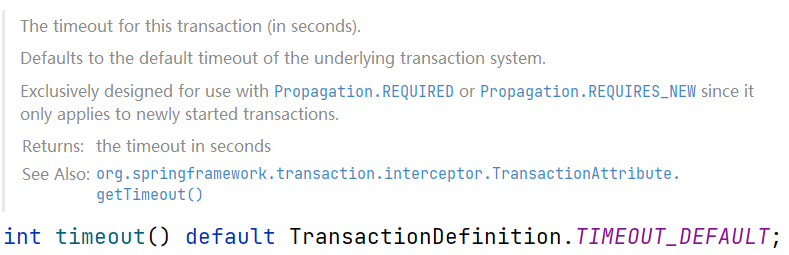
timeout 事务的超时时间,默认值-1
@Transactional(timeout = 10)
意思是:如果超过10s该事务的所有DML语句没有执行完毕的话,最终结果进行回滚
注意:事务的超时时间指的是:在当前事务中,最后一条DML语句执行之前的时间。如果最后一条DML语句后面有很多业务逻辑,这些业务代码的执行时机不计入超时时间。
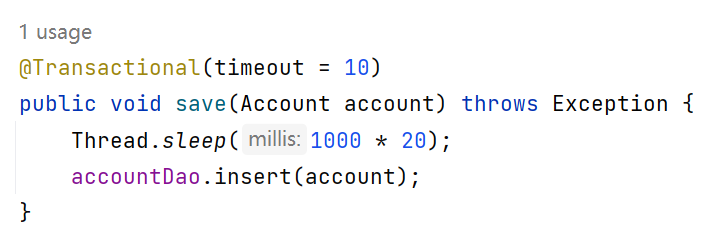
在insert执行之前sleep20s,超过了timeout = 10,会进行回滚
超时会报错:
org.springframework.transaction.TransactionTimedOutException: Transaction timed out: deadline was Sun Aug 13 05:14:56 CST 2023
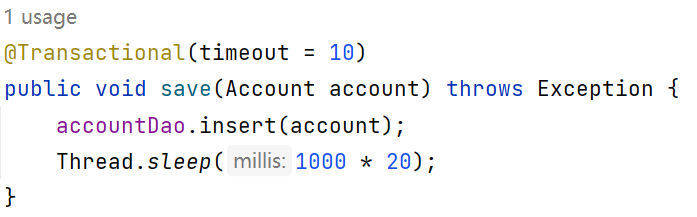
在最后一条DML语句之后sleep,不计入超时时间,不会回滚
如果想把service中某一个方法的所有时间都纳入超时时间,可以在方法最后加一个无关紧要的DML语句
只读事务
@Transactional(readOnly = true)
该事务执行的过程中只允许select语句的执行,其他语句不能执行(Connection is read-only)
可以启动spring的优化策略,提高select语句的执行效率
设置某些异常回滚事务
@Transactional(rollbackFor = RuntimeException.class)
只要发生RuntimeException及其子类异常都进行回滚,发生IO异常就不会回滚
Spring默认只回滚RuntimeException,如果想回滚全部异常需要手动指定Exception.class
设置某些异常不回滚事务
@Transactional(noRollbackFor = RuntimeException.class)
事务的全注解开发
当前的配置文件:
<context:component-scan base-package="com.eun.spring" />
<aop:aspectj-autoproxy />
<context:property-placeholder location="jdbc.properties" />
<bean id="dataSource" class="com.alibaba.druid.pool.DruidDataSource" >
<property name="driverClassName" value="${jdbc.driver}" />
<property name="url" value="${jdbc.url}" />
<property name="username" value="${jdbc.username}" />
<property name="password" value="${jdbc.password}" />
</bean>
<bean id="jdbcTemplate" class="org.springframework.jdbc.core.JdbcTemplate" >
<property name="dataSource" ref="dataSource" />
</bean>
<!--配置事务管理器-->
<bean id="transactionManager" class="org.springframework.jdbc.datasource.DataSourceTransactionManager" >
<property name="dataSource" ref="dataSource" />
</bean>
<!--开启事务注解驱动器 使用注解方式控制事务-->
<tx:annotation-driven transaction-manager="transactionManager" />
@Configuration
@ComponentScan("com.eun.spring")
//开启注解驱动器
@EnableTransactionManagement()
public class SpringConfig {
//spring扫描到bean注解后会调用这个方法,将返回值纳入IoC容器管理
//返回的对象就是一个bean
@Bean("dataSource")
public DruidDataSource getDruidDataSource() throws IOException {
DruidDataSource druidDataSource = new DruidDataSource();
/* Properties properties = new Properties();
properties.load(ClassLoader.getSystemResourceAsStream("jdbc.properties"));
druidDataSource.configFromPropety(properties);*/
druidDataSource.setDriverClassName("com.mysql.cj.jdbc.Driver");
druidDataSource.setUrl("jdbc:mysql://localhost:3306/spring6");
druidDataSource.setUsername("root");
druidDataSource.setPassword("");
return druidDataSource;
}
@Bean("jdbcTemplate")
public JdbcTemplate getJdbcTemplate(DataSource dataSource){
//可以手动调用getDruidDataSource()方法,但是一般会使用参数,自动会注入
return new JdbcTemplate(dataSource);
}
@Bean("transactionManager")
public DataSourceTransactionManager getDataSourceTransactionManager(DataSource dataSource){
return new DataSourceTransactionManager(dataSource);
}
}
事务的XML实现
-
配置事务管理器
-
配置通知
因为不需要配置事务注解驱动器,就需要手动配置通知
-
配置切面
还需要添加aspectj依赖
<!--配置事务管理器-->
<bean id="transactionManager" class="org.springframework.jdbc.datasource.DataSourceTransactionManager" >
<property name="dataSource" ref="dataSource" />
</bean>
<!--配置通知-->
<tx:advice id="txAdvice" >
<!--配置通知的属性-->
<tx:attributes>
<tx:method name="transfer" propagation="REQUIRED" isolation="READ_COMMITTED"/>
</tx:attributes>
</tx:advice>
<!--配置切面-->
<aop:config >
<!--切点-->
<aop:pointcut id="txPointCut" expression="execution(* com.eun.spring..*(..))"/>
<!--切面-->
<aop:advisor advice-ref="txAdvice" pointcut-ref="txPointCut" />
</aop:config>
Spring6整合JUnit5
之前我们使用的都是JUnit4.13.2,并没有使用Spring对Junit的支持;Spring底层有一套API支持单元测试
spring对JUnit4的支持
<dependencies>
<!--spring context依赖-->
<dependency>
<groupId>org.springframework</groupId>
<artifactId>spring-context</artifactId>
<version>6.0.0-M2</version>
</dependency>
<!--spring对junit的支持相关依赖-->
<dependency>
<groupId>org.springframework</groupId>
<artifactId>spring-test</artifactId>
<version>6.0.0</version>
</dependency>
<!--junit4依赖-->
<dependency>
<groupId>junit</groupId>
<artifactId>junit</artifactId>
<version>4.13.2</version>
<scope>test</scope>
</dependency>
</dependencies>
之前的方式:
public class SpringJunit4Test {
@Test
public void testUser(){
ApplicationContext applicationContext = new ClassPathXmlApplicationContext("spring.xml");
User bean = applicationContext.getBean(User.class);
System.out.println(bean);
}
}
使用注解:
//junit框架的api
@RunWith(SpringJUnit4ClassRunner.class)
//context包下,加载配置文件
@ContextConfiguration("classpath:spring.xml")
就会以注解方式加载Spring容器,不需要每次new .... ,并且可以将User作为属性注入:
//junit框架的api
@RunWith(SpringJUnit4ClassRunner.class)
//context包下,加载配置文件
@ContextConfiguration("classpath:spring.xml")
public class SpringJunit4Test {
@Autowired
private User user;
@Test
public void testUser(){
System.out.println(user);
}
}
但是注意要保持版本一致
spring对JUnit5的支持
<dependencies>
<!--spring context依赖-->
<dependency>
<groupId>org.springframework</groupId>
<artifactId>spring-context</artifactId>
<version>6.0.0</version>
</dependency>
<!--spring对junit的支持相关依赖-->
<dependency>
<groupId>org.springframework</groupId>
<artifactId>spring-test</artifactId>
<version>6.0.0</version>
</dependency>
<!--junit5依赖-->
<dependency>
<groupId>org.junit.jupiter</groupId>
<artifactId>junit-jupiter</artifactId>
<version>5.9.0</version>
<scope>test</scope>
</dependency>
</dependencies>
@ExtendWith(SpringExtension.class)
@ContextConfiguration("classpath:spring.xml")
public class SpringJUnit5Test {
@Autowired
private User user;
@Test
public void testUser(){
System.out.println(user);
}
}
Spring集成Mybatis3.5
-
准备数据库表 t_act
-
创建模块,引入依赖
- spring-context
- spring-jdbc(关联引入事务)
- mysql
- mybatis
- mybatis-spring:mybatis提供的是与spring框架集成的依赖
- Druid
- junit
-
基于三层架构建包
-
pojo类
-
mapper接口
-
mapper配置文件
-
service接口及其实现类
-
jdbc.properties配置文件
-
mybatis-config.xml配置文件
可以没有,大部分配置文件可以转移到spring的配置文件中;但是mybatis系统级的配置还需要这个文件
<?xml version="1.0" encoding="UTF-8" ?> <!DOCTYPE configuration PUBLIC "-//mybatis.org//DTD Config 3.0//EN" "http://mybatis.org/dtd/mybatis-3-config.dtd"> <configuration> <settings> <setting name="logImpl" value="STDOUT_LOGGING"/> </settings> </configuration>环境、扫描mapper相关的配置都转移到spring中了
-
spring.xml
组件扫描、外部属性文件、数据源
SqlSessionFactoryBean配置:注入mybatis核心配置文件路径、指定别名包、注入数据源
Mapper扫描配置器:扫描mapper下的接口
DataSourceTransactionManager、启动事务注解
<?xml version="1.0" encoding="UTF-8"?> <beans xmlns="http://www.springframework.org/schema/beans" xmlns:xsi="http://www.w3.org/2001/XMLSchema-instance" xmlns:context="http://www.springframework.org/schema/context" xmlns:tx="http://www.springframework.org/schema/tx" xsi:schemaLocation="http://www.springframework.org/schema/beans http://www.springframework.org/schema/beans/spring-beans.xsd http://www.springframework.org/schema/context https://www.springframework.org/schema/context/spring-context.xsd http://www.springframework.org/schema/tx http://www.springframework.org/schema/tx/spring-tx.xsd"> <context:component-scan base-package="com.eun.bank" /> <context:property-placeholder location="jdbc.properties" /> <bean id="dataSource" class="com.alibaba.druid.pool.DruidDataSource" > <property name="driverClassName" value="${jdbc.driver}" /> <property name="url" value="${jdbc.url}" /> <property name="username" value="${jdbc.username}" /> <property name="password" value="${jdbc.password}" /> </bean> <!--配置SqlSessionFactoryBean--> <bean class="org.mybatis.spring.SqlSessionFactoryBean" > <!--注入数据源--> <property name="dataSource" ref="dataSource" /> <!--指定mybatis核心配置文件--> <property name="configLocation" value="mybatis-config.xml" /> <!--指定别名--> <property name="typeAliasesPackage" value="com.eun.bank.pojo" /> </bean> <!--Mapper扫描配置器--> <bean class="org.mybatis.spring.mapper.MapperScannerConfigurer" > <property name="basePackage" value="com.eun.bank.mapper" /> </bean> <bean id="transactionManager" class="org.springframework.jdbc.datasource.DataSourceTransactionManager" > <property name="dataSource" ref="dataSource" /> </bean> <!--事务注解扫描驱动器--> <tx:annotation-driven transaction-manager="transactionManager" /> </beans> -
测试
spring主配置文件引入子配置文件
定义一个子配置文件,内容为组件扫描:
<?xml version="1.0" encoding="UTF-8"?>
<beans xmlns="http://www.springframework.org/schema/beans"
xmlns:xsi="http://www.w3.org/2001/XMLSchema-instance"
xmlns:context="http://www.springframework.org/schema/context"
xsi:schemaLocation="http://www.springframework.org/schema/beans http://www.springframework.org/schema/beans/spring-beans.xsd http://www.springframework.org/schema/context https://www.springframework.org/schema/context/spring-context.xsd">
<context:component-scan base-package="com.eun.bank" />
</beans>
在主配置文件中直接使用import导入就可以了:
<import resource="common.xml" />
Spring的八大设计模式
简单工厂模式
BeanFactory的getBean方法,通过唯一标识获取Bean,是典型的简单工厂模式(静态工厂模式)
工厂方法模式
FactoryBean是工厂方法模式,在配置文件中通过factory-method指定工厂方法,该方法是一个实例方法
单例模式
spring解决循环依赖的getSingleton方法
装饰器模式
JavaSE的IO流就是非常典型的装饰器模式。Spring中配置DataSource的时候,这些dataSource可能是各种不同类型的,比如不同的数据库:Oracle、SQL Server、MySQL等,也可能是不同的数据源:比如apache提供的org.apache.commons.dhcp.BasicDataSource,spring提供的org.springframework.jndi.JndiObjectFactoryBean等
装饰器模式可以在尽可能少的修改原有类代码的情况下动态的切换不同的数据源;Spring根据每次请求的不同,将dataSource设置成不同的数据源,以达到切换不同数据源的目的。
Spring中类名带有:Decorator和Wrapper单词的类,都是装饰器模式
观察者模式
定义对象间的一对多的关系,当一个对象的状态发生改变时,所有依赖于它的对象都得到通知并自动更新。spring中观察者模式一般用在listener的实现。
Spring中的事件编程模式就是观察者模式的实现,在spring中定义一个ApplicationListener接口,用来监听Application的事件,Application其实就是ApplicationContext,ApplicationContext中内置了几个事件,比较容易理解的是:ContextRefreshedEvent、ContextStartedEvent、ContextStoppedEvent、ContextClosedEvent
策略模式
策略模式是行为型模式,调用不同的方法,适应行为的变化,强调父类的调用子类的特性
getHandler是HandlerMappering接口的唯一的方法,用于根据请求找到匹配的处理器
比如我们自己写了AccountDao接口,这个接口下有不同的实现类:AccountDaoForMySQL,AccountDaoForOracle。对于Service来说不需要关心具体底层的实现,只需要面向AccountDAO接口调用不同的实现类,底层可以灵活切换,这就是策略模式
模板方法模式
Spring中的JdbcTemplate类就是一个模板类,就是模板方法设计模式的具体体现,在模板类的模板方法execute中编写核心算法,具体的实现步骤在l
AOT
-
JIT:Just In Time 动态编译、实时编译,一边运行一遍进行编译;目前默认使用JIT;程序运行时,进行JIT动态编译,吞吐量高,可以动态生成代码;但是启动很慢,编译时需要占用运行时资源
-
AOT:Ahead Of Time 运行前编译、提前编译,AOT可以将源代码直接转换为机器码,运行时直接启动,启动速度快、内存占用低;运行时不能进行优化,安装时间长
JIT在程序运行过程中将字节码文件转换为机器码并部署到环境;AOT在程序运行之前将字节码转换为机器码
.java -> .class -> (jaotc编译工具) -> .so(程序函数库)

 浙公网安备 33010602011771号