redis 版本升级数据迁移使用Redis-Shake
RedisShake是一款开源的Redis迁移工具,支持Cluster集群的在线迁移与离线迁移(备份文件导入)。DCS Cluster集群与Redis Cluster集群设计一致,数据可平滑迁移。
本文以Linux系统环境为例,介绍如何使用Redis-Shake工具进行Cluster集群数据迁移
在线迁移
在线迁移主要适用于自建Redis Cluster集群迁移到DCS Cluster集群的场景,且两端集群实例能够网络连通,或者有一台中转服务器能够连通两端集群实例。
部署在其他云厂商Redis服务上的Cluster集群数据,由于SYNC、PSYNC命令被云厂商禁用,暂不支持在线迁移。
1,创建redis-cluster集群实例.详情见上一章。
注意集群的内存规格不能小于源端Cluster集群
2,准备迁移包
wget https://github.com/alibaba/RedisShake/releases/download/release-v2.0.3-20200724/redis-shake-v2.0.3.tar.gz
tar xf redis-shake-v2.0.3.tar.gz
cd redis-shake-v2.0.3
3,修改配置
在线迁移需要将各个节点数据分别迁移。使用如下命令查询源和目标Cluster集群的所有节点的IP地址与端口:
redis-cli -h {redis_address} -p {redis_port} -a {redis_password} cluster nodes
vim redis-shake.conf
# log file,日志文件,不配置将打印到stdout (e.g. /var/log/redis-shake.log )
log.file = /home/ap/cloudapp/redis/dump/redis-shake-v2.0.3/log/redis-shake.log
# pid path,进程文件存储地址(e.g. /var/run/),不配置将默认输出到执行下面,
# 注意这个是目录,真正的pid是`{pid_path}/{id}.pid`
pid_path = /home/ap/cloudapp/redis/dump/redis-shake-v2.0.3/log
# 源端redis的类型,支持standalone,sentinel,cluster和proxy四种模式,注意:目前proxy只用于rump模式。
source.type = cluster
# 架构,比如codis, twemproxy, aliyun proxy等需要配置所有master或者slave的db地址。
source.address = 10.10.202.190:7005;10.10.202.190:7006;10.10.202.190:7004
# password of db/proxy. even if type is sentinel.
source.password_raw = Lining123
# 目的redis的类型,支持standalone,sentinel,cluster和proxy四种模式。
target.type = cluster
target.address = 10.10.202.151:7001;10.10.202.151:7002;10.10.202.151:7003
# password of db/proxy. even if type is sentinel.
target.password_raw =
# rewrite表示源端覆盖目的端。
# none表示一旦发生进程直接退出。
# ignore表示保留目的端key,忽略源端的同步key。该值在rump模式下没有用。
key_exists = rewrite
4,执行同步 ,建议同步时停止业务
./redis-shake.linux -conf=redis-shake.conf -type=sync
在打开一个窗口执行
tailf -100 /home/ap/cloudapp/redis/dump/redis-shake-v2.0.3/log/redis-shake.log
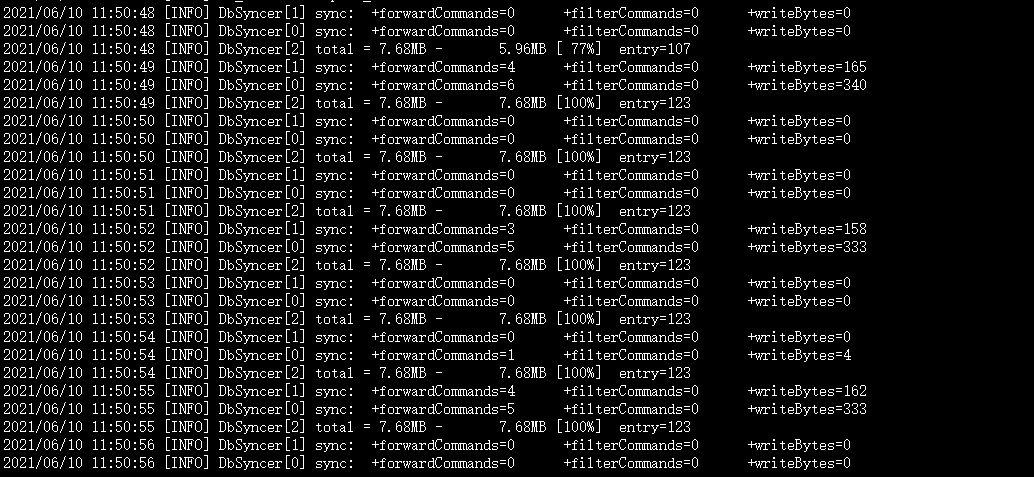
DbSyncer[1] sync: +forwardCommands=0 +filterCommands=0 +writeBytes=0 # 代表同步完成
DbSyncer[2] total = 7.68MB - 7.68MB [100%] entry=133 #代表有数据写入

5, redis 替换线上redis
1,A 服务器修改nodes把新的集群地址IP改为旧的集群IP 注意集群master和slave
find /home/ap/cloudapp/redis/conf -name "nodes.conf"|xargs sed -i '/7001@/s#10.10.202.151#10.10.206.144#g'
find /home/ap/cloudapp/redis/conf -name "nodes.conf"|xargs sed -i '/7002@/s#10.10.202.151#10.10.206.144#g'
find /home/ap/cloudapp/redis/conf -name "nodes.conf"|xargs sed -i '/7003@/s#10.10.202.151#10.10.206.144#g'
2,A服务器修改bind
find /home/ap/cloudapp/redis/conf/7001 -name "redis_*.conf"|xargs sed -i 's#10.10.202.151#10.10.206.144#g'
find /home/ap/cloudapp/redis/conf/7002 -name "redis_*.conf"|xargs sed -i 's#10.10.202.151#10.10.206.144#g'
find /home/ap/cloudapp/redis/conf/7003 -name "redis_*.conf"|xargs sed -i 's#10.10.202.151#10.10.206.144#g'
3,B服务器修改nodes把新的集群地址IP改为旧的集群IP 注意集群master和slave
find /home/ap/cloudapp/redis/conf -name "nodes.conf"|xargs sed -i '/7004@/s#10.10.202.151#10.10.202.190#g'
find /home/ap/cloudapp/redis/conf -name "nodes.conf"|xargs sed -i '/7005@/s#10.10.202.151#10.10.202.190#g'
find /home/ap/cloudapp/redis/conf -name "nodes.conf"|xargs sed -i '/7006@/s#10.10.202.151#10.10.202.190#g'
4,B服务器修改nodes把新的集群地址IP改为旧的集群IP 注意集群master和slave
find /home/ap/cloudapp/redis/conf/7004 -name "redis_*.conf"|xargs sed -i 's#10.10.202.151#10.10.202.190#g'
find /home/ap/cloudapp/redis/conf/7005 -name "redis_*.conf"|xargs sed -i 's#10.10.202.151#10.10.202.190#g'
find /home/ap/cloudapp/redis/conf/7006 -name "redis_*.conf"|xargs sed -i 's#10.10.202.151#10.10.202.190#g'
离线迁移
接到在前同步第四步开始
离线同步dump 把kye 下载到本地
./redis-shake.linux -conf=redis-shake.conf -type=dump

修改配置文件添加恢复db文件名
# 如果是decode或者restore,这个参数表示读取的rdb文件。支持输入列表,例如:rdb.0;rdb.1;rdb.2
# redis-shake将会挨个进行恢复。
source.rdb.input = local_dump.0;local_dump.1;local_dump.2
./redis-shake.linux -type restore -conf redis-shake.conf
在打开一个窗口查看日志 redis-shake.log
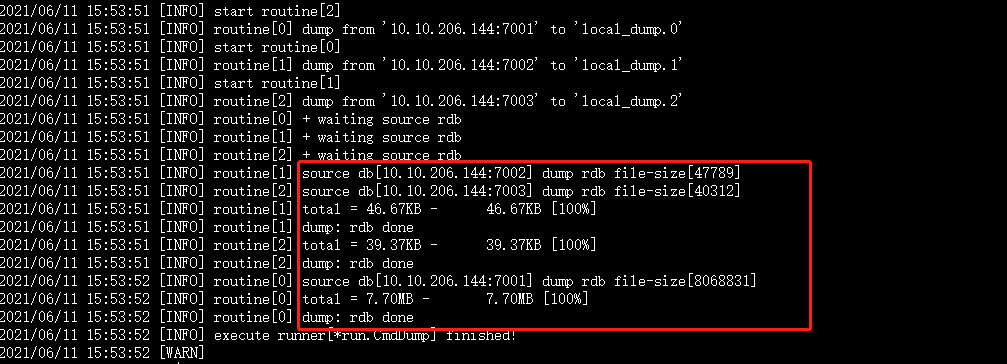
检查同步完成 dump:rdb node 代表下载结束
在第一个窗口结束进程ctrl +c
在次查看日志 redis-shake-2021-06-11T07-58-39.712.log

Enabled http stats, set status (incr), and wait forever #代表完成导入
新旧redis 替换流程
第一步把新的redis 部署上启动
1,注意端口和本地的不要相同 nodes.conf 和redis_700x,conf
2,把旧的Redis 添加密码,防止业务在写入
第二步使用redis-shake 同步数据
1,redis-shake.conf 注意添加reids 的密码
第三步停止新旧redis
1,注意数据同步完成
第四步把新redis 端口改为旧redis端口
1,注意master和slave对应
第五步 启动redis, 重启业务验证服务


 浙公网安备 33010602011771号