OpenShift应用镜像构建(3) - Jenkins的流水线构建
Jenkins方式构建的定位是使用专门的CICD平台。
既支持把JenKins作为一个Pod部署到openshift内部,也支持部署在Openshift集群外部,操作上的区别是
- openshift自己内部带的jenkins images包含了openshift的plugin
- Jenkins放在openshift外,需要手工安装plugin了。具体的安装过程可以参考
- https://blog.openshift.com/using-openshift-pipeline-plugin-external-jenkins/
为了演示方便仍然直接用openshift里面的imagestream了
jenkins Plugin能直接触发openshift的构建和部署过程, 同时最吸引的特点是:
- 支持流水线Pipeline这种模式,便于在同一集群的多个项目(对应开发,测试,生产)环境或者多个集群(对应开发集群,Stage集群,生产集群)中进行发布。
- 流水线支持自定义不同的阶段,每个阶段完成不同的任务,比如可以定义阶段为: CI环境部署->Stage环境部署->Prd部署
- 一条流水线支持包含多个微服务,针对项目中包含多个微服务,一旦定制好流水线,就可以重复运行
1.安装jenkins
CDK安装完成后暂时直接用里面带的Jenkins ImageStream
oc new-project ci
然后界面上部署jenkins,如果部署失败,除了删除deployment,service,route外,还需要删除ServiceAccount(jenkins),rolebinding(jenkins_edit)和pvc jenkins
ericdeMacBook-Pro:openshift-tomcat ericnie$ oc get sa;
NAME       SECRETS   AGE
builder    2         7h
default    2         7h
deployer   2         7h
jenkins    2         7h
ericdeMacBook-Pro:openshift-tomcat ericnie$ oc get rolebinding;
NAME                    ROLE                    USERS       GROUPS                      SERVICE ACCOUNTS   SUBJECTS
admin                   /admin                  developer
jenkins_edit            /edit                                                           jenkins
system:deployers        /system:deployer                                                deployer
system:image-builders   /system:image-builder                                           builder
system:image-pullers    /system:image-puller                system:serviceaccounts:ci
ericdeMacBook-Pro:openshift-tomcat ericnie$ oc get pvc
NAME      STATUS    VOLUME    CAPACITY   ACCESS MODES   STORAGECLASS   AGE
jenkins   Bound     pv0012    100Gi      RWO,ROX,RWX                   7h
部署完成后,通过命令行查看
ericdeMacBook-Pro:openshift-tomcat ericnie$ oc get all
NAME                        REVISION   DESIRED   CURRENT   TRIGGERED BY
deploymentconfigs/jenkins   1          1         1         config,image(jenkins:2)

NAME             HOST/PORT                          PATH      SERVICES   PORT      TERMINATION     WILDCARD
routes/jenkins   jenkins-ci.192.168.99.100.nip.io             jenkins    <all>     edge/Redirect   None

NAME                 READY     STATUS    RESTARTS   AGE
po/jenkins-1-f5gk7   1/1       Running   0          7h

NAME           DESIRED   CURRENT   READY     AGE
rc/jenkins-1   1         1         1         7h

NAME               TYPE        CLUSTER-IP       EXTERNAL-IP   PORT(S)     AGE
svc/jenkins        ClusterIP   172.30.182.209   <none>        80/TCP      7h
svc/jenkins-jnlp   ClusterIP   172.30.154.212   <none>        50000/TCP   7h
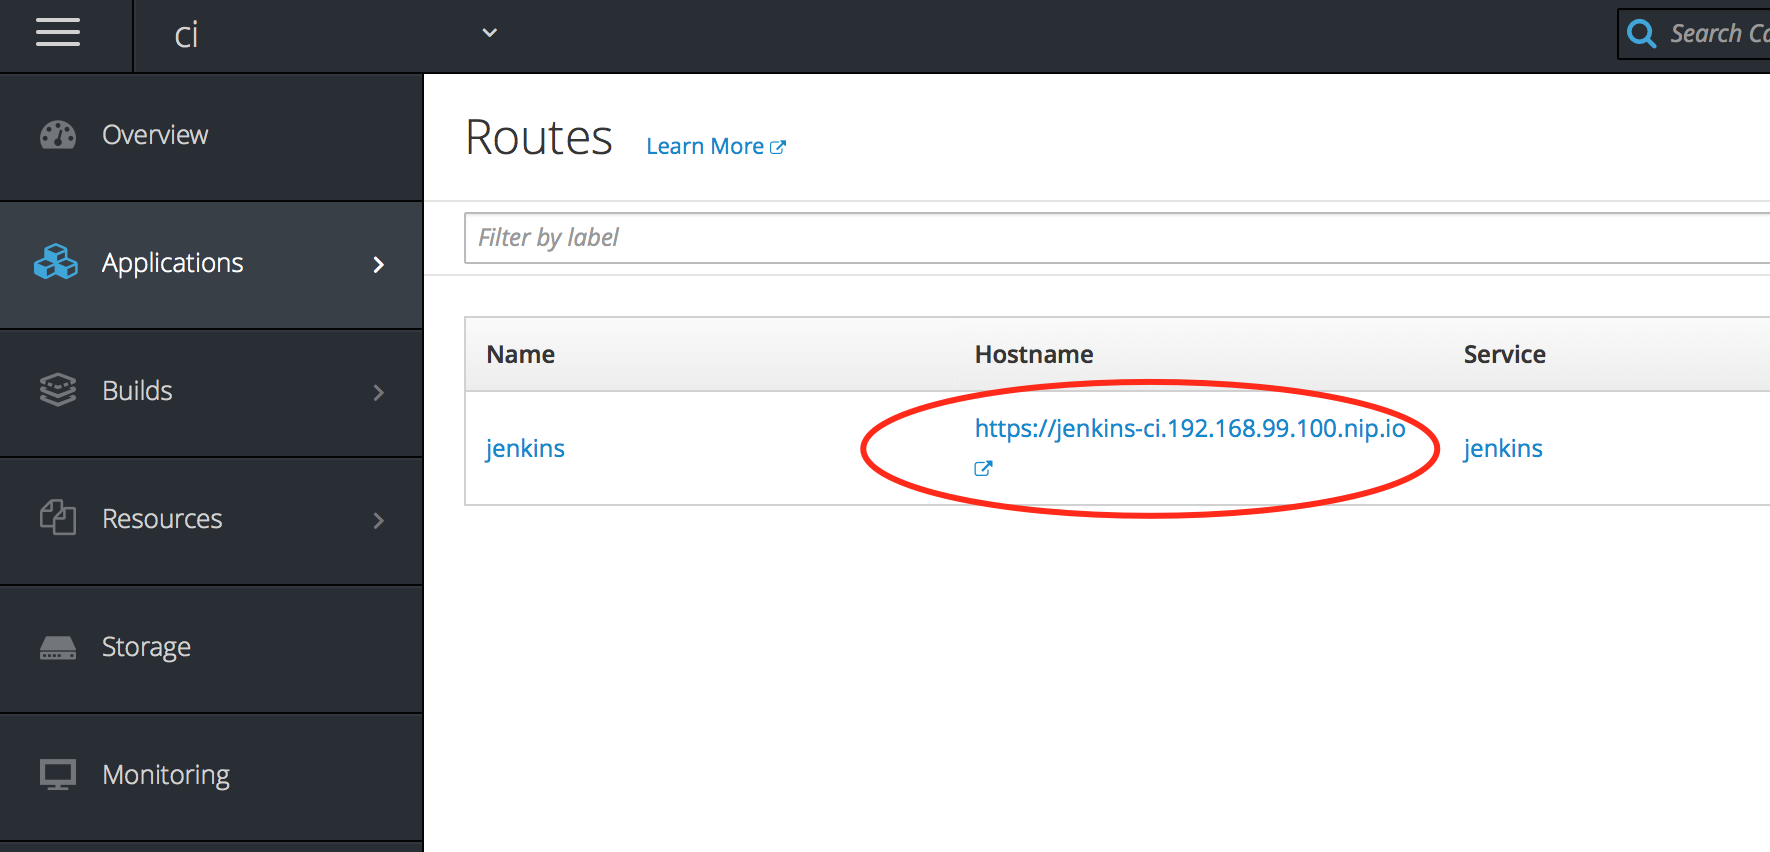
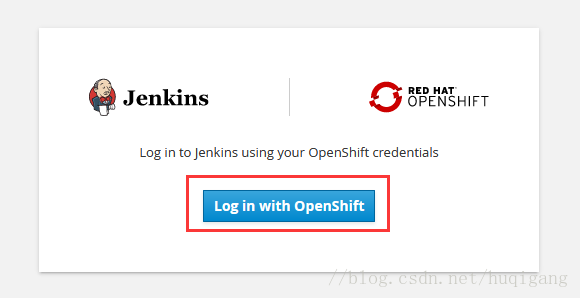
点击链接跳转
授权其他项目访问
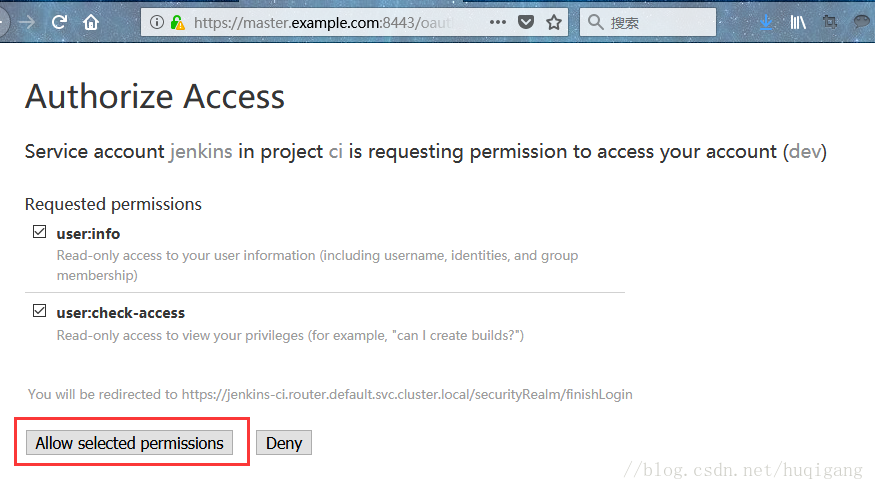
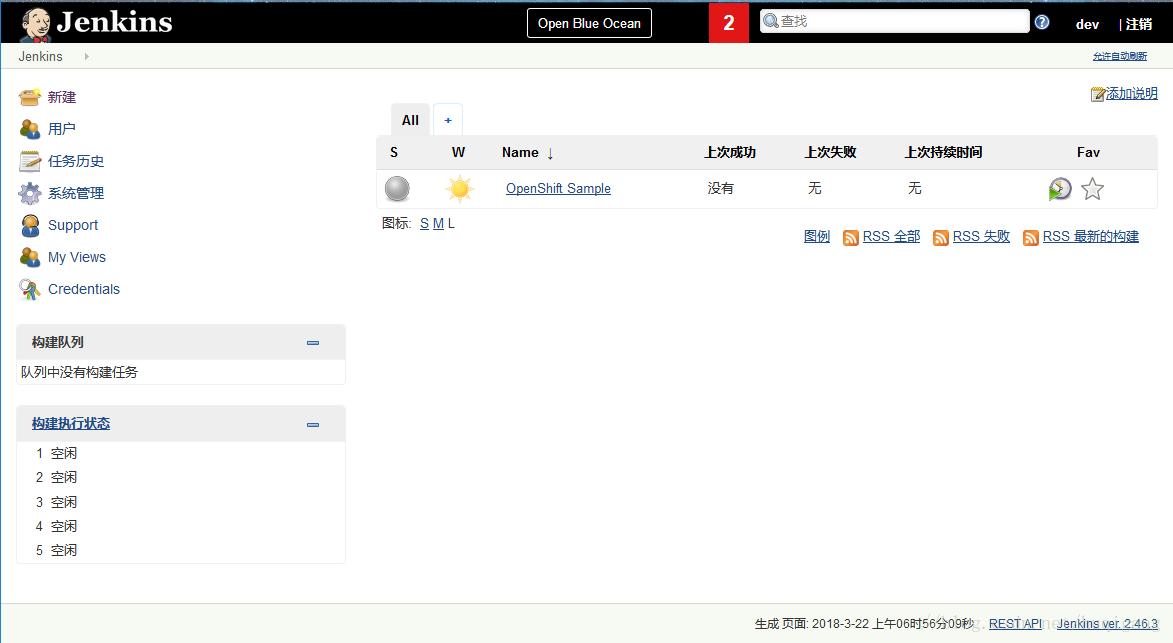
出现jenkins主页面
2.构建项目和Openshift集成
建立一个项目,选择

在构建处选择Trigger OpenShift Build,然后填入相关的选项

同时把jenkins用户加入访问命名空间的权限
oc policy add-role-to-user edit system:serviceaccount:ci:jenkins -n s2i-tomcat
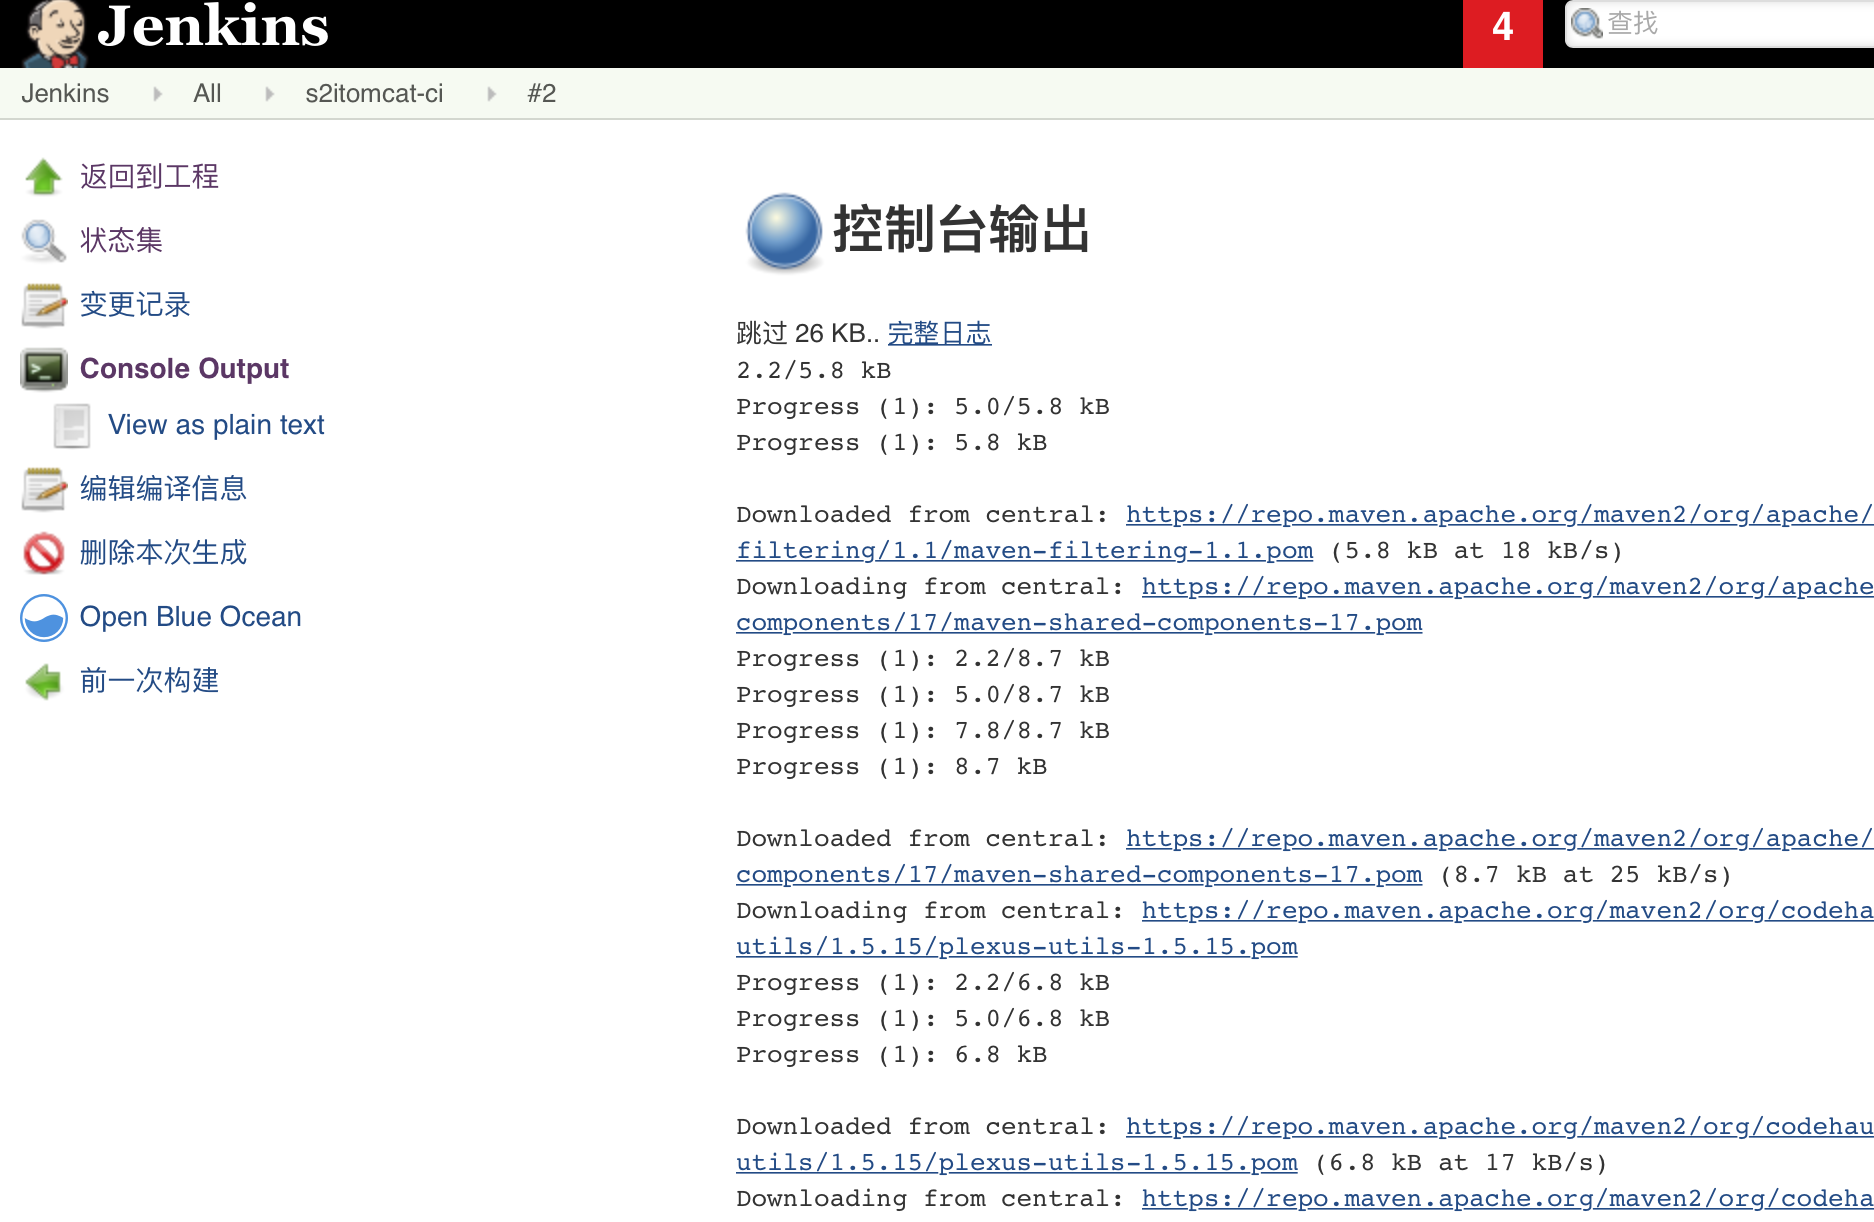
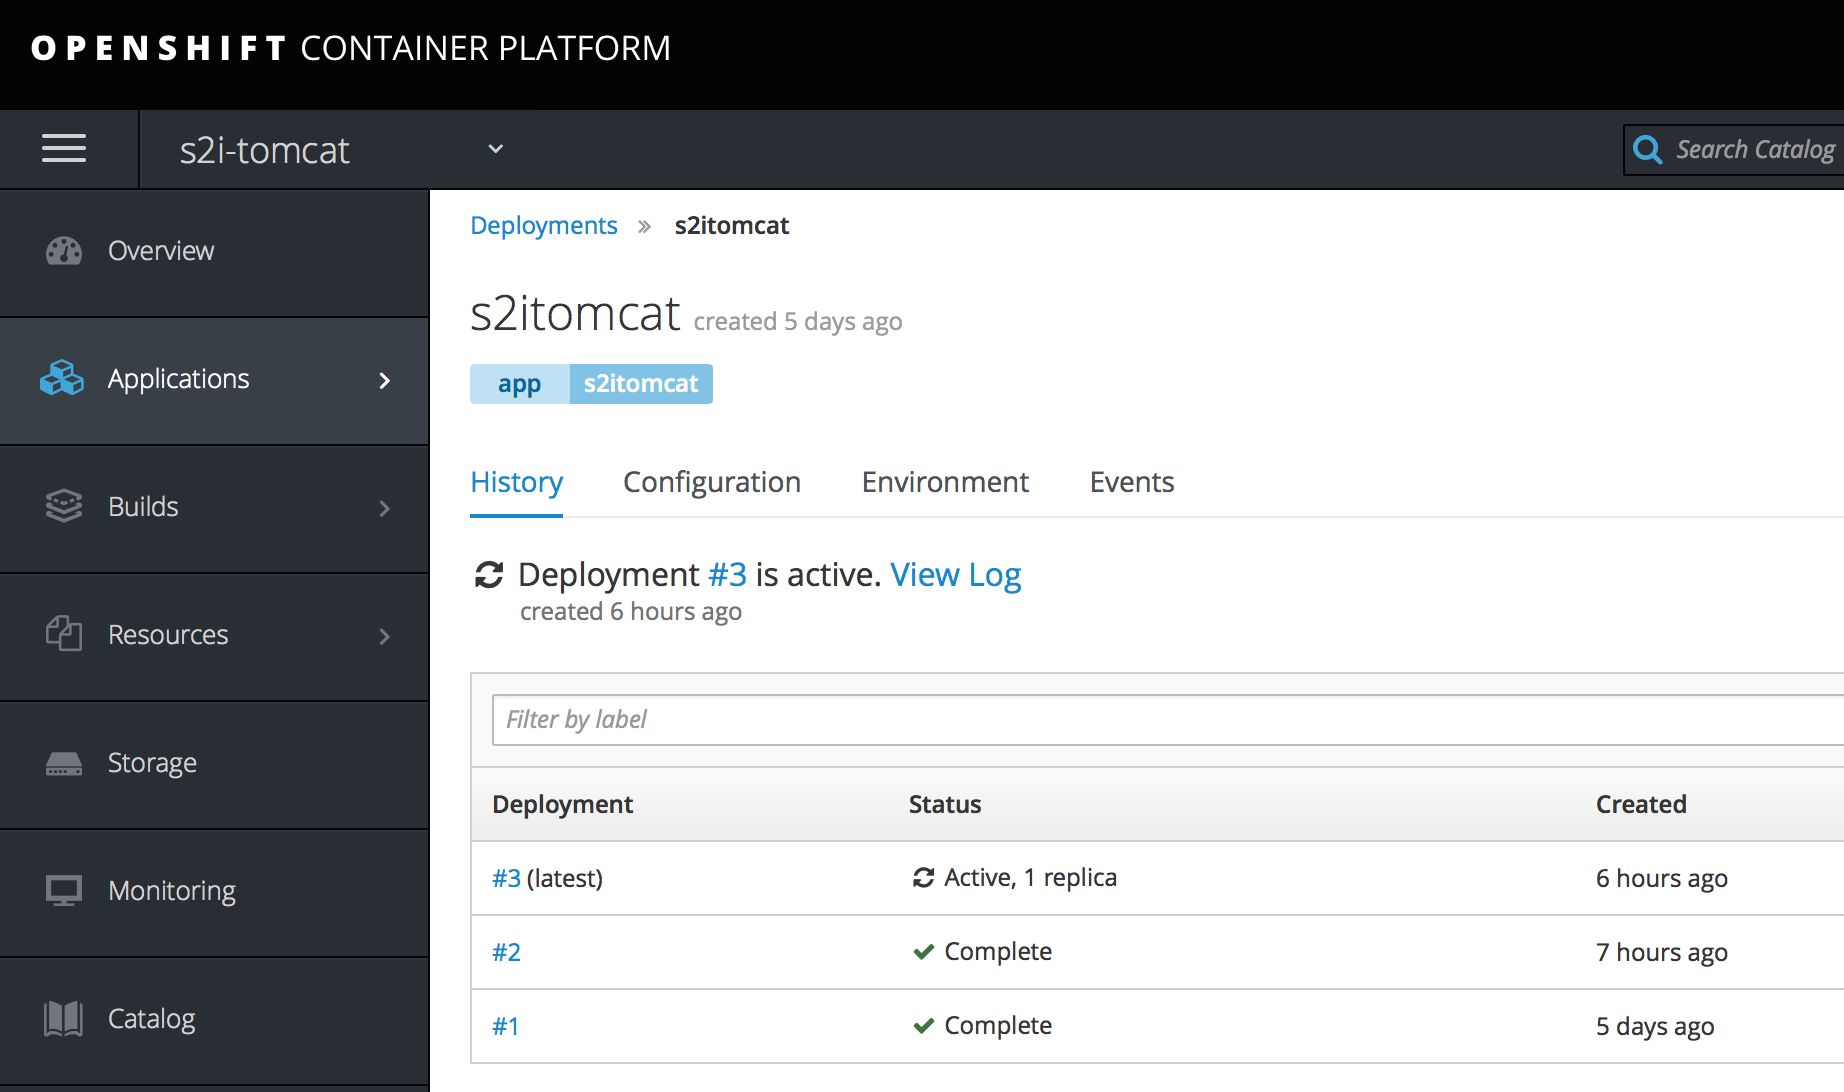
手工触发立即构建后,触发s2i-tomcat项目的构建,同时把镜像更新到depolyment
3.pipeline流水线构建
建立一个pipeline文件
ericdeMacBook-Pro:pipeline ericnie$ cat s2itomcat-pipeline.yaml
apiVersion: v1
kind: BuildConfig
metadata:
  annotations:
    pipeline.alpha.openshift.io/uses: '[{"name": "s2itomcat", "namespace": "s2i-tomcat", "kind":
      "DeploymentConfig"}]'
  creationTimestamp: null
  labels:
    app: jenkins-pipeline-development
    name: s2itomcat-development-pipeline
    template: application-template-development-pipeline
  name: s2itomcat-development-pipeline
spec:
  output: {}
  postCommit: {}
  resources: {}
  runPolicy: Serial
  source:
    type: None
  strategy:
    jenkinsPipelineStrategy:
      jenkinsfile: |-
        node('maven') {
        stage 'build'
        openshiftBuild(buildConfig: 's2itomcat', showBuildLogs: 'true', namespace: 's2i-tomcat')
        stage 'deploy'
        openshiftDeploy(deploymentConfig: 's2itomcat', namespace: 's2i-tomcat')
        }
    type: JenkinsPipeline
  triggers:
  - github:
      secret: secret101
    type: GitHub
  - generic:
      secret: secret101
    type: Generic
status:
  lastVersion: 0
切换到jenkins所在的项目ci, 然后通过命令行建立
ericdeMacBook-Pro:pipeline ericnie$ oc create -f s2itomcat-pipeline.yaml
buildconfig "s2itomcat-development-pipeline" created
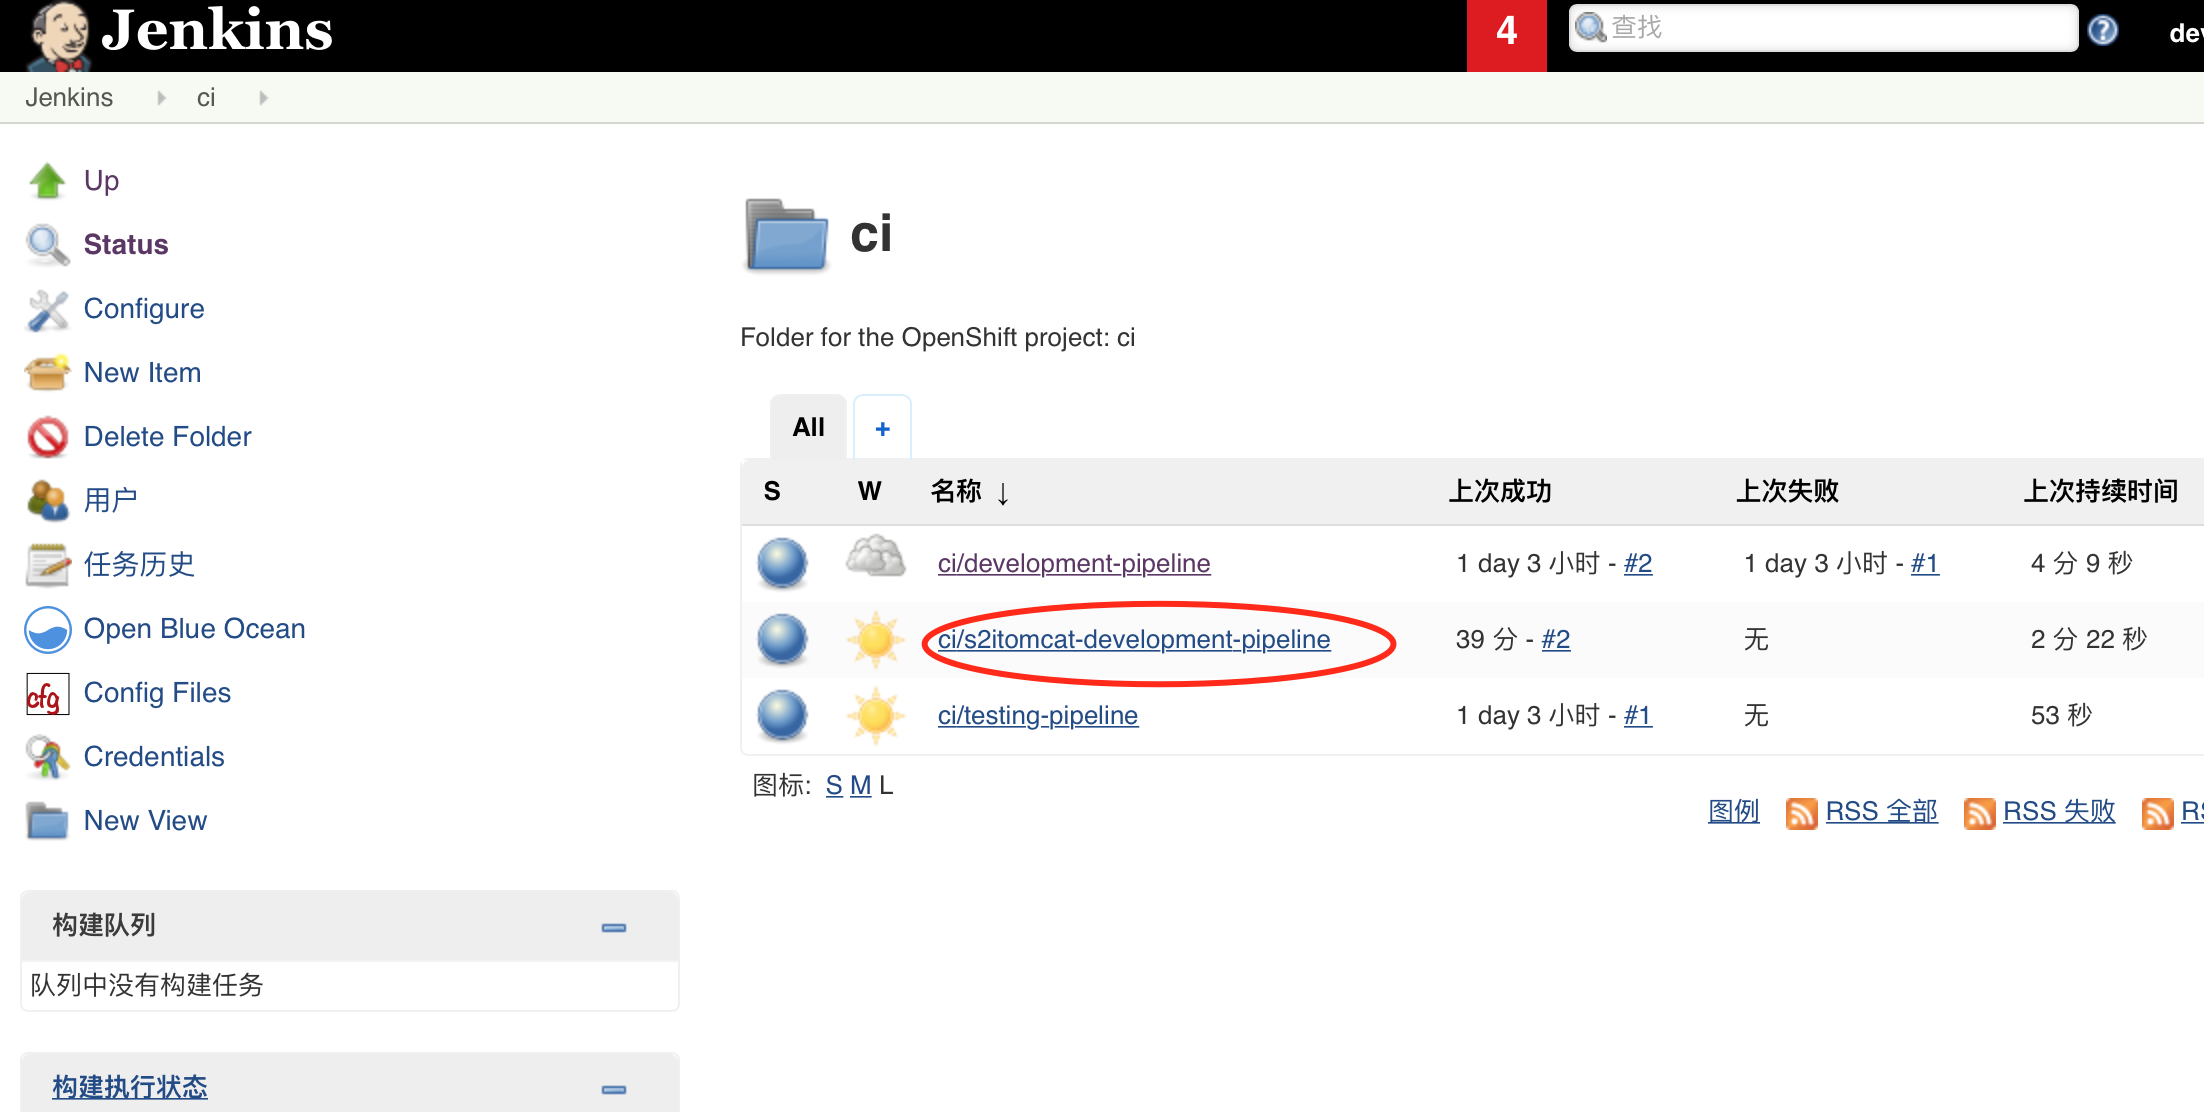
可以看到在jenkins界面上基于OpenShift的CI project创建了一个pipeline
授权
ericdeMacBook-Pro:pipeline ericnie$ oc policy add-role-to-user edit system:serviceaccount:ci:jenkins -n s2i-tomcat
role "edit" added: "system:serviceaccount:ci:jenkins"
在openshift console中start pipeline开始构建,完成后可以看见s2itomcat项目deployment的更新。

每次构建jenkins会启动一个新的maven pod,然后进行构建工作,构建完成后会将pod删除。
4.一条流水线多组件部署配置
在实际项目中存在一条流水线构建多个组件,同时需要部署多个镜像和微服务的场景,因此下面这个例子演示一下多组件的流水线构建过程。
还是相同的项目,我们再建立一个组件nodejs-example
ricdeMacBook-Pro:minishift ericnie$ oc new-app https://raw.githubusercontent.com/ericnie2015/nodejs-ex/master/openshift/templates/nodejs-dev.json
--> Deploying template "s2i-tomcat/nodejs-example" for "https://raw.githubusercontent.com/ericnie2015/nodejs-ex/master/openshift/templates/nodejs-dev.json" to project s2i-tomcat

     Node.js
     ---------
     An example Node.js application with no database. For more information about using this template, including OpenShift considerations, see https://github.com/openshift/nodejs-ex/blob/master/README.md.

     The following service(s) have been created in your project: nodejs-example.

     For more information about using this template, including OpenShift considerations, see https://github.com/openshift/nodejs-ex/blob/master/README.md.

     * With parameters:
        * Name=nodejs-example
        * Namespace=openshift
        * Memory Limit=512Mi
        * Git Repository URL=https://github.com/alezzandro/nodejs-ex.git
        * Git Reference=
        * Context Directory=
        * Application Hostname=
        * GitHub Webhook Secret=gk0fyAeT43s368qQIxkGvoeHbphK7XKkSXOMHKnf # generated
        * Generic Webhook Secret=4rWULbanlnwLsm8x38S0BACQKxCwfvpnKrARfSUn # generated
        * Database Service Name=
        * MongoDB Username=
        * MongoDB Password=
        * Database Name=
        * Database Administrator Password=
        * Custom NPM Mirror URL=

--> Creating resources ...
    service "nodejs-example" created
    route "nodejs-example" created
    imagestream "nodejs-example" created
    buildconfig "nodejs-example" created
    deploymentconfig "nodejs-example" created
--> Success
    Access your application via route 'nodejs-example-s2i-tomcat.192.168.99.100.nip.io'
    Use 'oc start-build nodejs-example' to start a build.
    Run 'oc status' to view your app.
现在项目中的bc和dc分别包括
ericdeMacBook-Pro:minishift ericnie$ oc get dc
NAME             REVISION   DESIRED   CURRENT   TRIGGERED BY
myapp            1          1         1         config,image(s2itomcat:latest)
nodejs-example   0          1         0
s2itomcat        8          1         1         config,image(s2itomcat:latest)
ericdeMacBook-Pro:minishift ericnie$ oc get bc
NAME             TYPE      FROM         LATEST
nodejs-example   Source    Git          0
s2itomcat        Source    Git@master   5
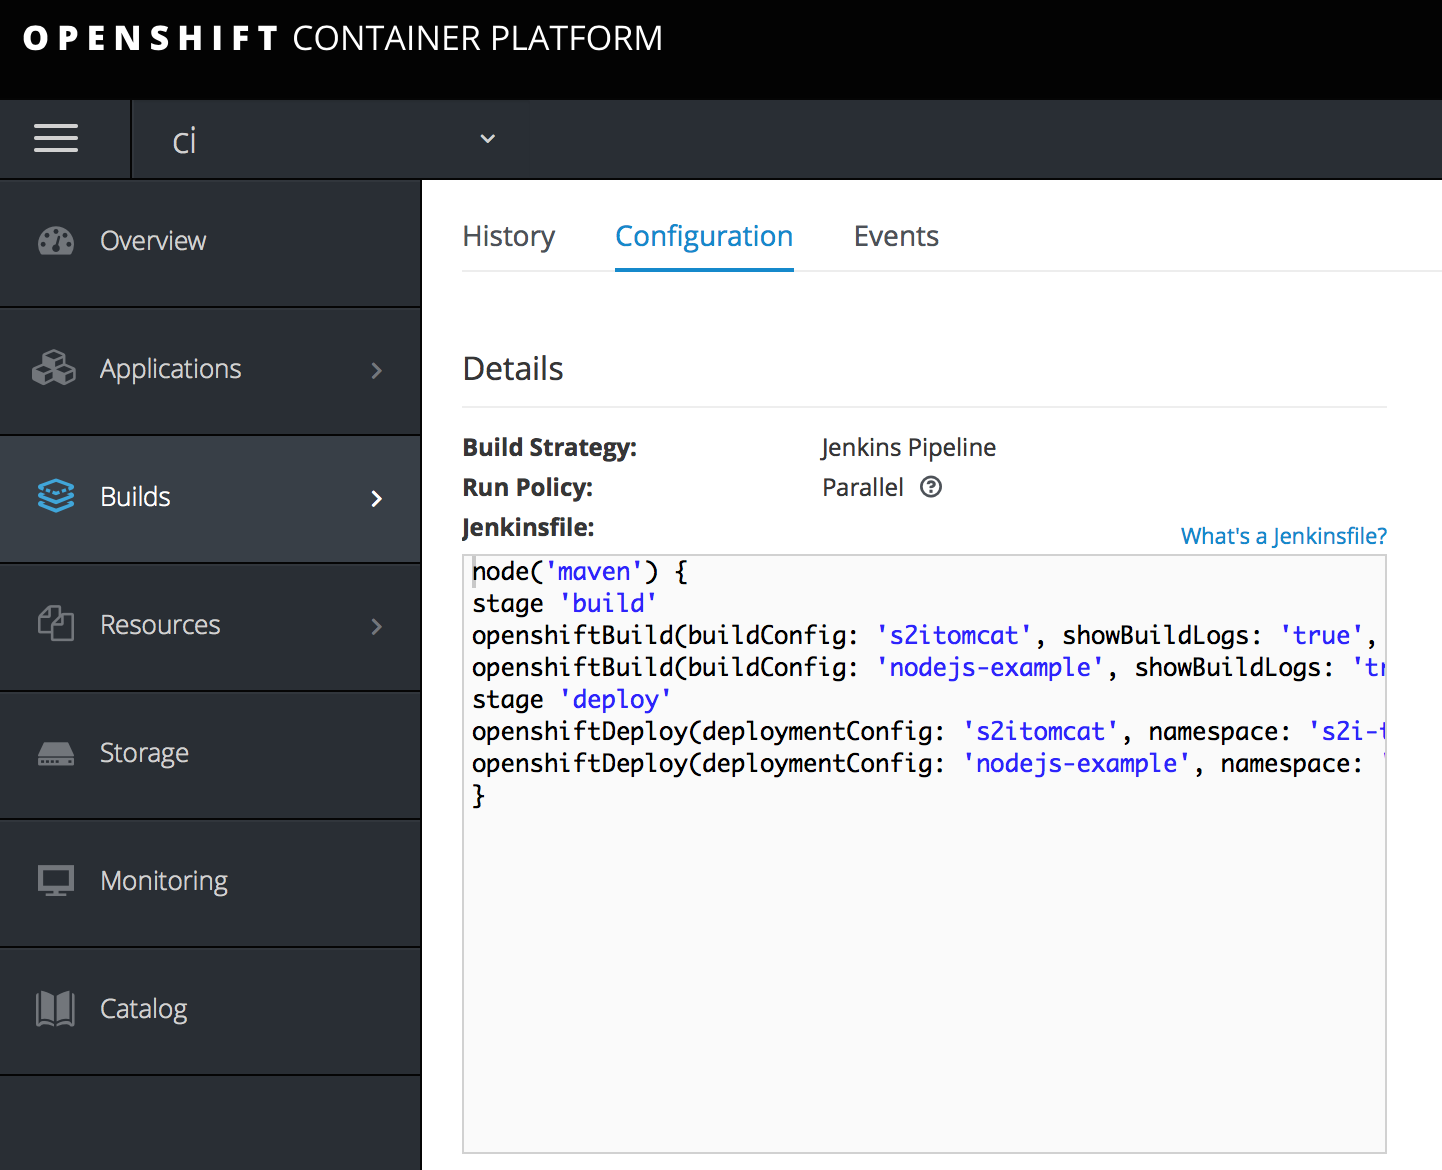
修改yaml文件,或者直接在界面上将原有pipeline的jenkinsfile修改成
node('maven') {
stage 'build'
openshiftBuild(buildConfig: 's2itomcat', showBuildLogs: 'true', namespace: 's2i-tomcat')
openshiftBuild(buildConfig: 'nodejs-example', showBuildLogs: 'true', namespace: 's2i-tomcat')
stage 'deploy'
openshiftDeploy(deploymentConfig: 's2itomcat', namespace: 's2i-tomcat')
openshiftDeploy(deploymentConfig: 'nodejs-example', namespace: 's2i-tomcat')
}
同时可以选择Serial或者Parrell的编译部署模式,然后完成部署。
设置了并行,但还是串行跑,应该是jenkins只provision了一个maven pod的原因。
pipeline跨集群运行的例子参考
https://github.com/openshift/jenkins-client-plugin/

 浙公网安备 33010602011771号