css36 CSS Dropdowns
https://www.w3schools.com/css/css_dropdowns.asp
CSS Dropdowns
Create a hoverable dropdown with CSS.
Demo: Dropdown Examples
Move the mouse over the examples below:


Basic Dropdown
Create a dropdown box that appears when the user moves the mouse over an element.
Example
<style>
.dropdown {
position: relative;
display: inline-block;
}
.dropdown-content {
display:
none;
position: absolute;
background-color: #f9f9f9;
min-width: 160px;
box-shadow: 0px 8px 16px 0px rgba(0,0,0,0.2);
padding:
12px 16px;
z-index: 1;
}
.dropdown:hover
.dropdown-content {
display: block;
}
</style>
<div class="dropdown">
<span>Mouse over me</span>
<div class="dropdown-content">
<p>Hello World!</p>
</div>
</div>
<!DOCTYPE html>
<html>
<head>
<style>
.dropdown {
  position: relative;
  display: inline-block;
}

.dropdown-content {
  display: none;
  position: absolute;
  background-color: #f9f9f9;
  min-width: 160px;
  box-shadow: 0px 8px 16px 0px rgba(0,0,0,0.2);
  padding: 12px 16px;
  z-index: 1;
}

.dropdown:hover .dropdown-content {
  display: block;
}
</style>
</head>
<body>

<h2>Hoverable Dropdown</h2>
<p>Move the mouse over the text below to open the dropdown content.</p>

<div class="dropdown">
  <span>Mouse over me</span>
  <div class="dropdown-content">
  <p>Hello World!</p>
  </div>
</div>

</body>
</html>
Example Explained
HTML) Use any element to open the dropdown content, e.g. a <span>, or a <button> element.
Use a container element (like <div>) to create the dropdown content and add whatever you want inside of it.
Wrap a <div> element around the elements to position the dropdown content correctly with CSS.
CSS) The .dropdown class uses position:relative, which is needed when we want the
dropdown content to be placed right below the dropdown button (using position:absolute).
The .dropdown-content class holds the actual dropdown content. It is hidden by
default, and will be displayed on hover (see below). Note the min-width is set to 160px. Feel free to change
this. Tip: If you want the width of the dropdown content to be
as wide as the dropdown button, set the width to 100% (and overflow:auto to
enable scroll on small screens).
Instead of using a border, we have used the CSS box-shadow property to make the
dropdown menu look like a "card".
The :hover selector is used to show the dropdown menu when the user moves the
mouse over the dropdown button.
Dropdown Menu
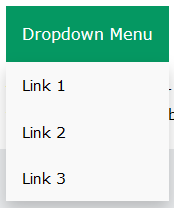
Create a dropdown menu that allows the user to choose an option from a list:

This example is similar to the previous one, except that we add links inside the dropdown box and style them to fit a styled dropdown button:
Example
<style>
/* Style The Dropdown Button */
.dropbtn {
background-color: #4CAF50;
color: white;
padding: 16px;
font-size: 16px;
border: none;
cursor: pointer;
}
/* The
container <div> - needed to position the dropdown content */
.dropdown {
position: relative;
display:
inline-block;
}
/* Dropdown Content (Hidden by Default) */
.dropdown-content {
display: none;
position:
absolute;
background-color: #f9f9f9;
min-width: 160px;
box-shadow:
0px 8px 16px 0px rgba(0,0,0,0.2);
z-index: 1;
}
/* Links inside the dropdown */
.dropdown-content a {
color: black;
padding: 12px 16px;
text-decoration: none;
display: block;
}
/* Change color of dropdown links on hover */
.dropdown-content a:hover {background-color: #f1f1f1}
/* Show the
dropdown menu on hover */
.dropdown:hover .dropdown-content {
display: block;
}
/* Change the background color of the dropdown
button when the dropdown content is shown */
.dropdown:hover .dropbtn {
background-color: #3e8e41;
}
</style>
<div class="dropdown">
<button class="dropbtn">Dropdown</button>
<div class="dropdown-content">
<a href="#">Link
1</a>
<a href="#">Link 2</a>
<a href="#">Link 3</a>
</div>
</div>
<!DOCTYPE html>
<html>
<head>
<style>
.dropbtn {
  background-color: #4CAF50;
  color: white;
  padding: 16px;
  font-size: 16px;
  border: none;
  cursor: pointer;
}

.dropdown {
  position: relative;
  display: inline-block;
}

.dropdown-content {
  display: none;
  position: absolute;
  background-color: #f9f9f9;
  min-width: 160px;
  box-shadow: 0px 8px 16px 0px rgba(0,0,0,0.2);
  z-index: 1;
}

.dropdown-content a {
  color: black;
  padding: 12px 16px;
  text-decoration: none;
  display: block;
}

.dropdown-content a:hover {background-color: #f1f1f1}

.dropdown:hover .dropdown-content {
  display: block;
}

.dropdown:hover .dropbtn {
  background-color: #3e8e41;
}
</style>
</head>
<body>

<h2>Dropdown Menu</h2>
<p>Move the mouse over the button to open the dropdown menu.</p>

<div class="dropdown">
  <button class="dropbtn">Dropdown</button>
  <div class="dropdown-content">
  <a href="#">Link 1</a>
  <a href="#">Link 2</a>
  <a href="#">Link 3</a>
  </div>
</div>

<p><strong>Note:</strong> We use href="#" for test links. In a real web site this would be URLs.</p>

</body>
</html>
Right-aligned Dropdown Content


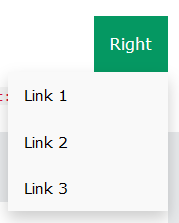
If you want the dropdown menu to go from right to left, instead of left to right, add right: 0;
Example
.dropdown-content {
right: 0;
}
<!DOCTYPE html>
<html>
<head>
<style>
.dropbtn {
  background-color: #4CAF50;
  color: white;
  padding: 16px;
  font-size: 16px;
  border: none;
  cursor: pointer;
}

.dropdown {
  position: relative;
  display: inline-block;
}

.dropdown-content {
  display: none;
  position: absolute;
  right: 0;
  background-color: #f9f9f9;
  min-width: 160px;
  box-shadow: 0px 8px 16px 0px rgba(0,0,0,0.2);
  z-index: 1;
}

.dropdown-content a {
  color: black;
  padding: 12px 16px;
  text-decoration: none;
  display: block;
}

.dropdown-content a:hover {background-color: #f1f1f1;}

.dropdown:hover .dropdown-content {
  display: block;
}

.dropdown:hover .dropbtn {
  background-color: #3e8e41;
}
</style>
</head>
<body>

<h2>Aligned Dropdown Content</h2>
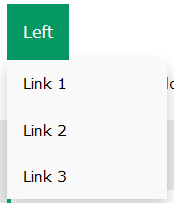
<p>Determine whether the dropdown content should go from left to right or right to left with the left and right properties.</p>

<div class="dropdown" style="float:left;">
  <button class="dropbtn">Left</button>
  <div class="dropdown-content" style="left:0;">
  <a href="#">Link 1</a>
  <a href="#">Link 2</a>
  <a href="#">Link 3</a>
  </div>
</div>

<div class="dropdown" style="float:right;">
  <button class="dropbtn">Right</button>
  <div class="dropdown-content">
  <a href="#">Link 1</a>
  <a href="#">Link 2</a>
  <a href="#">Link 3</a>
  </div>
</div>

</body>
</html>

More Examples

<!DOCTYPE html>
<html>
<head>
<style>
.dropdown {
  position: relative;
  display: inline-block;
}

.dropdown-content {
  display: none;
  position: absolute;
  background-color: #f9f9f9;
  min-width: 160px;
  box-shadow: 0px 8px 16px 0px rgba(0,0,0,0.2);
  z-index: 1;
}

.dropdown:hover .dropdown-content {
  display: block;
}

.desc {
  padding: 15px;
  text-align: center;
}
</style>
</head>
<body>

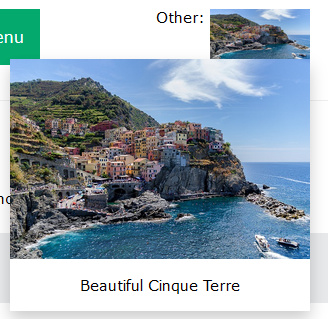
<h2>Dropdown Image</h2>
<p>Move the mouse over the image below to open the dropdown content.</p>

<div class="dropdown">
  <img src="img_5terre.jpg" alt="Cinque Terre" width="100" height="50">
  <div class="dropdown-content">
  <img src="img_5terre.jpg" alt="Cinque Terre" width="300" height="200">
  <div class="desc">Beautiful Cinque Terre</div>
  </div>
</div>

</body>
</html>

<!DOCTYPE html>
<html>
<head>
<style>
ul {
  list-style-type: none;
  margin: 0;
  padding: 0;
  overflow: hidden;
  background-color: #333;
}

li {
  float: left;
}

li a, .dropbtn {
  display: inline-block;
  color: white;
  text-align: center;
  padding: 14px 16px;
  text-decoration: none;
}

li a:hover, .dropdown:hover .dropbtn {
  background-color: red;
}

li.dropdown {
  display: inline-block;
}

.dropdown-content {
  display: none;
  position: absolute;
  background-color: #f9f9f9;
  min-width: 160px;
  box-shadow: 0px 8px 16px 0px rgba(0,0,0,0.2);
  z-index: 1;
}

.dropdown-content a {
  color: black;
  padding: 12px 16px;
  text-decoration: none;
  display: block;
  text-align: left;
}

.dropdown-content a:hover {background-color: #f1f1f1;}

.dropdown:hover .dropdown-content {
  display: block;
}
</style>
</head>
<body>

<ul>
  <li><a href="#home">Home</a></li>
  <li><a href="#news">News</a></li>
  <li class="dropdown">
    <a href="javascript:void(0)" class="dropbtn">Dropdown</a>
    <div class="dropdown-content">
      <a href="#">Link 1</a>
      <a href="#">Link 2</a>
      <a href="#">Link 3</a>
    </div>
  </li>
</ul>

<h3>Dropdown Menu inside a Navigation Bar</h3>
<p>Hover over the "Dropdown" link to see the dropdown menu.</p>

</body>
</html>


