How to Change Default Location for Outlook Data File (PST & OST)
Is there a way to change the default location of new .pst file when create a new e-mail account in Outlook? Different versions of Outlook use different default locations to store pst files. In this tutorial we’ll show you how to change default location for Outlook .PST & .OST data file using a registry trick. It works with all versions of Outlook, including Outlook 2016 / 2013 / 2010 / 2007 / 2003.
How to Change Default Location for Outlook PST/OST File?
- Press the Win + R keys in a meanwhile to open the Run box. Type regedit and click OK.
![regedit]()
-
When the Registry Editor launches, navigate to one of the following keys, depend on your Outlook version:
- Outlook 2016:
HKEY_CURRENT_USER\Software\Microsoft\Office\16.0\Outlook - Outlook 2013:
HKEY_CURRENT_USER\Software\Microsoft\Office\15.0\Outlook - Outlook 2010:
HKEY_CURRENT_USER\Software\Microsoft\Office\14.0\Outlook - Outlook 2007:
HKEY_CURRENT_USER\Software\Microsoft\Office\12.0\Outlook
- Outlook 2016:
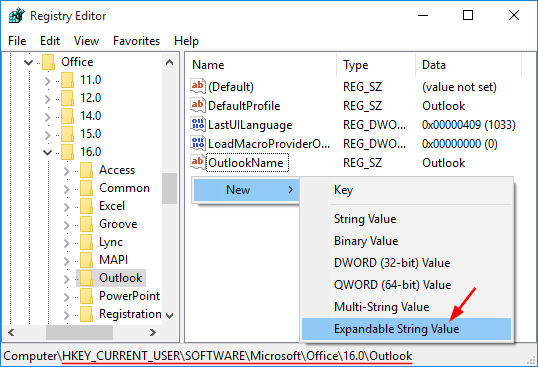
- At the right-side pane, right-click on any blank area and select New -> Expandable String Value.
![new-expandable-string]()
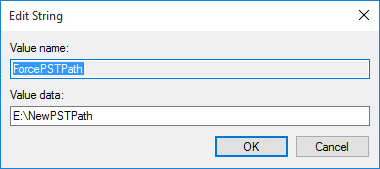
- Name the newly created value as ForcePSTPath, then double-click on it. On the Edit String dialog, enter the new default location where you wish to store the PST file for Outlook new profile, and click OK.
![ForcePSTPath]()
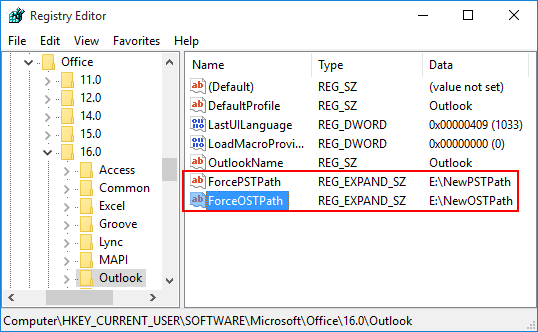
Note: To change the default location folder of .ost files generated by exchange accounts, you can create an expandable string value and name it as ForceOSTPath.
![ForceOSTPath]()
- Close the Registry Editor and restart Microsoft Outlook application. From now on, when you set up a new email account, Outlook will automatically create a new PST file in the new default location.
This method won’t affect the location of existing .pst files. If you want to change the location of existing pst file, follow these steps:
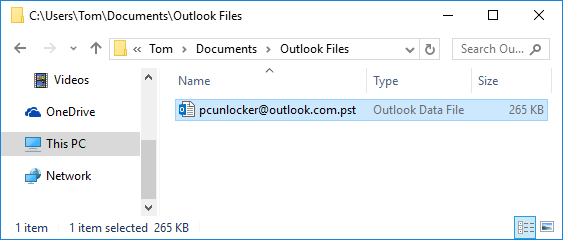
- Exit the Outlook application. Locate your .pst file in Windows Explorer and move it to a new location.
![outlook-pst-location]()
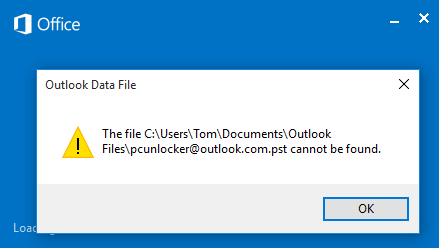
- Restart Outlook. An error dialog box appears that notifies you that an Outlook Data File (.pst) could not be found. Click OK.
![pst-file-cannot-be-found]()
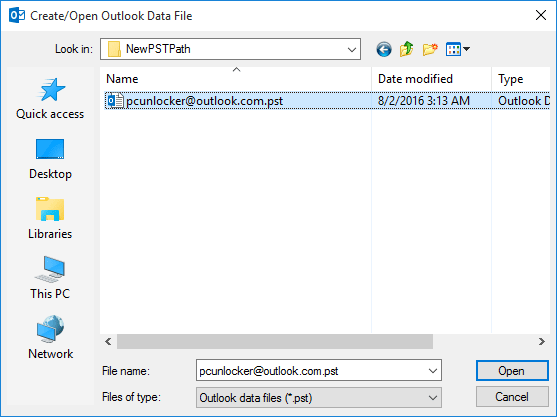
- It will open the Create/Open Outlook Data File dialog box. Browse to the new location, select the Outlook Data File (.pst) that you moved, and then click Open.
![open-outlook-data-file]()
- When you see a warning message, just ignore it by clicking OK. Now you’ve successfully moved your existing pst file to a new location.
![cannot-open-default-pst]()




 浙公网安备 33010602011771号