virtualBox和vagrant 入门使用笔记
virtualBox 和vagrant 的下载和安装
virtualbox:https://www.virtualbox.org/
vagrant:https://www.vagrantup.com/downloads
官网下载 box 镜像:http://www.vagrantbox.es/
https://app.vagrantup.com/boxes/search
ubuntu.box: https://github.com/jose-lpa/packer-ubuntu_lts/releases/
centos7-box: https://cloud.centos.org/centos/7/vagrant/x86_64/images/CentOS-7-x86_64-Vagrant-2004_01.VirtualBox.box
vagrant 常用命令
vagrant box add boxName boxPath:新增box
vagrant box list:查询box列表
vagrant box remove boxName:移除box
vagrant up:读取本地配置文件【Vagrantfile】,并启动虚拟机
vagrant halt:关闭虚拟机
vagrant ssh:连接虚拟机
vagrant 启动centos7
进入到对应目录:D:\centos7;
把刚刚下载的centos7的box文件复制到这个目录下面,这个是我下载的https://cloud.centos.org/centos/7/vagrant/x86_64/images/CentOS-7-x86_64-Vagrant-2004_01.VirtualBox.box
按Shift+鼠标右键,然后点击:在此处打开 Powershell 窗口(S),然后输入下面的命令
#vagrant box add [别名] [下载的box绝对地址]
D:\centos7>vagrant box add centos7-demo D:\centos7\CentOS-7-x86_64-Vagrant-2004_01.VirtualBox.box
D:\centos7>vagrant init centos7-demo
D:\centos7>vagrant box list #查看vagrant列表里面的box
D:\centos7>vagrant up #启动虚拟机
D:\centos7>vagrant ssh #使用ssh连接到box虚拟机
[vagrant@localhost ~]$ #进入虚拟机内部
[vagrant@localhost ~]$ pwd #vagrant的默认工作路径
/home/vagrant
以上命令已经安装好centos7,并可以连接上
vagrant up 命令
D:\centos7>vagrant up #启动虚拟机
Bringing machine 'default' up with 'virtualbox' provider...
==> default: Clearing any previously set forwarded ports...
==> default: Fixed port collision for 22 => 2222. Now on port 2200.
==> default: Clearing any previously set network interfaces...
==> default: Preparing network interfaces based on configuration...
    default: Adapter 1: nat
==> default: Forwarding ports...
    default: 22 (guest) => 2222 (host) (adapter 1)#端口转发,主机的2222端口映射到虚拟机的22
==> default: Booting VM...
==> default: Waiting for machine to boot. This may take a few minutes...
    default: SSH address: 127.0.0.1:2222
    default: SSH username: vagrant#用户名
    default: SSH auth method: private key#使用秘钥连接,文件名private key
==> default: Machine booted and ready!
[default] No Virtualbox Guest Additions installation found.
Loaded plugins: fastestmirror
Loading mirror speeds from cached hostfile
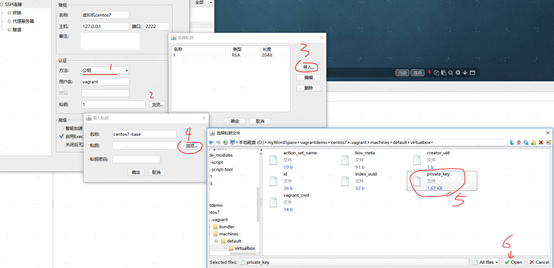
由于Powershell这个不是很好用,我使用FinalShell进行连接
使用finalshell连接,示例图:
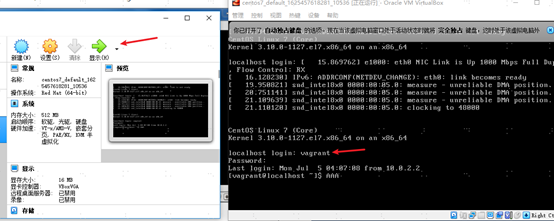
使用Virtualbox连接,用户名和密码都是:vagrant
安装docker
一样的,使用官网centos7系统安装docker:https://docs.docker.com/engine/install/centos/
#\ 回车不执行语句
[vagrant@localhost ~]$sudo yum remove docker \
                  docker-client \
                  docker-client-latest \
                  docker-common \
                  docker-latest \
                  docker-latest-logrotate \
                  docker-logrotate \
                  docker-engine
# 安装yum-utils包
[vagrant@localhost ~]$sudo yum install -y yum-utils
[vagrant@localhost ~]$sudo yum-config-manager \
    --add-repo \
https://download.docker.com/linux/centos/docker-ce.repo
# 安装 Docker 引擎
[vagrant@localhost ~]$sudo yum install docker-ce docker-ce-cli containerd.io
# 启动docker
[vagrant@localhost ~]$sudo systemctl start docker
[vagrant@localhost ~]$sudo docker run hello-world
#把vagrant分到docker下面,这样就不用写sudo,写完下面的命令之后,需要断开连接之后在连接进来就可以了
[vagrant@localhost ~]$usermod -aG docker vagrant
docker安装Nginx
[vagrant@localhost ~]$ docker pull nginx
Using default tag: latest
latest: Pulling from library/nginx
33847f680f63: Already exists
dbb907d5159d: Pull complete
8a268f30c42a: Pull complete
b10cf527a02d: Pull complete
c90b090c213b: Pull complete
1f41b2f2bf94: Pull complete
Digest: sha256:8f335768880da6baf72b70c701002b45f4932acae8d574dedfddaf967fc3ac90
Status: Downloaded newer image for nginx:latest
docker.io/library/nginx:latest
[vagrant@localhost ~]$ docker images
REPOSITORY   TAG       IMAGE ID       CREATED      SIZE
tomcat       latest    46cfbf1293b1   6 days ago   668MB
nginx        latest    08b152afcfae   7 days ago   133MB
mysql        latest    c60d96bd2b77   7 days ago   514MB
[vagrant@localhost ~]$ docker run -d --name nginx01 -p 3344:80 nginx
7dcd52f946a107deb4b06010da101625ba1f20a0b4f2cc5dc48890fa756abb5c
[vagrant@localhost ~]$ docker ps
CONTAINER ID   IMAGE     COMMAND                  CREATED         STATUS         PORTS                                   NAMES
7dcd52f946a1   nginx     "/docker-entrypoint.…"   8 seconds ago   Up 6 seconds   0.0.0.0:3344->80/tcp, :::3344->80/tcp   nginx01
[vagrant@localhost ~]$ curl localhost:3344
<!DOCTYPE html>
<html>
<head>
<title>Welcome to nginx!</title>
<style>
    body {
        width: 35em;
        margin: 0 auto;
        font-family: Tahoma, Verdana, Arial, sans-serif;
    }
</style>
</head>
<body>
<h1>Welcome to nginx!</h1>
<p>If you see this page, the nginx web server is successfully installed and
working. Further configuration is required.</p>

<p>For online documentation and support please refer to
<a href="http://nginx.org/">nginx.org</a>.<br/>
Commercial support is available at
<a href="http://nginx.com/">nginx.com</a>.</p>

<p><em>Thank you for using nginx.</em></p>
</body>
</html>
[vagrant@localhost ~]$
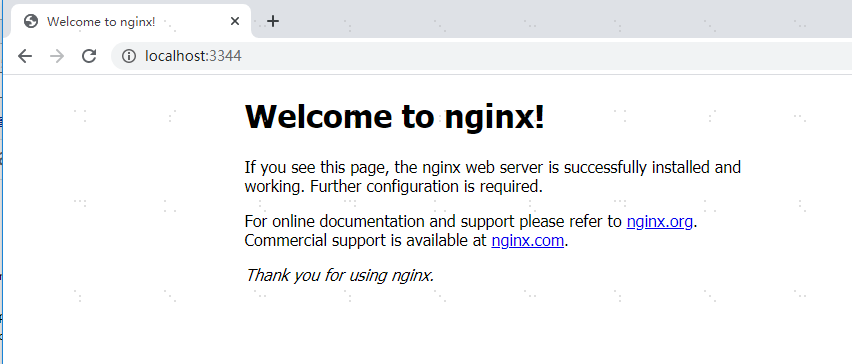
上面说明Nginx已经可以访问了
主机怎么访问虚拟机里面的Nginx呢?
我的网卡连接方式是:地址转换 nat
打开VirtualBox-->设置-->网络-->网卡1-->端口转发-->添加-->输入:Nginx,主系统ip:端口:127.0.0.1:3344,子系统的端口:3344
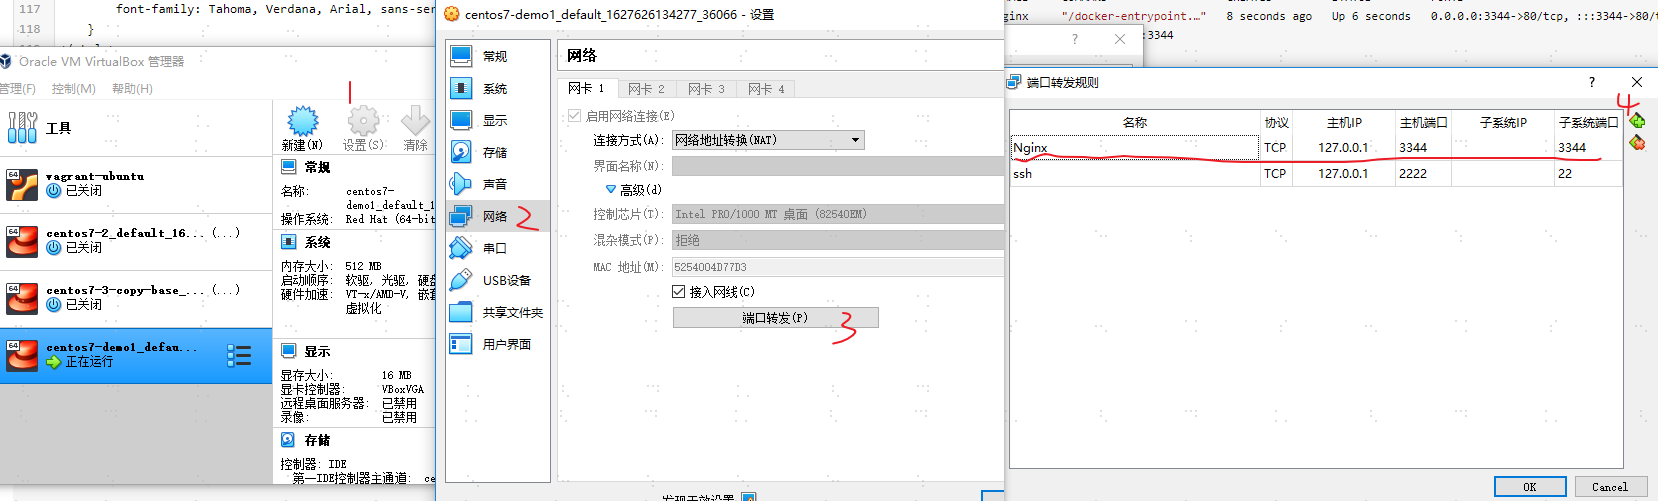
在主机上输入:http://localhost:3344/