SpringCloud之Config
【前面的话】本文的某些知识依赖我的微服务系列文章,如果没有看过可以先移步去看一下。在前面的应用当中,我们所有的配置都是写在yaml配置文件当中的,这样就会造成几个问题:安全、统一管理等等。而SpringCloud也是考虑到这一点,给出的方案就是Spring Cloud Config。
壹、Config的简介
Spring Cloud Config是Spring Cloud团队创建的一个全新项目,用来为分布式系统中的基础设施和微服务应用提供集中化的外部配置支持,它分为服务端与客户端两个部分。其中服务端也称为分布式配置中心,它是一个独立的微服务应用,用来连接配置仓库并为客户端提供获取配置信息、加密/解密信息等访问接口;而客户端则是微服务架构中的各个微服务应用或基础设施,它们通过指定的配置中心来管理应用资源与业务相关的配置内容,并在启动的时候从配置中心获取和加载配置信息。Spring Cloud Config实现了对服务端和客户端中环境变量和属性配置的抽象映射,所以它除了适用于Spring构建的应用程序之外,也可以在任何其他语言运行的应用程序中使用。由于Spring Cloud Config实现的配置中心默认采用Git来存储配置信息,所以使用Spring Cloud Config构建的配置服务器,天然就支持对微服务应用配置信息的版本管理,并且可以通过Git客户端工具来方便的管理和访问配置内容。当然它也提供了对其他存储方式的支持,比如:SVN仓库、本地化文件系统。
贰、准备工作
- 首先在工程下面新建lovin-config-repo,作为存放配置文件的地方,并且添加dev,test,pro的相关配置文件,最后在配置文件中添加token的配置,具体见下图
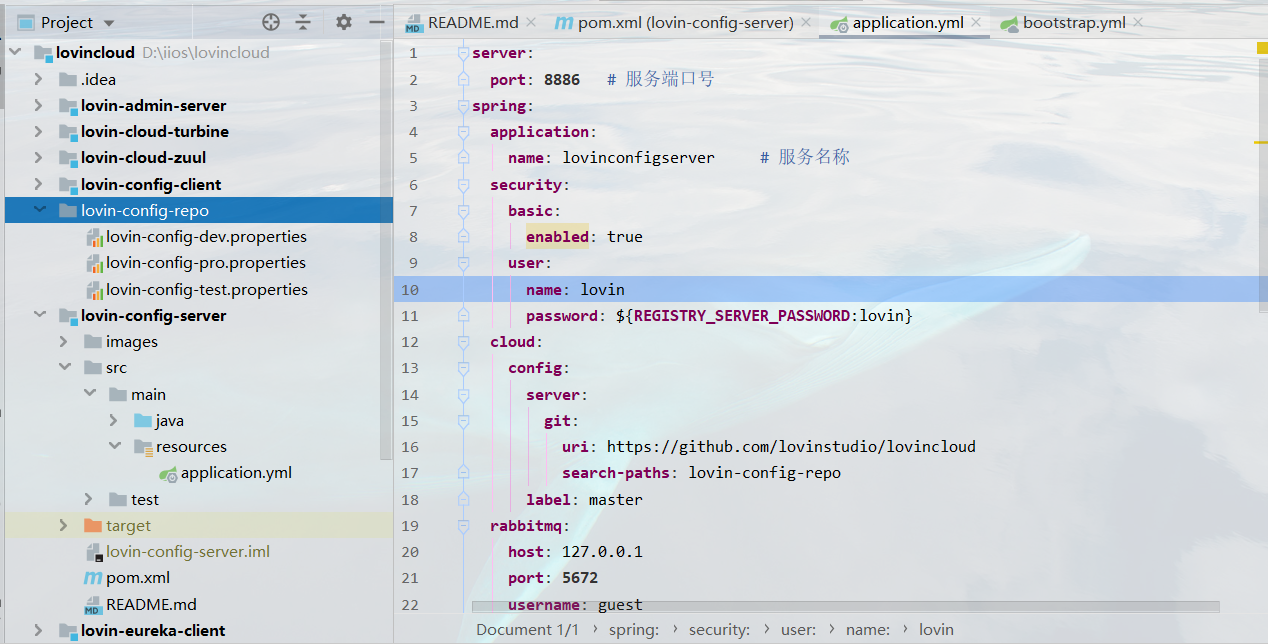
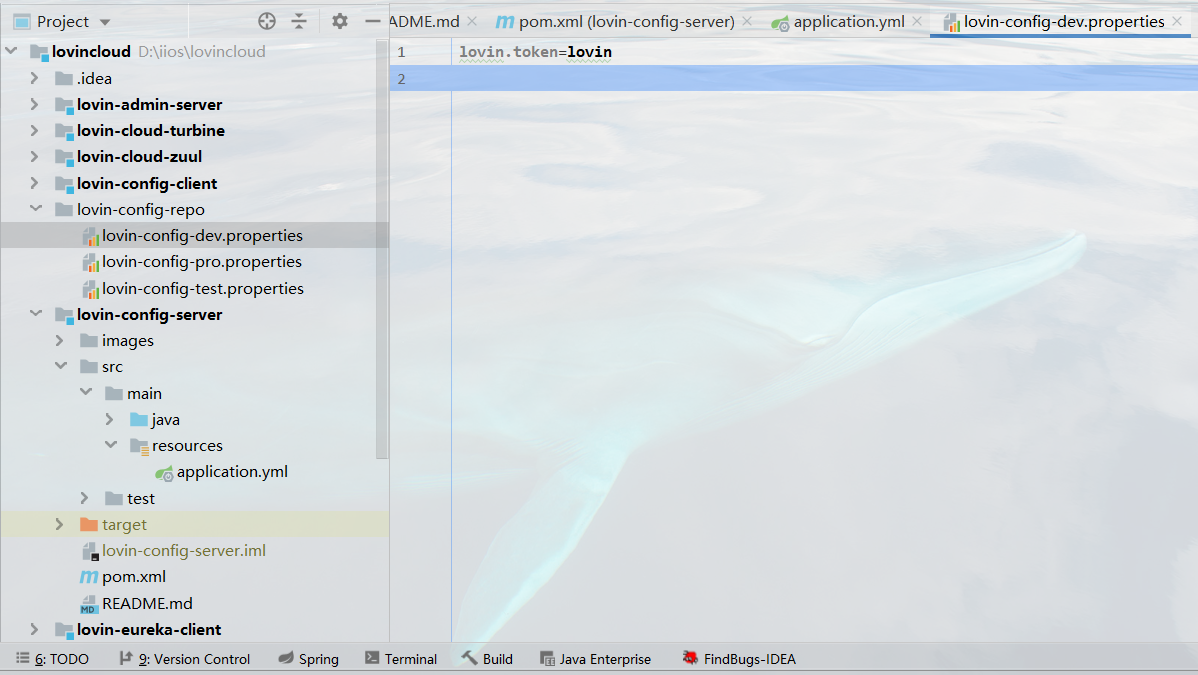
- 新建一个config的服务端子工程lovin-config-server,用于后面的操作。下面是主要的pom依赖:
<parent>
        <artifactId>lovincloud</artifactId>
        <groupId>com.eelve.lovincloud</groupId>
        <version>1.0-SNAPSHOT</version>
    </parent>
    <modelVersion>4.0.0</modelVersion>

    <artifactId>lovin-config-server</artifactId>
    <packaging>jar</packaging>
    <name>lovinconfigserver</name>
    <version>0.0.1</version>
    <description>配置服务端</description>

    <dependencies>
        <dependency>
            <groupId>org.springframework.cloud</groupId>
            <artifactId>spring-cloud-starter-netflix-eureka-client</artifactId>
        </dependency>
        <dependency>
            <groupId>org.springframework.boot</groupId>
            <artifactId>spring-boot-starter-security</artifactId>
        </dependency>
        <dependency>
            <groupId>org.springframework.boot</groupId>
            <artifactId>spring-boot-starter-web</artifactId>
        </dependency>
        <dependency>
            <groupId>de.codecentric</groupId>
            <artifactId>spring-boot-admin-starter-client</artifactId>
            <version>2.1.6</version>
        </dependency>
        <dependency>
            <groupId>org.springframework.cloud</groupId>
            <artifactId>spring-cloud-config-server</artifactId>
        </dependency>
        <dependency>
            <groupId>org.springframework.cloud</groupId>
            <artifactId>spring-cloud-starter-bus-amqp</artifactId>
        </dependency>
    </dependencies>

    <build>
        <plugins>
            <plugin>
                <groupId>org.springframework.boot</groupId>
                <artifactId>spring-boot-maven-plugin</artifactId>
            </plugin>
        </plugins>
    </build>
- 这里为了安全,我这里还是添加spring-boot-starter-security
server:
  port: 8886   # 服务端口号
spring:
  application:
    name: lovinconfigserver     # 服务名称
  security:
    basic:
      enabled: true
    user:
      name: lovin
      password: ${REGISTRY_SERVER_PASSWORD:lovin}
  cloud:
    config:
      server:
        git:
          uri: https://github.com/lovinstudio/lovincloud
          search-paths: lovin-config-repo
      label: master
eureka:
  client:
    serviceUrl:
      defaultZone: http://lovin:lovin@localhost:8881/eureka/   # 注册到的eureka服务地址
- 上面的配置文件是用git作为配置文件管理中心,还有svn和本地文件系统两种,我这里也在下面简单罗列以下:
git版本配置
spring:
    cloud:
      config:
        server:
          git:
            uri: https://github.com/lovinstudio/lovincloud
            search-paths: lovin-config-repo
            username: #如果是私人仓库,还需要配置用户名,公共仓库可以省略
            password: #如果是私人仓库,还需要配置密码,公共仓库可以省略
        label: master
svn版本配置
spring:
  cloud:
    config:
      server:
        svn:
          uri: http://192.168.0.6/svn/repo/config-repo
          username: username
          password: password
        default-label: trunk
  profiles:
    active: subversion  #这里需要显式声明为subversion
同时还需要引入相应的配置:
        <!--SVN-->
        <dependency>
            <groupId>org.tmatesoft.svnkit</groupId>
            <artifactId>svnkit</artifactId>
        </dependency>
本地版本配置
spring:
  cloud:
    config:
      server:
        native:
          searchLocations: file:D:\\config  #classpath:/config
  profiles:
    active: native  #native
- 配置spring-boot-starter-security,这里为了方便我这里放开所有请求
package com.eelve.lovin.config;

import org.springframework.context.annotation.Configuration;
import org.springframework.security.config.annotation.web.builders.HttpSecurity;
import org.springframework.security.config.annotation.web.configuration.WebSecurityConfigurerAdapter;

/**
 * @ClassName WebSecurityConfig
 * @Description TDO
 * @Author zhao.zhilue
 * @Date 2019/8/18 13:52
 * @Version 1.0
 **/
@Configuration
public class WebSecurityConfig extends WebSecurityConfigurerAdapter {

    @Override
    protected void configure(HttpSecurity http) throws Exception {
        http.authorizeRequests().anyRequest().permitAll()
                .and().csrf().disable();
    }
}
- 在主类上添加@EnableConfigServer,当然也需要注册到注册中心:
package com.eelve.lovin;

import org.springframework.boot.SpringApplication;
import org.springframework.boot.autoconfigure.SpringBootApplication;
import org.springframework.cloud.config.server.EnableConfigServer;
import org.springframework.cloud.netflix.eureka.EnableEurekaClient;

/**
 * @ClassName LovinEurekaClientApplication
 * @Description TDO
 * @Author zhao.zhilue
 * @Date 2019/8/15 16:37
 * @Version 1.0
 **/
@SpringBootApplication
@EnableEurekaClient
@EnableConfigServer
public class LovinConfigServerApplication {
    public static void main(String[] args) {
        SpringApplication.run(LovinConfigServerApplication.class,args);
    }
}
叁、启动测试
- 依次启动eureka的服务端和新建的lovin-config-server
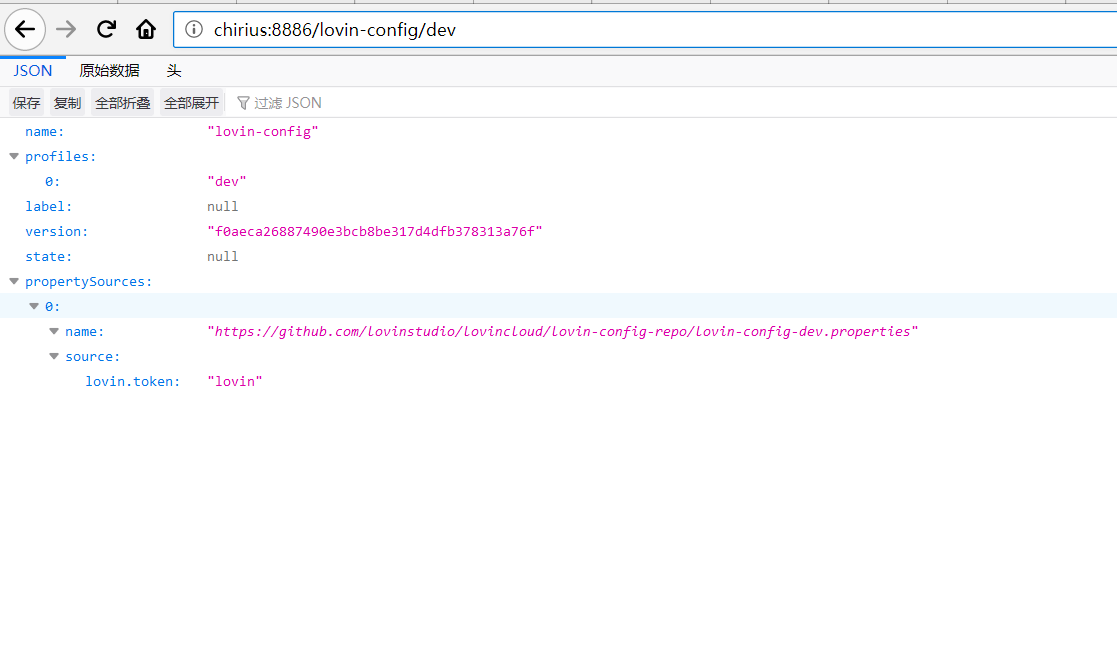
- 访问地址:http://chirius:8886/lovin-config/dev。
- 结果原始数据:
{"name":"lovin-config","profiles":["dev"],"label":null,"version":"f0aeca26887490e3bcb8be317d4dfb378313a76f","state":null,"propertySources":[{"name":"https://github.com/lovinstudio/lovincloud/lovin-config-repo/lovin-config-dev.properties","source":{"lovin.token":"lovin"}}]}
这时我们通过浏览器、POSTMAN或CURL等工具直接来访问到我们的配置内容了。访问配置信息的URL与配置文件的映射关系如下:
    /{application}/{profile}[/{label}]
    /{application}-{profile}.yml
    /{label}/{application}-{profile}.yml
    /{application}-{profile}.properties
    /{label}/{application}-{profile}.properties
上面的url会映射{application}-{profile}.properties对应的配置文件,其中{label}对应Git上不同的分支,默认为master。我们可以尝试构造不同的url来访问不同的配置内容,比如,要访问master分支,config-client应用的dev环境,就可以访问这个url:http://chirius:8806/lovin-config/dev,并获得如下返回:
这里有一点疑问,我通过http://localhost:8886/lovin-config/dev/去访问是一直不成功的,但是在换成其他github上面别人的配置仓库又是可以直接访问的
2019-08-19 12:55:54.686  INFO 9256 --- [nio-8886-exec-4] o.s.c.c.s.e.NativeEnvironmentRepository  : Adding property source: file:/C:/Users/Chirius/AppData/Local/Temp/config-repo-8280352825025657146/lovin-config-repo/lovin-config-dev.properties
2019-08-19 12:55:57.560  INFO 9256 --- [nio-8886-exec-2] o.s.cloud.commons.util.InetUtils         : Cannot determine local hostname
2019-08-19 12:55:57.576  INFO 9256 --- [nio-8886-exec-2] o.s.c.c.s.e.NativeEnvironmentRepository  : Adding property source: file:/C:/Users/Chirius/AppData/Local/Temp/config-repo-8280352825025657146/lovin-config-repo/lovin-config-dev.properties
2019-08-19 12:56:00.544  INFO 9256 --- [nio-8886-exec-1] o.s.cloud.commons.util.InetUtils         : Cannot determine local hostname
2019-08-19 12:56:00.559  INFO 9256 --- [nio-8886-exec-1] o.s.c.c.s.e.NativeEnvironmentRepository  : Adding property source: file:/C:/Users/Chirius/AppData/Local/Temp/config-repo-8280352825025657146/lovin-config-repo/lovin-config-dev.properties
2019-08-19 12:56:07.136  INFO 9256 --- [trap-executor-0] c.n.d.s.r.aws.ConfigClusterResolver      : Resolving eureka endpoints via configuration
2019-08-19 13:01:07.140  INFO 9256 --- [trap-executor-0] c.n.d.s.r.aws.ConfigClusterResolver      : Resolving eureka endpoints via configuration
2019-08-19 13:06:07.142  INFO 9256 --- [trap-executor-0] c.n.d.s.r.aws.ConfigClusterResolver      : Resolving eureka endpoints via configuration
ps:通过日志我们可以看到配置文件是被保存在我们本地的,当然我们也就可以通过配置,修改保存的路径,具体配置为:basedir
肆、新建配置客户端
新建一个config的服务端子工程lovin-config-client,用于后面的操作。下面是主要的pom依赖:
<parent>
        <artifactId>lovincloud</artifactId>
        <groupId>com.eelve.lovincloud</groupId>
        <version>1.0-SNAPSHOT</version>
    </parent>
    <modelVersion>4.0.0</modelVersion>

    <artifactId>lovin-config-client</artifactId>
    <packaging>jar</packaging>
    <name>lovinconfigclient</name>
    <version>0.0.1</version>
    <description>配置消费端</description>

    <dependencies>
        <dependency>
            <groupId>org.springframework.cloud</groupId>
            <artifactId>spring-cloud-starter-netflix-eureka-client</artifactId>
        </dependency>
        <dependency>
            <groupId>org.springframework.boot</groupId>
            <artifactId>spring-boot-starter-security</artifactId>
        </dependency>
        <dependency>
            <groupId>org.springframework.boot</groupId>
            <artifactId>spring-boot-starter-web</artifactId>
        </dependency>
        <dependency>
            <groupId>de.codecentric</groupId>
            <artifactId>spring-boot-admin-starter-client</artifactId>
            <version>2.1.6</version>
        </dependency>
        <dependency>
            <groupId>org.springframework.boot</groupId>
            <artifactId>spring-boot-starter-actuator</artifactId>
        </dependency>
        <dependency>
            <groupId>org.springframework.cloud</groupId>
            <artifactId>spring-cloud-starter-config</artifactId>
            <version>2.1.3.RELEASE</version>
        </dependency>
    </dependencies>

    <build>
        <plugins>
            <plugin>
                <groupId>org.springframework.boot</groupId>
                <artifactId>spring-boot-maven-plugin</artifactId>
            </plugin>
        </plugins>
    </build>
ps:在这里为了监控配置变化我们需要添加spring-boot-starter-actuator的依赖
- 这里为了安全,我这里还是添加spring-boot-starter-security的配置
- 新建bootstrap.yml
spring:
  cloud:
    config:
      name: lovin-config
      profile: dev
      uri: http://localhost:8886/
      label: master
eureka:
  client:
    serviceUrl:
      defaultZone: http://lovin:lovin@localhost:8881/eureka/   # 注意在高可用的时候需要见注册中心配置移到该文件中,在application.yml中见会读取不到配置
- 添加application.yml
server:
  port: 8807   # 服务端口号
spring:
  application:
    name: lovinconfigclient     # 服务名称
  security:
    basic:
      enabled: true
    user:
      name: lovin
      password: ${REGISTRY_SERVER_PASSWORD:lovin}
- 配置spring-boot-starter-security,这里为了方便我这里放开所有请求
package com.eelve.lovin.config;

import org.springframework.context.annotation.Configuration;
import org.springframework.security.config.annotation.web.builders.HttpSecurity;
import org.springframework.security.config.annotation.web.configuration.WebSecurityConfigurerAdapter;

/**
 * @ClassName WebSecurityConfig
 * @Description TDO
 * @Author zhao.zhilue
 * @Date 2019/8/20 16:59
 * @Version 1.0
 **/
@Configuration
public class WebSecurityConfig extends WebSecurityConfigurerAdapter {

    @Override
    protected void configure(HttpSecurity http) throws Exception {
        http.authorizeRequests().anyRequest().permitAll()
                .and().csrf().disable();
    }
}
- 我们需要注册到注册中心:
package com.eelve.lovin;

import org.springframework.boot.SpringApplication;
import org.springframework.boot.autoconfigure.SpringBootApplication;
import org.springframework.cloud.netflix.eureka.EnableEurekaClient;

/**
 * @ClassName LovinEurekaClientApplication
 * @Description TDO
 * @Author zhao.zhilue
 * @Date 2019/8/15 16:37
 * @Version 1.0
 **/
@SpringBootApplication
@EnableEurekaClient
public class LovinConfigClientApplication {
    public static void main(String[] args) {
        SpringApplication.run(LovinConfigClientApplication.class,args);
    }
}
- 添加ConfigController用来测试获取配置
package com.eelve.lovin.controller;

import org.springframework.beans.factory.annotation.Value;
import org.springframework.cloud.context.config.annotation.RefreshScope;
import org.springframework.web.bind.annotation.RequestMapping;
import org.springframework.web.bind.annotation.RestController;

/**
 * @ClassName ConfigController
 * @Description TDO
 * @Author zhao.zhilue
 * @Date 2019/8/20 17:17
 * @Version 1.0
 **/
@RestController
@RefreshScope // 使用该注解的类,会在接到SpringCloud配置中心配置刷新的时候,自动将新的配置更新到该类对应的字段中。
public class ConfigController {

    @Value("${lovin.token}")
    private String token;
    @RequestMapping("/token")
    public String getToken() {
        return this.token;
    }
}
PS:其中RefreshScope注解是为了刷新配置来添加的,这样让配置仓库中的配置发生改变的时候,我们可以通过访问/refresh请求来刷新配置(由spring-boot-starter-actuator提供的监控功能)
通过客户端去访问获取配置数据
-
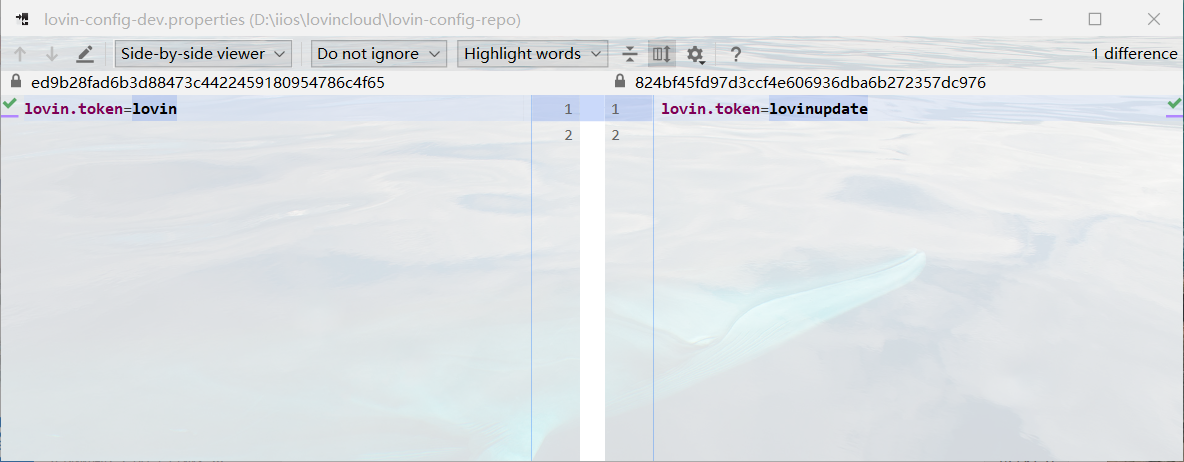
修改配置,然后再次访问,我们可以看到配置是没有变更的
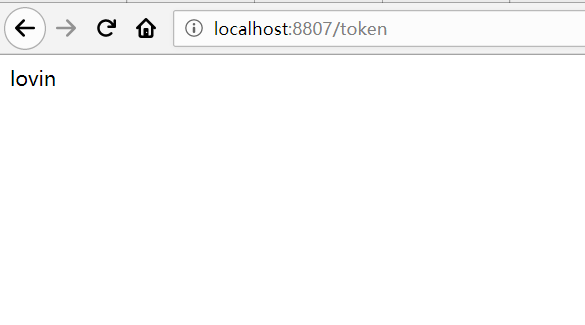
-
刷新配置再次访问
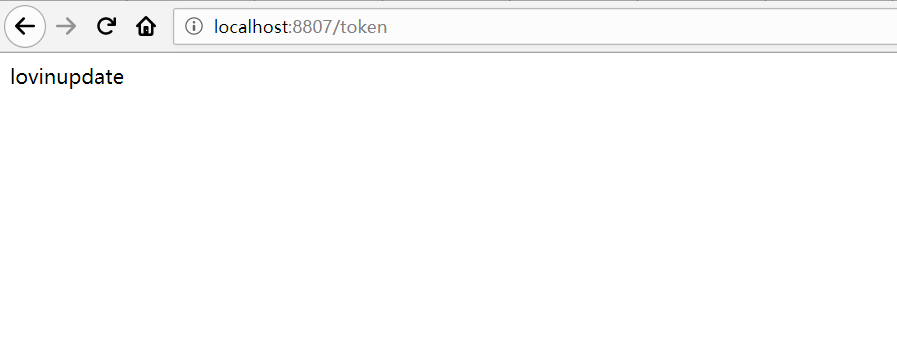
可以看到这是我们已经获取到了最新的配置,当时这样就存在一个问题,每一个配置客户端都需要刷新配置,会非常麻烦,也很容易出错。解决方案由webhook来刷新配置,但是这个不是最好的解决办法。但是我们可以通过消息总线来解决,这里见会在下一篇文章中详细讲解,在这里就不作赘述了。


 浙公网安备 33010602011771号