stellar
13)
Sundapeng.123
12)

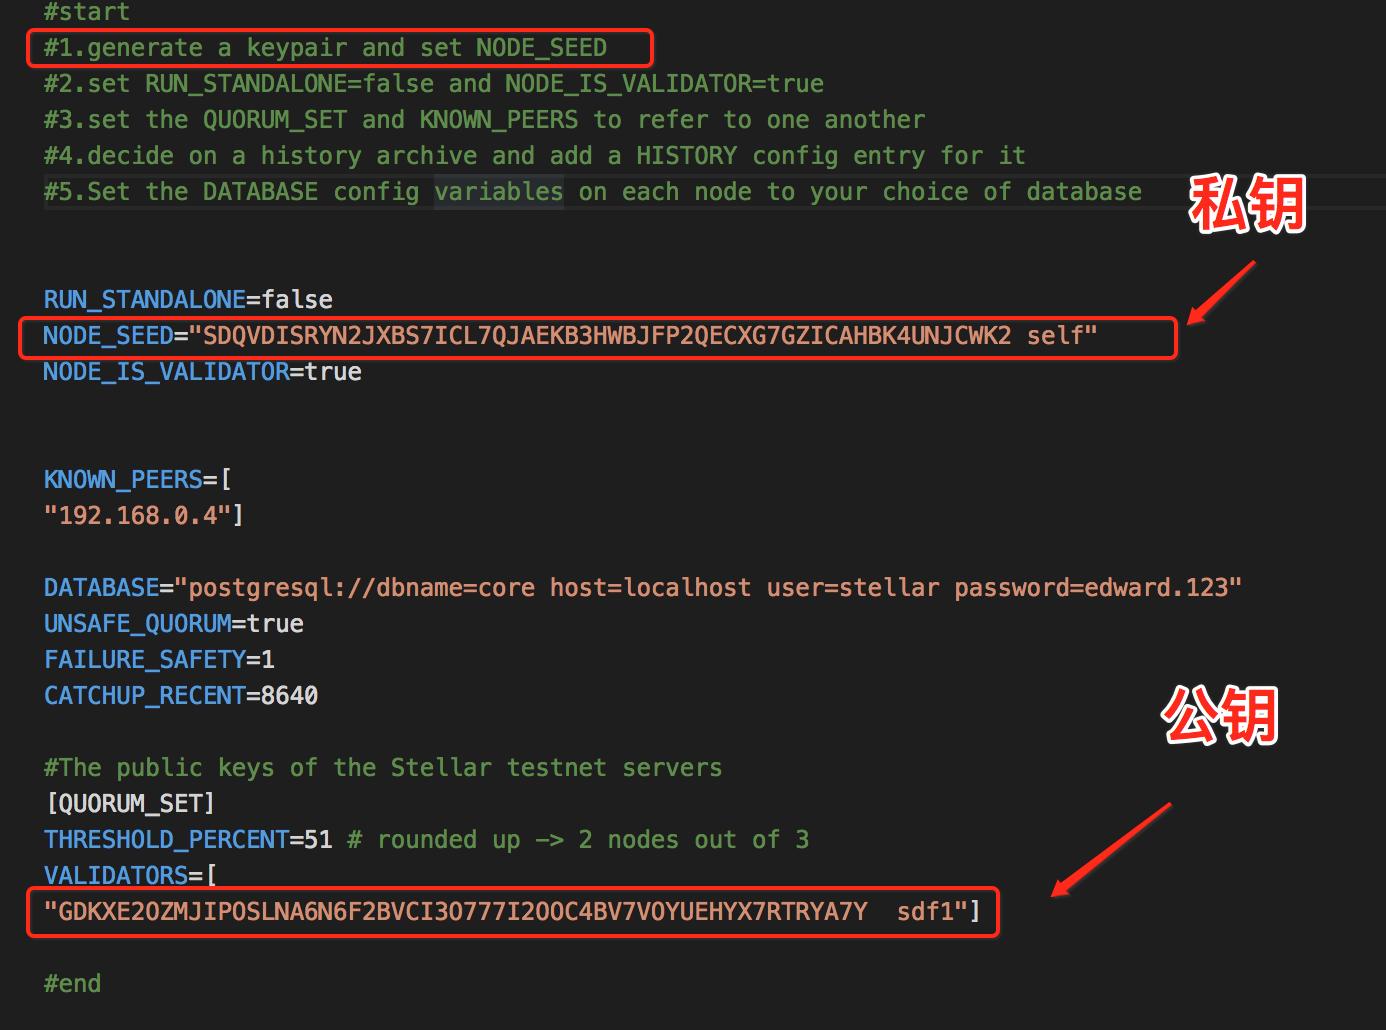
有个问题问下,这里的私钥和公钥是随意生成的吗?
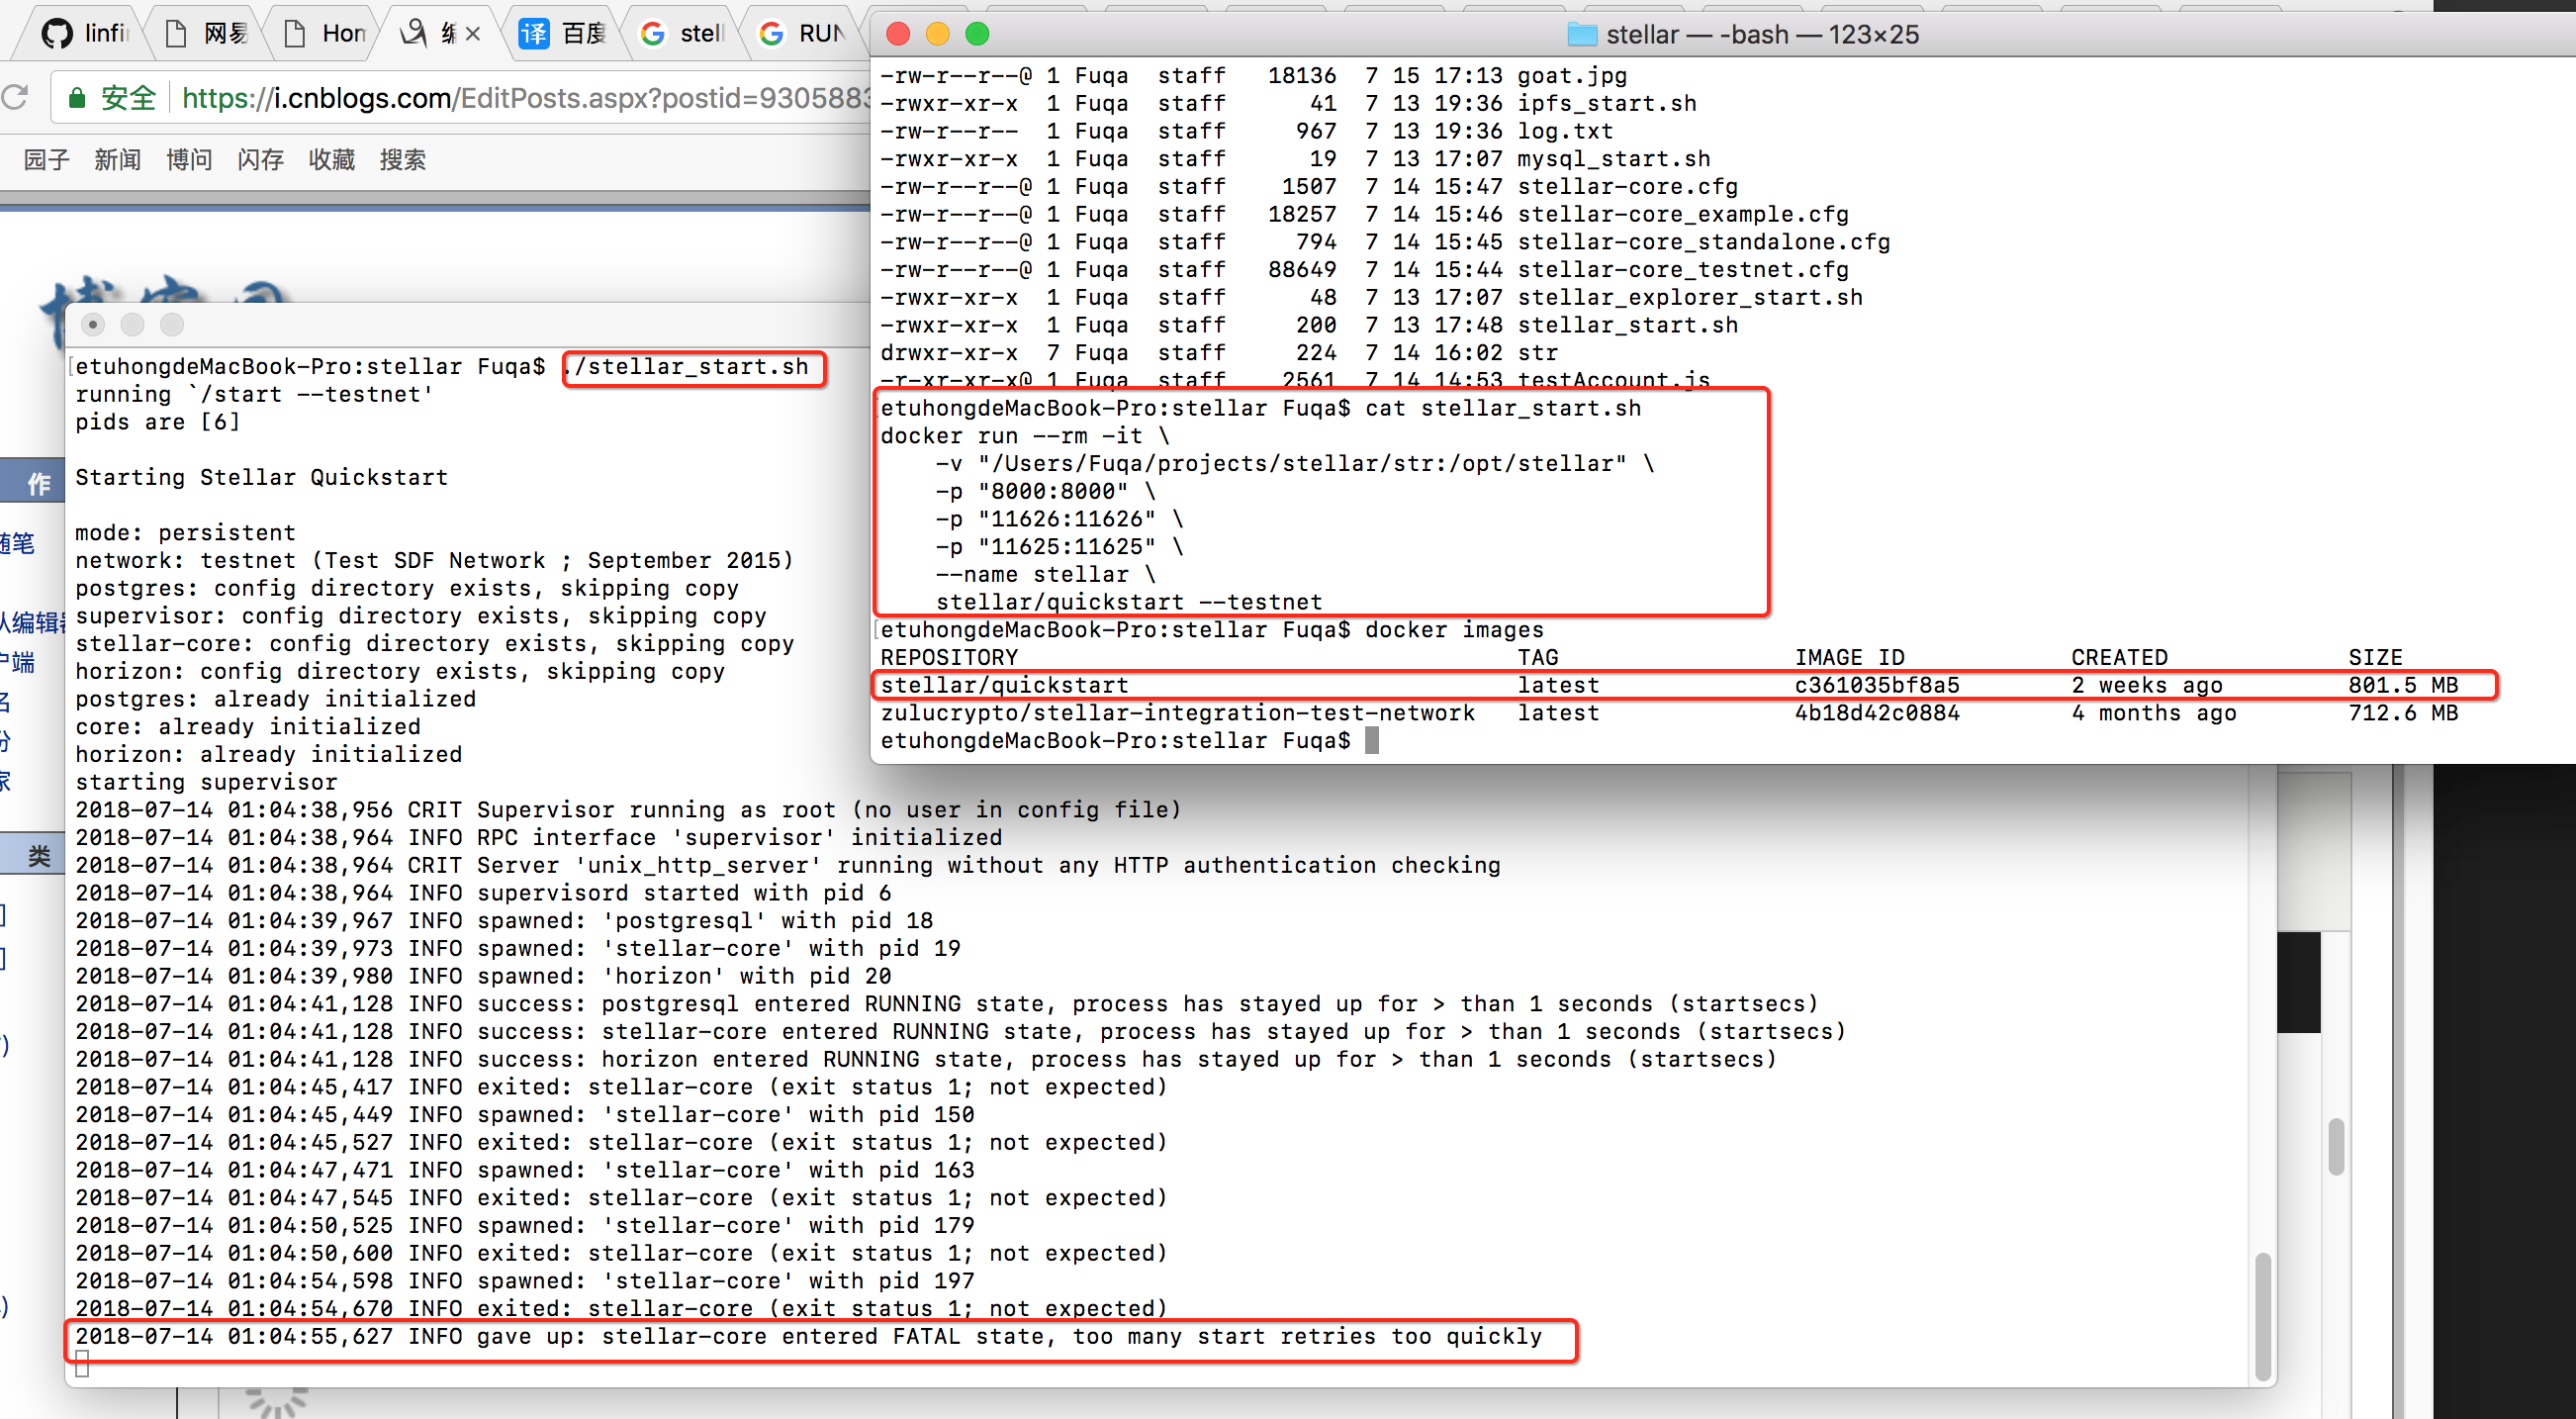
当前的配置启动的时候报错了

11)

ssh root@39.108.127.234
Liansen2018
10)
什么是lumen?
Lumen是Stellar网络的内置资产。
内置意味着lumen是内置于网络內的。 资产是网络引用存储在总账上的is how the network refers to an item of value that is stored on the ledger.
一个lumen是一种类似数字货币单位,就像一个比特币一样。
虽然你无法将lumen拿在手上,但是它们对Stellar网络是至关重要的——因为这可以实现资金在全世界流通,同时可以安全快速的用不同的货币进行交易。
lumen来源?
2014年,Stellar网络发行了1000亿个stellar,这是该网络内置资产的原名。
2015年,随着升级网络的推出,内置资产的名字从stellar改为lumen,以此来区分1)Stellar网络本身和2) Stellar.org,这是一家非盈利组织,旨在促进网络的开发。
如果lumen是免费分发的,那为什么我还要买lumen呢?
作为集成商或锚点(接受存款和兑现提款的可信任集成商,通常是持牌货币服务供应商),你可能需要lumen来支付网络上交易的基本费用。
作为一名支持者或成员的话,你可能希望支持Stellar.org的工作,并为了未来的投资进行投资。
以后,在我们赠送了所有的lumen之后——这可能在未来十年发生——大家都要从交易所中采购lumen。
9)
8)
navicat链接mysql 8 出现 2015 authentication plugin 'caching_sha2_password' 错误
使用mysql自带的 MySQL 8.0 Command Line Client - Unicode 登录,
然后使用命令:
alter user 'root'@'localhost' identified with mysql_native_password by 'root';
进行密码的更新;
alter user 'root'@'localhost' identified with mysql_native_password by 'root';
alter user 'root'@'localhost' identified with mysql_native_password by 'root';
7)
GRANT ALL PRIVILEGES ON *.* TO root@'%' IDENTIFIED BY 'root';
最後將權限flush, 然後離開MySQL即可:
mysql> FLUSH PRIVILEGES;
6) mysql root a/c: root
Mac os x几款mysql客户端
1,Navicat
这是一款可支持多种数据库的客户端,可支持mysql,sqlite,oracle,sql server等数据库。当然也可以选择只支持某种数据库的客户端下载。
软件可以免费使用30天,当然可以在网上下个注册机就可以了。
注册机
下载地址:http://www.navicat.com/download
2,DBeave
无需破解,直接使用,下载只需选择适合自己的版本
下载地址:http://dbeaver.jkiss.org/download/#macos
3,MySQL GUI Tool
这是mysql提供的一款sql客户端工具,可去官网下载
下载地址:http://dev.mysql.com/downloads/tools/workbench/
4,Selquel pro
这是一款免费使用软件下载即可使用
下载地址:http://www.sequelpro.com
当然这些mysql客户端也有windows版本
5)
实例
启动已被停止的容器myrunoob
docker start myrunoob
停止运行中的容器myrunoob
docker stop myrunoob
重启容器myrunoob
docker restart myrunoob
4)
Launch an ephemeral pubnet node in the background:
$ docker run -d -p "8000:8000" --name stellar stellar/quickstart --pubnet
Launch an ephemeral testnet node in the foreground, exposing all ports:
$ docker run --rm -it \
    -p "8000:8000" \
    -p "11626:11626" \
    -p "11625:11625" \
    --name stellar \
    stellar/quickstart --testnet
Setup a new persistent node using the host directory /str:
$ docker run -it --rm \
    -v "/str:/opt/stellar" \
    --name stellar \
    stellar/quickstart --pubnet
Start a background persistent container for an already initialized host directory:
$ docker run -d \
    -v "/str:/opt/stellar" \
    -p "8000:8000" \
    --name stellar \
    stellar/quickstart --pubnet
$ docker exec -it stellar /bin/bash
3)stellar image
etuhongdeMacBook-Pro:~ Fuqa$ docker images
REPOSITORY TAG IMAGE ID CREATED SIZE
zulucrypto/stellar-integration-test-network latest 4b18d42c0884 4 months ago 712.6 MB
etuhongdeMacBook-Pro:~ Fuqa$
2)install jmeter
etuhongdeMacBook-Pro:~ Fuqa$ brew install jmeter
Updating Homebrew...
==> Downloading https://homebrew.bintray.com/bottles/jmeter-4.0.high_sierra.bottle.tar.gz
######################################################################## 100.0%
==> Pouring jmeter-4.0.high_sierra.bottle.tar.gz
🍺 /usr/local/Cellar/jmeter/4.0: 2,339 files, 83.2MB
etuhongdeMacBook-Pro:~ Fuqa$
1) install brew
ruby -e "$(curl -fsSL https://raw.githubusercontent.com/Homebrew/install/master/install)"


 浙公网安备 33010602011771号