Zabbix的安装与配置
Zabbix Server的安装

● 安装zabbix仓库
# rpm -ivh http://repo.zabbix.com/zabbix/3.4/rhel/7/x86_64/zabbix-release-3.4-2.el7.noarch.rpm
● 安装zabbix server, frontend, agent
# yum -y install zabbix-server-mysql zabbix-web-mysql zabbix-apache-conf zabbix-agent
● 安装数据库-mariadb
# yum -y install mariadb-server
● 启动mariadb服务
# systemctl start mariadb
● 数据库初始化 (包括设置zabbix数据库的密码)
# mysql -uroot -p
password
mysql> create database zabbix character set utf8 collate utf8_bin;
mysql> grant all privileges on zabbix.* to zabbix@localhost identified by 'password';
mysql> quit;
● 初始化zabbix数据库表结构
# zcat /usr/share/doc/zabbix-server-mysql*/create.sql.gz | mysql -uzabbix -p zabbix
● 编辑配置文件/etc/zabbix/zabbix_server.conf 更改zabbix数据库的密码
# vim /etc/zabbix/zabbix_server.conf
DBPassword=password
● 查看web模块是否已经安装完成
# rpm -q php
php-5.4.16-46.el7.x86_64
# rpm -q php-mysql
php-mysql-5.4.16-46.el7.x86_64
● 编辑配置文件/etc/httpd/conf.d/zabbix.conf 修改时区
# vim /etc/httpd/conf.d/zabbix.conf
php_value date.timezone Asia/Shanghai
● 关闭SELinux
# setenforce 0
● 开放防火墙端口
# firewall-cmd --permanent --add-port 10050/tcp
success
# firewall-cmd --permanent --add-port 10051/tcp
success
# firewall-cmd --permanent --add-port 80/tcp
success
# firewall-cmd --permanent --list-port
10050/tcp 10051/tcp 80/tcp
# systemctl restart firewalld
● 开启httpd服务
# systemctl start httpd
● 开启zabbix server 和 agent服务 并设置为开机自启动
# systemctl restart zabbix-server zabbix-agent httpd
# systemctl enable zabbix-server zabbix-agent httpd
● 检查端口3306、80、10050、10051的监听状态
# ss -ntl
State Recv-Q Send-Q Local Address:Port
LISTEN 0 128 *:10050
LISTEN 0 128 *:10051
LISTEN 0 50 *:3306
LISTEN 0 128 :::80
● 用浏览器打开zabbix页面
http://zabbix ip address/zabbix/index.php
安装agent
修改配置文件
设置zabbix server的地址
Server=10.10.101.100

设置本机主动模式的地址
ServerActive=10.10.101.102

本机的hostname
Hostname=play-shell
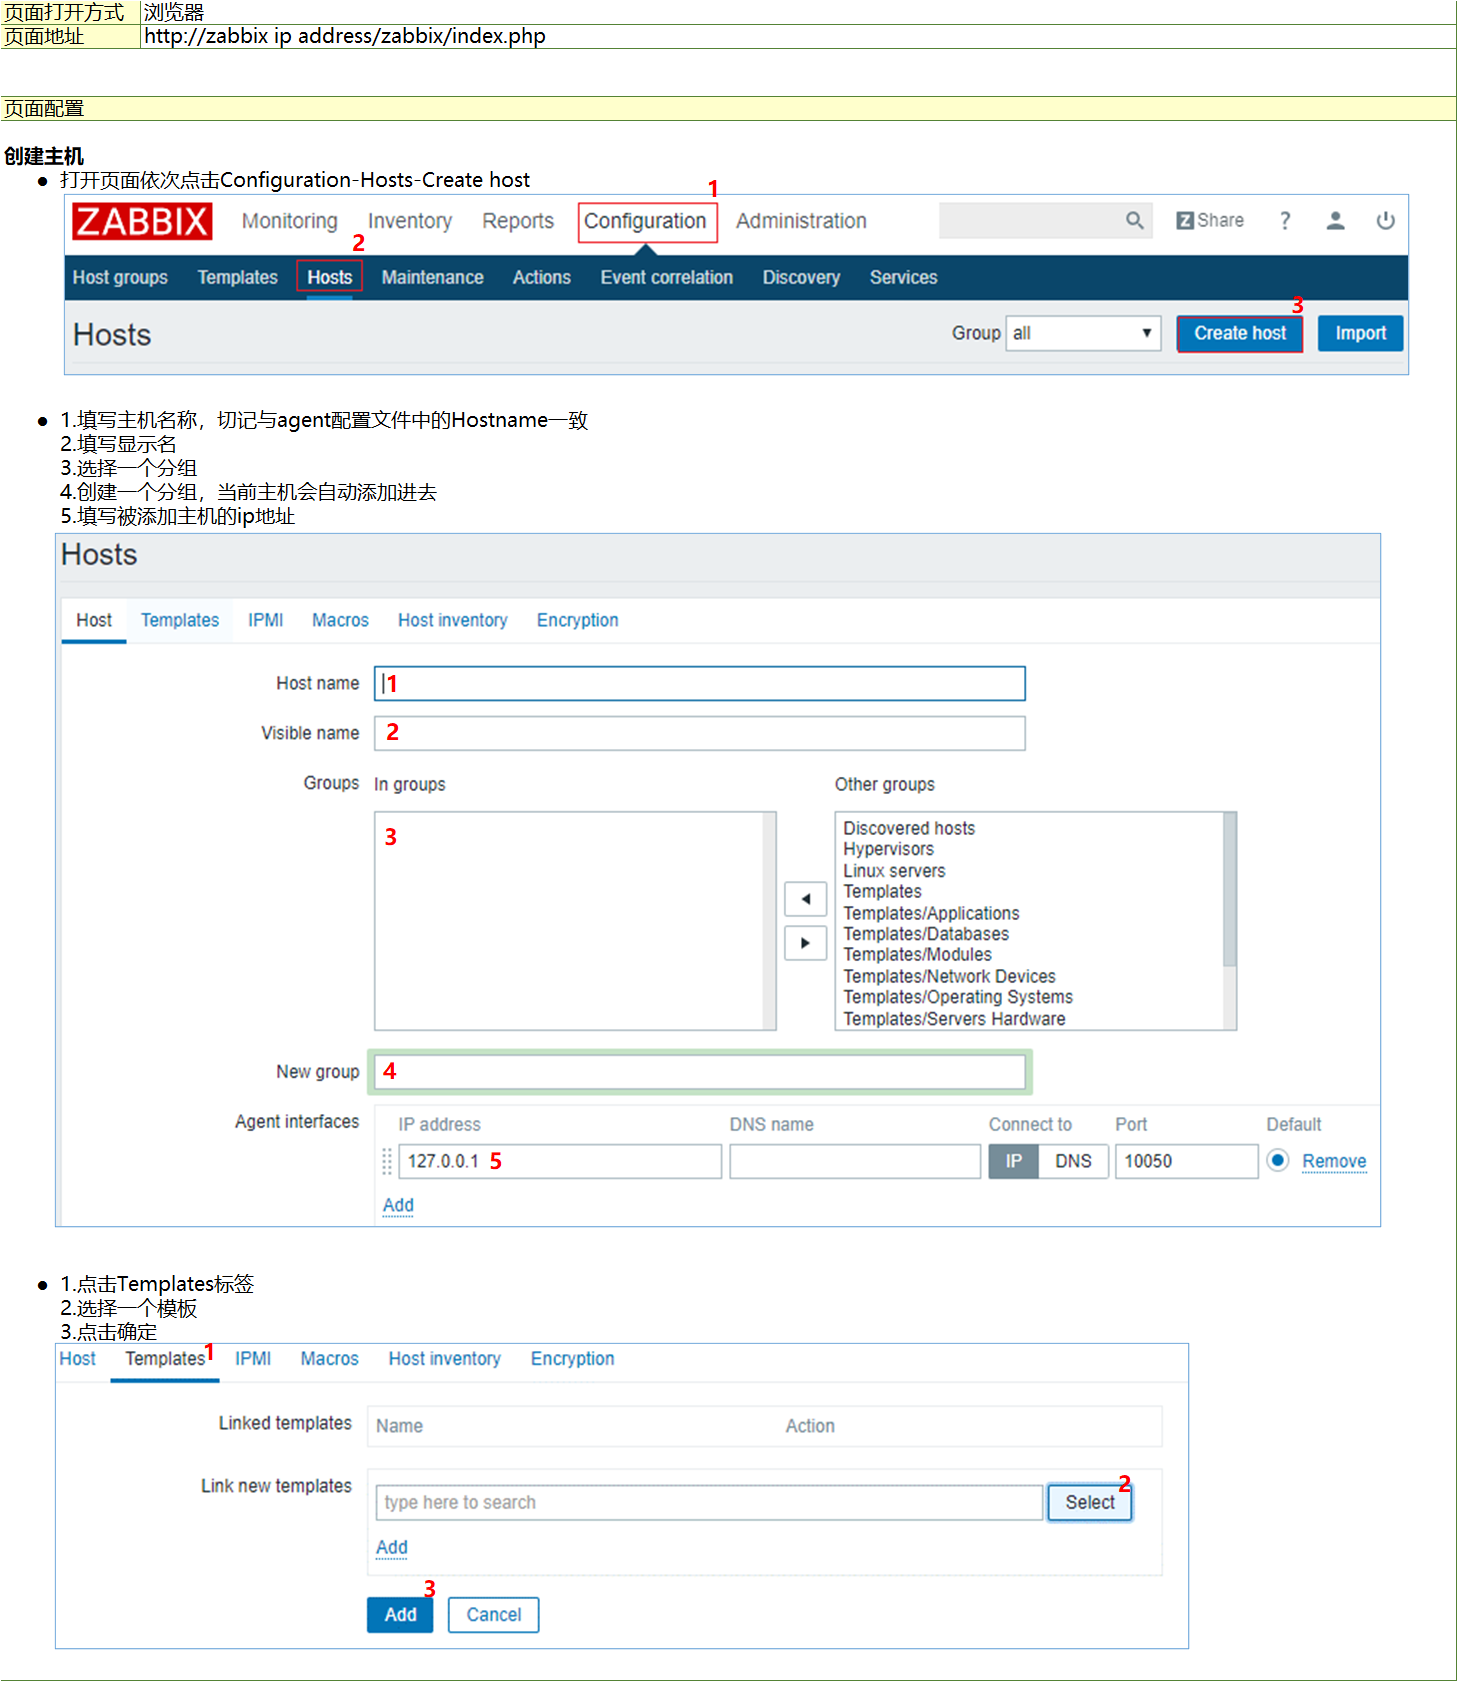
页面配置