SpringBoot06:Web开发静态资源处理
Web开发探究
简介
好的,同学们,那么接下来呢,我们开始学习SpringBoot与Web开发,从这一章往后,就属于我们实战部分的内容了;
其实SpringBoot的东西用起来非常简单,因为SpringBoot最大的特点就是自动装配。
使用SpringBoot的步骤:
1、创建一个SpringBoot应用,选择我们需要的模块,SpringBoot就会默认将我们的需要的模块自动配置好
2、手动在配置文件中配置部分配置项目就可以运行起来了
3、专注编写业务代码,不需要考虑以前那样一大堆的配置了。
要熟悉掌握开发,之前学习的自动配置的原理一定要搞明白!
比如SpringBoot到底帮我们配置了什么?我们能不能修改?我们能修改哪些配置?我们能不能扩展?
- 向容器中自动配置组件 :*** Autoconfiguration
- 自动配置类,封装配置文件的内容:***Properties
没事就找找类,看看自动装配原理!
我们之后来进行一个单体项目的小项目测试,让大家能够快速上手开发!
静态资源处理
首先,我们搭建一个普通的SpringBoot项目,回顾一下HelloWorld程序!
写请求非常简单,那我们要引入我们前端资源,我们项目中有许多的静态资源,比如css,js等文件,这个SpringBoot怎么处理呢?
如果我们是一个web应用,我们的main下会有一个webapp,我们以前都是将所有的页面导在这里面的,对吧!但是我们现在的pom呢,打包方式是为jar的方式,那么这种方式SpringBoot能不能来给我们写页面呢?当然是可以的,但是SpringBoot对于静态资源放置的位置,是有规定的!
我们先来聊聊这个静态资源映射规则:
SpringBoot中,SpringMVC的web配置都在 WebMvcAutoConfiguration 这个配置类里面;
我们可以去看看 WebMvcAutoConfigurationAdapter 中有很多配置方法;
有一个方法:addResourceHandlers 添加资源处理
public void addResourceHandlers(ResourceHandlerRegistry registry) {
    if (!this.resourceProperties.isAddMappings()) {
        // 已禁用默认资源处理
        logger.debug("Default resource handling disabled");
    } else {
        // webjars 配置
        this.addResourceHandler(registry, "/webjars/**", "classpath:/META-INF/resources/webjars/");
        // 静态资源配置
        this.addResourceHandler(registry, this.mvcProperties.getStaticPathPattern(), (registration) -> {
            registration.addResourceLocations(this.resourceProperties.getStaticLocations());
            if (this.servletContext != null) {
                ServletContextResource resource = new ServletContextResource(this.servletContext, "/");
                registration.addResourceLocations(new Resource[]{resource});
            }

        });
    }
}

private void addResourceHandler(ResourceHandlerRegistry registry, String pattern, String... locations) {
    this.addResourceHandler(registry, pattern, (registration) -> {
        registration.addResourceLocations(locations);
    });
}

private void addResourceHandler(ResourceHandlerRegistry registry, String pattern, Consumer<ResourceHandlerRegistration> customizer) {
    if (!registry.hasMappingForPattern(pattern)) {
        ResourceHandlerRegistration registration = registry.addResourceHandler(new String[]{pattern});
        customizer.accept(registration);
        registration.setCachePeriod(this.getSeconds(this.resourceProperties.getCache().getPeriod()));
        registration.setCacheControl(this.resourceProperties.getCache().getCachecontrol().toHttpCacheControl());
        registration.setUseLastModified(this.resourceProperties.getCache().isUseLastModified());
        this.customizeResourceHandlerRegistration(registration);
    }
}
读一下源代码:比如所有的 /webjars/** , 都需要去 classpath:/META-INF/resources/webjars/ 找对应的资源;
什么是webjars呢?
Webjars本质就是以jar包的方式引入我们的静态资源 , 我们以前要导入一个静态资源文件,直接导入即可。
使用SpringBoot需要使用Webjars,我们可以去搜索一下:
要使用jQuery,我们只要要引入jQuery对应版本的pom依赖即可!
<dependency>
    <groupId>org.webjars</groupId>
    <artifactId>jquery</artifactId>
    <version>3.6.0</version>
</dependency>
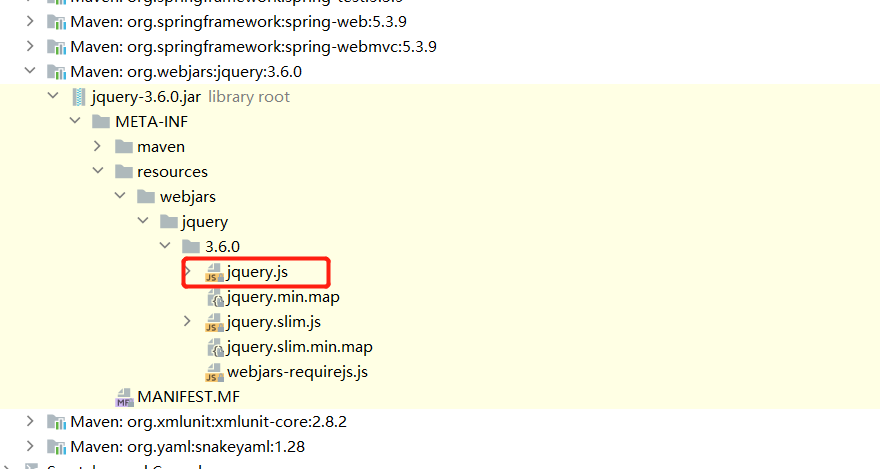
导入完毕,查看webjars目录结构,并访问Jquery.js文件!
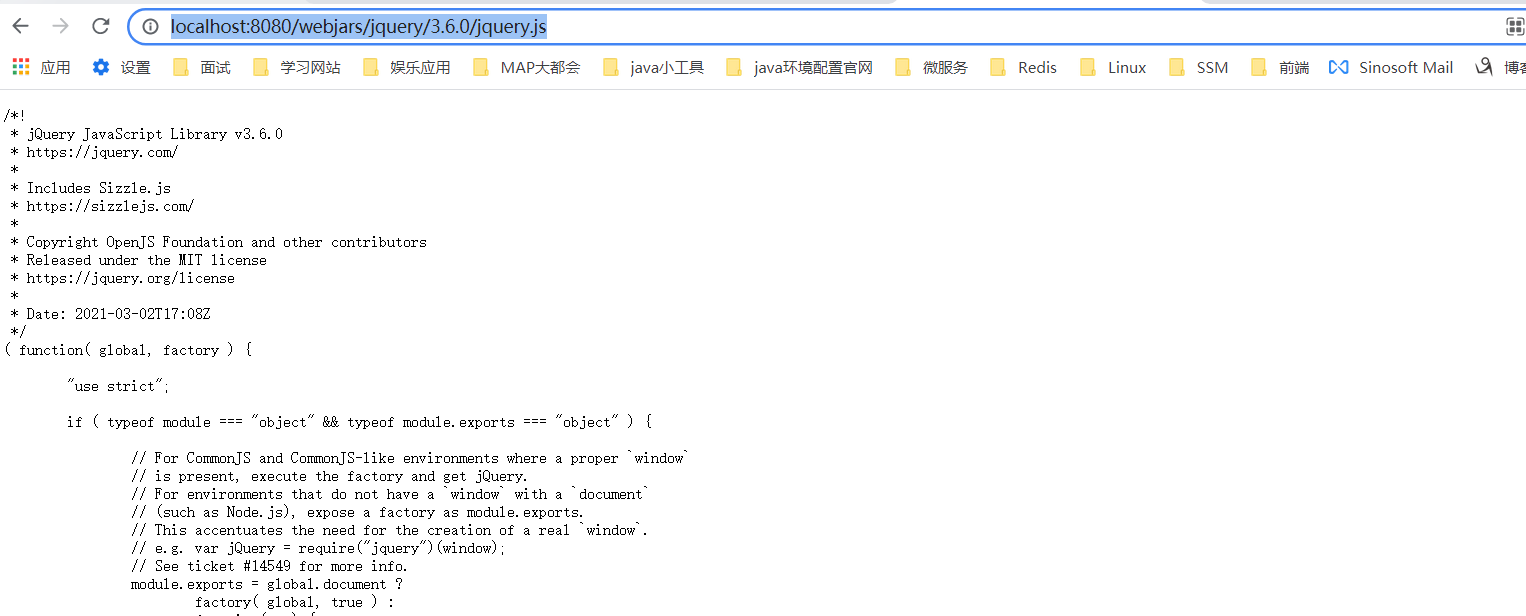
访问:只要是静态资源,SpringBoot就会去对应的路径寻找资源,我们这里访问:http://localhost:8080/webjars/jquery/3.6.0/jquery.js
第二种静态资源映射规则
那我们项目中要是使用自己的静态资源该怎么导入呢?我们看下一行代码;
我们去找staticPathPattern发现第二种映射规则 :/** , 访问当前的项目任意资源,它会去找 WebProperties这个类,我们可以点进去看一下分析:
public String[] getStaticLocations() {
    return this.staticLocations;
}

public Resources() {
    this.staticLocations = CLASSPATH_RESOURCE_LOCATIONS;
    this.addMappings = true;
    this.customized = false;
    this.chain = new WebProperties.Resources.Chain();
    this.cache = new WebProperties.Resources.Cache();
}

private static final String[] CLASSPATH_RESOURCE_LOCATIONS = new String[]{
    "classpath:/META-INF/resources/",
    "classpath:/resources/",
    "classpath:/static/",
    "classpath:/public/"
};
WebProperties可以设置和我们静态资源有关的参数;这里面指向了它会去寻找资源的文件夹,即上面数组的内容。
所以得出结论,以下四个目录存放的静态资源可以被我们识别:
"classpath:/META-INF/resources/",
"classpath:/resources/",
"classpath:/static/",
"classpath:/public/"
我们可以在resources根目录下新建对应的文件夹,都可以存放我们的静态文件;
比如我们访问 http://localhost:8080/1.js , 他就会去这些文件夹中寻找对应的静态资源文件;
优先级从高到低:resources > static > public
自定义静态资源路径
我们也可以自己通过配置文件来指定一下,哪些文件夹是需要我们放静态资源文件的,在application.properties中配置;
spring.web.resources.static-locations=classpath:/coding/,classpath:/edgar/
一旦自己定义了静态文件夹的路径,原来的自动配置就都会失效了!
设置首页
静态资源文件夹说完后,我们继续向下看源码!可以看到一个欢迎页的映射,就是我们的首页!
@Bean
public WelcomePageHandlerMapping welcomePageHandlerMapping(ApplicationContext applicationContext) {
    WelcomePageHandlerMapping welcomePageHandlerMapping = new WelcomePageHandlerMapping(new TemplateAvailabilityProviders(applicationContext), applicationContext, this.getWelcomePage(), this.mvcProperties.getStaticPathPattern());
    welcomePageHandlerMapping.setInterceptors(this.getInterceptors());
    return welcomePageHandlerMapping;
}
点进去继续看
private Optional<Resource> getWelcomePage() {
    String[] locations = WebMvcAutoConfiguration.getResourceLocations(this.resourceProperties.getStaticLocations());
    // // ::是java8 中新引入的运算符
    // Class::function的时候function是属于Class的,应该是静态方法。
    // this::function的funtion是属于这个对象的。
    // 简而言之,就是一种语法糖而已,是一种简写
    return Arrays.stream(locations).map(this::getIndexHtml).filter(this::isReadable).findFirst();
}
// 欢迎页就是一个location下的的 index.html 而已
private Resource getIndexHtml(String location) {
    return this.resourceLoader.getResource(location + "index.html");
}
欢迎页,静态资源文件夹下的所有 index.html 页面;被 /** 映射。
比如我访问 http://localhost:8080/ ,就会找静态资源文件夹下的 index.html
新建一个 index.html ,在我们上面的3个目录中任意一个;然后访问测试 http://localhost:8080/ 看结果!
设置网站图标
与其他静态资源一样,Spring Boot在配置的静态内容位置中查找 favicon.ico。如果存在这样的文件,它将自动用作应用程序的favicon。
1、关闭SpringBoot默认图标(如今是springboot的新版本不支持该配置,可以直接从第2步开始操作)
#关闭默认图标
spring.mvc.favicon.enabled=false
2、自己放一个图标在静态资源目录下,我放在 static目录下,图片名:favicon.ico
3、清除浏览器缓存!刷新网页,发现图标已经变成自己的了!


 浙公网安备 33010602011771号