Python入妖4-----Request库的基本使用
什么是Requests
Requests是用python语言基于urllib编写的,采用的是Apache2 Licensed开源协议的HTTP库
如果你看过上篇文章关于urllib库的使用,你会发现,其实urllib还是非常不方便的,而Requests它会比urllib更加方便,可以节约我们大量的工作。(用了requests之后,你基本都不愿意用urllib了)一句话,requests是python实现的最简单易用的HTTP库,建议爬虫使用requests库。
默认安装好python之后,是没有安装requests模块的,需要单独通过pip安装
requests功能详解
总体功能的一个演示
import requests

response  = requests.get("https://www.baidu.com")
print(type(response))
print(response.status_code)
print(type(response.text))
print(response.text)
print(response.cookies)
print(response.content)

print(response.content.decode("utf-8"))
我们可以看出response使用起来确实非常方便,这里有个问题需要注意一下:
很多情况下的网站如果直接response.text会出现乱码的问题,所以这个使用response.content
这样返回的数据格式其实是二进制格式,然后通过decode()转换为utf-8,这样就解决了通过response.text直接返回显示乱码的问题.
请求发出后,Requests 会基于 HTTP 头部对响应的编码作出有根据的推测。当你访问 response.text 之时,Requests 会使用其推测的文本编码。你可以找出 Requests 使用了什么编码,并且能够使用 response.encoding 属性来改变它.如:
response =requests.get("http://www.baidu.com")
response.encoding="utf-8"
print(response.text)
各种请求方式
requests里提供个各种请求方式
import requests
requests.post("http://httpbin.org/post")
requests.put("http://httpbin.org/put")
requests.delete("http://httpbin.org/delete")
requests.head("http://httpbin.org/get")
requests.options("http://httpbin.org/get")
请求
基本GET请求
import requests

response = requests.get('http://httpbin.org/get')
print(response.text)
带参数的GET请求,例子1
import requests

response = requests.get("http://httpbin.org/get?name=zhaofan&age=23")
print(response.text)
如果我们想要在URL查询字符串传递数据,通常我们会通过httpbin.org/get?key=val方式传递。Requests模块允许使用params关键字传递参数,以一个字典来传递这些参数,例子如下:
import requests
data = {
    "name":"zhaofan",
    "age":22
}
response = requests.get("http://httpbin.org/get",params=data)
print(response.url)
print(response.text
上述两种的结果是相同的,通过params参数传递一个字典内容,从而直接构造url
注意:第二种方式通过字典的方式的时候,如果字典中的参数为None则不会添加到url上
解析json
import requests
import json

response = requests.get("http://httpbin.org/get")
print(type(response.text))

print(response.json())
print(json.loads(response.text))

print(type(response.json()))
从结果可以看出requests里面集成的json其实就是执行了json.loads()方法,两者的结果是一样的
获取二进制数据
在上面提到了response.content,这样获取的数据是二进制数据,同样的这个方法也可以用于下载图片以及
视频资源
添加headers
和前面我们将urllib模块的时候一样,我们同样可以定制headers的信息,如当我们直接通过requests请求知乎网站的时候,默认是无法访问的
import requests
response =requests.get("https://www.zhihu.com")
print(response.text)
这样会得到如下的错误
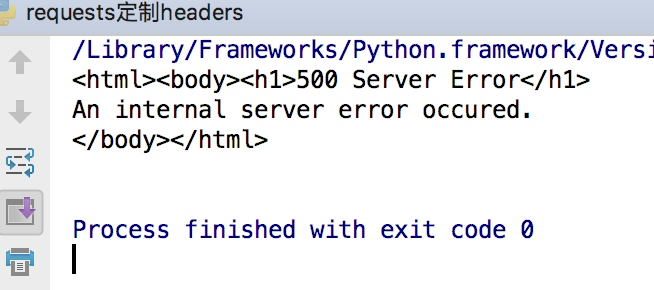
因为访问知乎需要头部信息,这个时候我们在谷歌浏览器里输入chrome://version,就可以看到用户代理,将用户代理添加到头部信息
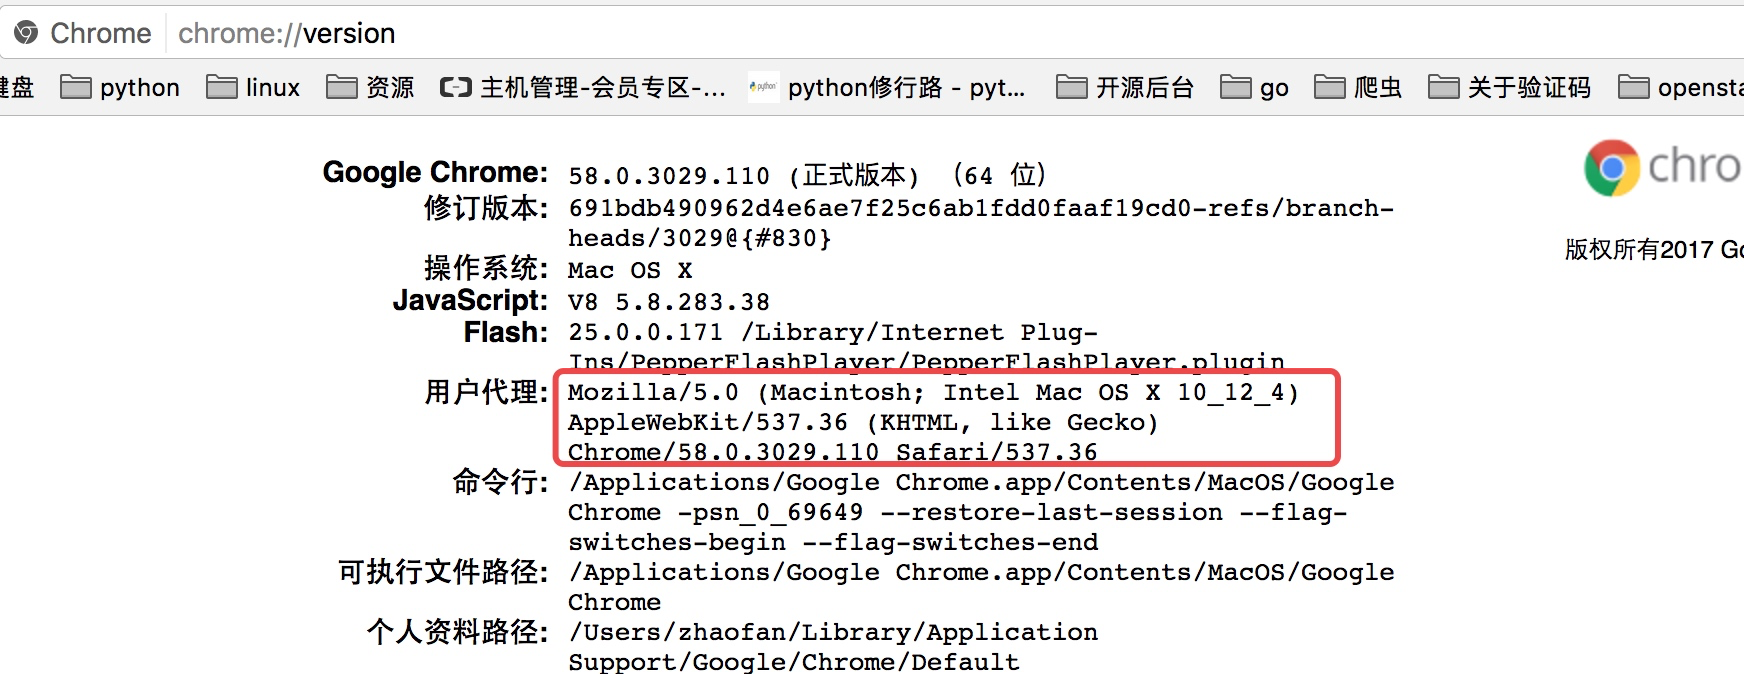
import requests
headers = {

    "User-Agent":"Mozilla/5.0 (Macintosh; Intel Mac OS X 10_12_4) AppleWebKit/537.36 (KHTML, like Gecko) Chrome/58.0.3029.110 Safari/537.36"
}
response =requests.get("https://www.zhihu.com",headers=headers)

print(response.text)
这样就可以正常的访问知乎了。
基本POST请求
通过在发送post请求时添加一个data参数,这个data参数可以通过字典构造成,这样
对于发送post请求就非常方便
import requests

data = {
    "name":"zhaofan",
    "age":23
}
response = requests.post("http://httpbin.org/post",data=data)
print(response.text)
同样的在发送post请求的时候也可以和发送get请求一样通过headers参数传递一个字典类型的数据
响应
我们可以通过response获得很多属性,例子如下
import requests

response = requests.get("http://www.baidu.com")
print(type(response.status_code),response.status_code)
print(type(response.headers),response.headers)
print(type(response.cookies),response.cookies)
print(type(response.url),response.url)
print(type(response.history),response.history)
结果如下:

状态码判断
Requests还附带了一个内置的状态码查询对象
主要有如下内容:
100: ('continue',),
101: ('switching_protocols',),
102: ('processing',),
103: ('checkpoint',),
122: ('uri_too_long', 'request_uri_too_long'),
200: ('ok', 'okay', 'all_ok', 'all_okay', 'all_good', '\o/', '✓'),
201: ('created',),
202: ('accepted',),
203: ('non_authoritative_info', 'non_authoritative_information'),
204: ('no_content',),
205: ('reset_content', 'reset'),
206: ('partial_content', 'partial'),
207: ('multi_status', 'multiple_status', 'multi_stati', 'multiple_stati'),
208: ('already_reported',),
226: ('im_used',),
Redirection.
300: ('multiple_choices',),
301: ('moved_permanently', 'moved', '\o-'),
302: ('found',),
303: ('see_other', 'other'),
304: ('not_modified',),
305: ('use_proxy',),
306: ('switch_proxy',),
307: ('temporary_redirect', 'temporary_moved', 'temporary'),
308: ('permanent_redirect',
'resume_incomplete', 'resume',), # These 2 to be removed in 3.0
Client Error.
400: ('bad_request', 'bad'),
401: ('unauthorized',),
402: ('payment_required', 'payment'),
403: ('forbidden',),
404: ('not_found', '-o-'),
405: ('method_not_allowed', 'not_allowed'),
406: ('not_acceptable',),
407: ('proxy_authentication_required', 'proxy_auth', 'proxy_authentication'),
408: ('request_timeout', 'timeout'),
409: ('conflict',),
410: ('gone',),
411: ('length_required',),
412: ('precondition_failed', 'precondition'),
413: ('request_entity_too_large',),
414: ('request_uri_too_large',),
415: ('unsupported_media_type', 'unsupported_media', 'media_type'),
416: ('requested_range_not_satisfiable', 'requested_range', 'range_not_satisfiable'),
417: ('expectation_failed',),
418: ('im_a_teapot', 'teapot', 'i_am_a_teapot'),
421: ('misdirected_request',),
422: ('unprocessable_entity', 'unprocessable'),
423: ('locked',),
424: ('failed_dependency', 'dependency'),
425: ('unordered_collection', 'unordered'),
426: ('upgrade_required', 'upgrade'),
428: ('precondition_required', 'precondition'),
429: ('too_many_requests', 'too_many'),
431: ('header_fields_too_large', 'fields_too_large'),
444: ('no_response', 'none'),
449: ('retry_with', 'retry'),
450: ('blocked_by_windows_parental_controls', 'parental_controls'),
451: ('unavailable_for_legal_reasons', 'legal_reasons'),
499: ('client_closed_request',),
Server Error.
500: ('internal_server_error', 'server_error', '/o\', '✗'),
501: ('not_implemented',),
502: ('bad_gateway',),
503: ('service_unavailable', 'unavailable'),
504: ('gateway_timeout',),
505: ('http_version_not_supported', 'http_version'),
506: ('variant_also_negotiates',),
507: ('insufficient_storage',),
509: ('bandwidth_limit_exceeded', 'bandwidth'),
510: ('not_extended',),
511: ('network_authentication_required', 'network_auth', 'network_authentication'),
通过下面例子测试:(不过通常还是通过状态码判断更方便)
import requests

response= requests.get("http://www.baidu.com")
if response.status_code == requests.codes.ok:
    print("访问成功")
项目实例:
使用流程
- 指定url
- 基于requests模块发起请求
- 获取响应对象中的数据值
- 持久化存储
1、需求:爬取搜狗指定词条搜索后的页面数据


import requests
import os
#指定搜索关键字
word = input('enter a word you want to search:')
#自定义请求头信息
headers={
    'User-Agent': 'Mozilla/5.0 (Macintosh; Intel Mac OS X 10_12_0) AppleWebKit/537.36 (KHTML, like Gecko) Chrome/69.0.3497.100 Safari/537.36',
    }
#指定url
url = 'https://www.sogou.com/web'
#封装get请求参数
param = {
    'query':word,
    'ie':'utf-8'
}
#发起请求
response = requests.get(url=url,params=param)

#获取响应数据
page_text = response.text

with open('./sougou.html','w',encoding='utf-8') as fp:
    fp.write(page_text)
2、需求:登录豆瓣电影,爬取登录成功后的页面数据
import requests
import os
url = 'https://accounts.douban.com/login'
#封装请求参数
data = {
    "source": "movie",
    "redir": "https://movie.douban.com/",
    "form_email": "15027900535",
    "form_password": "bobo@15027900535",
    "login": "登录",
}
#自定义请求头信息
headers={
    'User-Agent': 'Mozilla/5.0 (Macintosh; Intel Mac OS X 10_12_0) AppleWebKit/537.36 (KHTML, like Gecko) Chrome/69.0.3497.100 Safari/537.36',
    }
response = requests.post(url=url,data=data)
page_text = response.text

with open('./douban111.html','w',encoding='utf-8') as fp:
    fp.write(page_text)
3、需求:爬取豆瓣电影分类排行榜 https://movie.douban.com/中的电影详情数据
#!/usr/bin/env python
# -*- coding:utf-8 -*-

import requests
import urllib.request
if __name__ == "__main__":

    #指定ajax-get请求的url(通过抓包进行获取)
    url = 'https://movie.douban.com/j/chart/top_list?'

    #定制请求头信息,相关的头信息必须封装在字典结构中
    headers = {
        #定制请求头中的User-Agent参数,当然也可以定制请求头中其他的参数
        'User-Agent': 'Mozilla/5.0 (Windows NT 6.1; Win64; x64) AppleWebKit/537.36 (KHTML, like Gecko) Chrome/66.0.3359.181 Safari/537.36',
    }

    #定制get请求携带的参数(从抓包工具中获取)
    param = {
        'type':'5',
        'interval_id':'100:90',
        'action':'',
        'start':'0',
        'limit':'20'
    }
    #发起get请求,获取响应对象
    response = requests.get(url=url,headers=headers,params=param)

    #获取响应内容:响应内容为json串
    print(response.text)
4、需求:爬取肯德基餐厅查询http://www.kfc.com.cn/kfccda/index.aspx中指定地点的餐厅数据
#!/usr/bin/env python
# -*- coding:utf-8 -*-

import requests
import urllib.request
if __name__ == "__main__":

    #指定ajax-post请求的url(通过抓包进行获取)
    url = 'http://www.kfc.com.cn/kfccda/ashx/GetStoreList.ashx?op=keyword'

    #定制请求头信息,相关的头信息必须封装在字典结构中
    headers = {
        #定制请求头中的User-Agent参数,当然也可以定制请求头中其他的参数
        'User-Agent': 'Mozilla/5.0 (Windows NT 6.1; Win64; x64) AppleWebKit/537.36 (KHTML, like Gecko) Chrome/66.0.3359.181 Safari/537.36',
    }

    #定制post请求携带的参数(从抓包工具中获取)
    data = {
        'cname':'',
        'pid':'',
        'keyword':'北京',
        'pageIndex': '1',
        'pageSize': '10'
    }
    #发起post请求,获取响应对象
    response = requests.get(url=url,headers=headers,data=data)

    #获取响应内容:响应内容为json串
    print(response.text)
5、需求:爬取搜狗知乎指定词条指定页码下的页面数据
import requests
import os
#指定搜索关键字
word = input('enter a word you want to search:')
#指定起始页码
start_page = int(input('enter start page num:'))
end_page = int(input('enter end page num:'))
#自定义请求头信息
headers={
    'User-Agent': 'Mozilla/5.0 (Macintosh; Intel Mac OS X 10_12_0) AppleWebKit/537.36 (KHTML, like Gecko) Chrome/69.0.3497.100 Safari/537.36',
    }
#指定url
url = 'https://zhihu.sogou.com/zhihu'
#创建文件夹
if not os.path.exists('./sougou'):
    os.mkdir('./sougou')
for page in range(start_page,end_page+1):
    #封装get请求参数
    params = {
        'query':word,
        'ie':'utf-8',
        'page':str(page)
    }
    #发起post请求,获取响应对象
    response = requests.get(url=url,params=params)
    #获取页面数据
    page_text = response.text
    fileName = word+'_'+str(page)+'.html'
    filePath = './sougou/'+fileName
    with open(filePath,'w',encoding='utf-8') as fp:
        fp.write(page_text)
        print('爬取'+str(page)+'页结束')
requests高级用法
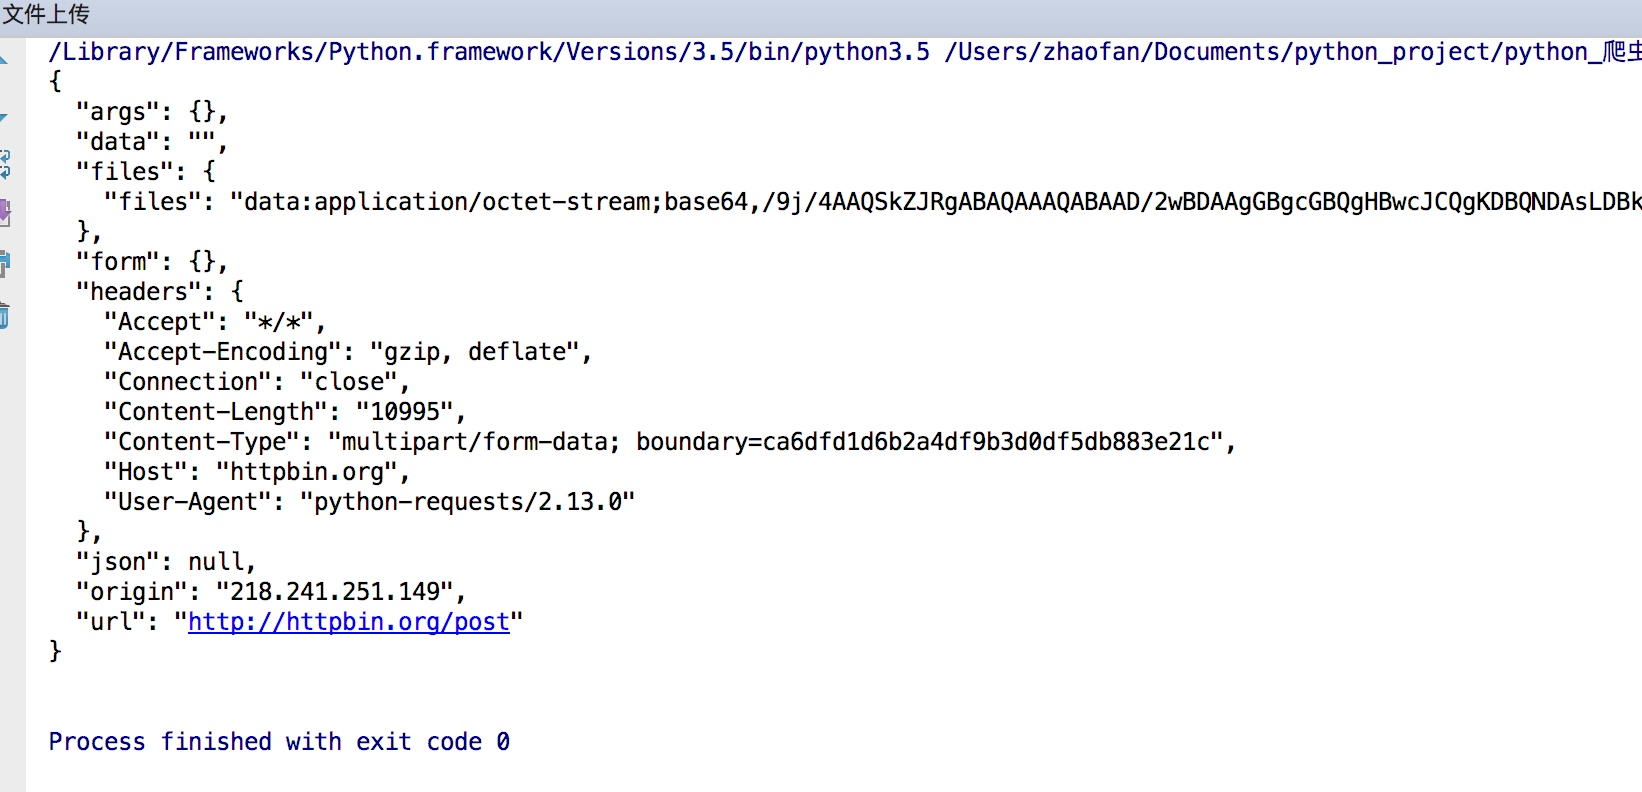
文件上传
实现方法和其他参数类似,也是构造一个字典然后通过files参数传递
import requests
files= {"files":open("git.jpeg","rb")}
response = requests.post("http://httpbin.org/post",files=files)
print(response.text)
结果如下:
获取cookie
import requests

response = requests.get("http://www.baidu.com")
print(response.cookies)

for key,value in response.cookies.items():
    print(key+"="+value)
会话维持
cookie的一个作用就是可以用于模拟登陆,做会话维持
import requests
s = requests.Session()
s.get("http://httpbin.org/cookies/set/nufffmber/123456")
response = s.get("http://httpbin.org/cookies")
print(response.text)
这是正确的写法,而下面的写法则是错误的
import requests

requests.get("http://httpbin.org/cookies/set/number/123456")
response = requests.get("http://httpbin.org/cookies")
print(response.text)
因为这种方式是两次requests请求之间是独立的,而第一次则是通过创建一个session对象,两次请求都通过这个对象访问
证书验证
现在的很多网站都是https的方式访问,所以这个时候就涉及到证书的问题
import requests

response = requests.get("https:/www.12306.cn")
print(response.status_code)
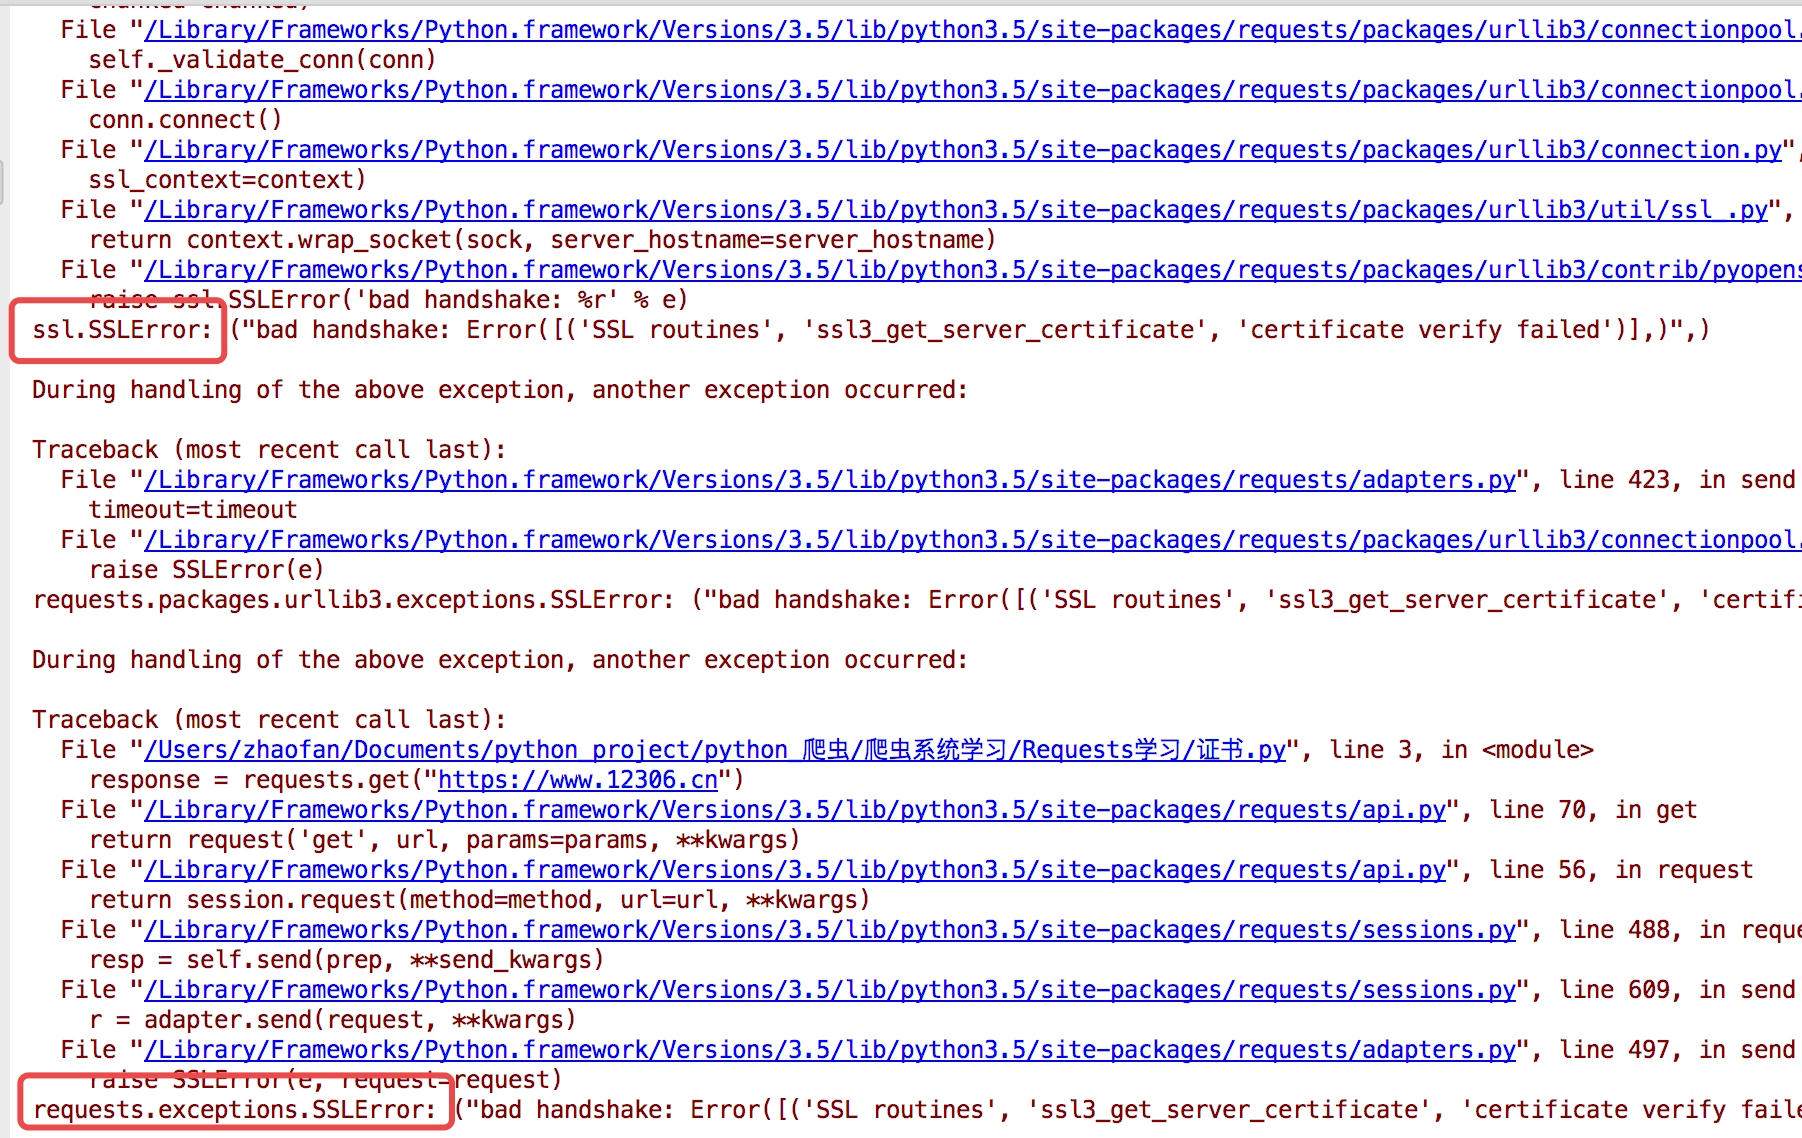
为了避免这种情况的发生可以通过 verify=False
但是这样是可以访问到页面,但是会提示:
InsecureRequestWarning: Unverified HTTPS request is being made. Adding certificate verification is strongly advised. See: https://urllib3.readthedocs.io/en/latest/advanced-usage.html#ssl-warnings InsecureRequestWarning)
解决方法为:
import requests
from requests.packages import urllib3

urllib3.disable_warnings()
response = requests.get("https://www.12306.cn",verify=False)
print(response.status_code)
这样就不会提示警告信息,当然也可以通过cert参数放入证书路径
代理设置
import requests

proxies= {
    "http":"http://127.0.0.1:9999",
    "https":"http://127.0.0.1:8888"
}
response  = requests.get("https://www.baidu.com",proxies=proxies)
print(response.text)
如果代理需要设置账户名和密码,只需要将字典更改为如下:
proxies = {
"http":"http://user:password@127.0.0.1:9999"
}
如果你的代理是通过sokces这种方式则需要pip install "requests[socks]"
proxies= {
"http":"socks5://127.0.0.1:9999",
"https":"sockes5://127.0.0.1:8888"
}
超时设置
通过timeout参数可以设置超时的时间
认证设置
如果碰到需要认证的网站可以通过requests.auth模块实现
import requests

from requests.auth import HTTPBasicAuth

response = requests.get("http://120.27.34.24:9001/",auth=HTTPBasicAuth("user","123"))
print(response.status_code)
当然这里还有一种方式
import requests

response = requests.get("http://120.27.34.24:9001/",auth=("user","123"))
print(response.status_code)
异常处理
关于reqeusts的异常在这里可以看到详细内容:
http://www.python-requests.org/en/master/api/#exceptions
所有的异常都是在requests.excepitons中
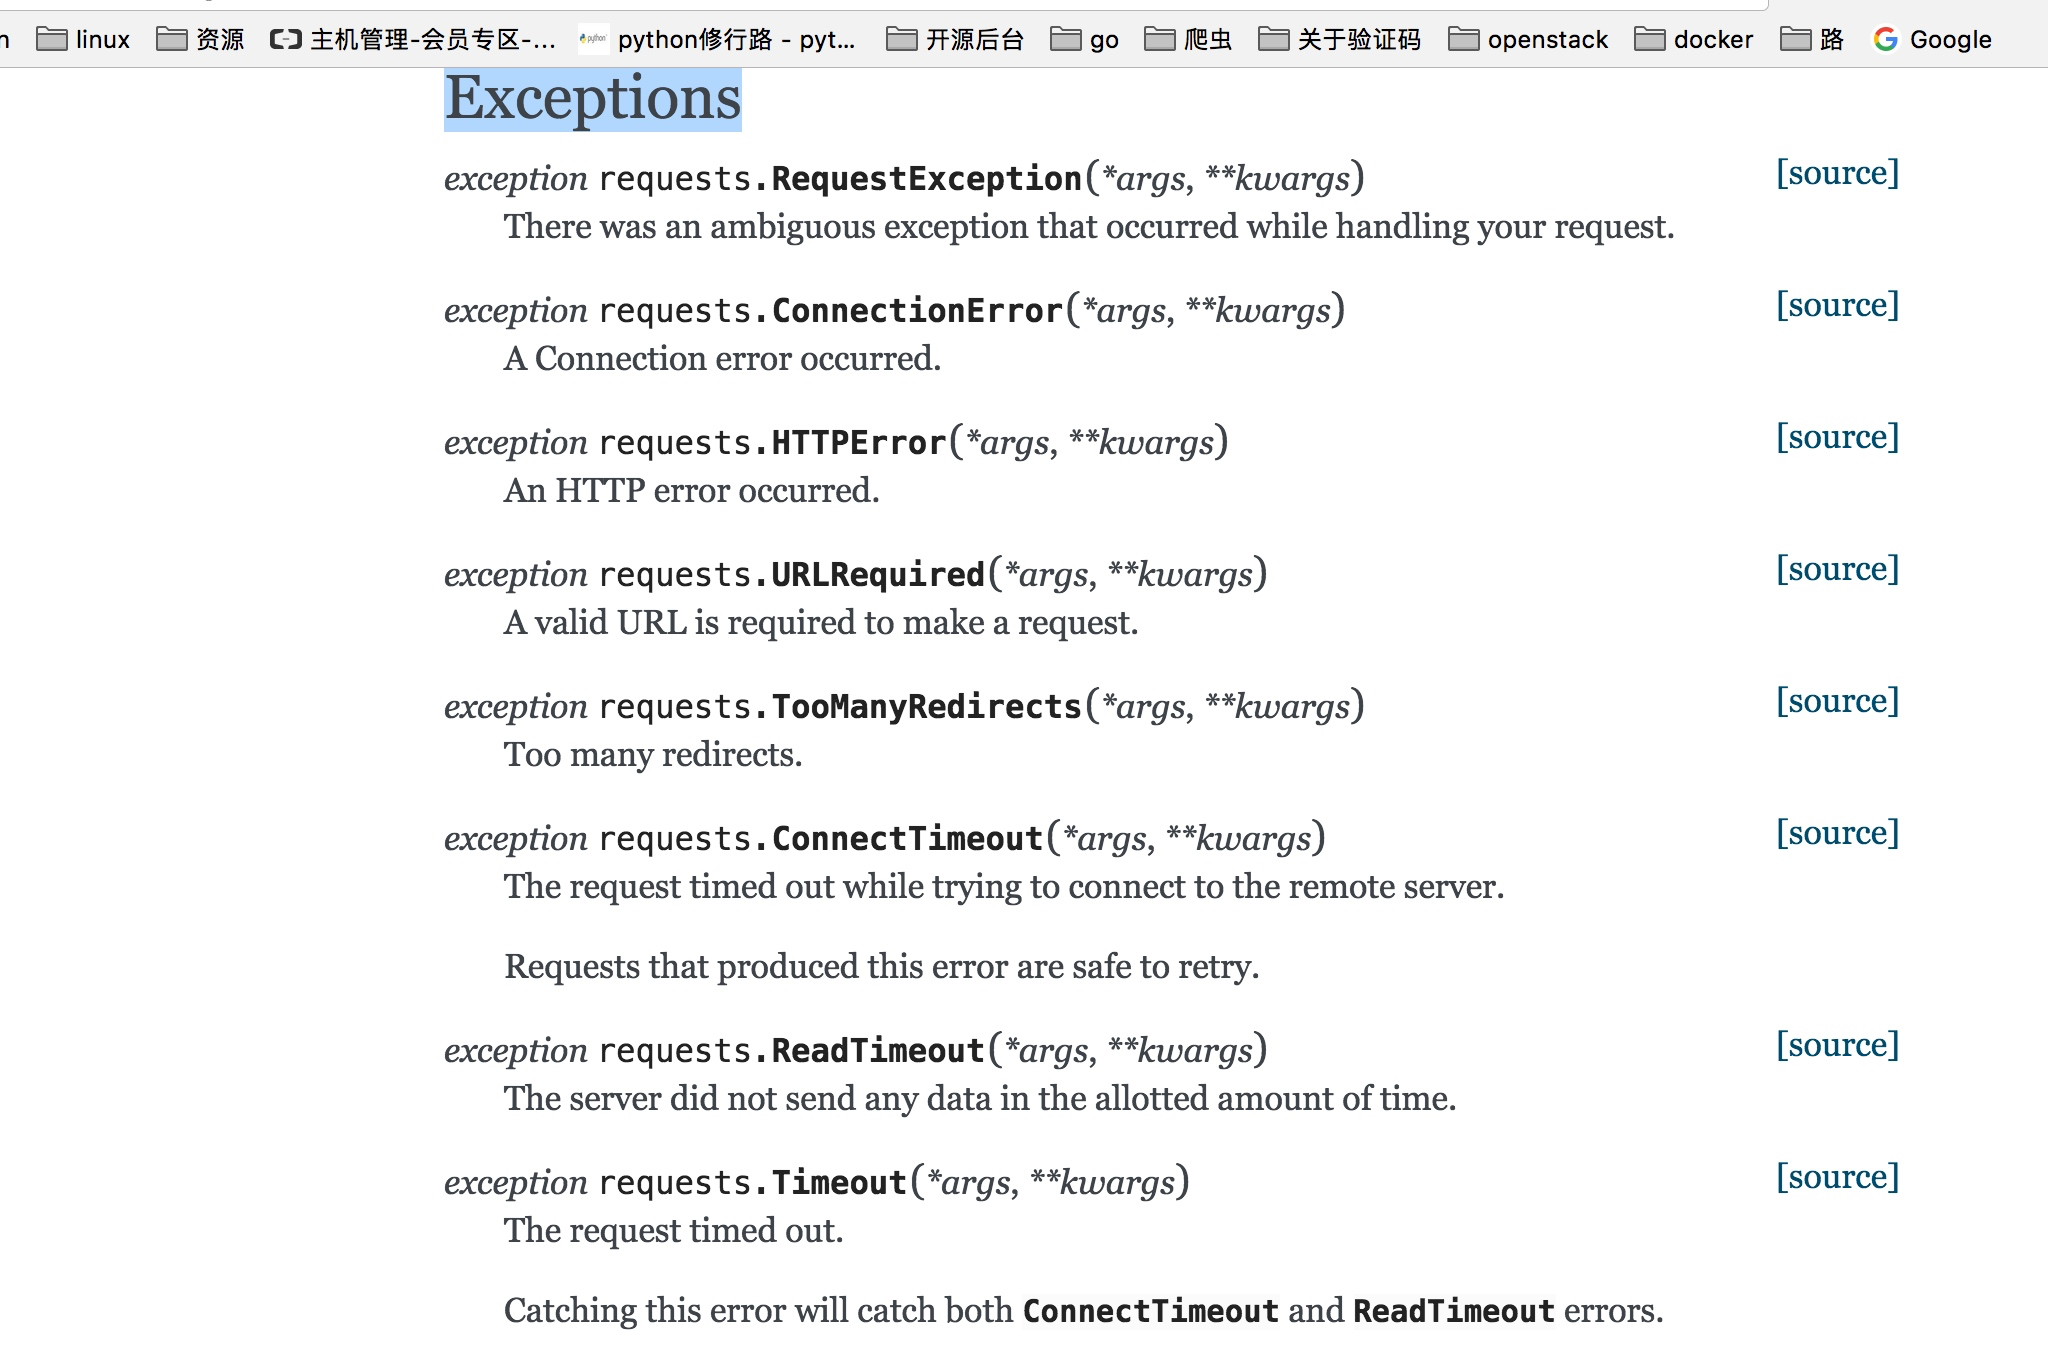
从源码我们可以看出RequestException继承IOError,
HTTPError,ConnectionError,Timeout继承RequestionException
ProxyError,SSLError继承ConnectionError
ReadTimeout继承Timeout异常
这里列举了一些常用的异常继承关系,详细的可以看:
http://cn.python-requests.org/zh_CN/latest/_modules/requests/exceptions.html#RequestException
通过下面的例子进行简单的演示
import requests
from requests.exceptions import ReadTimeout,ConnectionError,RequestException

try:
    response = requests.get("http://httpbin.org/get",timeout=0.1)
    print(response.status_code)
except ReadTimeout:
    print("timeout")
except ConnectionError:
    print("connection Error")
except RequestException:
    print("error")
其实最后测试可以发现,首先被捕捉的异常是timeout,当把网络断掉的haul就会捕捉到ConnectionError,如果前面异常都没有捕捉到,最后也可以通过RequestExctption捕捉到
项目实例:
cookie和代理实例
一、基于requests模块的cookie操作
引言:有些时候,我们在使用爬虫程序去爬取一些用户相关信息的数据(爬取张三“人人网”个人主页数据)时,如果使用之前requests模块常规操作时,往往达不到我们想要的目的,例如:
#!/usr/bin/env python
# -*- coding:utf-8 -*-
import requests
if __name__ == "__main__":

    #张三人人网个人信息页面的url
    url = 'http://www.renren.com/289676607/profile'

   #伪装UA
    headers={
        'User-Agent': 'Mozilla/5.0 (Macintosh; Intel Mac OS X 10_12_0) AppleWebKit/537.36 (KHTML, like Gecko) Chrome/69.0.3497.100 Safari/537.36',
    }
    #发送请求,获取响应对象
    response = requests.get(url=url,headers=headers)
    #将响应内容写入文件
    with open('./renren.html','w',encoding='utf-8') as fp:
        fp.write(response.text)
结果发现,写入到文件中的数据,不是张三个人页面的数据,而是人人网登陆的首页面,why?首先我们来回顾下cookie的相关概念及作用:
cookie概念:当用户通过浏览器首次访问一个域名时,访问的 web服务器会给客户端发送数据,以保持web服务器与客户端之间的状态保持,这些数据就是cookie。
cookie作用:我们在浏览器中,经常涉及到数据的交换,比如你登录邮箱,登录一个页面。我们经常会在此时设置30天内记住我,或者自动登录选项。那么它们是怎么记录信息的呢,答案就是今天的主角cookie了,Cookie是由HTTP服务器设置的,保存在浏览器中,但HTTP协议是一种无状态协议,在数据交换完毕后,服务器端和客户端的链接就会关闭,每次交换数据都需要建立新的链接。就像我们去超市买东西,没有积分卡的情况下,我们买完东西之后,超市没有我们的任何消费信息,但我们办了积分卡之后,超市就有了我们的消费信息。cookie就像是积分卡,可以保存积分,商品就是我们的信息,超市的系统就像服务器后台,http协议就是交易的过程。
经过cookie的相关介绍,其实你已经知道了为什么上述案例中爬取到的不是张三个人信息页,而是登录页面。那应该如何抓取到张三的个人信息页呢?
思路:
1、我们需要使用爬虫程序对人人网的登录时的请求进行一次抓取,获取请求中的cookie数据。
2、在使用个人信息页的url进行请求时,该请求需要携带 1 中的cookie,只有携带了cookie后,服务器才可识别这次请求的用户信息,方可响应回指定的用户信息页数据。
#!/usr/bin/env python
# -*- coding:utf-8 -*-
import requests
if __name__ == "__main__":

    #登录请求的url(通过抓包工具获取)
    post_url = 'http://www.renren.com/ajaxLogin/login?1=1&uniqueTimestamp=201873958471'
    #创建一个session对象,该对象会自动将请求中的cookie进行存储和携带
    session = requests.session()
   #伪装UA
    headers={
        'User-Agent': 'Mozilla/5.0 (Macintosh; Intel Mac OS X 10_12_0) AppleWebKit/537.36 (KHTML, like Gecko) Chrome/69.0.3497.100 Safari/537.36',
    }
    formdata = {
        'email': '17701256561',
        'icode': '',
        'origURL': 'http://www.renren.com/home',
        'domain': 'renren.com',
        'key_id': '1',
        'captcha_type': 'web_login',
        'password': '7b456e6c3eb6615b2e122a2942ef3845da1f91e3de075179079a3b84952508e4',
        'rkey': '44fd96c219c593f3c9612360c80310a3',
        'f': 'https%3A%2F%2Fwww.baidu.com%2Flink%3Furl%3Dm7m_NSUp5Ri_ZrK5eNIpn_dMs48UAcvT-N_kmysWgYW%26wd%3D%26eqid%3Dba95daf5000065ce000000035b120219',
    }
    #使用session发送请求,目的是为了将session保存该次请求中的cookie
    session.post(url=post_url,data=formdata,headers=headers)

    get_url = 'http://www.renren.com/960481378/profile'
    #再次使用session进行请求的发送,该次请求中已经携带了cookie
    response = session.get(url=get_url,headers=headers)
    #设置响应内容的编码格式
    response.encoding = 'utf-8'
    #将响应内容写入文件
    with open('./renren.html','w') as fp:
        fp.write(response.text)
二、基于requests模块的代理操作
- 什么是代理
-
代理就是第三方代替本体处理相关事务。例如:生活中的代理:代购,中介,微商......
-
-
爬虫中为什么需要使用代理
-
一些网站会有相应的反爬虫措施,例如很多网站会检测某一段时间某个IP的访问次数,如果访问频率太快以至于看起来不像正常访客,它可能就会会禁止这个IP的访问。所以我们需要设置一些代理IP,每隔一段时间换一个代理IP,就算IP被禁止,依然可以换个IP继续爬取。
-
-
代理的分类:
-
正向代理:代理客户端获取数据。正向代理是为了保护客户端防止被追究责任。
-
反向代理:代理服务器提供数据。反向代理是为了保护服务器或负责负载均衡。
-
-
免费代理ip提供网站
-
http://www.goubanjia.com/
-
西祠代理
-
快代理
-
代码:
#!/usr/bin/env python
# -*- coding:utf-8 -*-
import requests
import random
if __name__ == "__main__":
    #不同浏览器的UA
    header_list = [
        # 遨游
        {"user-agent": "Mozilla/4.0 (compatible; MSIE 7.0; Windows NT 5.1; Maxthon 2.0)"},
        # 火狐
        {"user-agent": "Mozilla/5.0 (Windows NT 6.1; rv:2.0.1) Gecko/20100101 Firefox/4.0.1"},
        # 谷歌
        {
            "user-agent": "Mozilla/5.0 (Macintosh; Intel Mac OS X 10_7_0) AppleWebKit/535.11 (KHTML, like Gecko) Chrome/17.0.963.56 Safari/535.11"}
    ]
    #不同的代理IP
    proxy_list = [
        {"http": "112.115.57.20:3128"},
        {'http': '121.41.171.223:3128'}
    ]
    #随机获取UA和代理IP
    header = random.choice(header_list)
    proxy = random.choice(proxy_list)

    url = 'http://www.baidu.com/s?ie=UTF-8&wd=ip'
    #参数3:设置代理
    response = requests.get(url=url,headers=header,proxies=proxy)
    response.encoding = 'utf-8'

    with open('daili.html', 'wb') as fp:
        fp.write(response.content)
    #切换成原来的IP
    requests.get(url, proxies={"http": ""})
本文来自博客园,作者:王竹笙,转载请注明原文链接:https://www.cnblogs.com/edeny/p/9792363.html

 浙公网安备 33010602011771号