Apache James 系列2 --- SPF & DKIM
一、承上启下
7. 方向
在之前的博客里,我已经介绍了如何配置SPF记录和DKIM记录,这其实跟某一个具体的邮件服务器无关,这些配置是应用在DNS平台(比如阿里云)上,这些配置是我们作为发件人面向收件人所做的配置;
我们转换一下角度,作为收件人,我们也需要配置相应的规则来验证发件人(公司内外)的合法性。
二、SPF
1. 域名配置(发件方)
域名配置是我们作为发件方,为了让收件方服务器识别我们而需要完成的配置。
域名配置可参考: DNS 系列2 --- SPF
2. 服务器配置(收件方)
服务器端的配置是我们作为收件方,如何核实发信人信息,如果防止垃圾和恶意邮件需要完成的配置。
未完待续
三、DKIM
1. 域名配置(发件方)
域名配置可参考:DNS 系列4 --- DKIM
(1) 生成私钥:
openssl genrsa -out private.pem 1024
(2) 生成公钥:
openssl rsa -in private.pem -outform PEM -pubout -out public.pem
(3) 创建TXT记录:
Record Type: TXT Record
Host Name: james3._domainkey
Text: v=DKIM1; k=rsa; p=[...Your Public Key...]
2. 服务器配置(收件方)
(1) 编辑mailetcontainer.xml
sudo vi /opt/apache-james/conf/mailetcontainer.xml
(2) 在root processor后添加新的processor:
 1 <processor state="relay" enableJmx="true">
 2     <mailet match="All" class="org.apache.james.jdkim.mailets.ConvertTo7Bit"/>
 3     <mailet match="All" class="org.apache.james.jdkim.mailets.DKIMSign">
 4         <signatureTemplate>v=1; s=james3; d=domain.example.com ; h=from : reply-to : subject : date : to : cc : resent-date : resent-from : resent-sender : resent-to : resent-cc : in-reply-to : references : list-id : list-help : list-unsubscribe : list-subscribe : list-post : list-owner : list-archive; a=rsa-sha256; bh=; b=;</signatureTemplate>
 5         <privateKey>
 6 -----BEGIN RSA PRIVATE KEY-----
 7 [Your Private Key]
 8 -----END RSA PRIVATE KEY-----
 9         </privateKey>
10     </mailet>
11 </processor>
a. 替换第3行的"domain.example.com";
b. 替换第7行的公钥;
c. 第6、7、8三行均无空格。
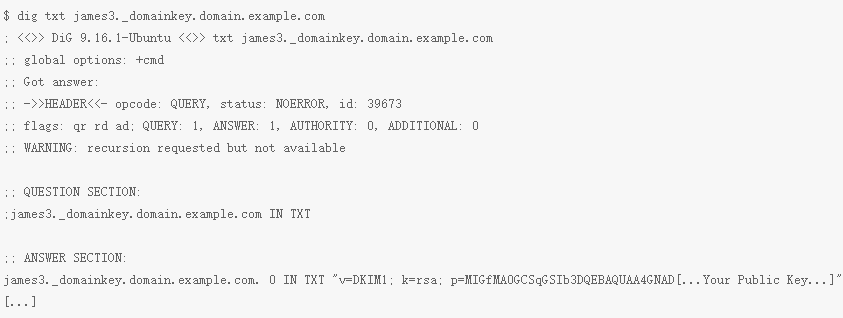
(3) 测试DKIM配置
sudo yum install bind-utils -y
dig txt james3._domainkey.example.com
输出:

四、参考
1. 官方
https://james.apache.org/howTo/spf.html
https://james.apache.org/howTo/dkim.html
2. 其他
https://robertmunn.com/blog/configuring-dkim-and-spf-for-apache-james/


【推荐】国内首个AI IDE,深度理解中文开发场景,立即下载体验Trae
【推荐】编程新体验,更懂你的AI,立即体验豆包MarsCode编程助手
【推荐】抖音旗下AI助手豆包,你的智能百科全书,全免费不限次数
【推荐】轻量又高性能的 SSH 工具 IShell:AI 加持,快人一步
· TypeScript + Deepseek 打造卜卦网站:技术与玄学的结合
· 阿里巴巴 QwQ-32B真的超越了 DeepSeek R-1吗?
· 【译】Visual Studio 中新的强大生产力特性
· 10年+ .NET Coder 心语 ── 封装的思维:从隐藏、稳定开始理解其本质意义
· 【设计模式】告别冗长if-else语句:使用策略模式优化代码结构