.Core3.1使用SwaggerApi的JWT token验证
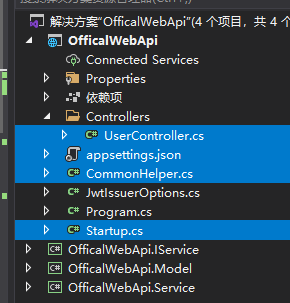
1.目录结构
2.上代码
1)appsettings.json

{
  "Logging": {
    "LogLevel": {
      "Default": "Information",
      "Microsoft": "Warning",
      "Microsoft.Hosting.Lifetime": "Information"
    }
  },
  "AllowedHosts": "*",
  "ConnectionStrings": {
  //数据库地址链接
    "DefaultConnection": "Data Source=localhost;Port=3306;User ID=root;Password=root; Initial Catalog=Offical;Charset=utf8; SslMode=none;Min pool size=1"
  },
  "JwtIssuerOptions": {
    "Issuer": "AESCE", //发行人
    "Audience": "AESCE",//订阅人
    "ValidFor": 604800,
    "SecurityKey": "1ee65348-0a3d-11ec-bb18-8cec4b697def" //自定义密钥,记得设置长一点
  }
}
2)StartUp.cs
    public class Startup
    {
        public IFreeSql FreeSql { get; private set; }
        public IConfiguration Configuration { get; }
        public Startup(IConfiguration configuration)
        {
            Configuration = configuration;
            string connStr = Configuration.GetConnectionString("DefaultConnection");
            this.FreeSql = new FreeSqlBuilder().UseConnectionString(DataType.MySql, connStr)
                .UseAutoSyncStructure(true)
                .UseLazyLoading(true)
                .UseNoneCommandParameter(true)
                .Build();
        }

        //autofac 新增
        public void ConfigureContainer(ContainerBuilder builder)
        {
            //业务逻辑层所在程序集命名空间
            Assembly service = Assembly.Load("OfficalWebApi.Service");//注:webapi要引用接口和类,不然这边读不到
            //接口层所在程序集命名空间
            Assembly repository = Assembly.Load("OfficalWebApi.IService");
            //自动注入
            builder.RegisterAssemblyTypes(service, repository)
                .Where(t => t.Name.EndsWith("Service"))
                .AsImplementedInterfaces();
        }

        // This method gets called by the runtime. Use this method to add services to the container.
        public void ConfigureServices(IServiceCollection services)
        {
            services.AddSwaggerGen(c =>
            {
                //只取一個 Action
                //c.ResolveConflictingActions(apiDescriptions => apiDescriptions.First());
                c.SwaggerDoc("v1", new OpenApiInfo { Title = "OfficalWebApi接口文档", Version = "v1" });
                var xmlFile = $"{ Assembly.GetExecutingAssembly().GetName().Name}.xml";
                var xmlPath = Path.Combine(AppContext.BaseDirectory, xmlFile);
                c.IncludeXmlComments(xmlPath, true);//添加控制器层注释(true表示显示控制器注释)
                var xmlFile2 = $"{ Assembly.GetExecutingAssembly().GetName().Name}.Model.xml";
                var xmlPath2 = Path.Combine(AppContext.BaseDirectory, xmlFile2);
                c.IncludeXmlComments(xmlPath2, true);//添加控制器层注释(true表示显示控制器注释)

                #region JWT验证

                //开启权限验证
                c.OperationFilter<AddResponseHeadersFilter>();
                c.OperationFilter<AppendAuthorizeToSummaryOperationFilter>();

                //在header钟添加token,传递到后台
                c.OperationFilter<SecurityRequirementsOperationFilter>();
                c.AddSecurityDefinition("oauth2",new OpenApiSecurityScheme
                {
                    Description = "JWT授权(数据将在请求头钟进行传递)直接在下面框中输入:Bearer Token(注意两者之间是一个空格)",
                    Name = "Authorization",//jwt默认参数名
                    In = ParameterLocation.Header,//jwt默认存放Authorization信息的位置(请求头中)
                    Type = SecuritySchemeType.ApiKey,
                    BearerFormat = "JWT",
                    Scheme = "Bearer"
                });

                #endregion

            });
            //添加jwt验证
            services.AddAuthentication(x => {
                x.DefaultAuthenticateScheme = JwtBearerDefaults.AuthenticationScheme;
                x.DefaultChallengeScheme = JwtBearerDefaults.AuthenticationScheme;
            })
            .AddJwtBearer(options => {
                //获取appsettings配置值
                var jwtmodel = Configuration.GetSection(nameof(JwtIssuerOptions));
                var iss = jwtmodel[nameof(JwtIssuerOptions.Issuer)];
                var key = jwtmodel[nameof(JwtIssuerOptions.SecurityKey)];
                var audience = jwtmodel[nameof(JwtIssuerOptions.Audience)];
                options.TokenValidationParameters = new TokenValidationParameters
                {
                    ValidateIssuer = true,//是否验证Issuer
                    ValidateAudience = true,//是否验证Audience
                    ValidateLifetime = true, //是否验证失效时间
                    ValidateIssuerSigningKey = true,//是否验证SecurityKey
                    RequireExpirationTime = true,
                    ClockSkew = TimeSpan.Zero,//默认允许300s的时间偏移量,设置为0
                    ValidAudience = audience,//订阅人
                    ValidIssuer = iss,//发行人,这两项和后面签发jwt的设置一致
                    IssuerSigningKey = new SymmetricSecurityKey(Encoding.UTF8.GetBytes(key))
                };
            });

            services.AddControllers();
            //注入freesql
            services.AddSingleton(this.FreeSql);
        }

        // This method gets called by the runtime. Use this method to configure the HTTP request pipeline.
        public void Configure(IApplicationBuilder app, IWebHostEnvironment env)
        {
            if (env.IsDevelopment())
            {
                app.UseDeveloperExceptionPage();
            }

            app.UseRouting();

            app.UseAuthentication();//这里顺序很重要
            app.UseAuthorization();

            //配置Swagger接口页面
            app.UseSwagger();
            app.UseSwaggerUI(c =>
            {
                c.SwaggerEndpoint("/swagger/v1/swagger.json", "RFIDBaseDataApiV1");
            });

            //指向Swagger接口静态页面
            //DefaultFilesOptions defaultFilesOptions = new DefaultFilesOptions();
            //defaultFilesOptions.DefaultFileNames.Clear();
            //defaultFilesOptions.DefaultFileNames.Add("/Swagger/Index.html");
            //app.UseDefaultFiles(defaultFilesOptions);
            app.UseStaticFiles();

            app.UseEndpoints(endpoints =>
            {
                endpoints.MapControllers();
            });
        }
    }
注:这里.Core3.1安装的JWT需要用3.1版本及以下的,最新版安装不上
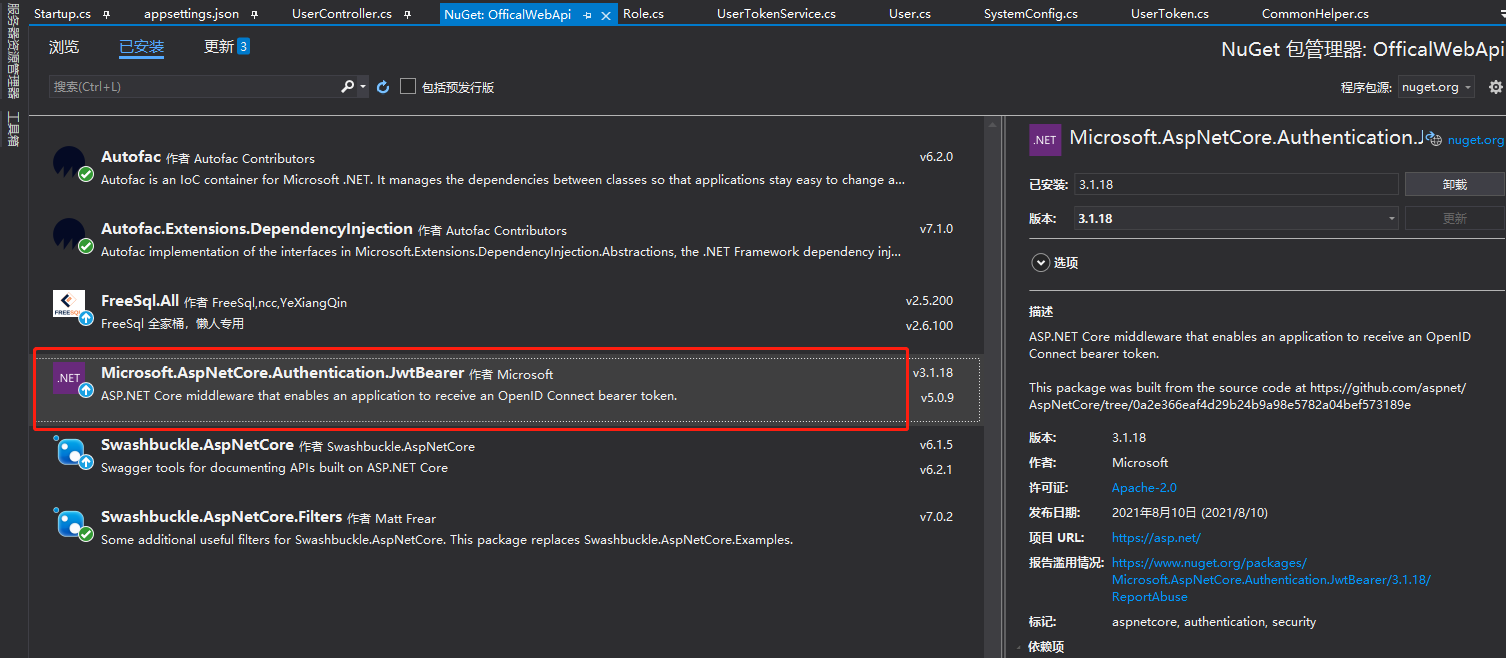
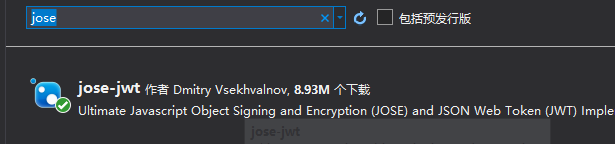
3)帮助类CommonHelper.cs(Token 解析需要Nutget安装 jose-jwt)
    /// <summary>
    /// 帮助类
    /// </summary>
    public class CommonHelper
    {
        /// <summary>
        /// 根据用户获取token
        /// </summary>
        /// <returns></returns>
        public string GetTokenByUser(LoginModel model, IConfiguration Configuration)
        {
            var jwtModel = Configuration.GetSection(nameof(JwtIssuerOptions));
            //颁发者
            var issuer = jwtModel[nameof(JwtIssuerOptions.Issuer)];
            var key = jwtModel[nameof(JwtIssuerOptions.SecurityKey)];
            //接收者
            var audience = jwtModel[nameof(JwtIssuerOptions.Audience)];
            //参数
            var claims = new List<Claim> {
                new Claim(JwtRegisteredClaimNames.Iat,$"{new DateTimeOffset(DateTime.Now).ToUnixTimeSeconds()}"),
                new Claim(JwtRegisteredClaimNames.Nbf,$"{new DateTimeOffset(DateTime.Now).ToUnixTimeSeconds()}"),
                new Claim(JwtRegisteredClaimNames.Exp,$"{new DateTimeOffset(DateTime.Now.AddMilliseconds(1000)).ToUnixTimeSeconds()}"),
                new Claim(JwtRegisteredClaimNames.Iss,issuer),
                new Claim(JwtRegisteredClaimNames.Aud,audience),
                new Claim(ClaimTypes.Role,"Admin"),
                new Claim("Id",model.Id.ToString()),
                new Claim("UserName",model.UserName)
                };//一个用户多个角色
//claims.AddRange(model.Roles.Split(",").Select(s => new Claim(ClaimTypes.Role, s)))

            var m5dkey = new SymmetricSecurityKey(Encoding.UTF8.GetBytes(key));
            var creds = new SigningCredentials(m5dkey,SecurityAlgorithms.HmacSha256);//生成签名
            var jwttoken = new JwtSecurityToken(
                    issuer : issuer,
                    audience:audience,
                    claims:claims,
                    expires:DateTime.Now.AddMinutes(30),
                    signingCredentials:creds
                );
            var token = new JwtSecurityTokenHandler().WriteToken(jwttoken);//生成token
            return token;
        }

        /// <summary>
        /// 解析token获取用户信息
        /// </summary>
        ///<returns></returns>
        public User DesUserToken(string token, IConfiguration Configuration)
        {
            var userInfo = Jose.JWT.Payload<User>(token.Replace("Bearer ",""));
            return userInfo;
        }
}
4)Controllers
    /// <summary>
    /// 用户操作接口
    /// </summary>
    [Route("api/[controller]")]
    [ApiController]
    public class UserController : ControllerBase
    {
        private readonly IUserService _userService;
        private readonly IConfiguration _configuration;
        public UserController(IUserService userService, IConfiguration configuration)
        {
            _userService = userService;
            _configuration = configuration;
        }

        /// <summary>
        /// 根据Id获取用户信息
        /// </summary>
        /// <param name="id"></param>
        /// <returns></returns>
        [HttpGet("GetUserById")]
        [Authorize]
        public ResultModel GetUserById(string id)
        {
            return _userService.GetUserById(id);
        }

        /// <summary>
        /// 用户登录
        /// </summary>
        /// <param name="model"></param>
        /// <returns></returns>
        [HttpPost("LoginUser")]
        public ResultModel LoginUser(LoginModel model)
        {
            ResultModel result = new ResultModel();
            //获取用户
            var user = _userService.GetUserInfo(model);
            if (user != null && user.Id != null)
            {
                model.Id = user.Id;
                CommonHelper commonHelper = new CommonHelper();
                var token = commonHelper.GetTokenByUser(model, _configuration);
                result.Data = new { token };
                result.SetSuccess();
            }
            else
                result.SetFail("账号密码错误!");

            return result;
        }
5)使用
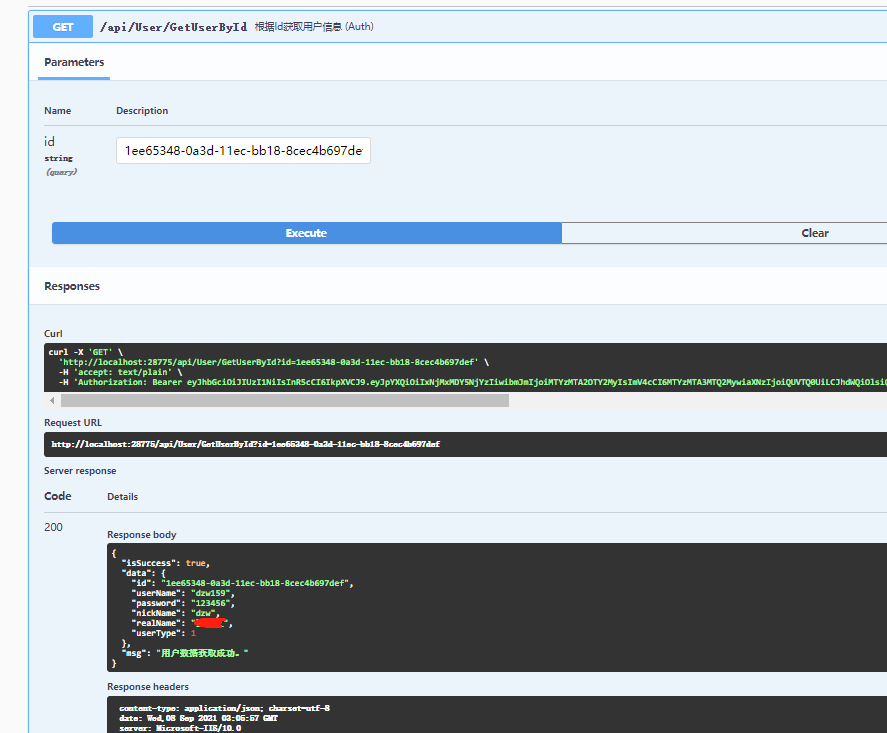
①使用登录接口获取token
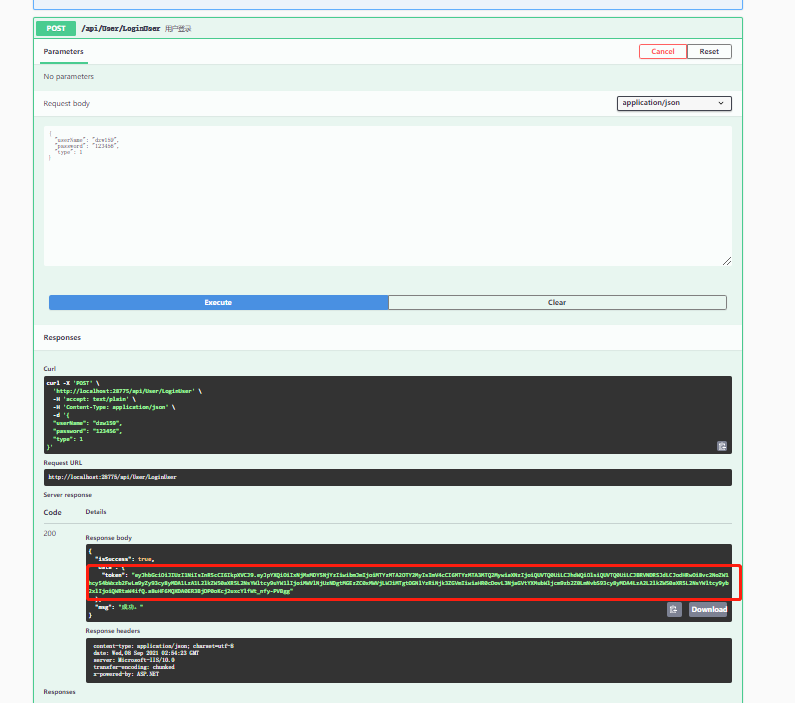
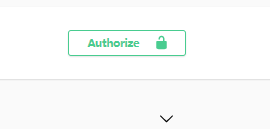
②点击右上角Authorize,输入 【Bearer token】 =》这里的token 是赋值①的
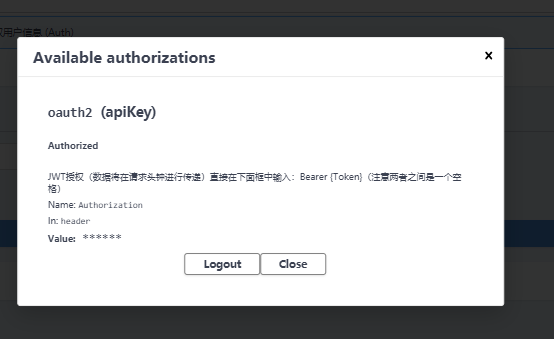
Bearer Token
③Close后就可以正常进行操作了
分享:有个JWT的token官网验证地址:https://jwt.io/
感谢:https://blog.csdn.net/qq_20258573/article/details/108726983
https://www.cnblogs.com/nwdnote/p/13554202.html
https://blog.csdn.net/qq_20258573/article/details/108727344
https://blog.csdn.net/weixin_42873937/article/details/82460997
https://blog.csdn.net/crazyxiaoyuge/article/details/109057779


【推荐】国内首个AI IDE,深度理解中文开发场景,立即下载体验Trae
【推荐】编程新体验,更懂你的AI,立即体验豆包MarsCode编程助手
【推荐】抖音旗下AI助手豆包,你的智能百科全书,全免费不限次数
【推荐】轻量又高性能的 SSH 工具 IShell:AI 加持,快人一步
· Linux系列:如何用heaptrack跟踪.NET程序的非托管内存泄露
· 开发者必知的日志记录最佳实践
· SQL Server 2025 AI相关能力初探
· Linux系列:如何用 C#调用 C方法造成内存泄露
· AI与.NET技术实操系列(二):开始使用ML.NET
· 无需6万激活码!GitHub神秘组织3小时极速复刻Manus,手把手教你使用OpenManus搭建本
· C#/.NET/.NET Core优秀项目和框架2025年2月简报
· Manus爆火,是硬核还是营销?
· 终于写完轮子一部分:tcp代理 了,记录一下
· 【杭电多校比赛记录】2025“钉耙编程”中国大学生算法设计春季联赛(1)
2017-09-08 c# DateTime时间格式转换为Unix时间戳格式
2017-09-08 本地路径转化成虚拟路径
2017-09-08 数据库二进制流图片数据转换成图片