.NetCore3.1使用Swagger
场景,准备使用Core3.1制作SwaggerApi接口
1.项目结构:
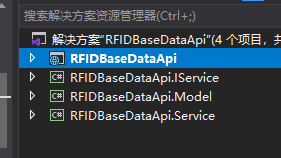
2.创建好空项目后,NuGet程序集安装Swashbuckle.AspNetCore

3.StartUp.cs代码(红色部分为配置SwaggerApi的配置代码)
    public class Startup
    {
        public IFreeSql FreeSql { get; private set; }
        public IConfiguration Configuration { get; }
        public Startup(IConfiguration configuration)
        {
            Configuration = configuration;
            string connStr = Configuration.GetConnectionString("DefaultConnection");
            this.FreeSql = new FreeSqlBuilder().UseConnectionString(DataType.SqlServer,connStr)
                .UseAutoSyncStructure(true)
                .UseLazyLoading(true)
                .UseNoneCommandParameter(true)
                .Build();
        }

        // This method gets called by the runtime. Use this method to add services to the container.
        public void ConfigureServices(IServiceCollection services)
        {
            services.AddSwaggerGen(c =>
            {
                //只取一個 Action
                //c.ResolveConflictingActions(apiDescriptions => apiDescriptions.First());
                c.SwaggerDoc("v1",new OpenApiInfo { Title = "RFID盘点机数据接口文档",Version ="v1"});
                var xmlFile = $"{ Assembly.GetExecutingAssembly().GetName().Name}.xml";
                var xmlPath = Path.Combine(AppContext.BaseDirectory,xmlFile);
                c.IncludeXmlComments(xmlPath, true);//添加控制器层注释(true表示显示控制器注释)
                var xmlFile2 = $"{ Assembly.GetExecutingAssembly().GetName().Name}.Model.xml";
                var xmlPath2 = Path.Combine(AppContext.BaseDirectory,xmlFile2);
                c.IncludeXmlComments(xmlPath2, true);//添加控制器层注释(true表示显示控制器注释)
            });
            services.AddControllers();
            //注入freesql
            services.AddSingleton(this.FreeSql);
        }

        public void ConfigureContainer(ContainerBuilder builder)
        {
            //业务逻辑层所在程序集命名空间
            Assembly service = Assembly.Load("RFIDBaseDataApi.Service");//注:webapi要引用接口和类,不然这边读不到
            //接口层所在程序集命名空间
            Assembly repository = Assembly.Load("RFIDBaseDataApi.IService");
            //自动注入
            builder.RegisterAssemblyTypes(service, repository)
                .Where(t => t.Name.EndsWith("Service"))
                .AsImplementedInterfaces();
        }

        // This method gets called by the runtime. Use this method to configure the HTTP request pipeline.
        public void Configure(IApplicationBuilder app, IWebHostEnvironment env)
        {
            if (env.IsDevelopment())
            {
                app.UseDeveloperExceptionPage();
            }

            //app.UseHttpsRedirection();

            app.UseRouting();

            app.UseAuthorization();

            //配置Swagger接口页面
            app.UseSwagger();
            app.UseSwaggerUI(c =>
            {
                c.SwaggerEndpoint("/swagger/v1/swagger.json", "RFIDBaseDataApiV1");
            });

            //指向Swagger接口静态页面
            //DefaultFilesOptions defaultFilesOptions = new DefaultFilesOptions();
            //defaultFilesOptions.DefaultFileNames.Clear();
            //defaultFilesOptions.DefaultFileNames.Add("/Swagger/Index.html");
            //app.UseDefaultFiles(defaultFilesOptions);
            app.UseStaticFiles();


            app.UseEndpoints(endpoints =>
            {
                endpoints.MapControllers();
            });
        }
    }
4.在launchSettings.json设置接口启动项显示页面路径为 swagger/Index.html
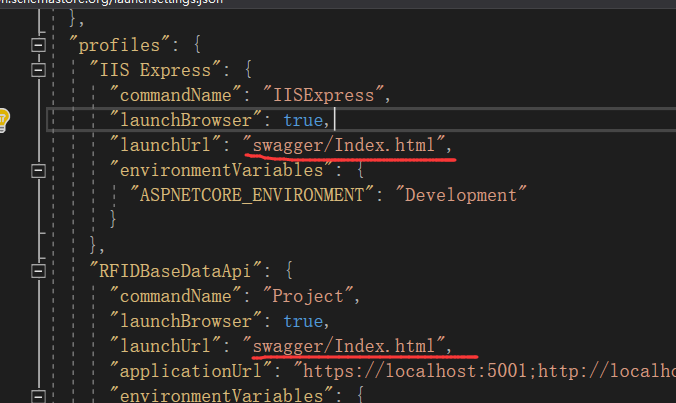
5.注意配置 RFIDBaseDataApi.Model 类库的项目文件(红色部分)
<Project Sdk="Microsoft.NET.Sdk">

  <PropertyGroup>
    <TargetFramework>netcoreapp3.1</TargetFramework>
    <GenerateDocumentationFile>true</GenerateDocumentationFile>
  </PropertyGroup>

  <ItemGroup>
    <PackageReference Include="FreeSql" Version="2.3.100" />
    <PackageReference Include="Newtonsoft.Json" Version="12.0.3" />
  </ItemGroup>

</Project>
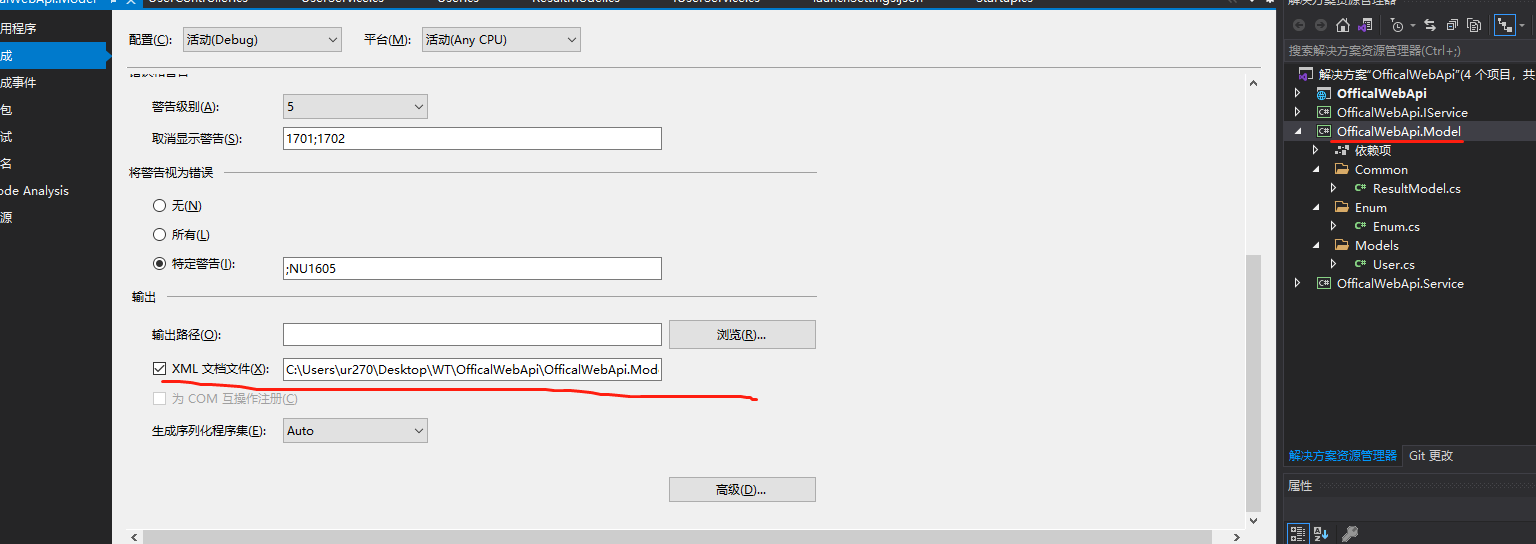
6.勾选首选项生成XML文件
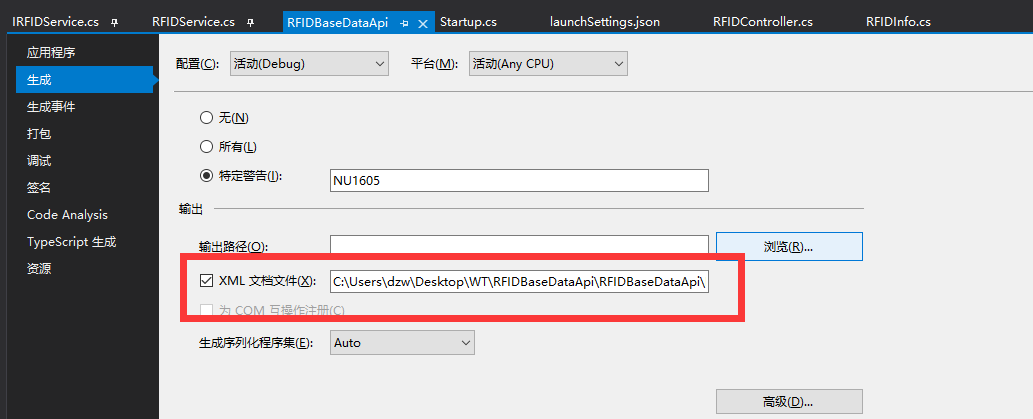
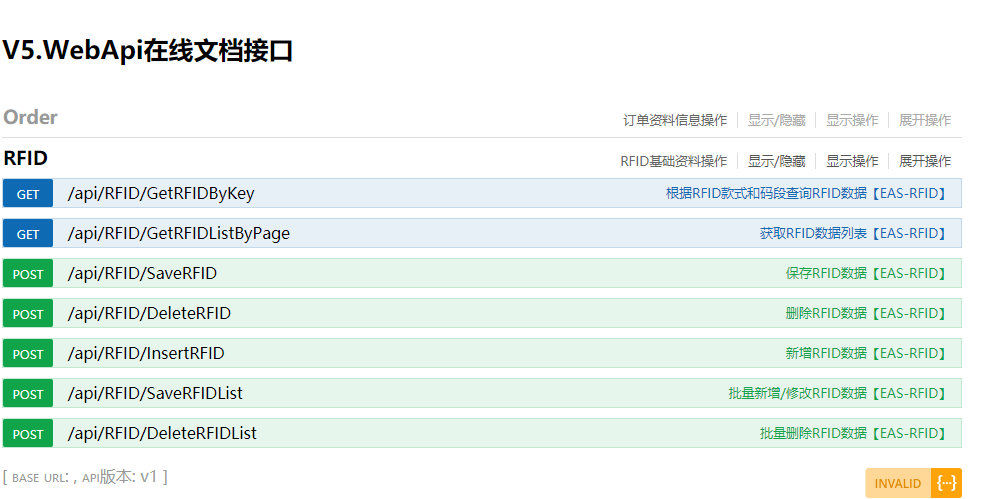
7.结果展示:
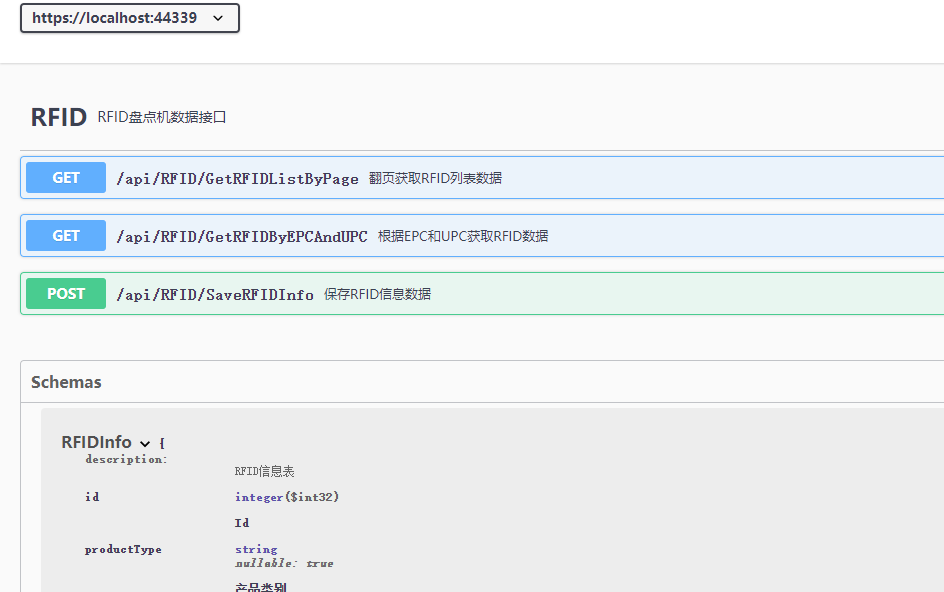
顺带看一下 之前 MVC的 SwaggerApi界面(对比起来不一样吧)
注:碰到生成的Model无法显示注释问题,由于项目中的Model和主项目分开了,所对应的Model的XML就没有读取到,所以才有
StartUp.cs中的xmlFile2(新增读取Model类库的XML配置),这块配合 第5点配置

补充:对应的需要显示的Model,记得勾选生成xml,我这里是建立一个model库生
感谢:https://blog.csdn.net/weixin_39934929/article/details/108275673
https://www.cnblogs.com/personblog/p/13468583.html

