
caffe目标检测模型训练全过程(三)目标检测第一步
遍历整图查找蝴蝶位置
2018/04/22
训练模型对于识别背景和蝴蝶有比较好的效果,基本对不会识别错误,接下来,将通过整图遍历的原始而又野蛮的方式对一张原始图片进行处理,进而查找到蝴蝶的具体位置。具体思路如下图。对原图进行缩放成理想大小,例如,
最小边长缩放为227*6像素,最大边长等比缩放:
设置滑动窗大小为227*227像素
设置滑动窗移动步长为
# 自动step_size

scale =min(img.shape[0],(227*6.0)/img.shape[1])*1.0

step_size = int(min(img.shape[0]*scale,img.shape[1]*scale))/20

print("scale",img.shape[0]*scale,img.shape[1]*scale)

#resize image

scale_img = cv2.resize(img,((int(img.shape[1] * scale), int(img.shape[0] * scale))))


然后通过模型预测每个滑动框的类别,若是蝴蝶(类别1)的概率大于99%,则记录滑动框位置,其后绘制在图片上

具体代码:

# 自动step_size

        scale =min(img.shape[0],(227*6.0)/img.shape[1])*1.0

        print(scale)


        step_size = int(min(img.shape[0]*scale,img.shape[1]*scale))/20

        print("scale",img.shape[0]*scale,img.shape[1]*scale)

        #resize image

        scale_img = cv2.resize(img,((int(img.shape[1] * scale), int(img.shape[0] * scale))))

        temp2=scale_img[:]

        print(scale_img.shape,temp2.shape,img.shape)


        while x+227 < img.shape[0]*scale:

            while y+227 < img.shape[1]*scale:

                # cv2.rectangle(scale_img,(x,y),(x+227,y+227),(0,0,255),1)

                temp = scale_img[x:x+227,y:y+227]

                cv2.imwrite("scale_img.jpg",temp)

                im = caffe.io.load_image('scale_img.jpg')

                print(im.shape)


                transformer = caffe.io.Transformer({'data': net_full_conv.blobs['data'].data.shape})

                #transformer.set_mean('data', np.load(caffe_root + 'python/caffe/imagenet/ilsvrc_2012_mean.npy').mean(1).mean(1))

                transformer.set_transpose('data', (2,0,1))

                transformer.set_channel_swap('data', (2,1,0))

                transformer.set_raw_scale('data', 255.0)


                transformed_image = transformer.preprocess('data', im)

                net_full_conv.blobs['data'].data[...] = transformed_image

                net_full_conv.blobs['data'].reshape(1,3,227,227)


                ### perform classification

                out = net_full_conv.forward()

                # make classification map by forward and print prediction indices at each location

                # out = net_full_conv.forward_all(data=np.asarray([transformer.preprocess('data', im)]))

                print (out['prob'],(x,y))

                if (out['prob'][0][1]>0.99):

                    cv2.rectangle(temp2,(y,x),(y+227,x+227),(0,0,255),2)

                # print (out['prob'][0,1].shape,(x,y))

                del im

                y += step_size

            y = 0

            x += step_size

        cv2.imwrite(imgFile.split('.')[0]+"_result.jpg",temp2)
其程序运行效果如下:
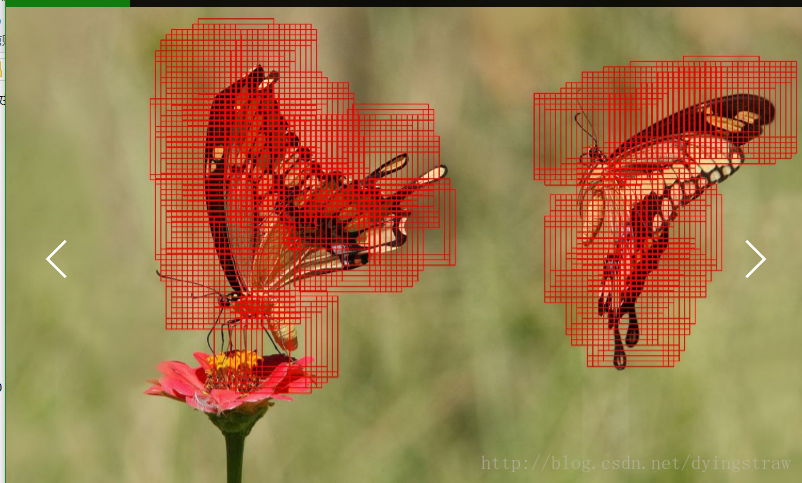
图1 运行效果
从图中可以看出,所标记的框的数量很多,但交际支出就是蝴蝶的维治所在,因此通过算法即可准确画出蝴蝶的位置,此步下次笔记提出。以上图所示,滑动窗的移动粒度step_size比较小,引起蝴蝶位置比较精确,但是消耗的时间比较长,我们试着1.缩放图片;2.调整step_size大小;看看最终效果。
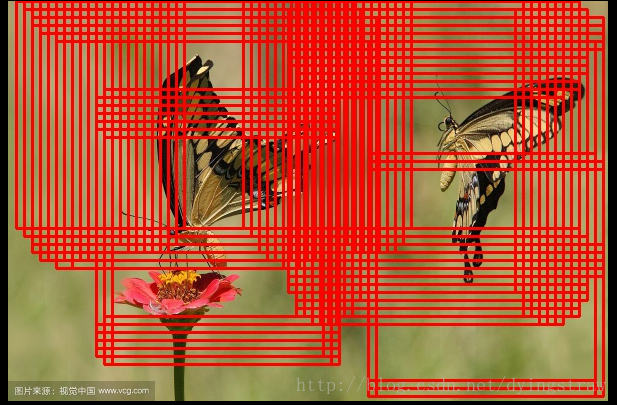
图2 缩放图片后的效果

图3 调整step_size大小
经过上述效果,最终课调整最佳尺寸。
同时,对于检测对象和背景区分度不大的情况下,模型表现力不是很好,如下图所示:

图4 模型变现比较差
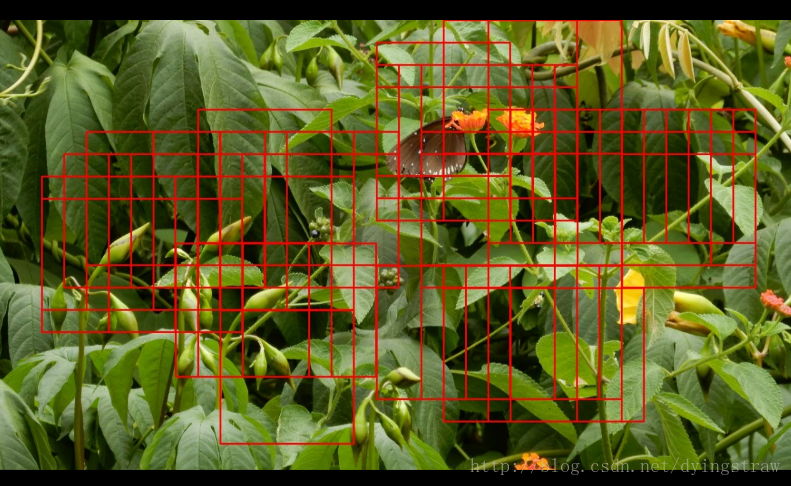
图5 模型变现比较差
其原因个人猜测如下:
1. 训练集加测试集样本只选择了100张图片,train datas中没有包含此类信息
2. 模型过拟合比较严重
3. 其他原因
附件:
其他测试结果图如下:

附图1

附图2

附图3
