WebService入门
1. 新建JavaWeb Project。
2. 新建远程调用的接口,HelloWorld.java,源码如下
package com.cvicse.ump.webservices.hello;

public interface HelloWorld {

    public String sayHello(String name);
    public String getHelloName();

}
3. 实现远程调用接口,HelloWorldImp.java,源码如下:(注意webService注解)
package com.cvicse.ump.webservices.hello.imp;

import javax.jws.WebService;

import com.cvicse.ump.webservices.hello.HelloWorld;

@WebService
public class HelloWorldImp implements HelloWorld{

	@Override
	public String sayHello(String name) {
		return "hello,"+name;
	}

	@Override
	public String getHelloName() {
		return "World";
	}

}
4. 编写启动服务程序,HelloWorldTest.java,代码如下:
package com.cvicse.ump.webservices.hello;

import javax.xml.ws.Endpoint;

import com.cvicse.ump.webservices.hello.imp.HelloWorldImp;

public class HelloWorldTest {

	public static void main(String[] args) {

		HelloWorld helloWorld = new HelloWorldImp();
		String url = "http://192.168.19.188:8080/helloWorld";
		Endpoint.publish(url, helloWorld);
		System.out.println("Web Services start...");
	}

}
运行HelloWorldTest.java程序。浏览器访问http://192.168.19.188:8080/helloWorld?wsdl,效果如下图所示:

至此,服务器端开发完成。
客户端开发过程如下:
1. 新建客户端JAVA Web 开发工程WebClient。
2. 进入工程WebClient的src路径下,执行命令:wsimport -keep url(url为wsdl文件的路径)生成客户端代码。如下图所示:

3. 进入eclipse的WebClient工程,刷新目录,自动生成的代码,出现,如下图所示:

4. 编写客户端程序HelloWorldTest.java,源码如下所示:
package com.cvicse.ump.webservices.hello;

import com.cvicse.ump.webservices.hello.imp.HelloWorldImp;
import com.cvicse.ump.webservices.hello.imp.HelloWorldImpService;

public class HelloWorldTest {

    public static void main(String[] args) {

        HelloWorldImpService helloWorldImpService = new HelloWorldImpService();
        HelloWorldImp helloWorldImp = helloWorldImpService.getHelloWorldImpPort();
        String result = helloWorldImp.sayHello("dyh");
        String helloName = helloWorldImp.getHelloName();
        System.out.println(result);
        System.out.println(helloName);

    }

}
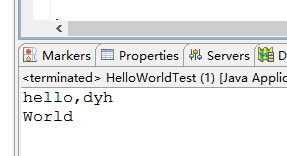
运行效果如下图所示:

源码下载:https://yunpan.cn/cYm5wVevNsH4B (提取码:53f0)
参考网址:http://www.cnblogs.com/xdp-gacl/p/4259481.html


