一、luffy后台配置之封装logger
1.1 导入日志配置文件
# 真实项目上线后,日志文件打印级别不能过低,因为一次日志记录就是一次文件io操作
LOGGING = {
    'version': 1,
    'disable_existing_loggers': False,
    'formatters': {
        'verbose': {
            'format': '%(levelname)s %(asctime)s %(module)s %(lineno)d %(message)s'
        },
        'simple': {
            'format': '%(levelname)s %(module)s %(lineno)d %(message)s'
        },
    },
    'filters': {
        'require_debug_true': {
            '()': 'django.utils.log.RequireDebugTrue',
        },
    },
    'handlers': {
        'console': {
            # 实际开发建议使用WARNING
            'level': 'DEBUG',
            'filters': ['require_debug_true'],
            'class': 'logging.StreamHandler',
            'formatter': 'simple'
        },
        'file': {
            # 实际开发建议使用ERROR
            'level': 'INFO',
            'class': 'logging.handlers.RotatingFileHandler',
            # 日志位置,日志文件名,日志保存目录必须手动创建,注:这里的文件路径要注意BASE_DIR代表的是小luffyapi
            'filename': os.path.join(os.path.dirname(BASE_DIR), "logs", "luffy.log"),
            # 日志文件的最大值,这里我们设置300M
            'maxBytes': 300 * 1024 * 1024,
            # 日志文件的数量,设置最大日志数量为10
            'backupCount': 10,
            # 日志格式:详细格式
            'formatter': 'verbose',
            # 文件内容编码
            'encoding': 'utf-8'
        },
    },
    # 日志对象
    'loggers': {
        'django': {
            'handlers': ['console', 'file'],
            'propagate': True,  # 是否让日志信息继续冒泡给其他的日志处理系统
        },
    }
}
1.2 utils下新建common_logger.py
import logging

logger = logging.getLogger('django')
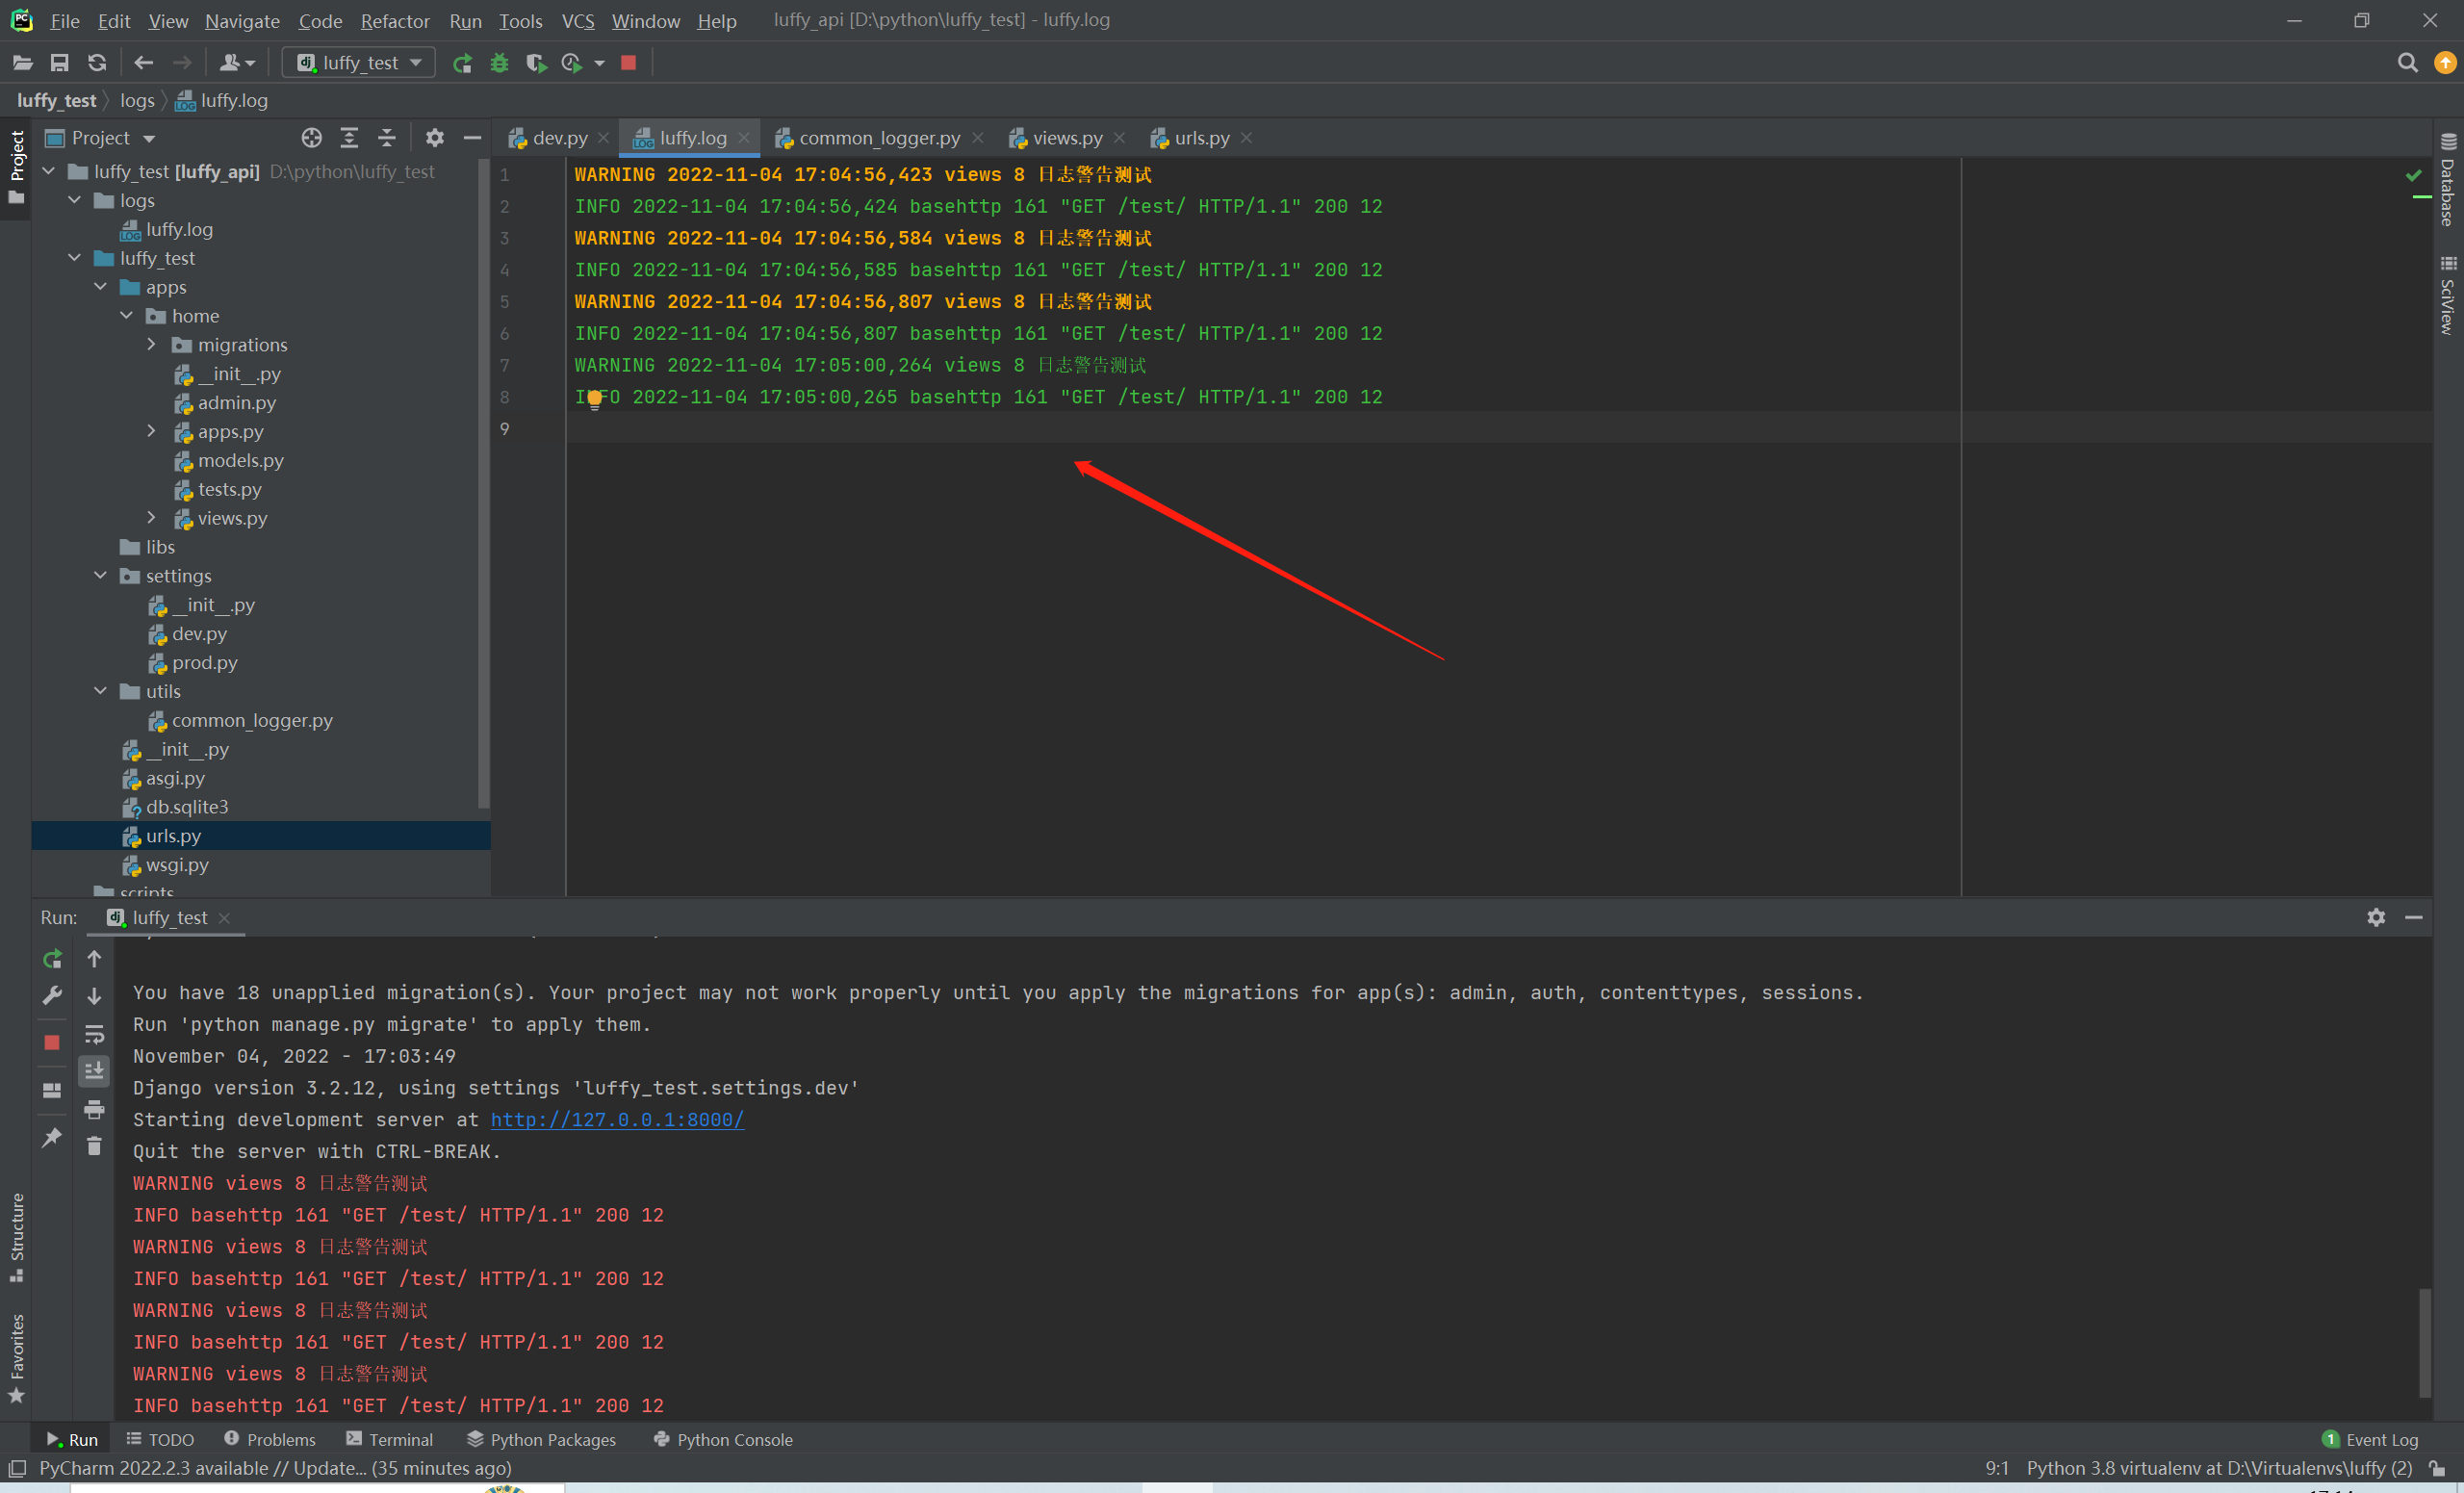
1.3 日志功能测试
urls.py
from django.contrib import admin
from django.urls import path
from home import views

urlpatterns = [
    path('admin/', admin.site.urls),
    path('test/', views.test),
]
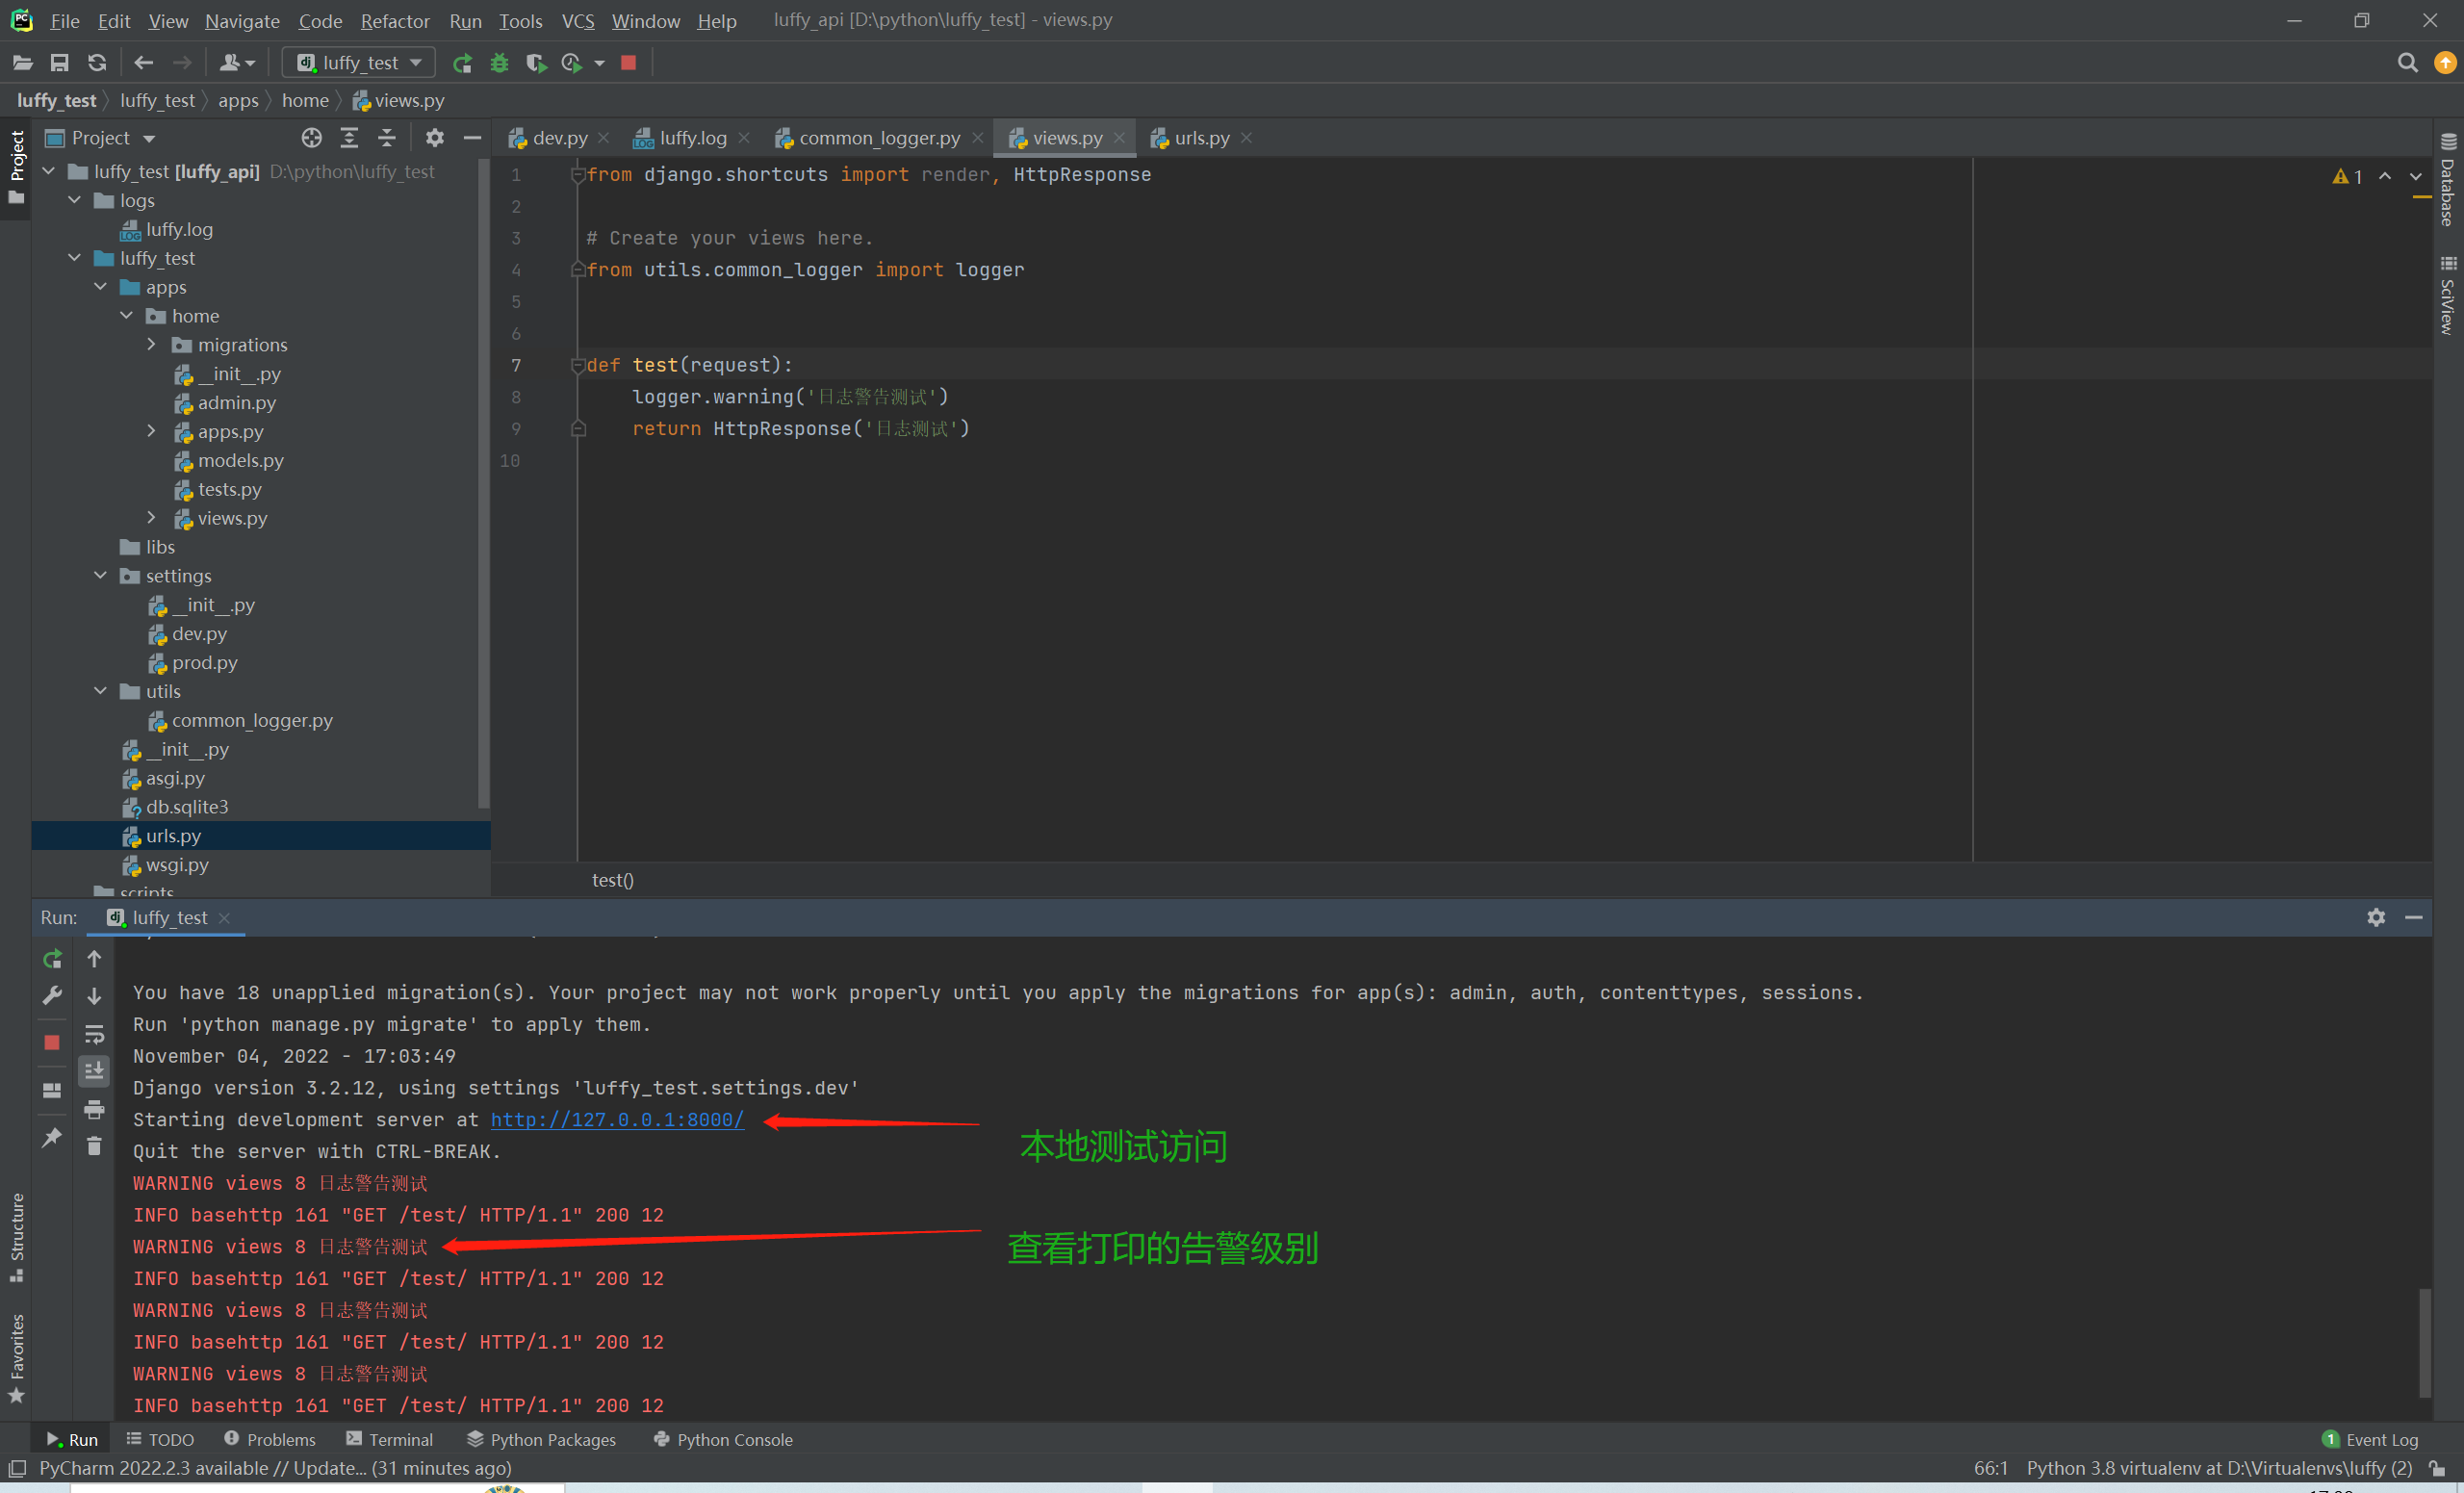
views.py
from django.shortcuts import render, HttpResponse

# Create your views here.
from utils.common_logger import logger


def test(request):
    logger.warning('日志警告测试')
    return HttpResponse('日志测试')
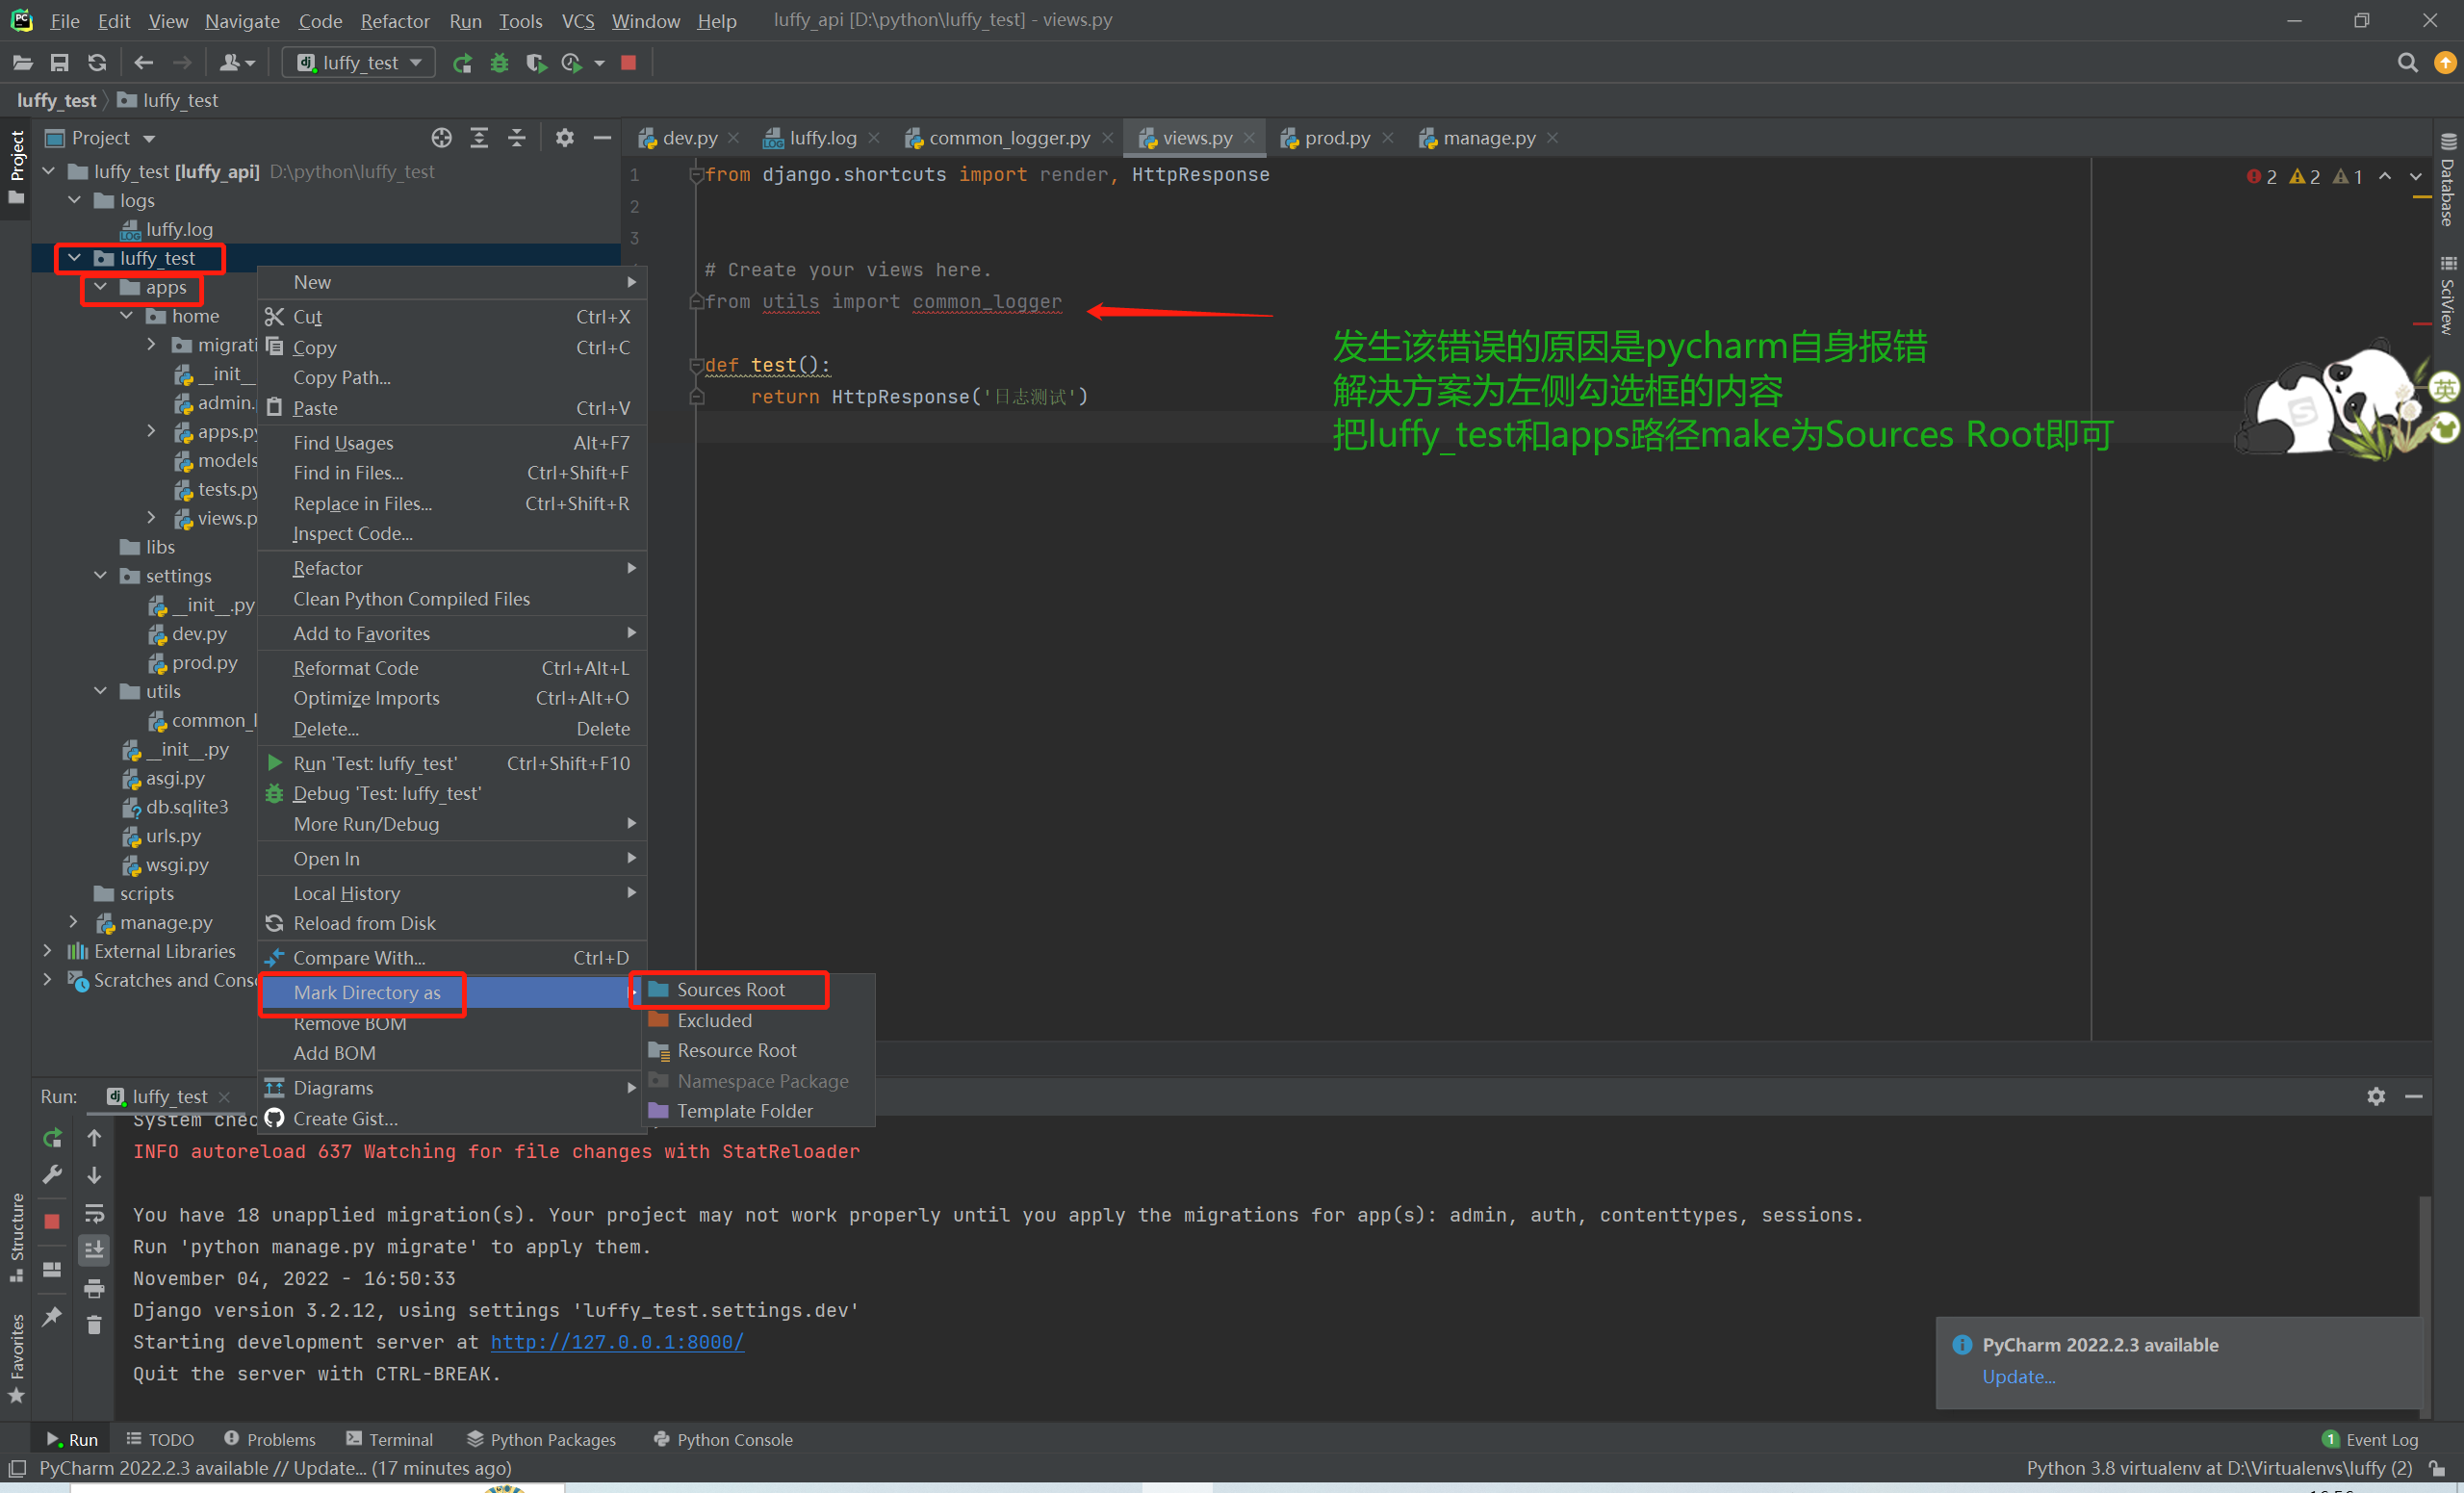
1.4 导入模块错误解决
1.5 测试成功
二、luffy后台配置之封装全局异常
2.1 安装并注册django_rest_framework
# 安装django_rest_framework

# 在配置文件中注册rest_framework

INSTALLED_APPS = [
    'django.contrib.admin',
    'django.contrib.auth',
    'django.contrib.contenttypes',
    'django.contrib.sessions',
    'django.contrib.messages',
    'django.contrib.staticfiles',
    'rest_framework',
    'home',
]
2.2 utils下新建exceptions.py
from rest_framework.views import exception_handler as drf_exception_handler
from rest_framework.response import Response
from utils.common_logger import logger
def exception_handler(exc, context):
# 记录日志,并返回错误信息的格式
request = context.get('request')
# 异常捕获处理
try:
user_id = request.useruser.pk
if not user_id:
user_id = '匿名用户'
except:
user_id = '匿名用户'
view = context.get('view')
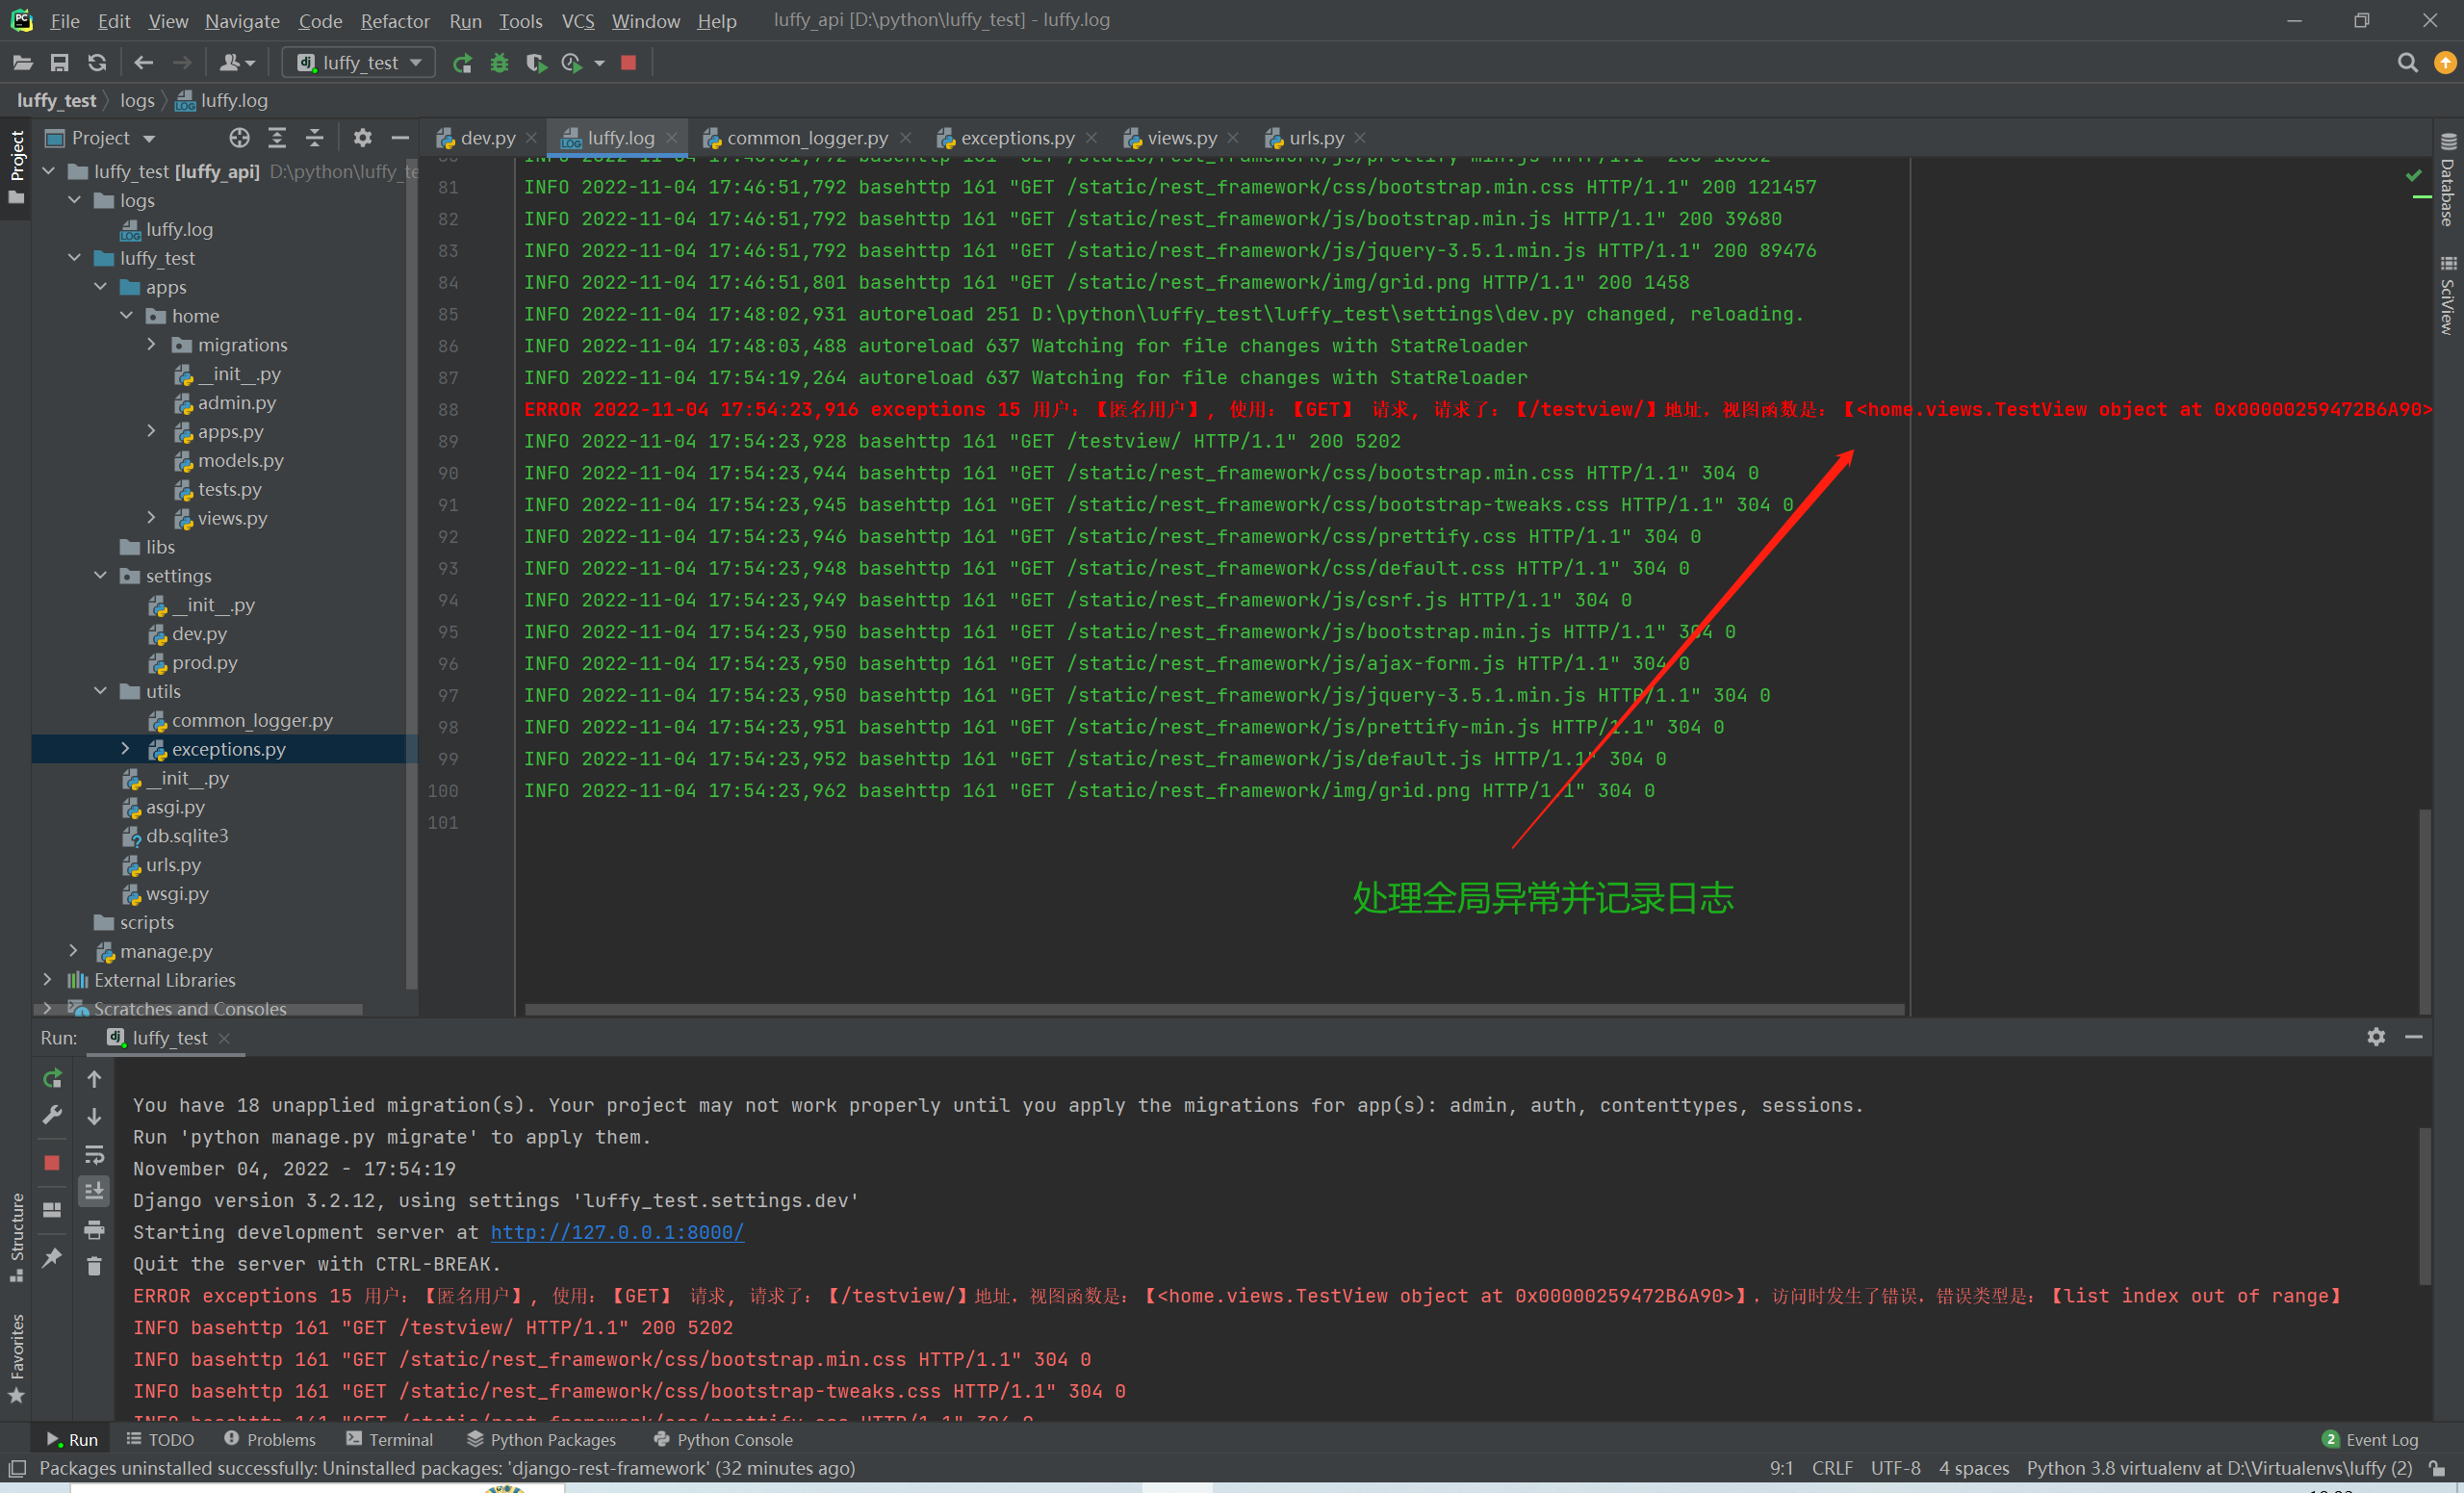
logger.error('用户:【%s】, 使用:【%s】 请求, 请求了:【%s】地址,视图函数是:【%s】,访问时发生了错误,错误类型是:【%s】' % (
user_id, request.method, request.get_full_path(), str(view), str(exc)
))
# 先执行原来的异常处理:它只处理drf的异常,django的异常没有处理
# info如果有值是Response的对象,说明是drf的异常
# info如果是None,说明是django的异常
info = drf_exception_handler(exc, context)
if info:
info = Response(data={'code': 503, 'msg': info.data.get('detail', '服务器内部发生错误,请联系管理员')})
else:
# django的异常,状态码是501,错误信息是:exc异常对象转成字符串
info = Response(data={'code': 501, 'msg': str(exc)})
return info
2.3 配置文件中添加以下内容
REST_FRAMEWORK = {
    # 以后,只要出异常,就会执行exception_handler
    'EXCEPTION_HANDLER': 'utils.exceptions.exception_handler',
}
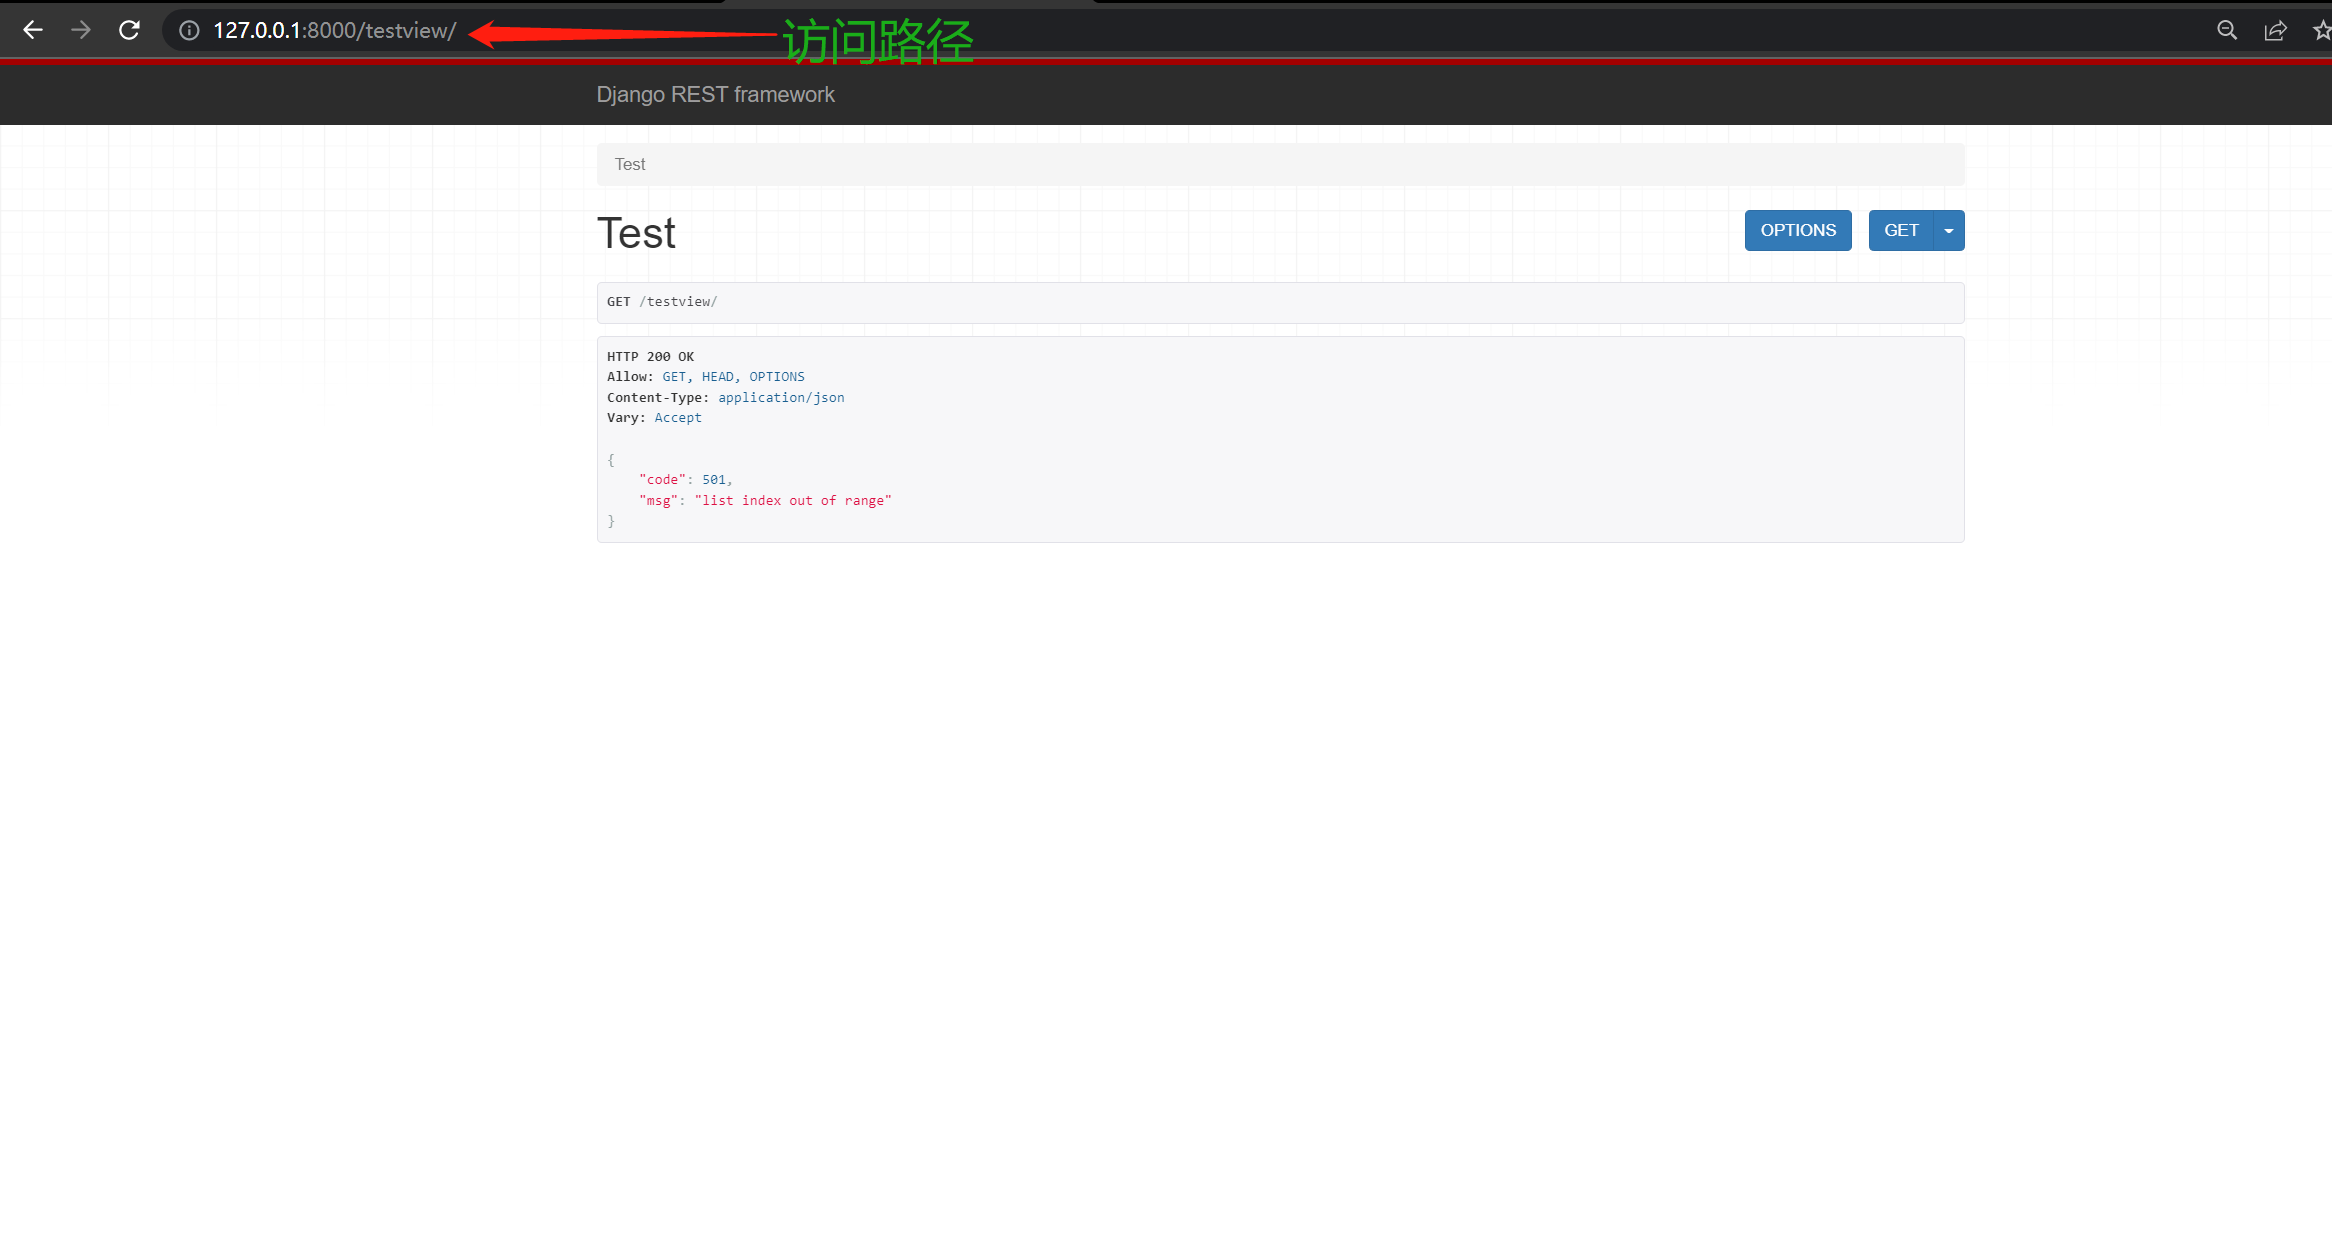
2.4 全局异常测试
urls.py
from django.contrib import admin
from django.urls import path
from home import views

urlpatterns = [
    path('admin/', admin.site.urls),
    path('test/', views.test),
    path('testview/', views.TestView.as_view()),
]
views.py
from django.shortcuts import render, HttpResponse
from rest_framework.views import APIView
from utils.common_logger import logger
from rest_framework.response import Response


def test(request):
    logger.warning('日志警告测试')
    return HttpResponse('日志测试')


class TestView(APIView):
    def get(self, request):
        l1 = [6, 7, 8]
        print(l1[6])
        return Response('okk')
2.5 测试成功
三、luffy后台配置之二次封装response
3.1 utils下新建response.py
from rest_framework.response import Response


class APIResponse(Response):  # 继承Response进行封装
    def __init__(self, code=200, msg='响应成功', status=None, headers=None, **kwargs):
        data = {'code': code, 'msg': msg}
        if kwargs:
            data.update(kwargs)
        super().__init__(data=data, status=status, headers=headers)
3.2 验证测试
views.py
from utils.response import APIResponse  # 导入我们封装好的模块


class TestView(APIView):
    def get(self, request):
        # l1 = [6, 7, 8]
        # print(l1[6])
        return APIResponse(result='13da6bfa355964dn66dab9345fd')  # 自定义返回的数据格式
        # 如果想要往响应头中添加数据,则在后边填写对应的参数headers={},同样也支持修改响应状态码,直接修改对应的值即可

四、luffy数据库配置
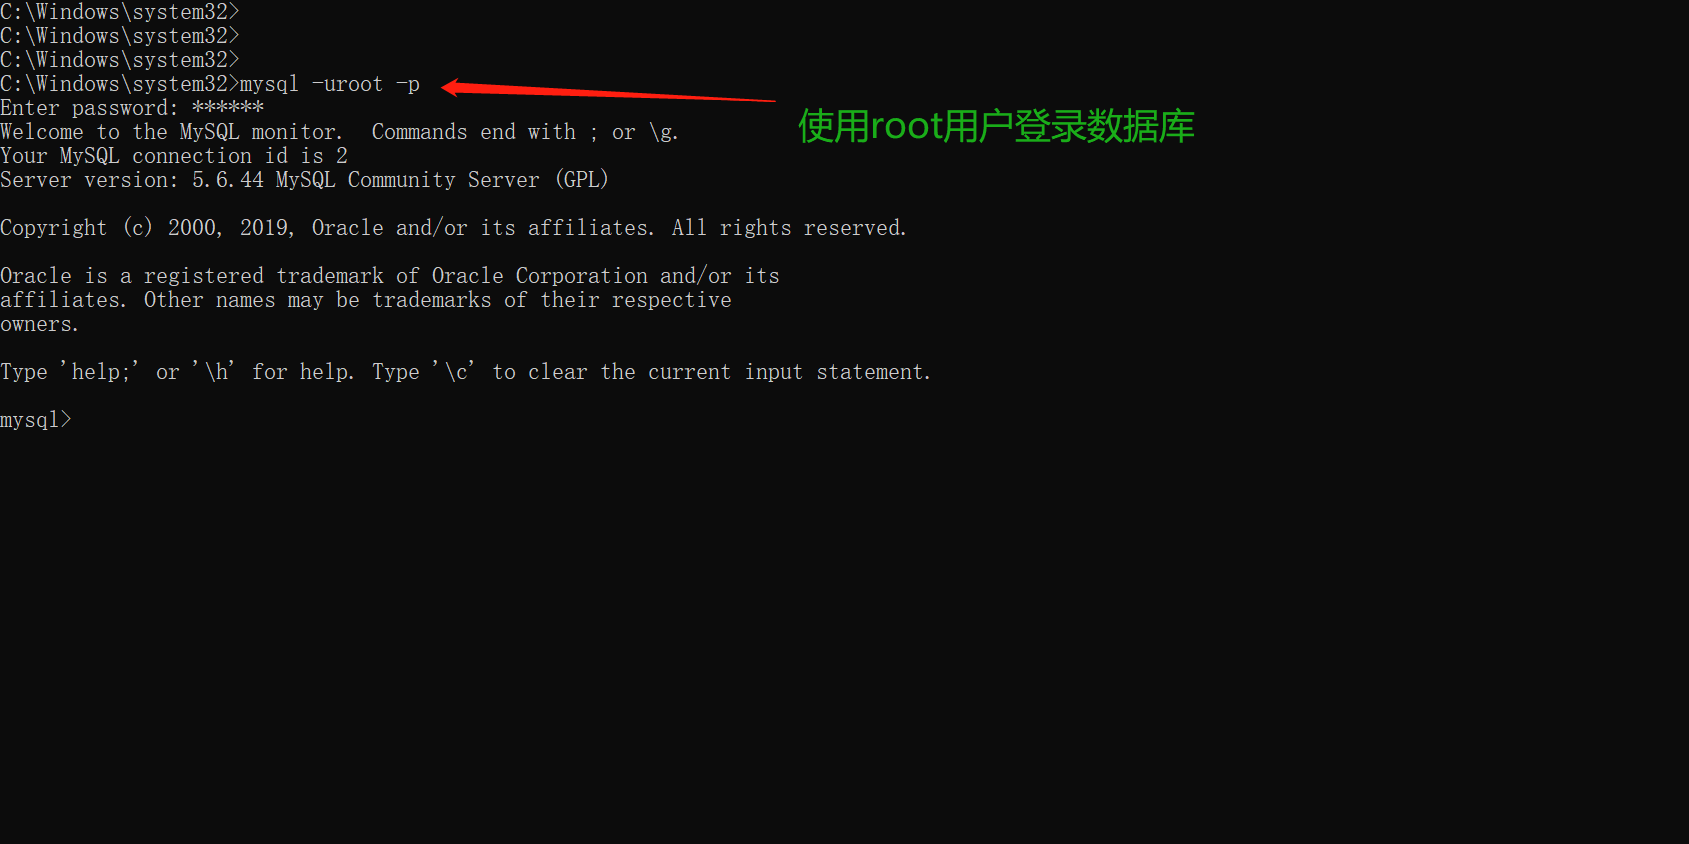
4.1 使用root用户连接数据库
# 连接数据库命令:
	mysql -uroot -p
4.2 创建luffy项目数据库
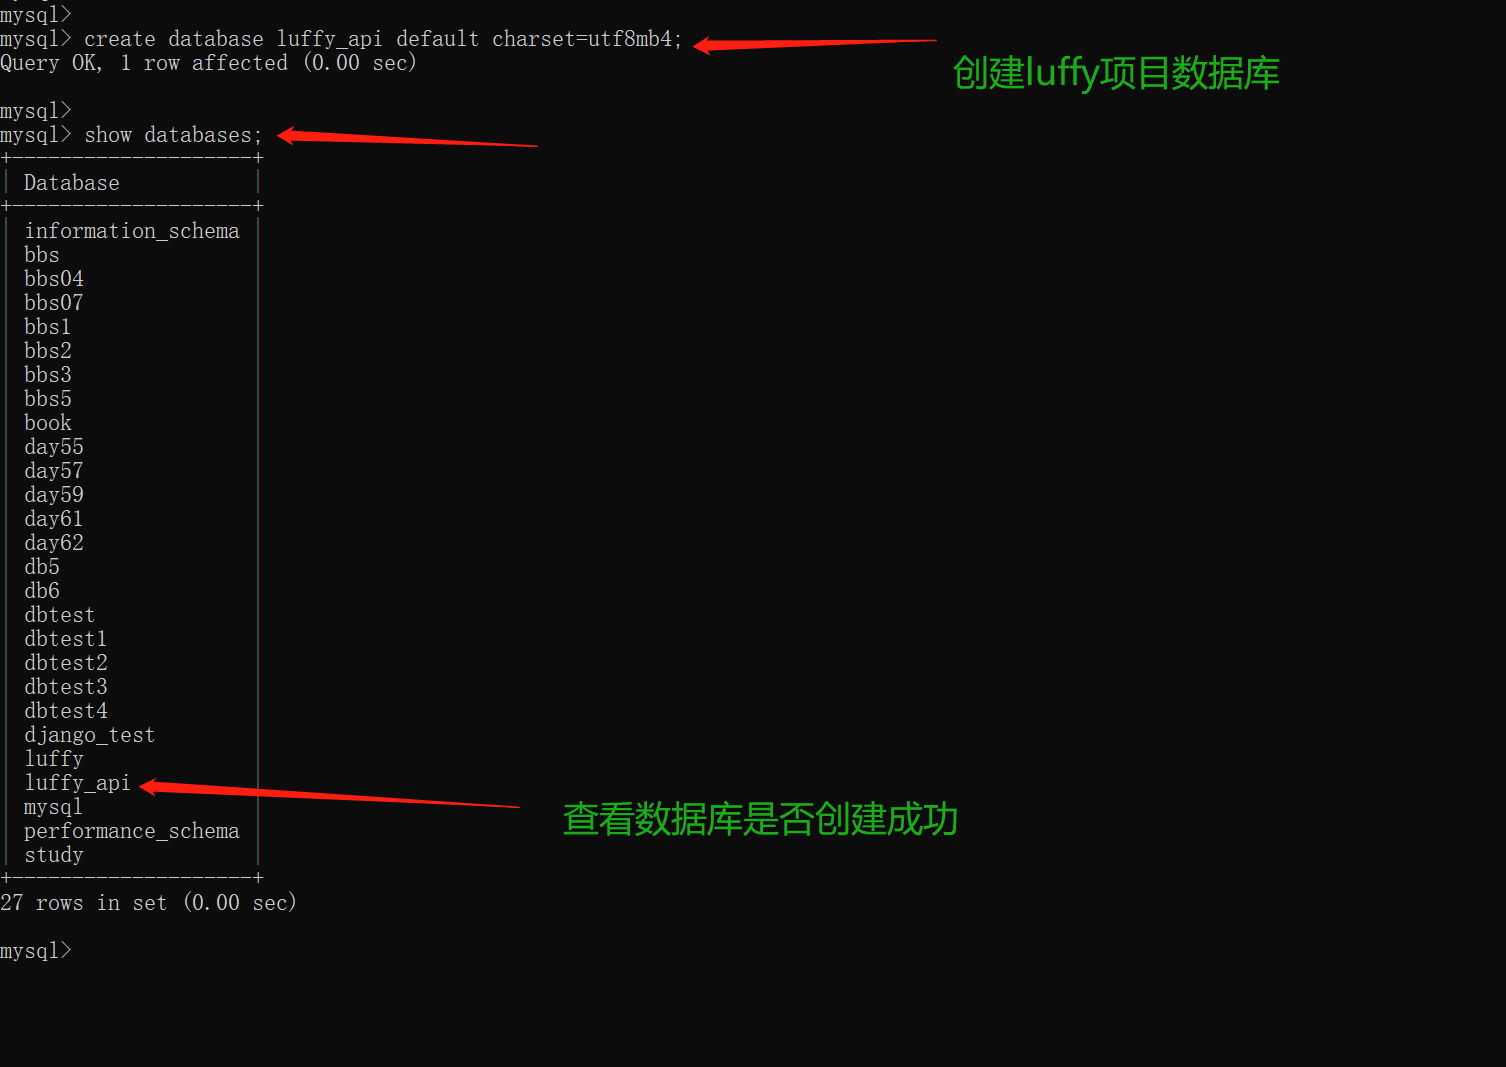
# 创建数据库命令:
	create database luffy default charset=utf8mb4;

# 查看数据库命令:

	show databases;
4.3 创建luffy项目用户并授权
设置权限账号密码
# 授权账号命令:grant 权限(create, update) on 库.表 to '账号'@'host' identified by '密码'

# 密码自己设置,尽量复杂一点儿,这里以*号为示例

1.配置任意ip都可以连入数据库的账户
>: grant all privileges on luffy.* to 'luffy_api'@'%' identified by '*****';

2.由于数据库版本的问题,可能本地还连接不上,就给本地用户单独配置
>: grant all privileges on luffy.* to 'luffy_api'@'localhost' identified by '*****';

3.刷新一下权限
>: flush privileges;
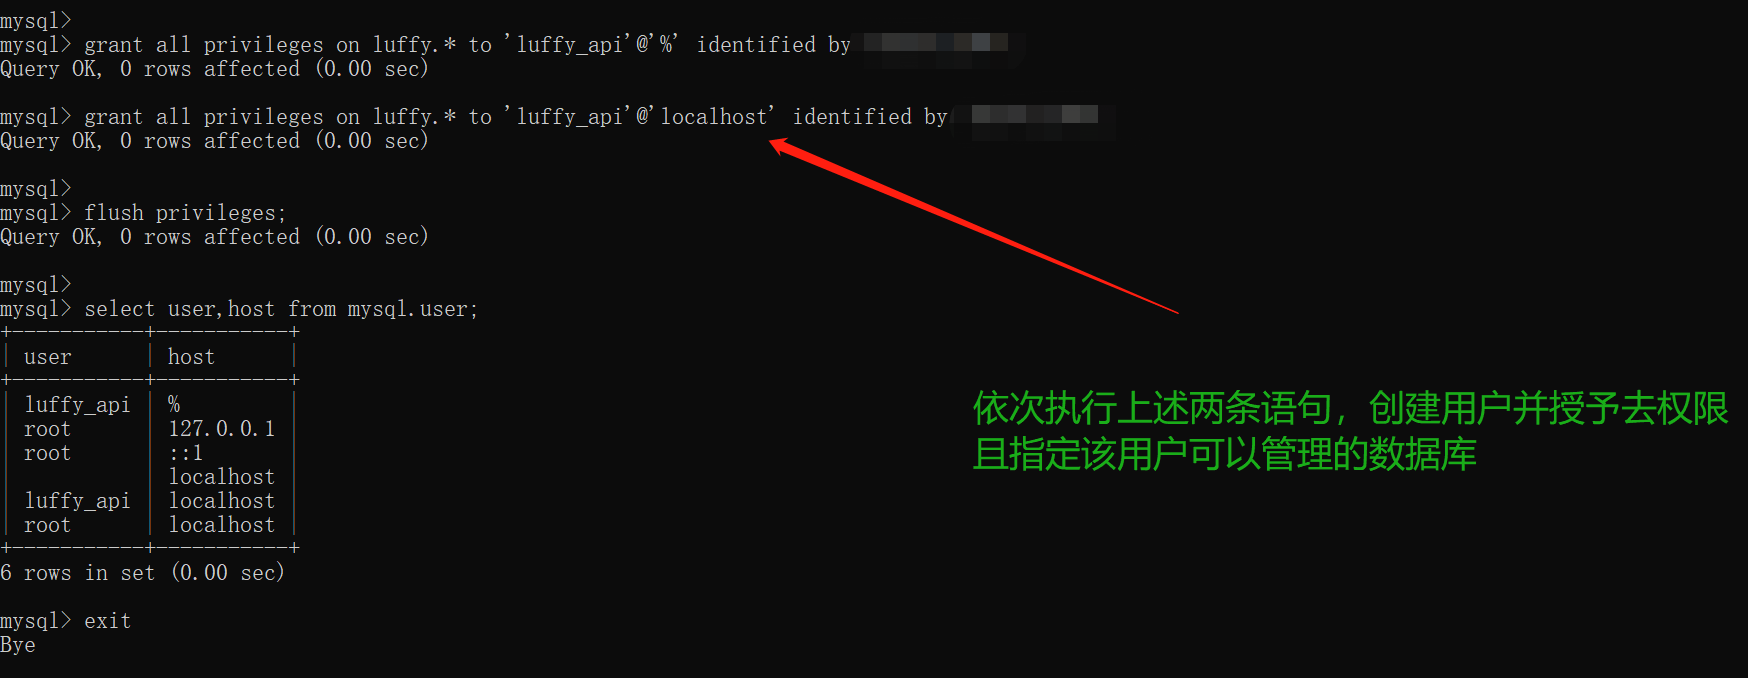
4.4 查看创建成功的用户
# 查看当前用户
	select user,host from mysql.user;
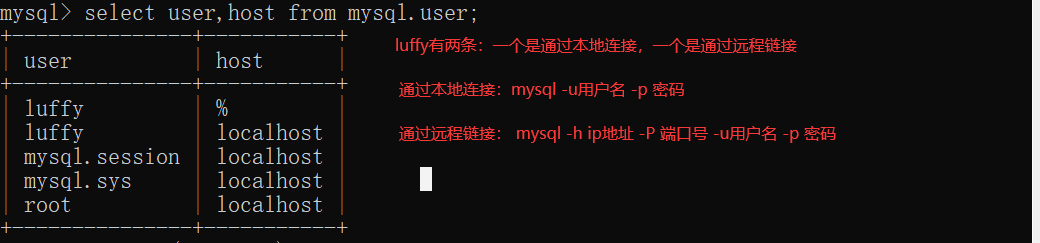
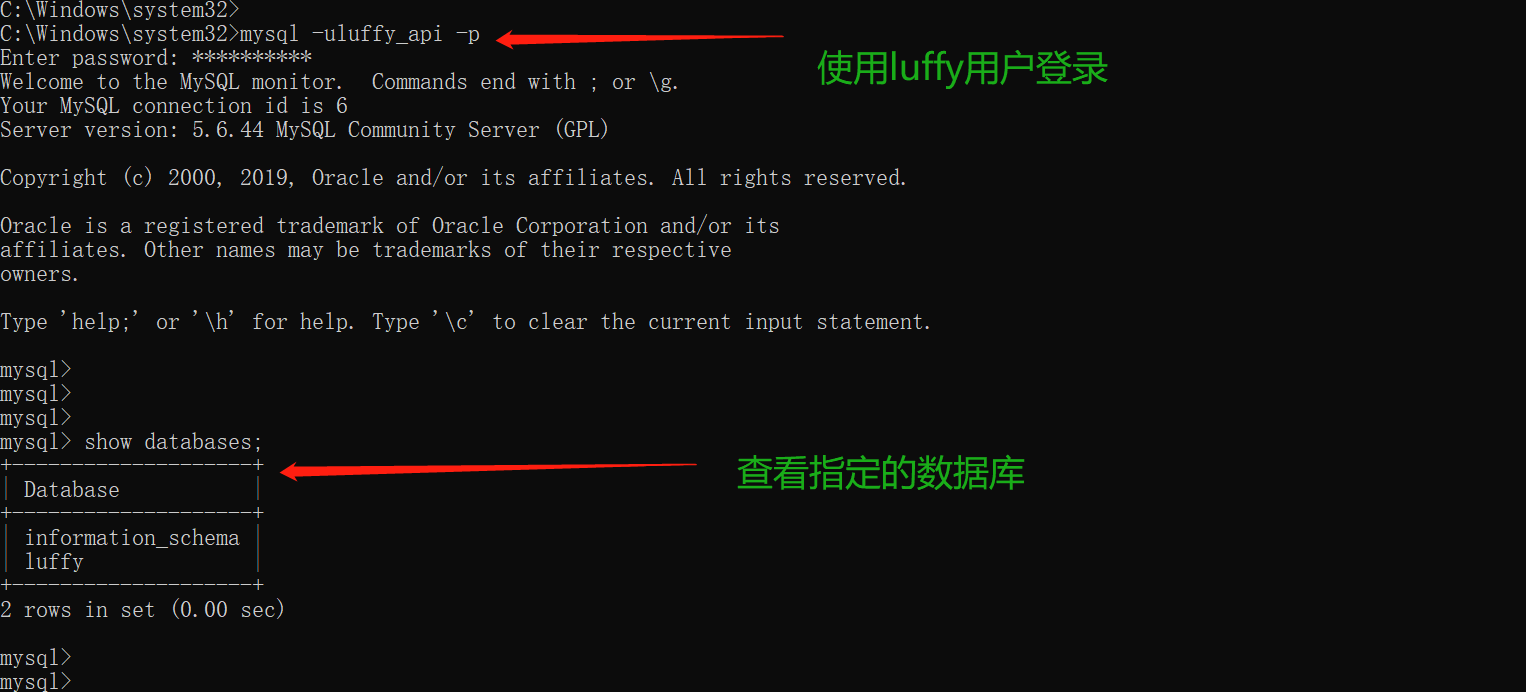
4.5 使用创建的用户登录
# 以luffy_api用户登录,查看,只能看到luffy库

# 连接数据库命令:
	mysql -uluffy_api -p
4.7 在配置文件中修改数据库配置
DATABASES = {
    'default': {
        'ENGINE': 'django.db.backends.mysql',
        'NAME': 'luffy',
        'USER': 'luffy_api',
        'PASSWORD': '******	',
        'HOST': '127.0.0.1',
        'PORT': 3306,
    }
}
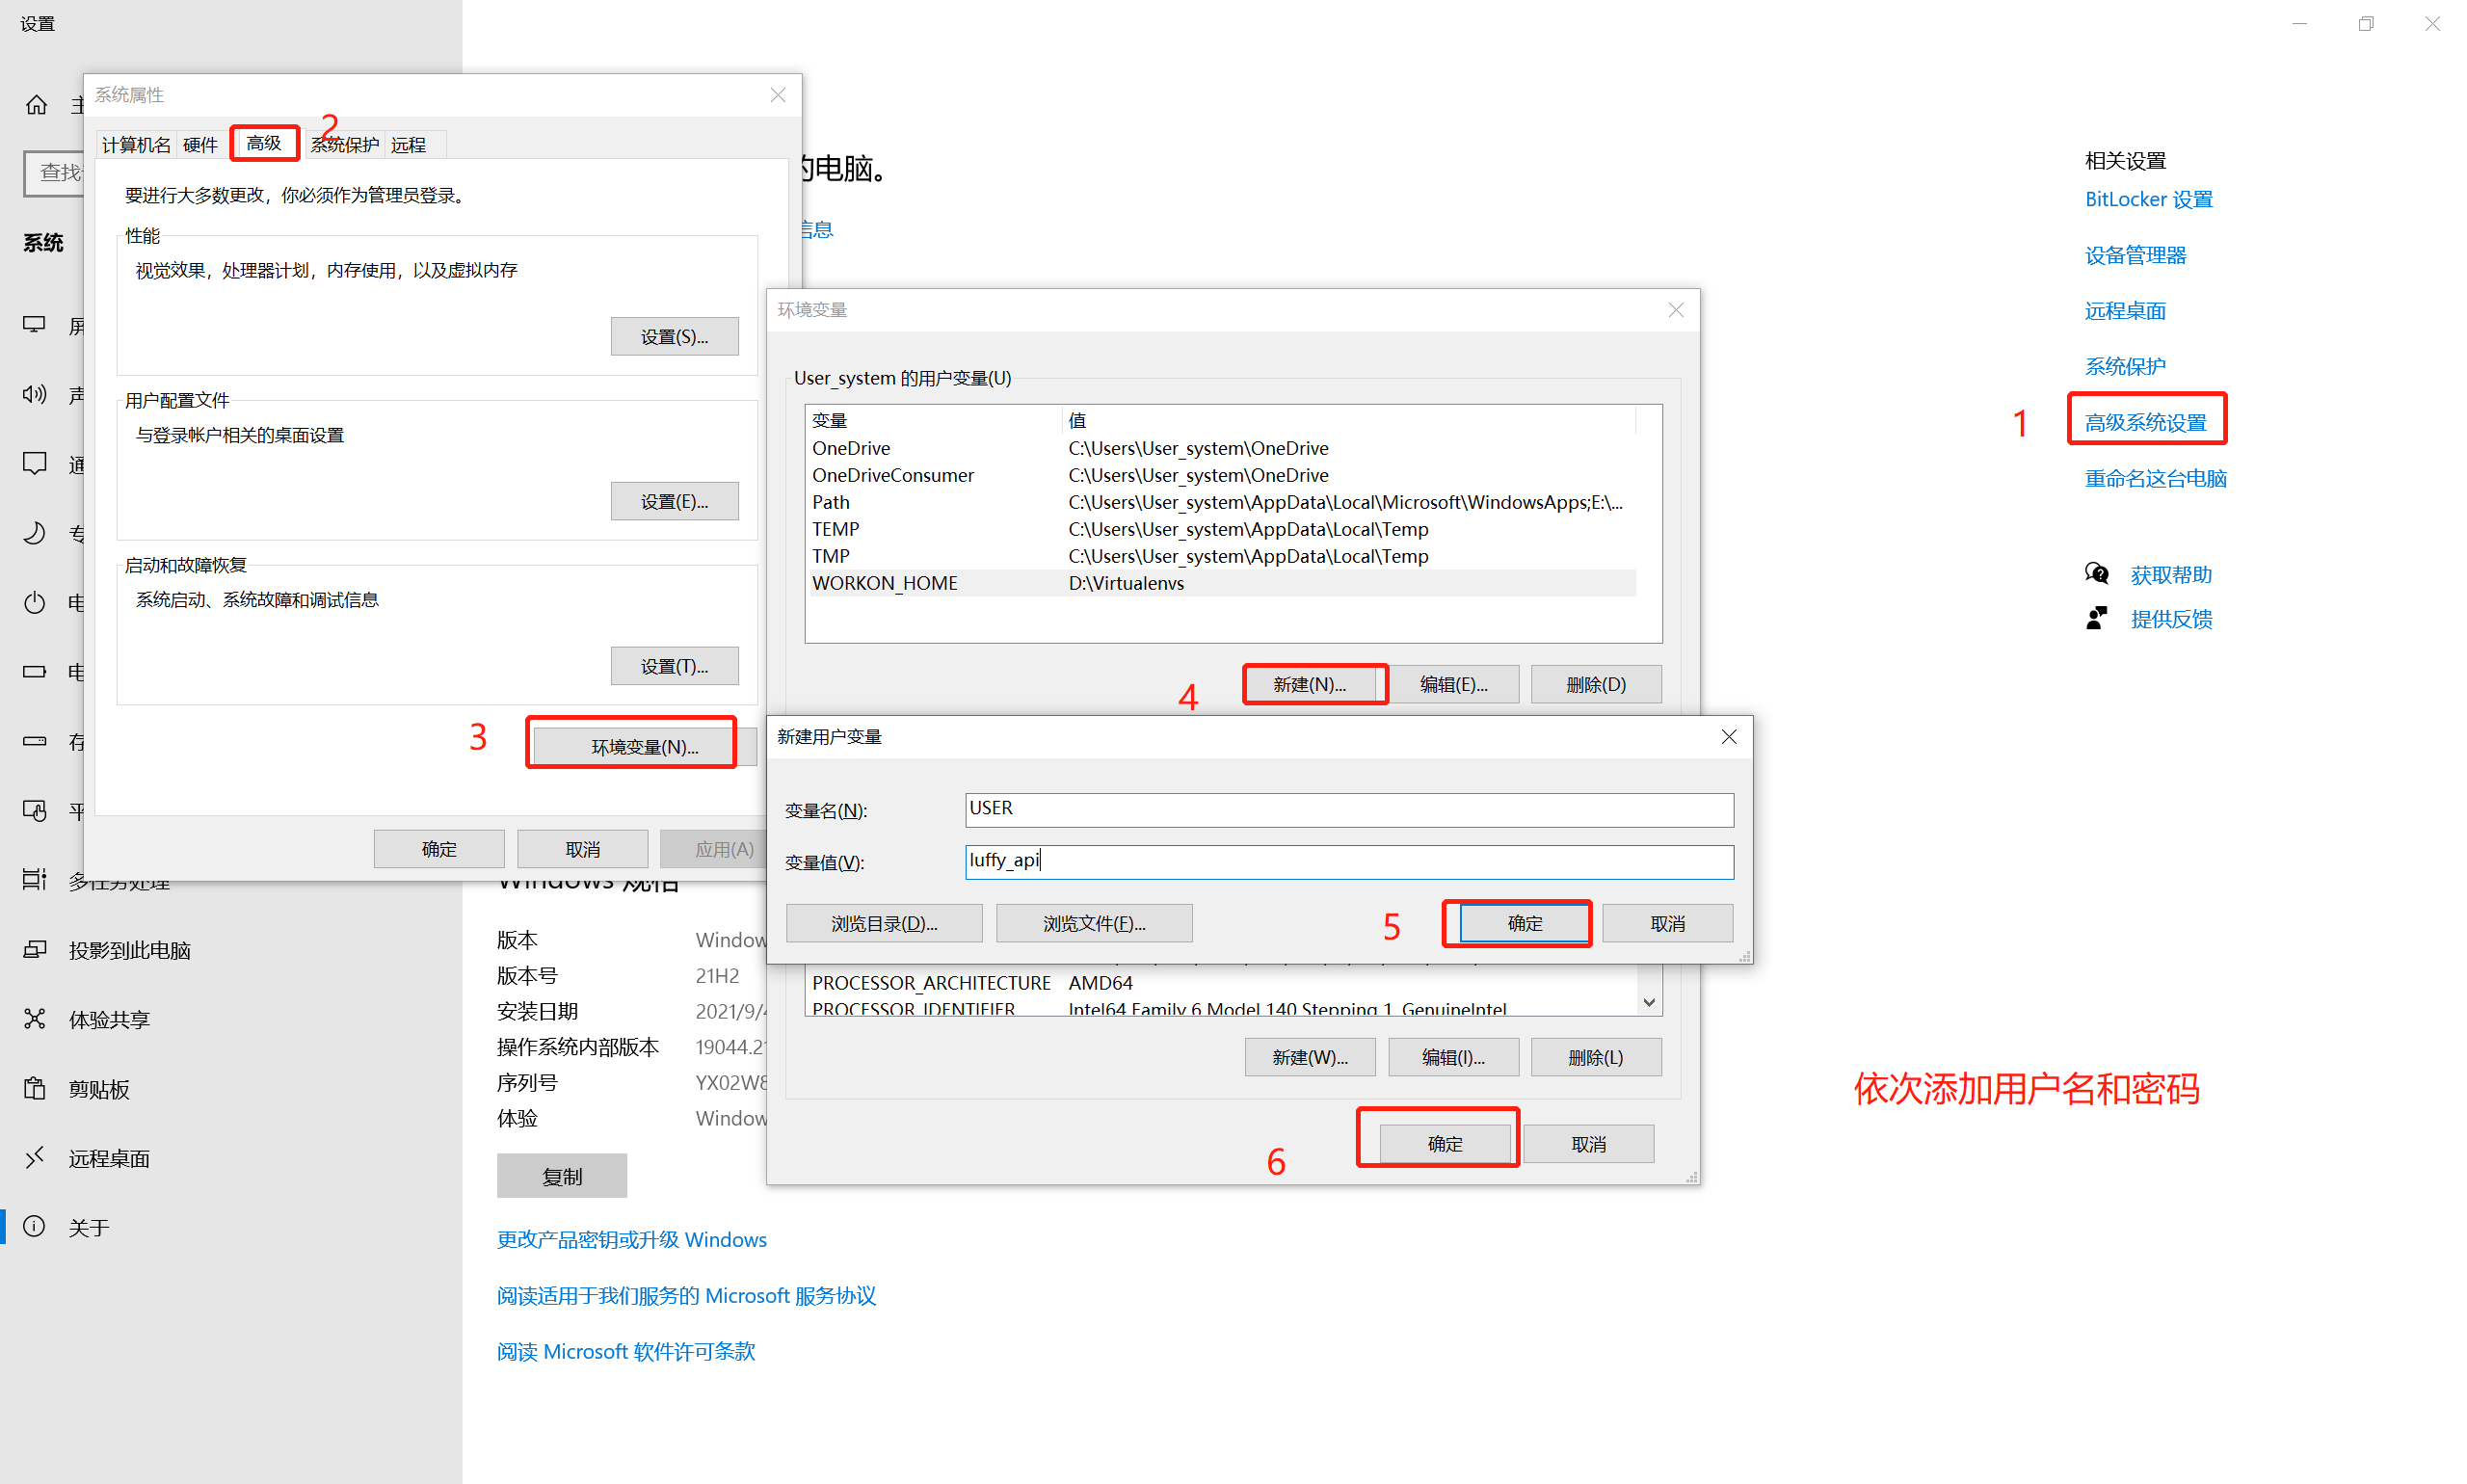
4.8 为避免密码泄露风险,做出以下配置
#  上方配置文件有一定的风险,为避免密码泄露,出于对数据安全的考虑,特做出如下改配:

#  后期项目上线,把用户名和密码配置在windows的环境变量里,这样密码的安全性就得到了极大的保障
import os

user = os.environ.get('USER', 'luffy_api')
password = os.environ.get('PWD', '******')   # 密码的环境变量添加时,变量名不要出现PASSWORD

DATABASES = {
    'default': {
        'ENGINE': 'django.db.backends.mysql',
        'NAME': 'luffy',
        'USER': user,
        'PASSWORD': password,
        'HOST': '127.0.0.1',
        'PORT': 3306,
    }
}
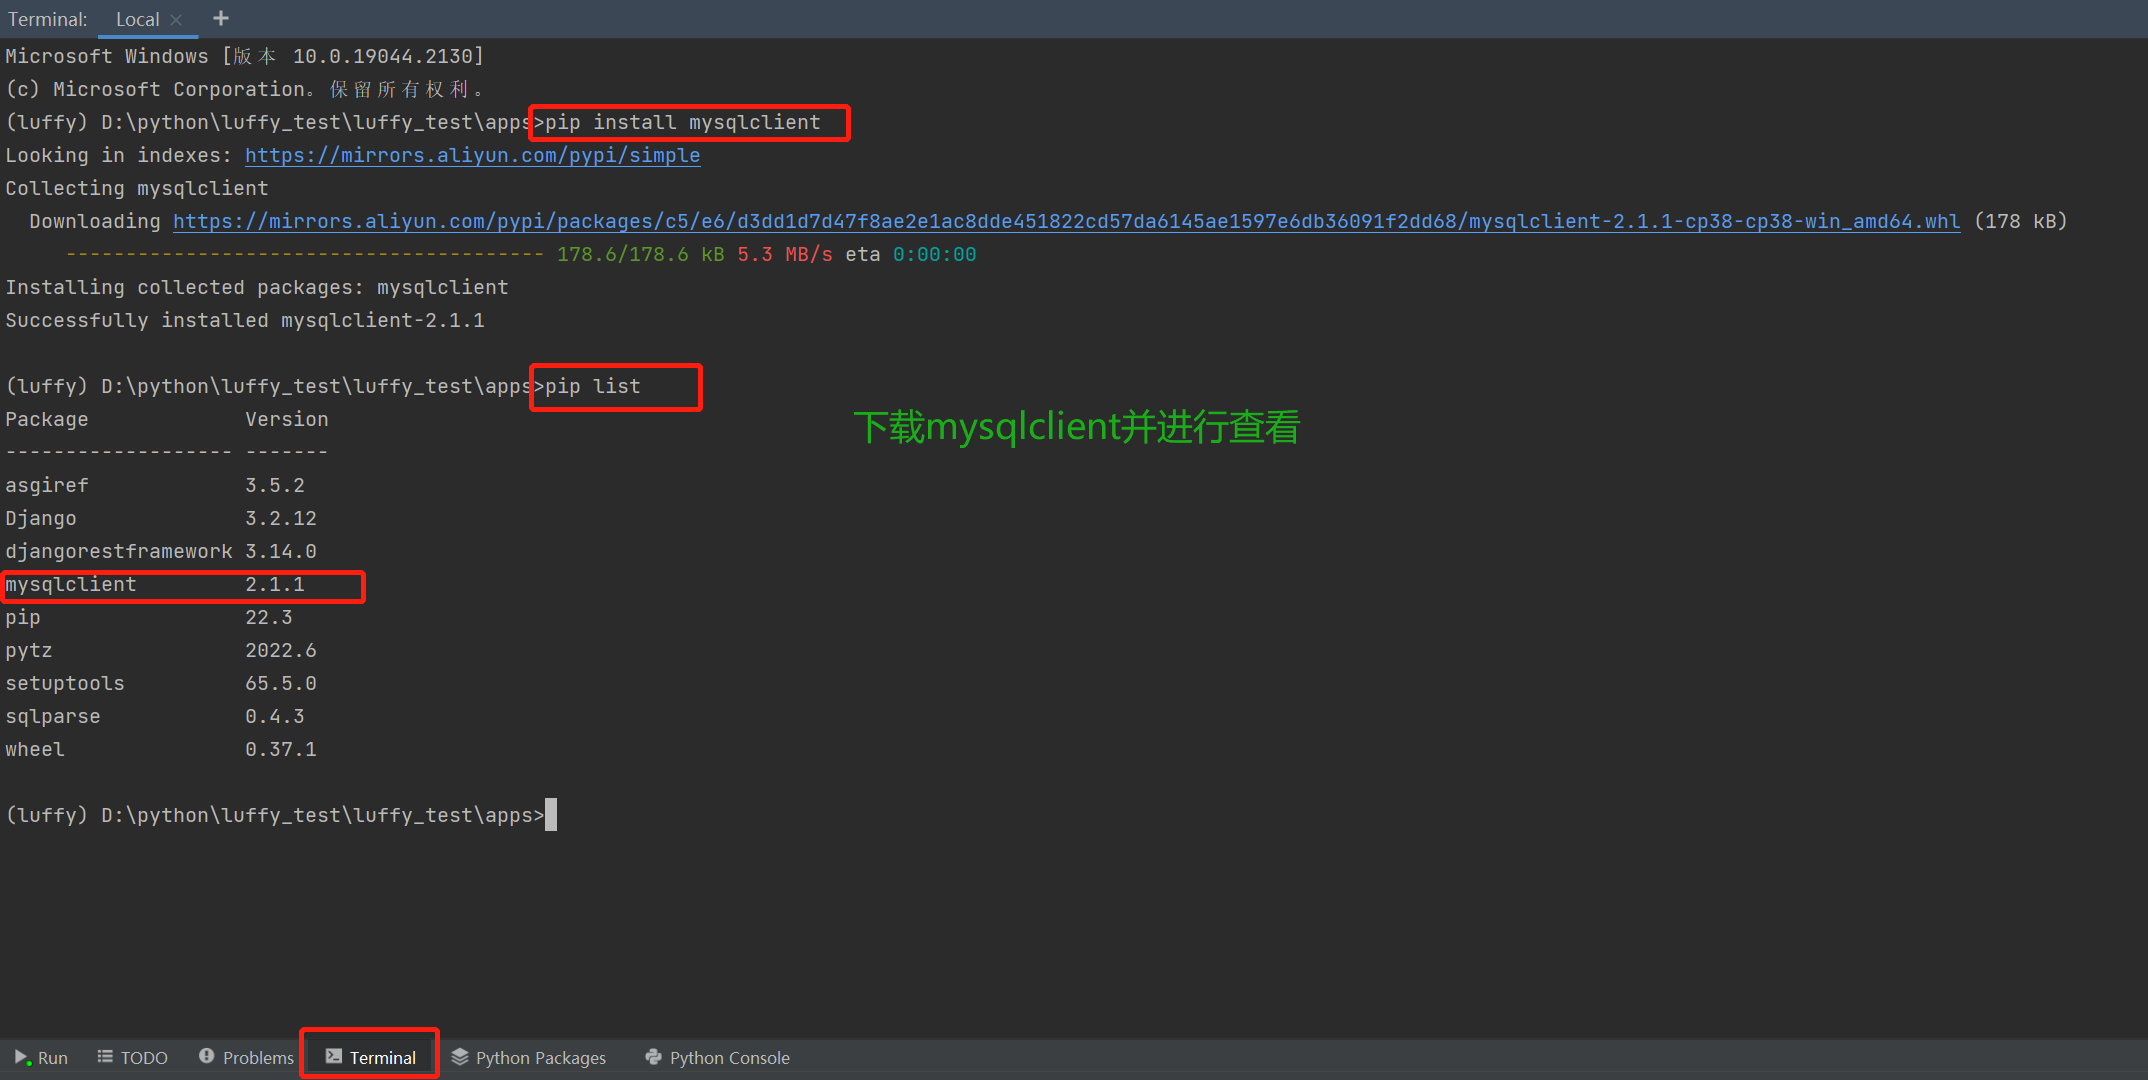
4.9 安装mysqlclient
# 此时运行项目会报错,因为django默认使用mysqlDB操作mysql,mysqlDB这个模块,在python2中支持,在python3中不支持,我们可以使用pymysql替换
# 但是到了django2.0.7以后,如果使用pymysql替换,需要改django的源代码
# 于是我们选择使用mysqlclient来替换pymysql,mysqlclient是mysqlDB的python3.x版本


# 如果使用pymysql,需要改源码,需要执行以下操作
        import pymysql
        pymysql.install_as_MySQLdb() # 猴子补丁,把里面所有mysqlDB的对象,都替换成pymysql

# 猴子补丁是:在程序运行过程中得动态替换技术,具体参考下方博客
    https://liuqingzheng.top/python/Python并发编程/24-协程之gevent模块/

# 以后再django中不使用pymysql了,使用mysqlclient,不需要再执行任何补丁
五、luffy User表配置
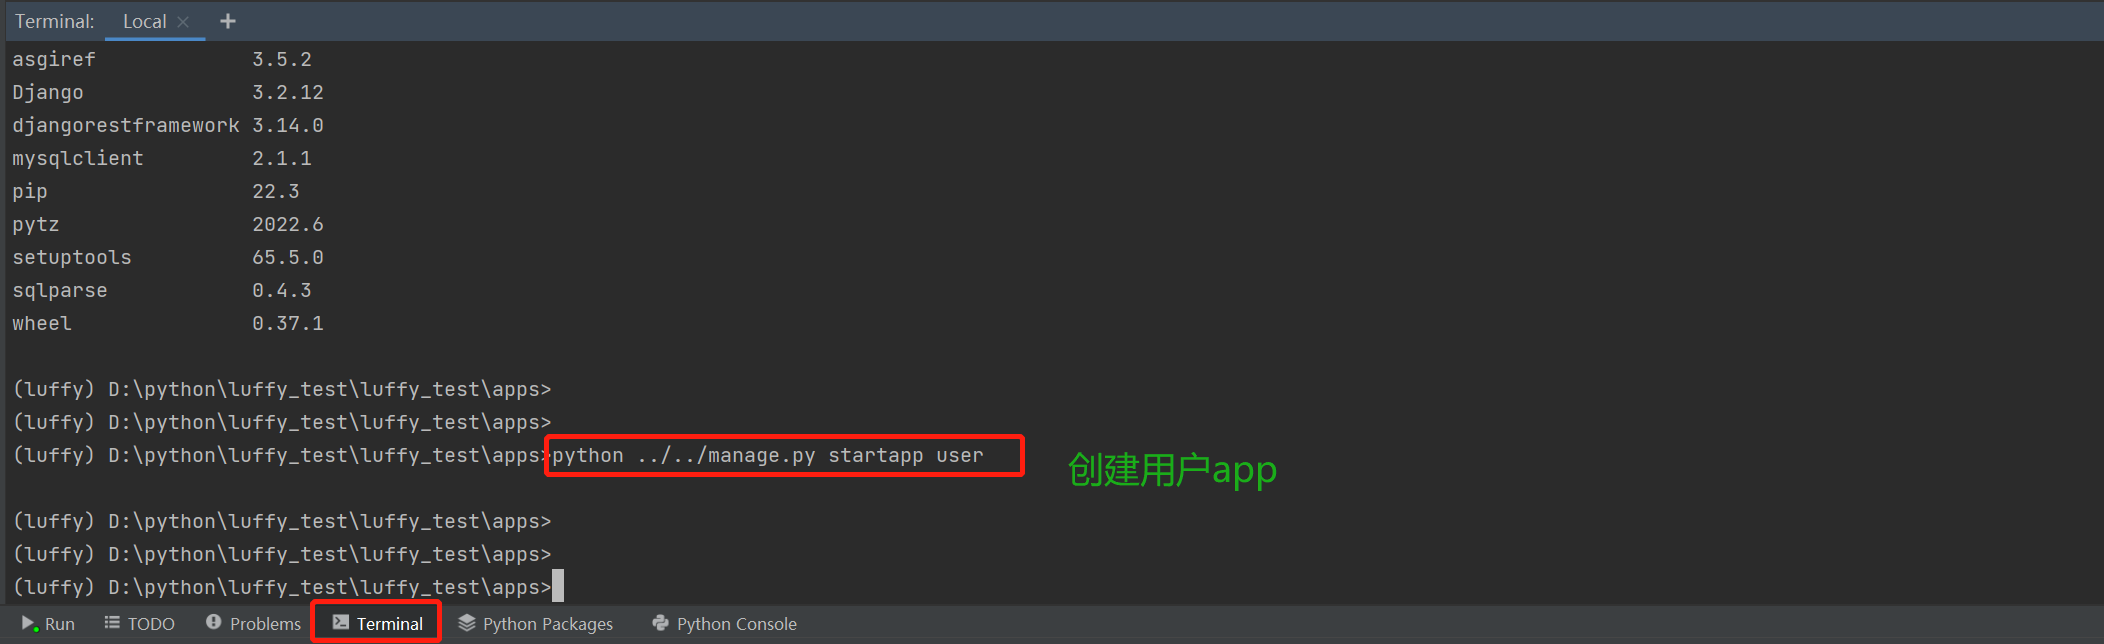
5.1 创建一个用户app
# 创建用户app,切换到apps路径下创建  使用cd 路径名即可切换
	python ../../manage.py startapp user
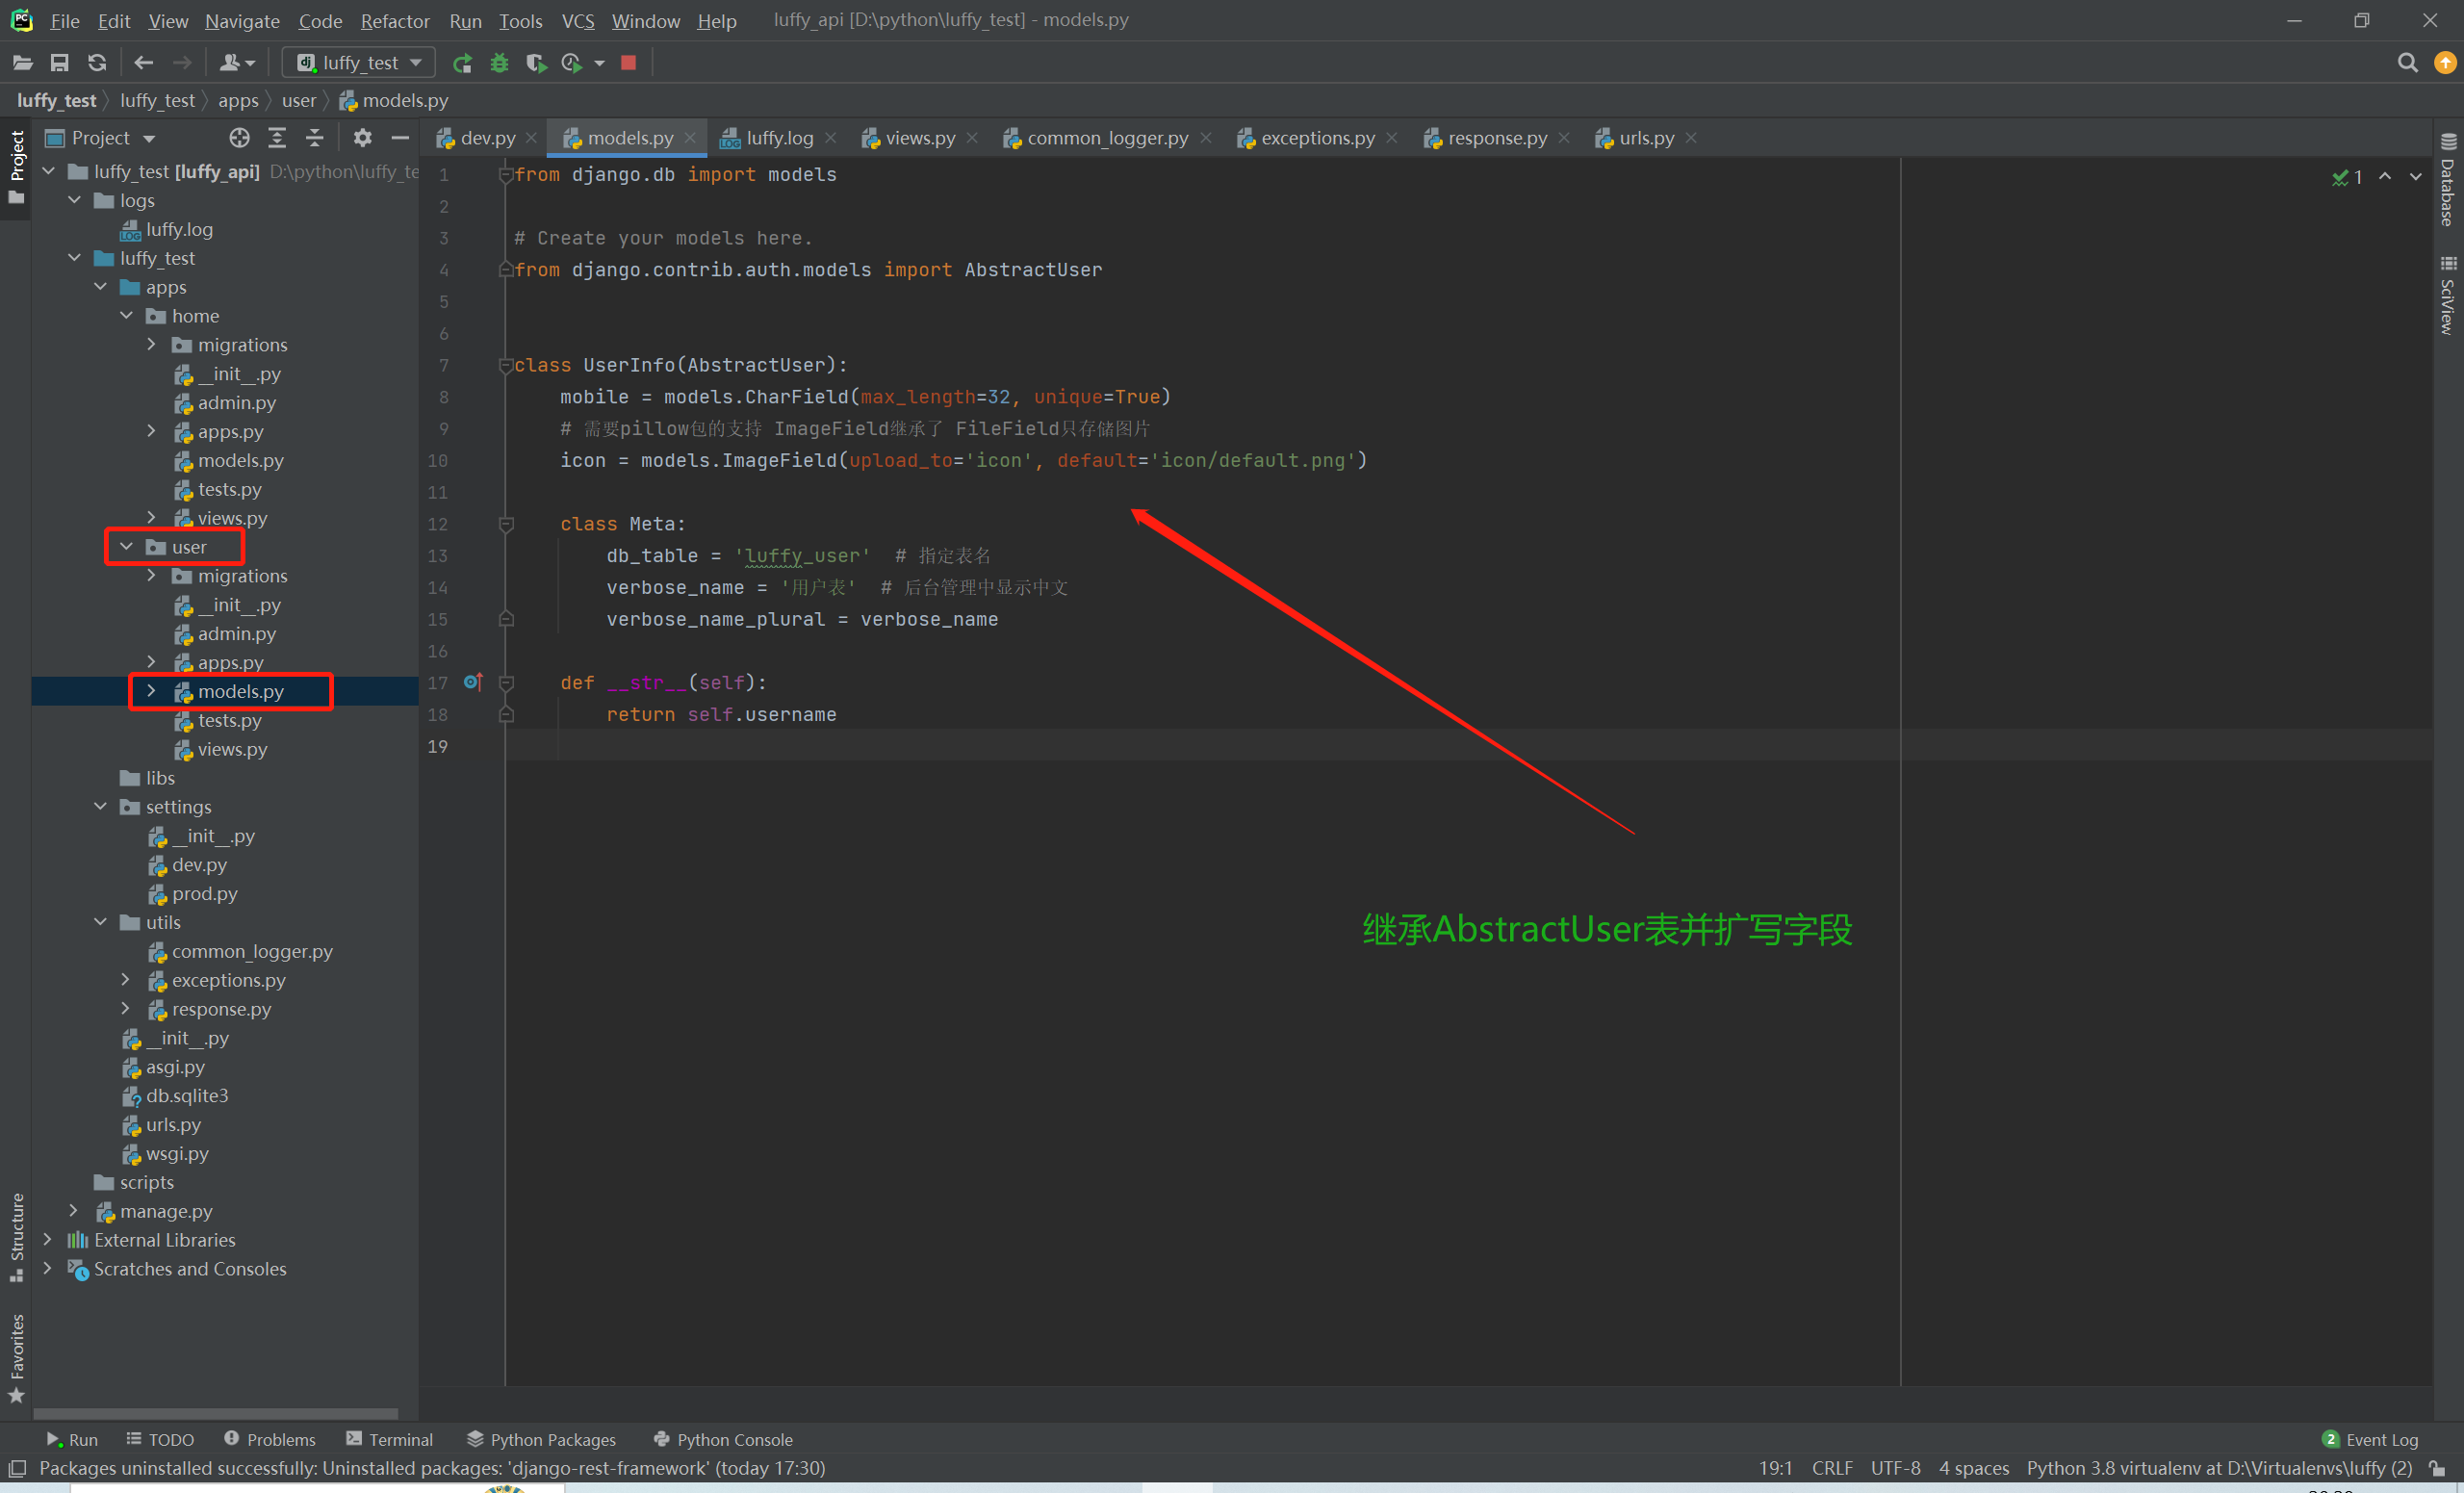
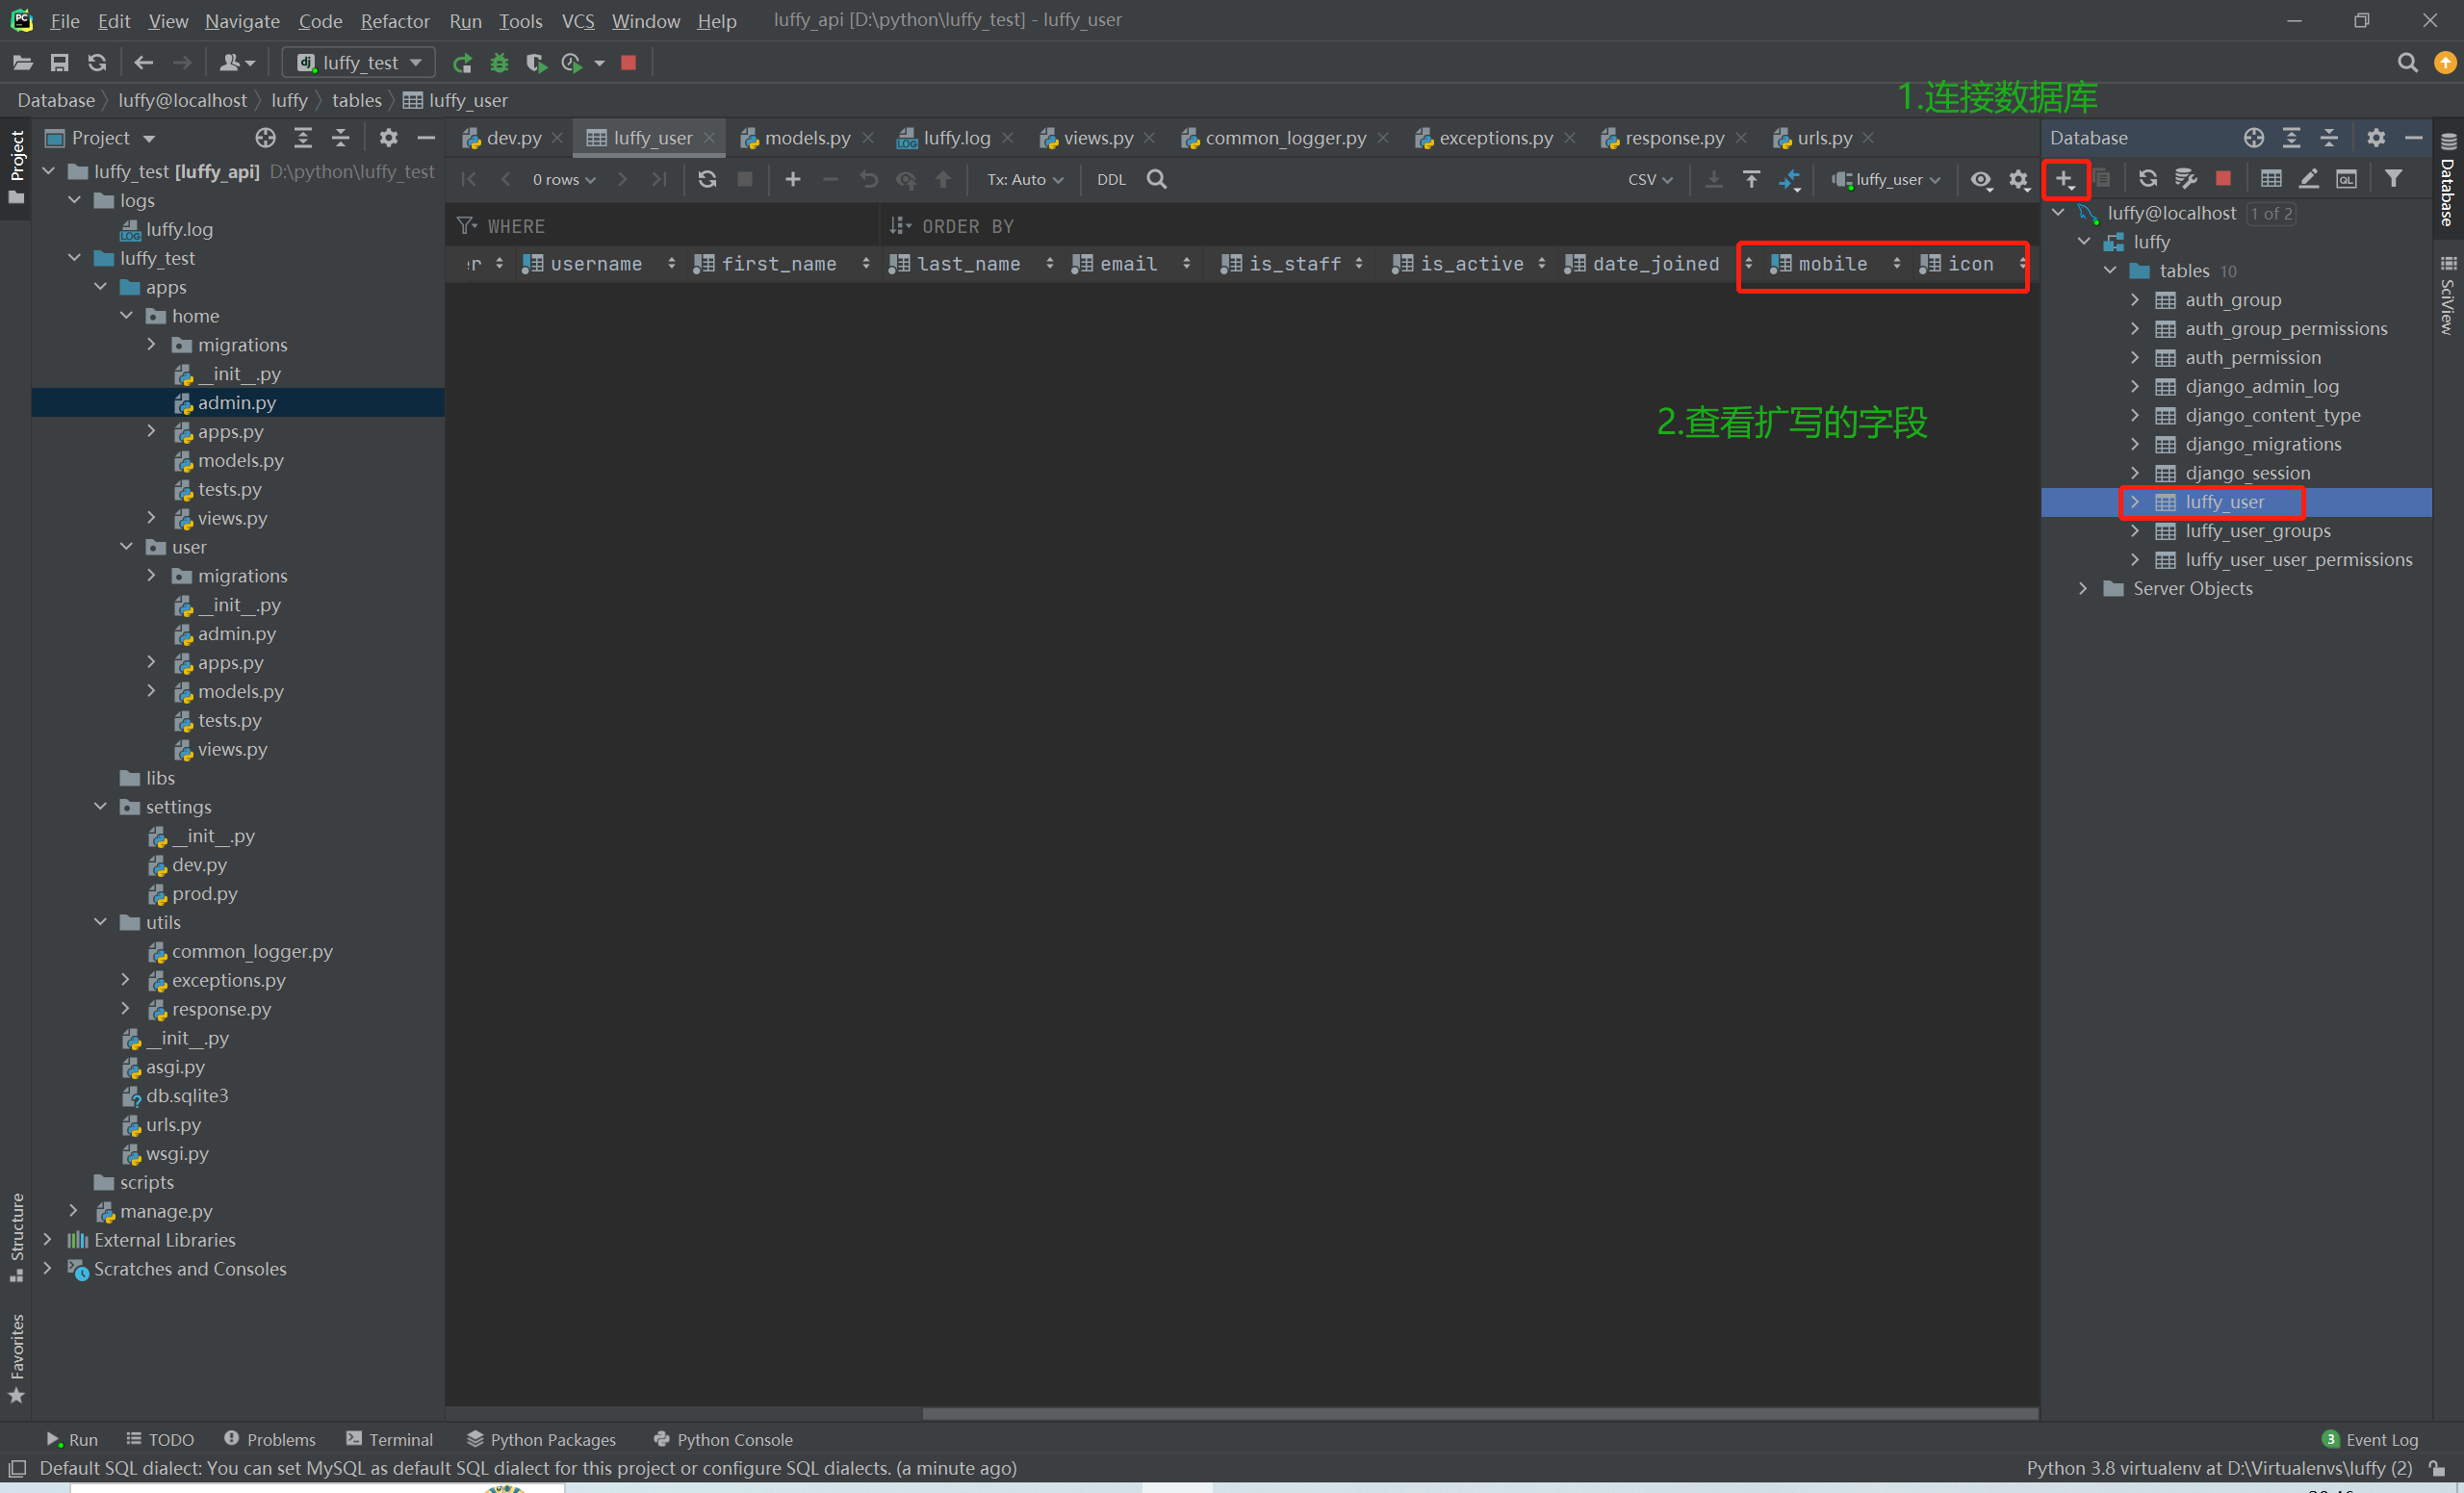
5.2 在user下的models.py中继承Auth表扩写字段
from django.db import models
# Create your models here.
from django.contrib.auth.models import AbstractUser
class UserInfo(AbstractUser):
mobile = models.CharField(max_length=32, unique=True)
# 需要pillow包的支持 ImageField继承了 FileField只存储图片
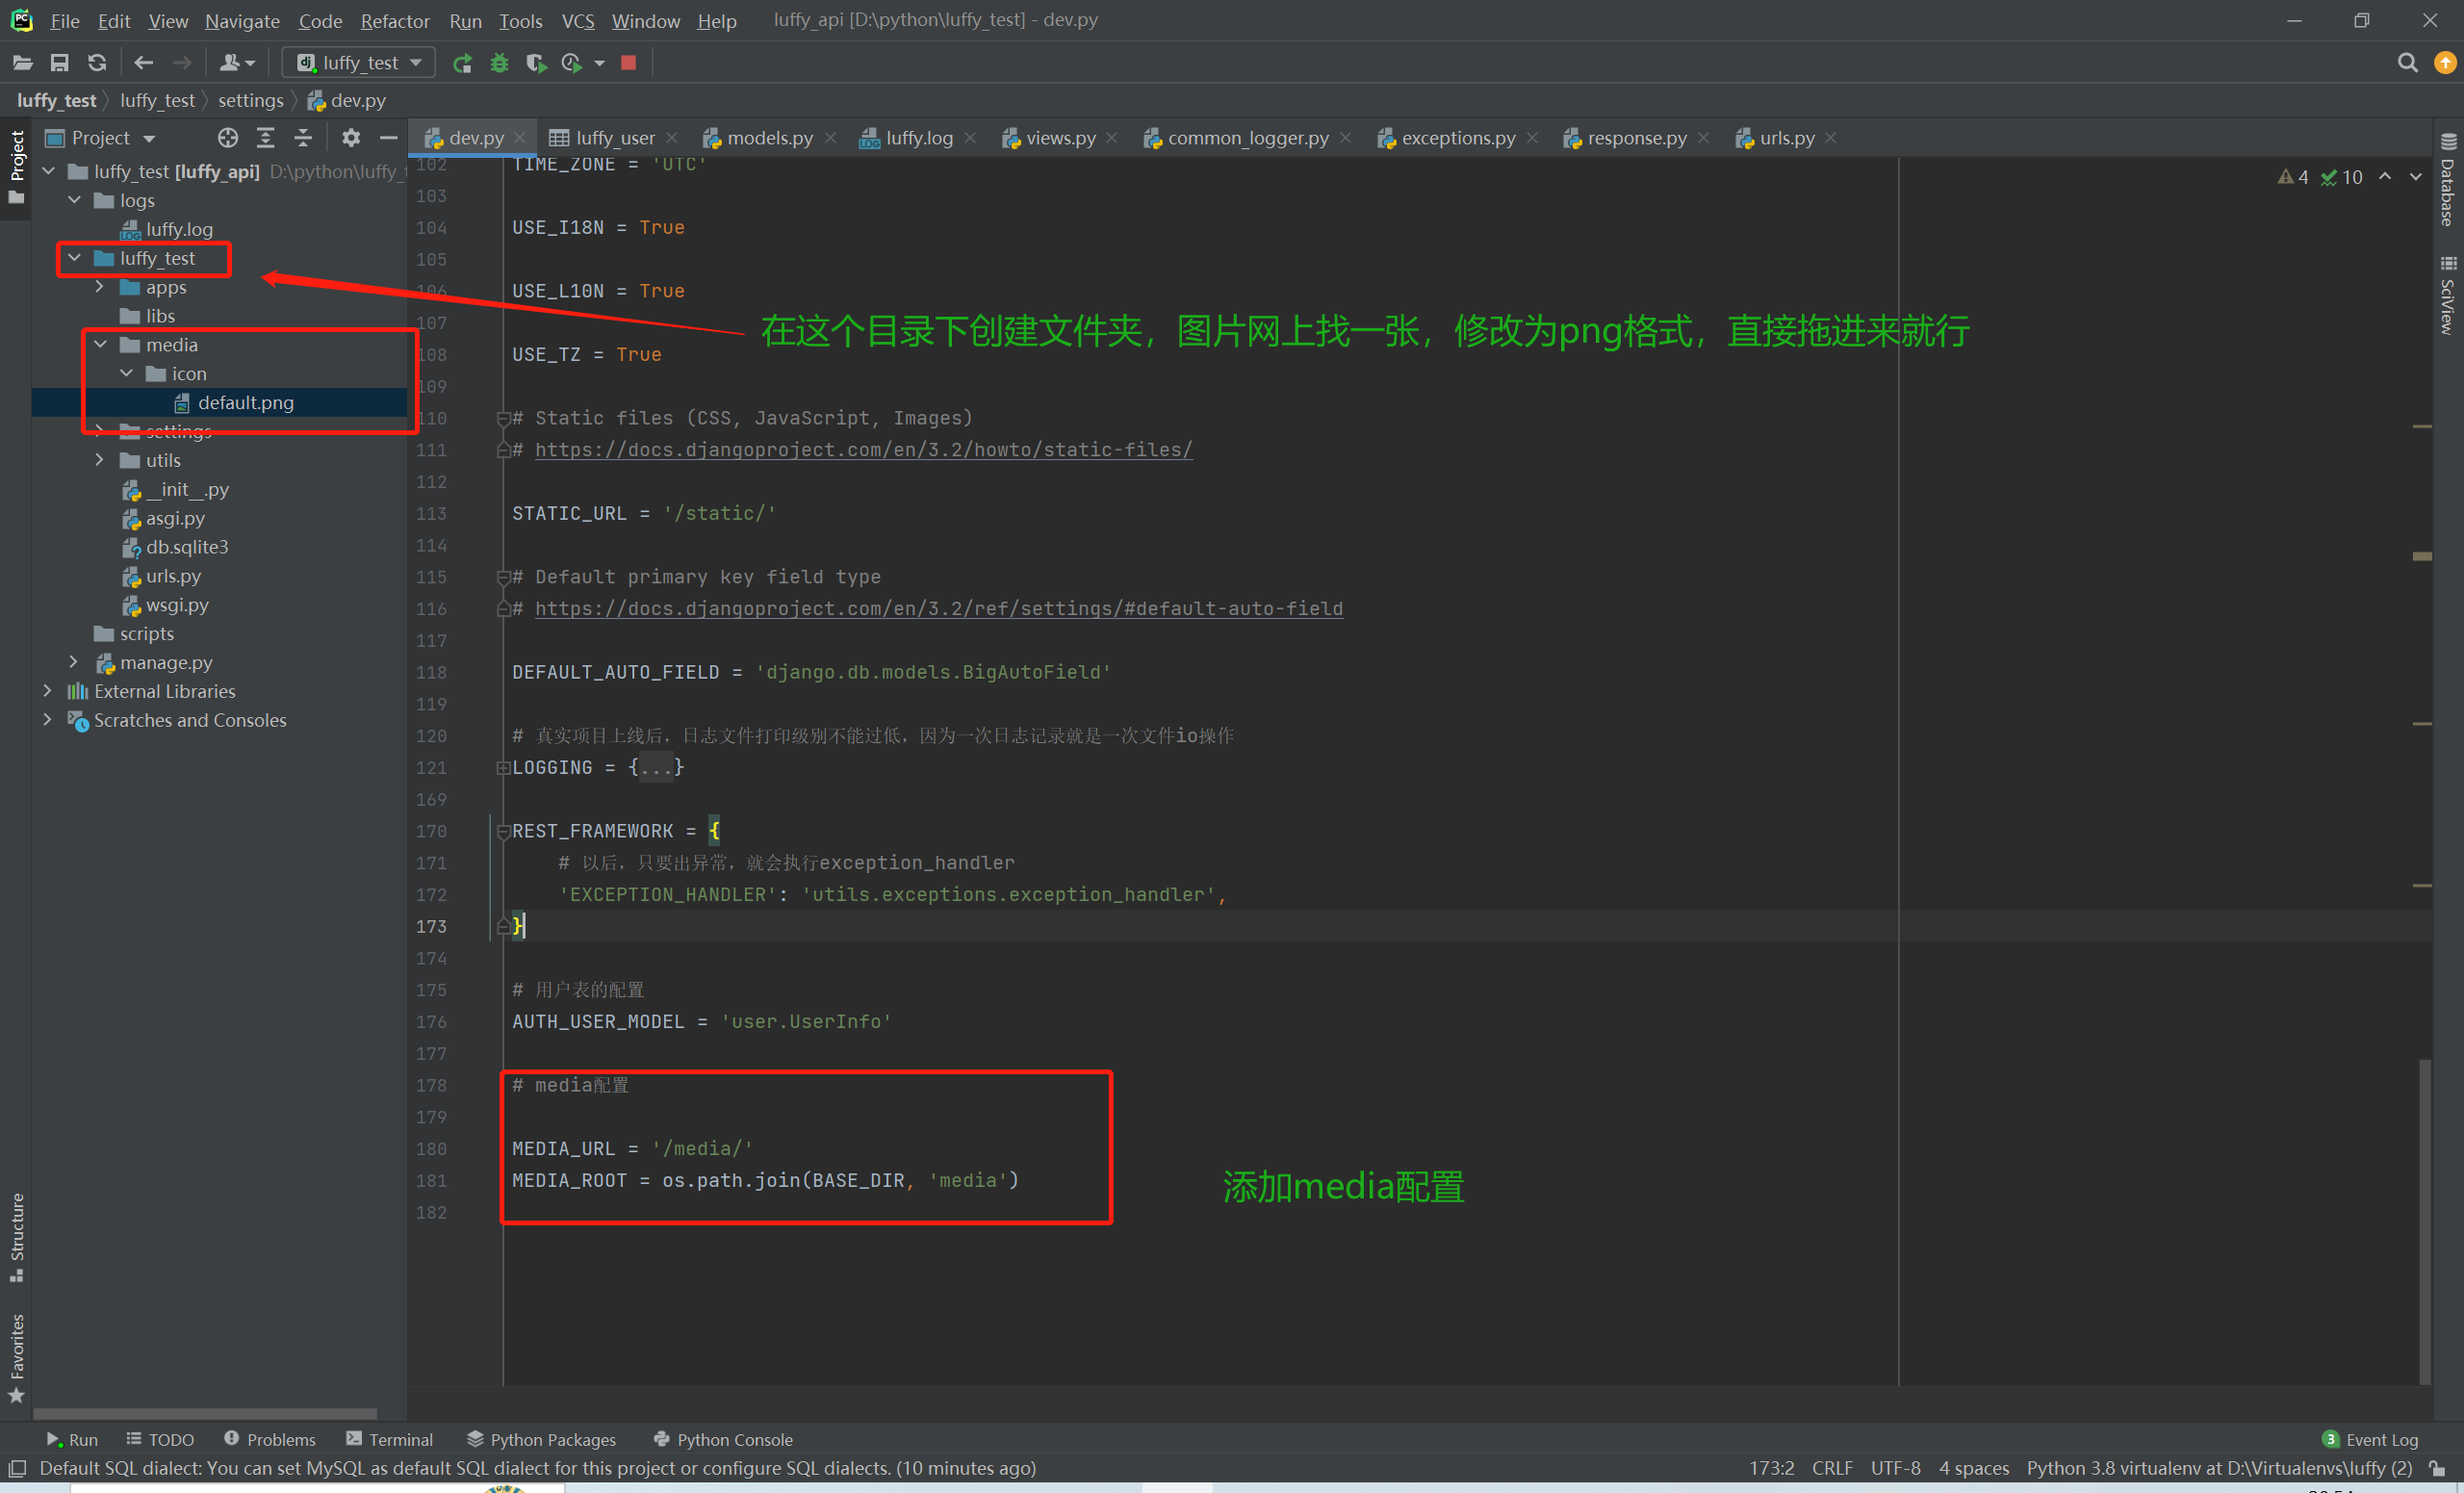
icon = models.ImageField(upload_to='icon', default='icon/default.png')
class Meta:
db_table = 'luffy_user' # 指定表名
verbose_name = '用户表' # 后台管理中显示中文
verbose_name_plural = verbose_name
def __str__(self):
return self.username
5.3 在配置文件中添加配置并注册app
# 用户表的配置
AUTH_USER_MODEL='user.UserInfo'

# 注册app
INSTALLED_APPS = [
    'django.contrib.admin',
    'django.contrib.auth',
    'django.contrib.contenttypes',
    'django.contrib.sessions',
    'django.contrib.messages',
    'django.contrib.staticfiles',
    'rest_framework',
    'home',
    'user',

]
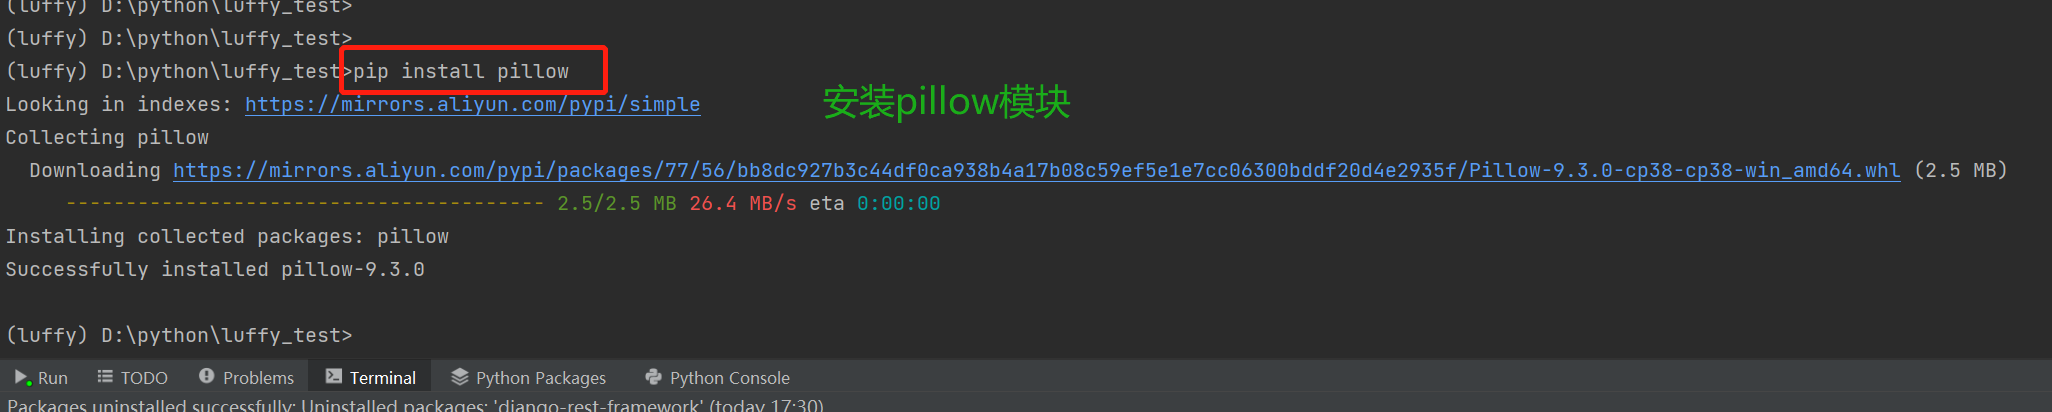
5.4 安装pillow模块
# 安装pillow模块
	pip install pillow
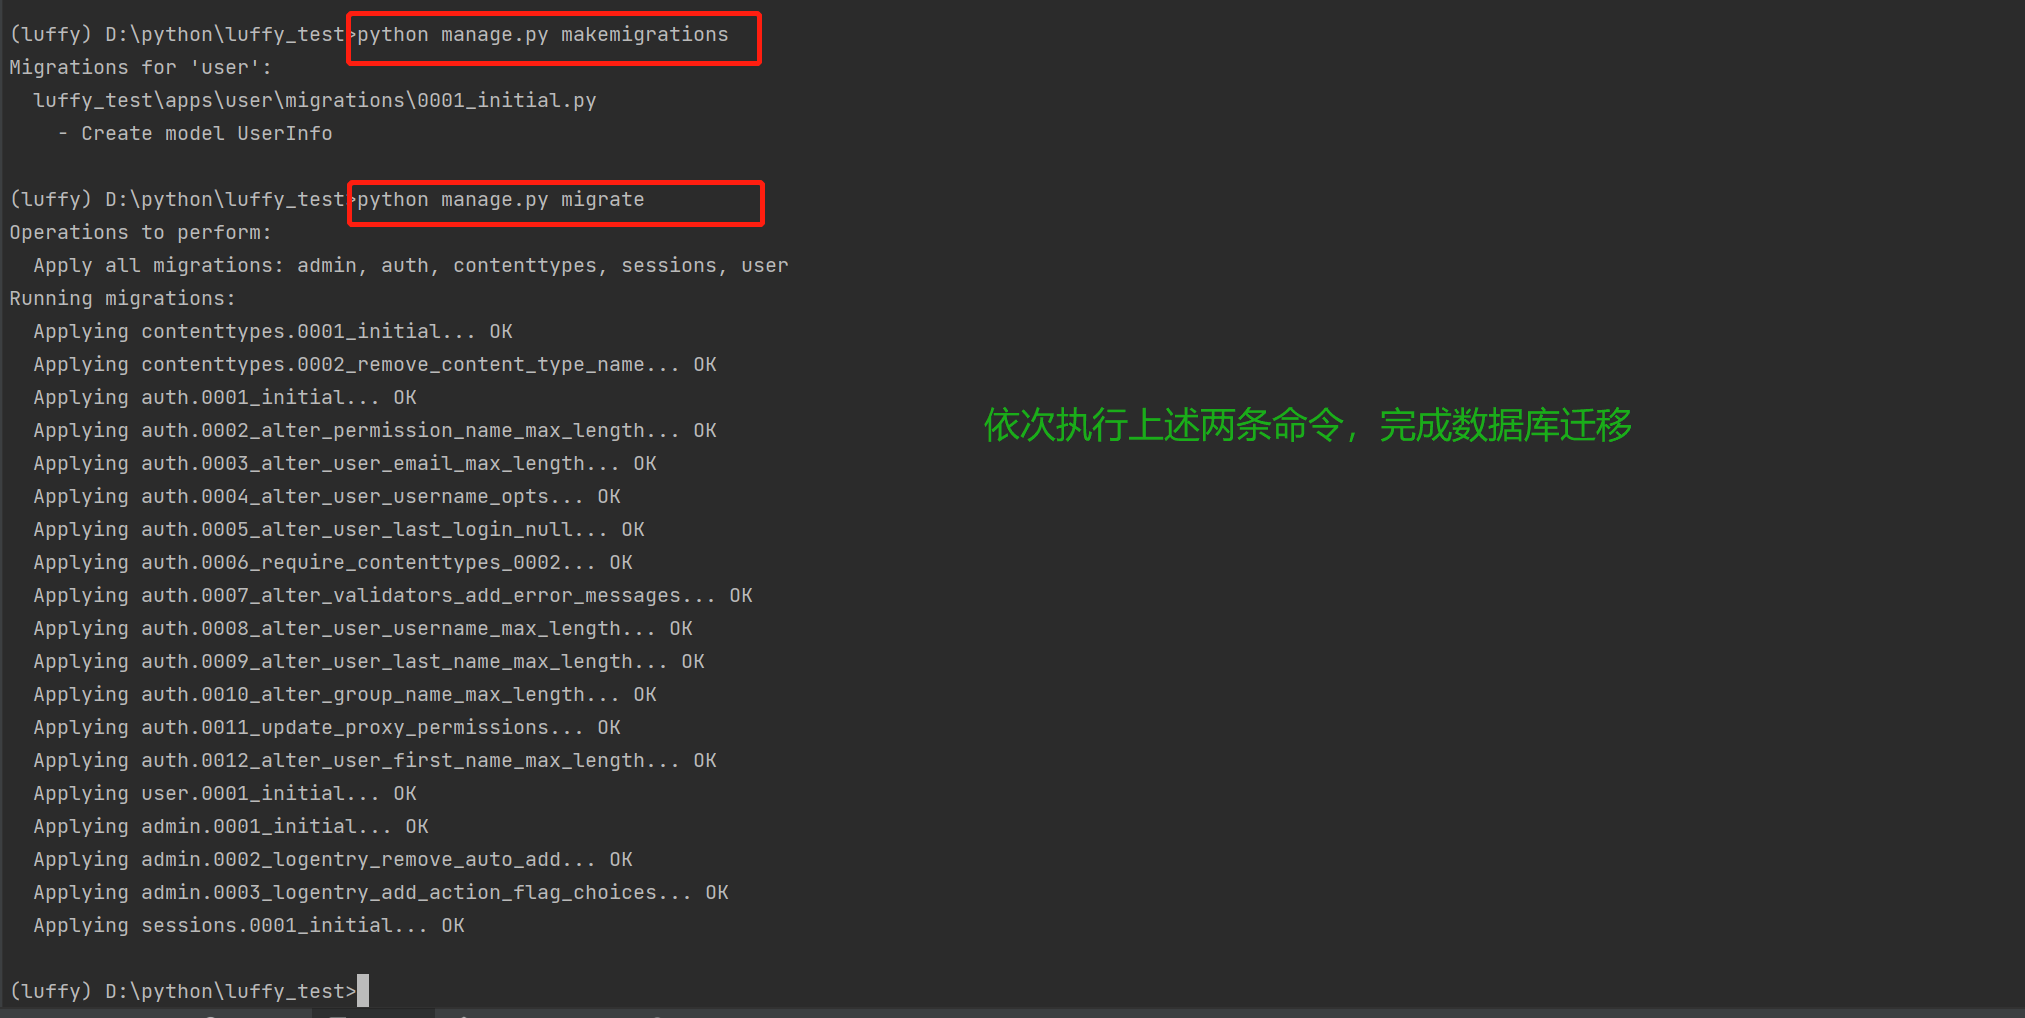
5.5 执行数据库迁移命令
# 数据库迁移命令,要注意路径,在根目录下执行  使用cd..  可以退到上一级目录

    python manage.py makemigrations
    python manage.py migrate
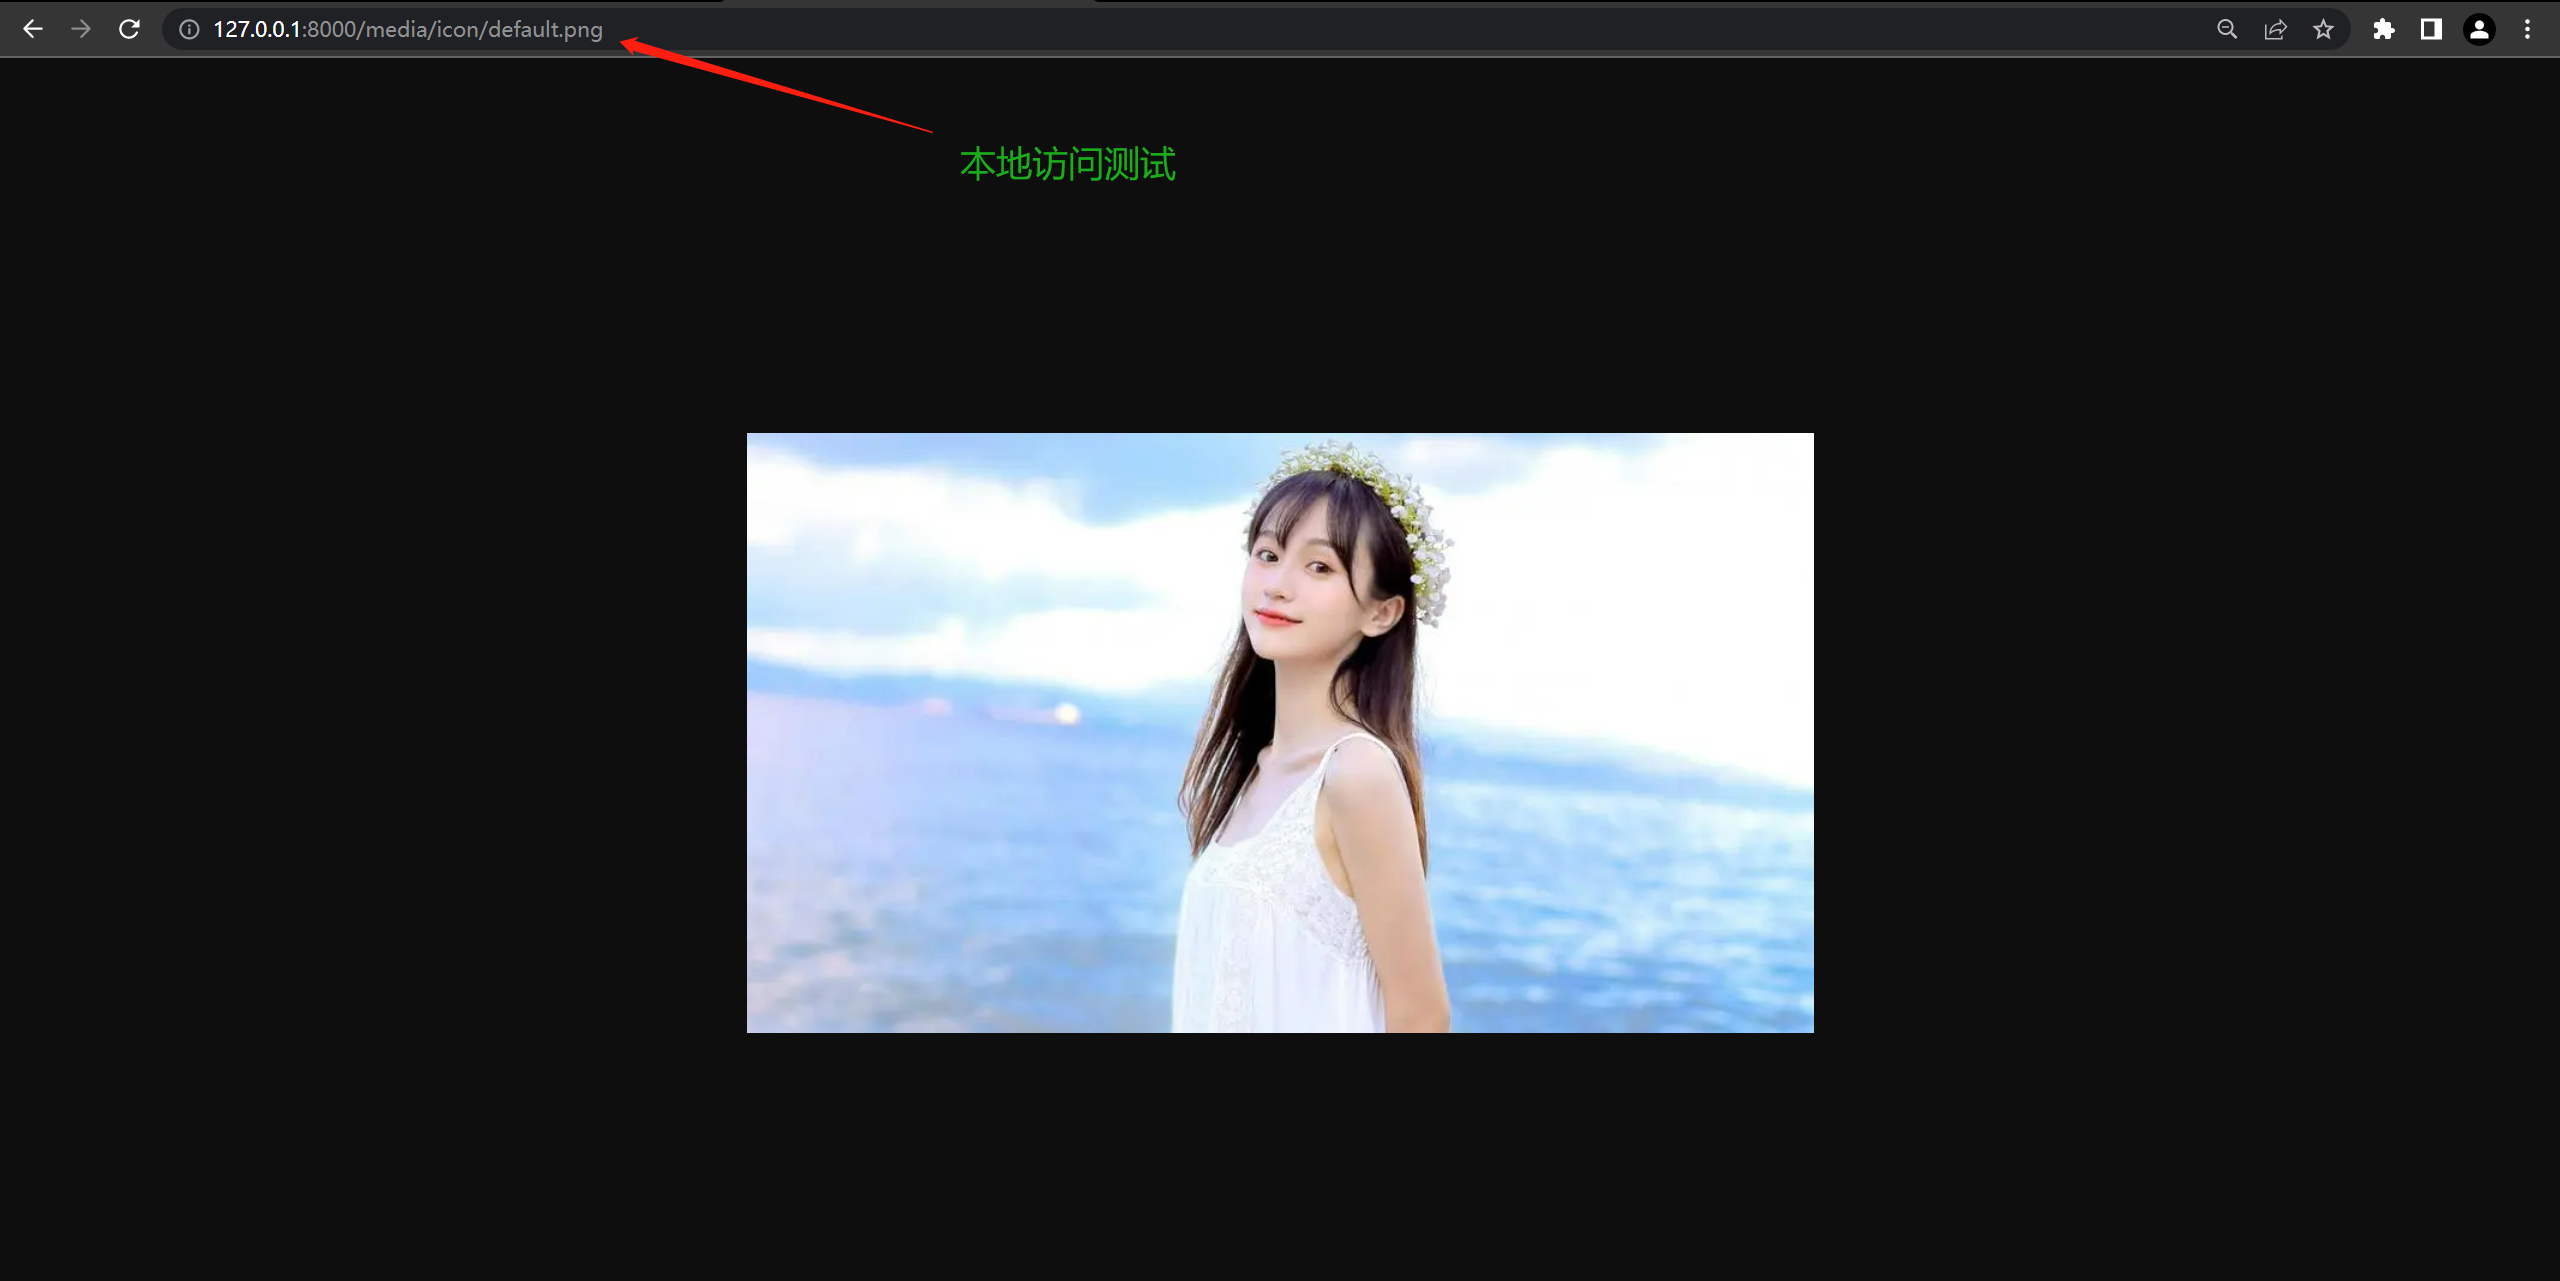
6.1 在配置文件中添加以下内容
# media配置

MEDIA_URL = '/media/'
MEDIA_ROOT = os.path.join(BASE_DIR, 'media')
6.3 在urls.py中配置路由
from django.contrib import admin
from django.urls import path
from home import views
from django.views.static import serve
from django.conf import settings

urlpatterns = [
    path('admin/', admin.site.urls),
    path('test/', views.test),
    path('testview/', views.TestView.as_view()),
    # 开启media访问
    path('media/<path:path>', serve, kwargs={'document_root': settings.MEDIA_ROOT}),
]
6.4 本地访问测试
七、luffy前台项目创建和配置
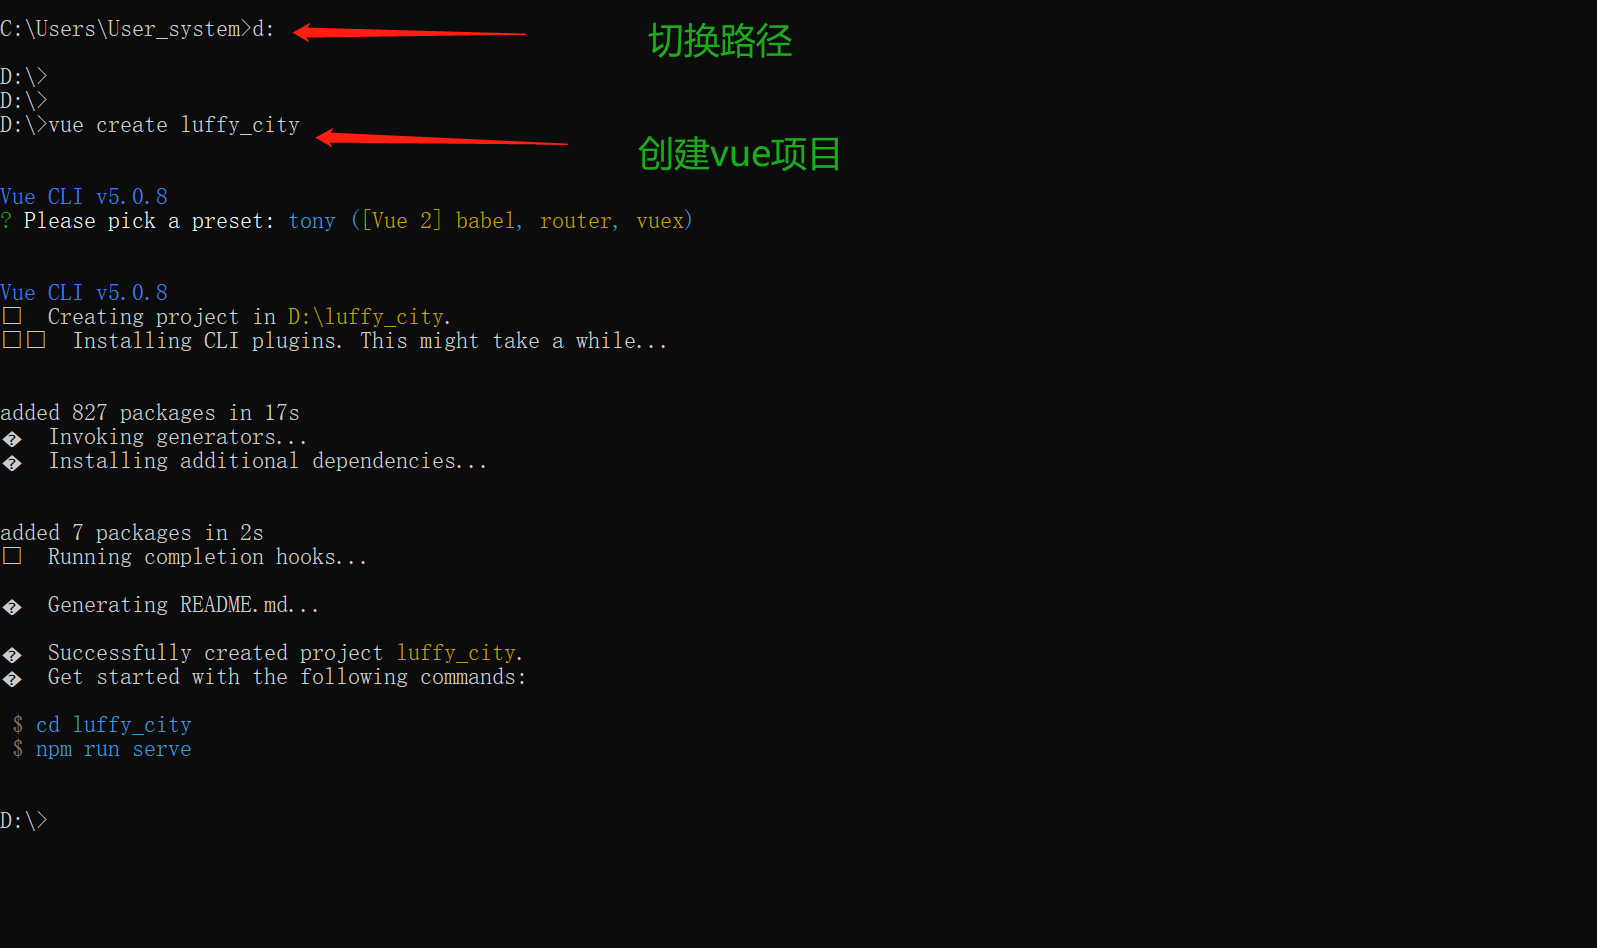
7.1 创建Vue项目
# 创建vue项目
vue create luffy_city
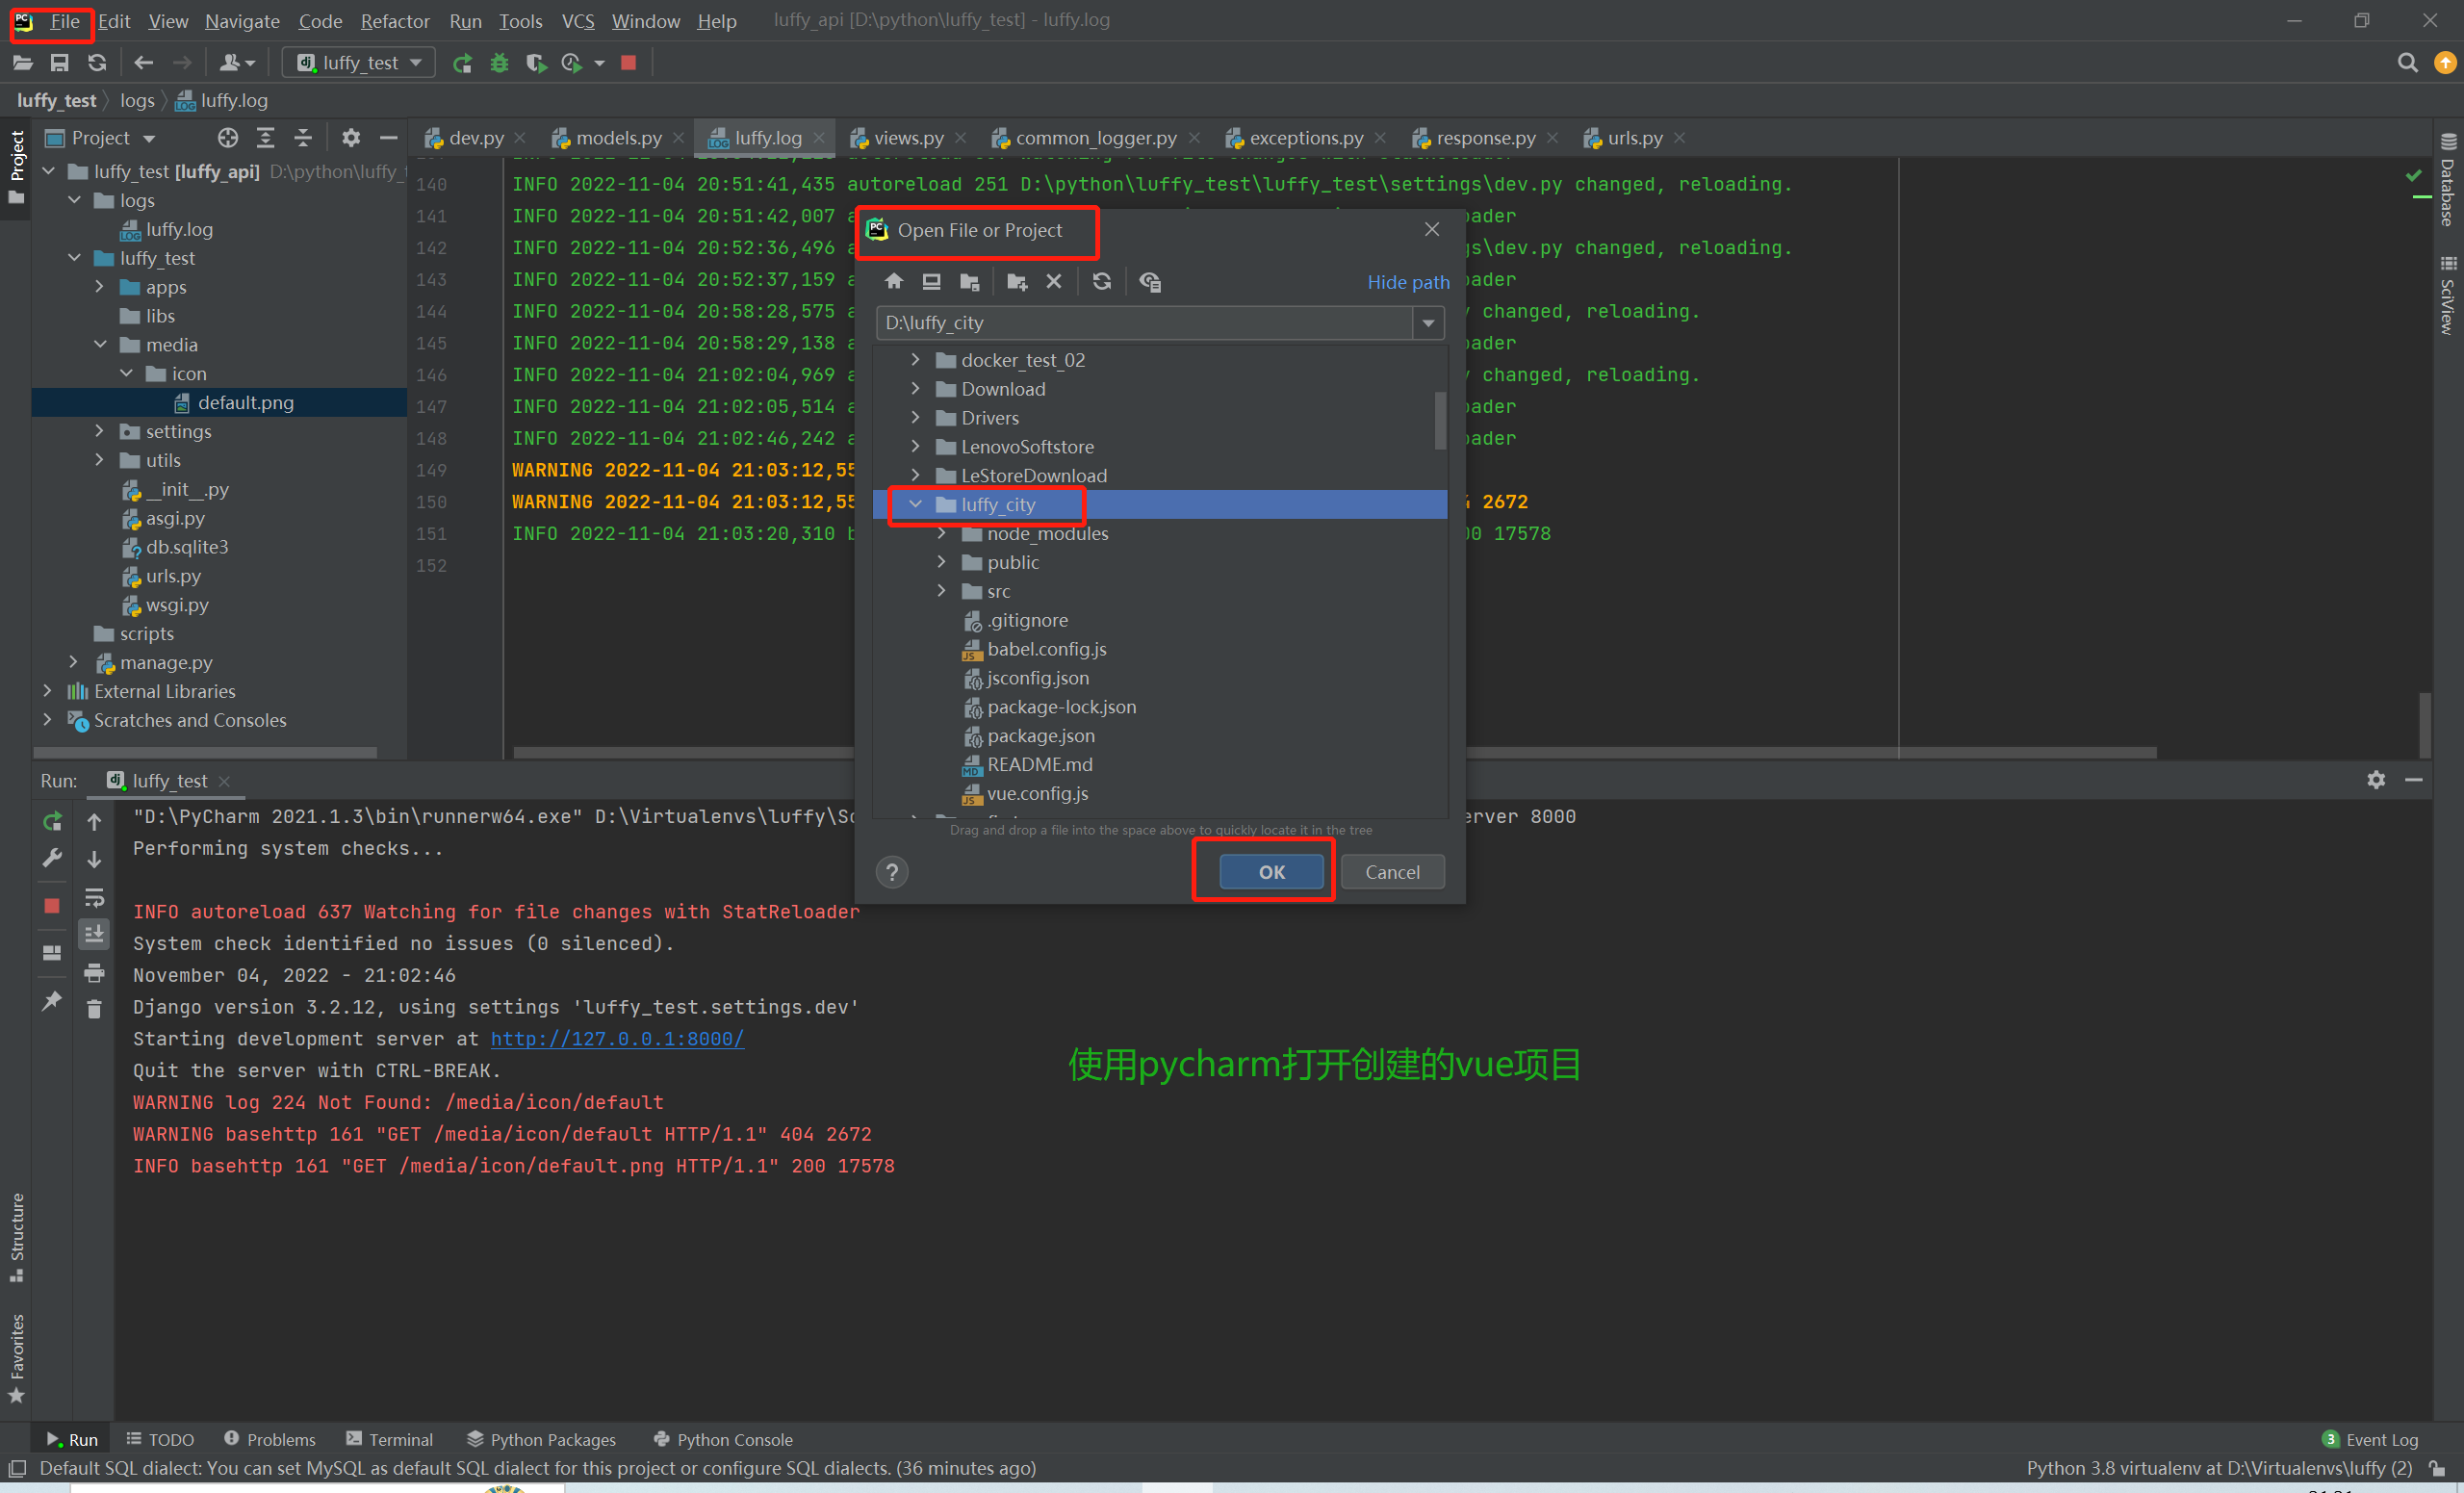
# 使用pycharm打开vue项目
File------>open-------->luffy_city----------->ok
# 记得选择New Window,即打开一个新的窗口,原先的后端项目窗口不要动,方便前后端分离操作
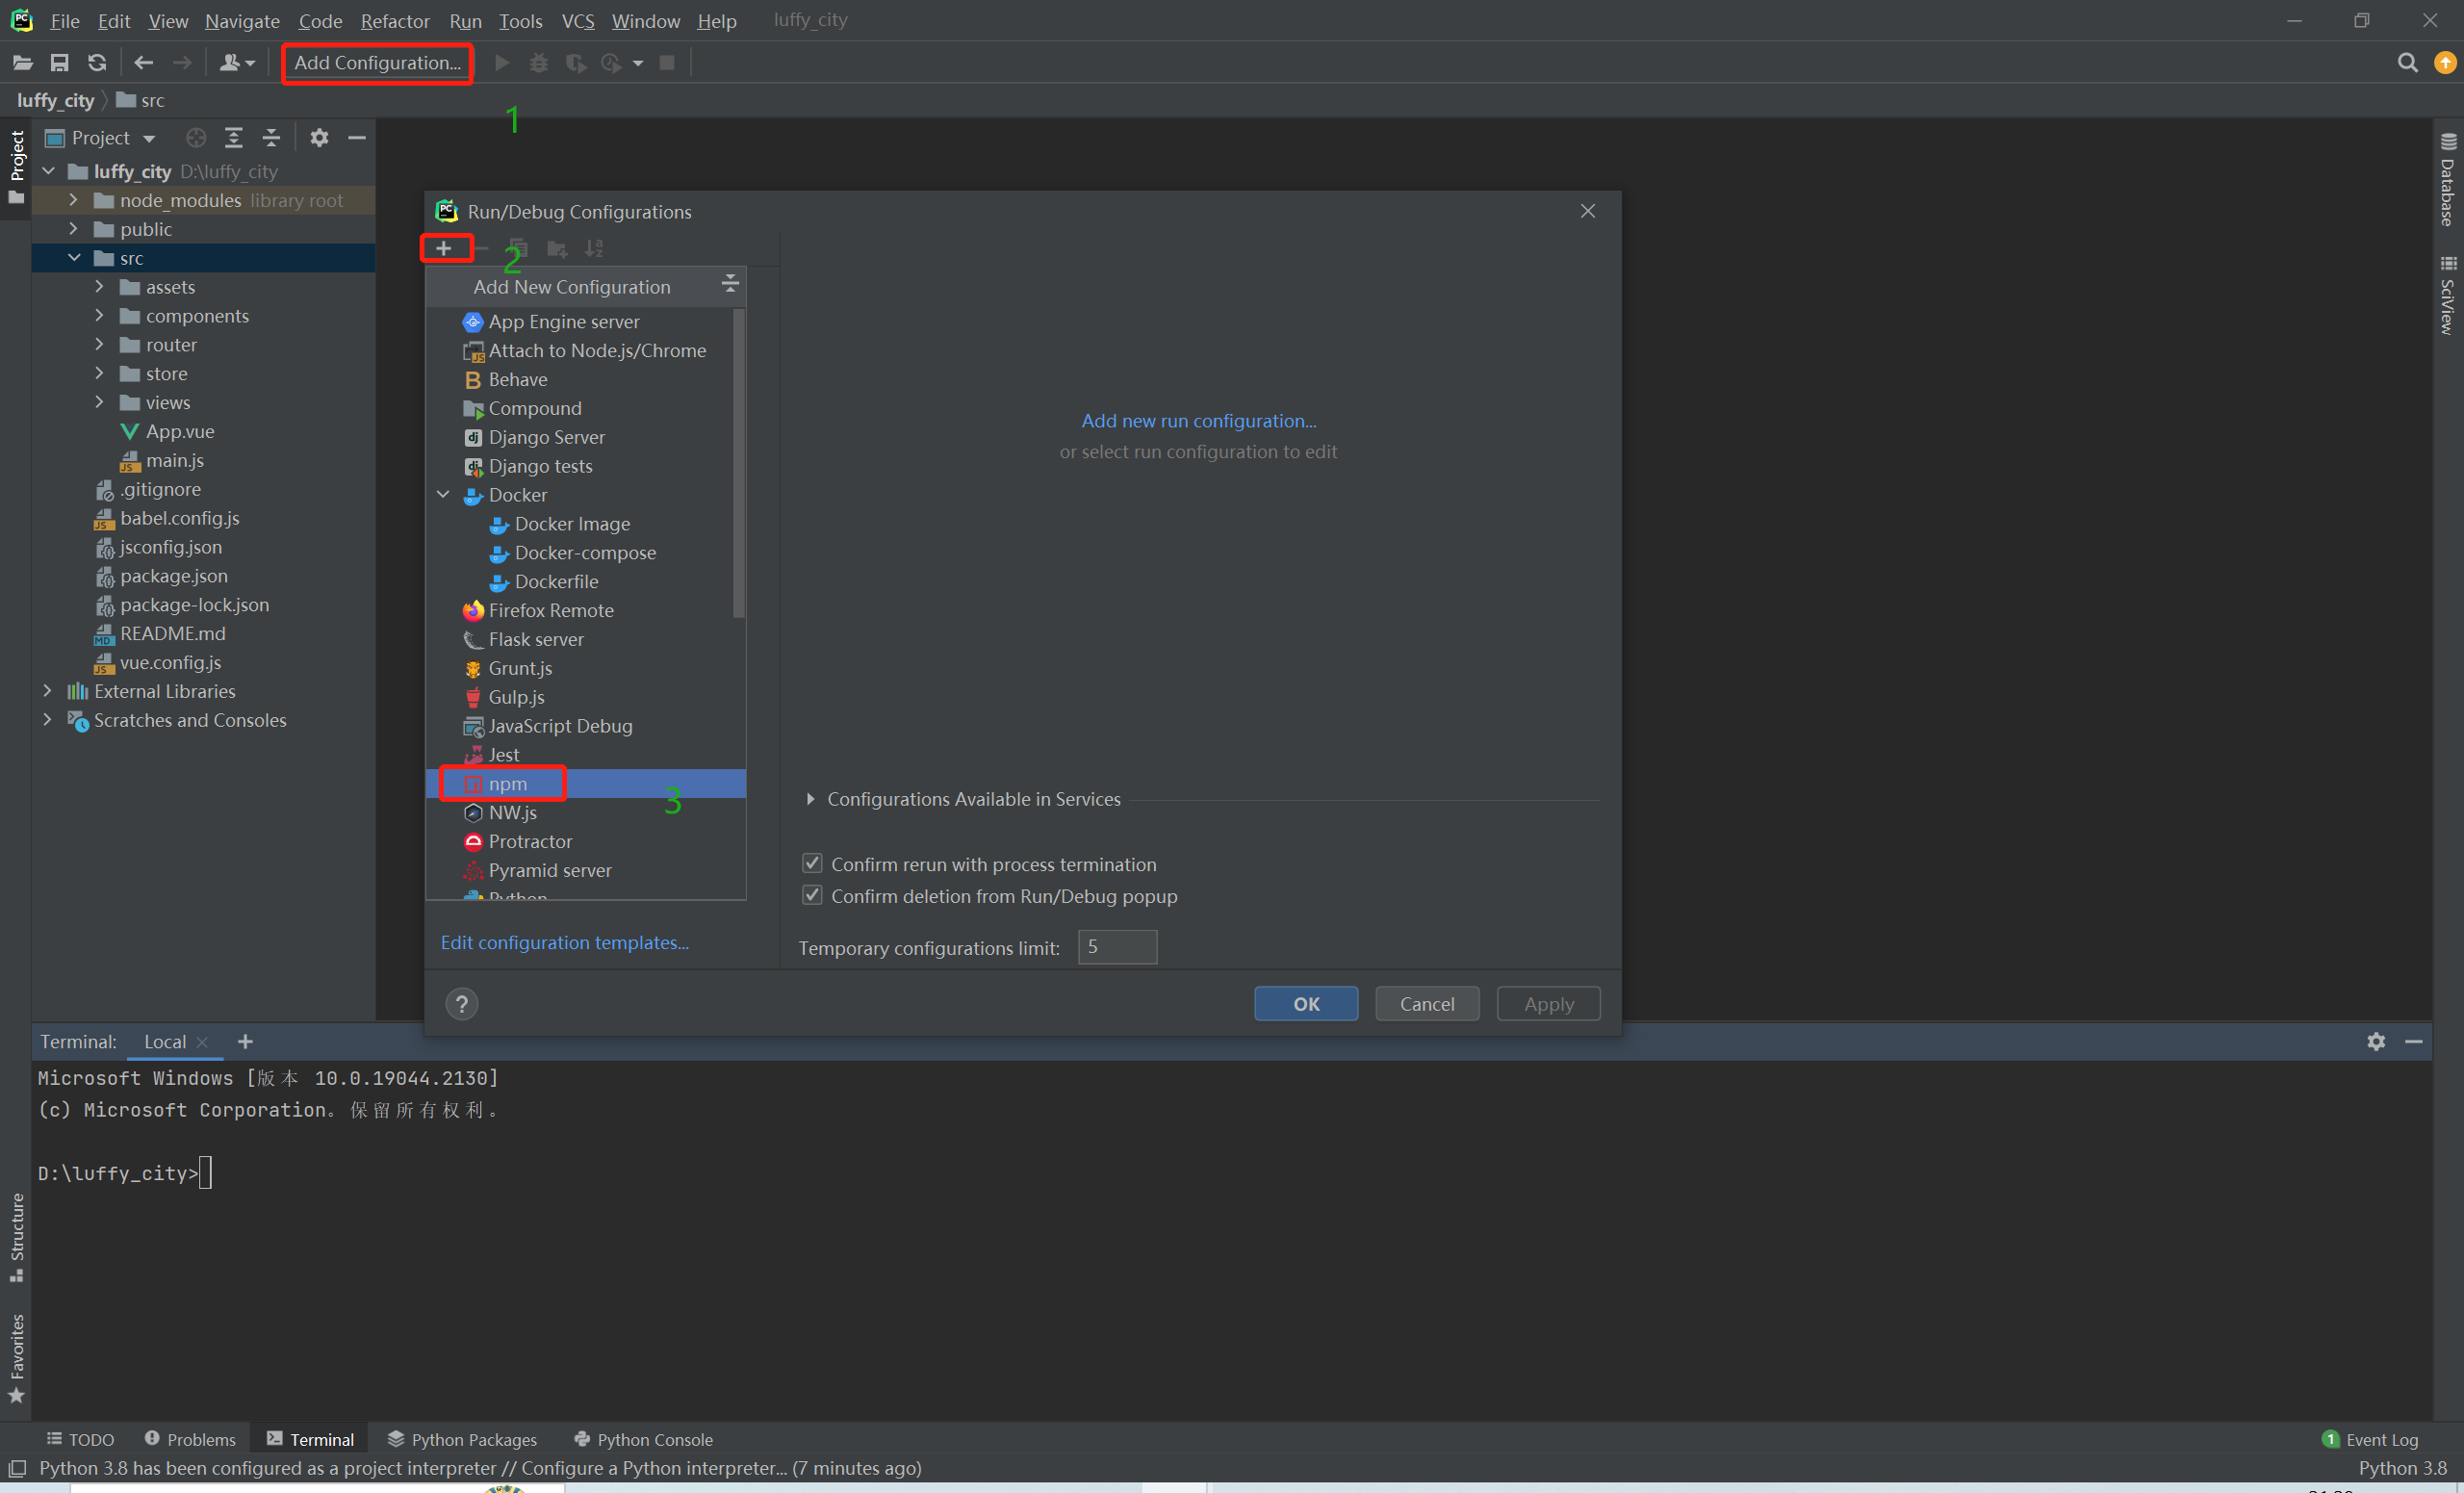
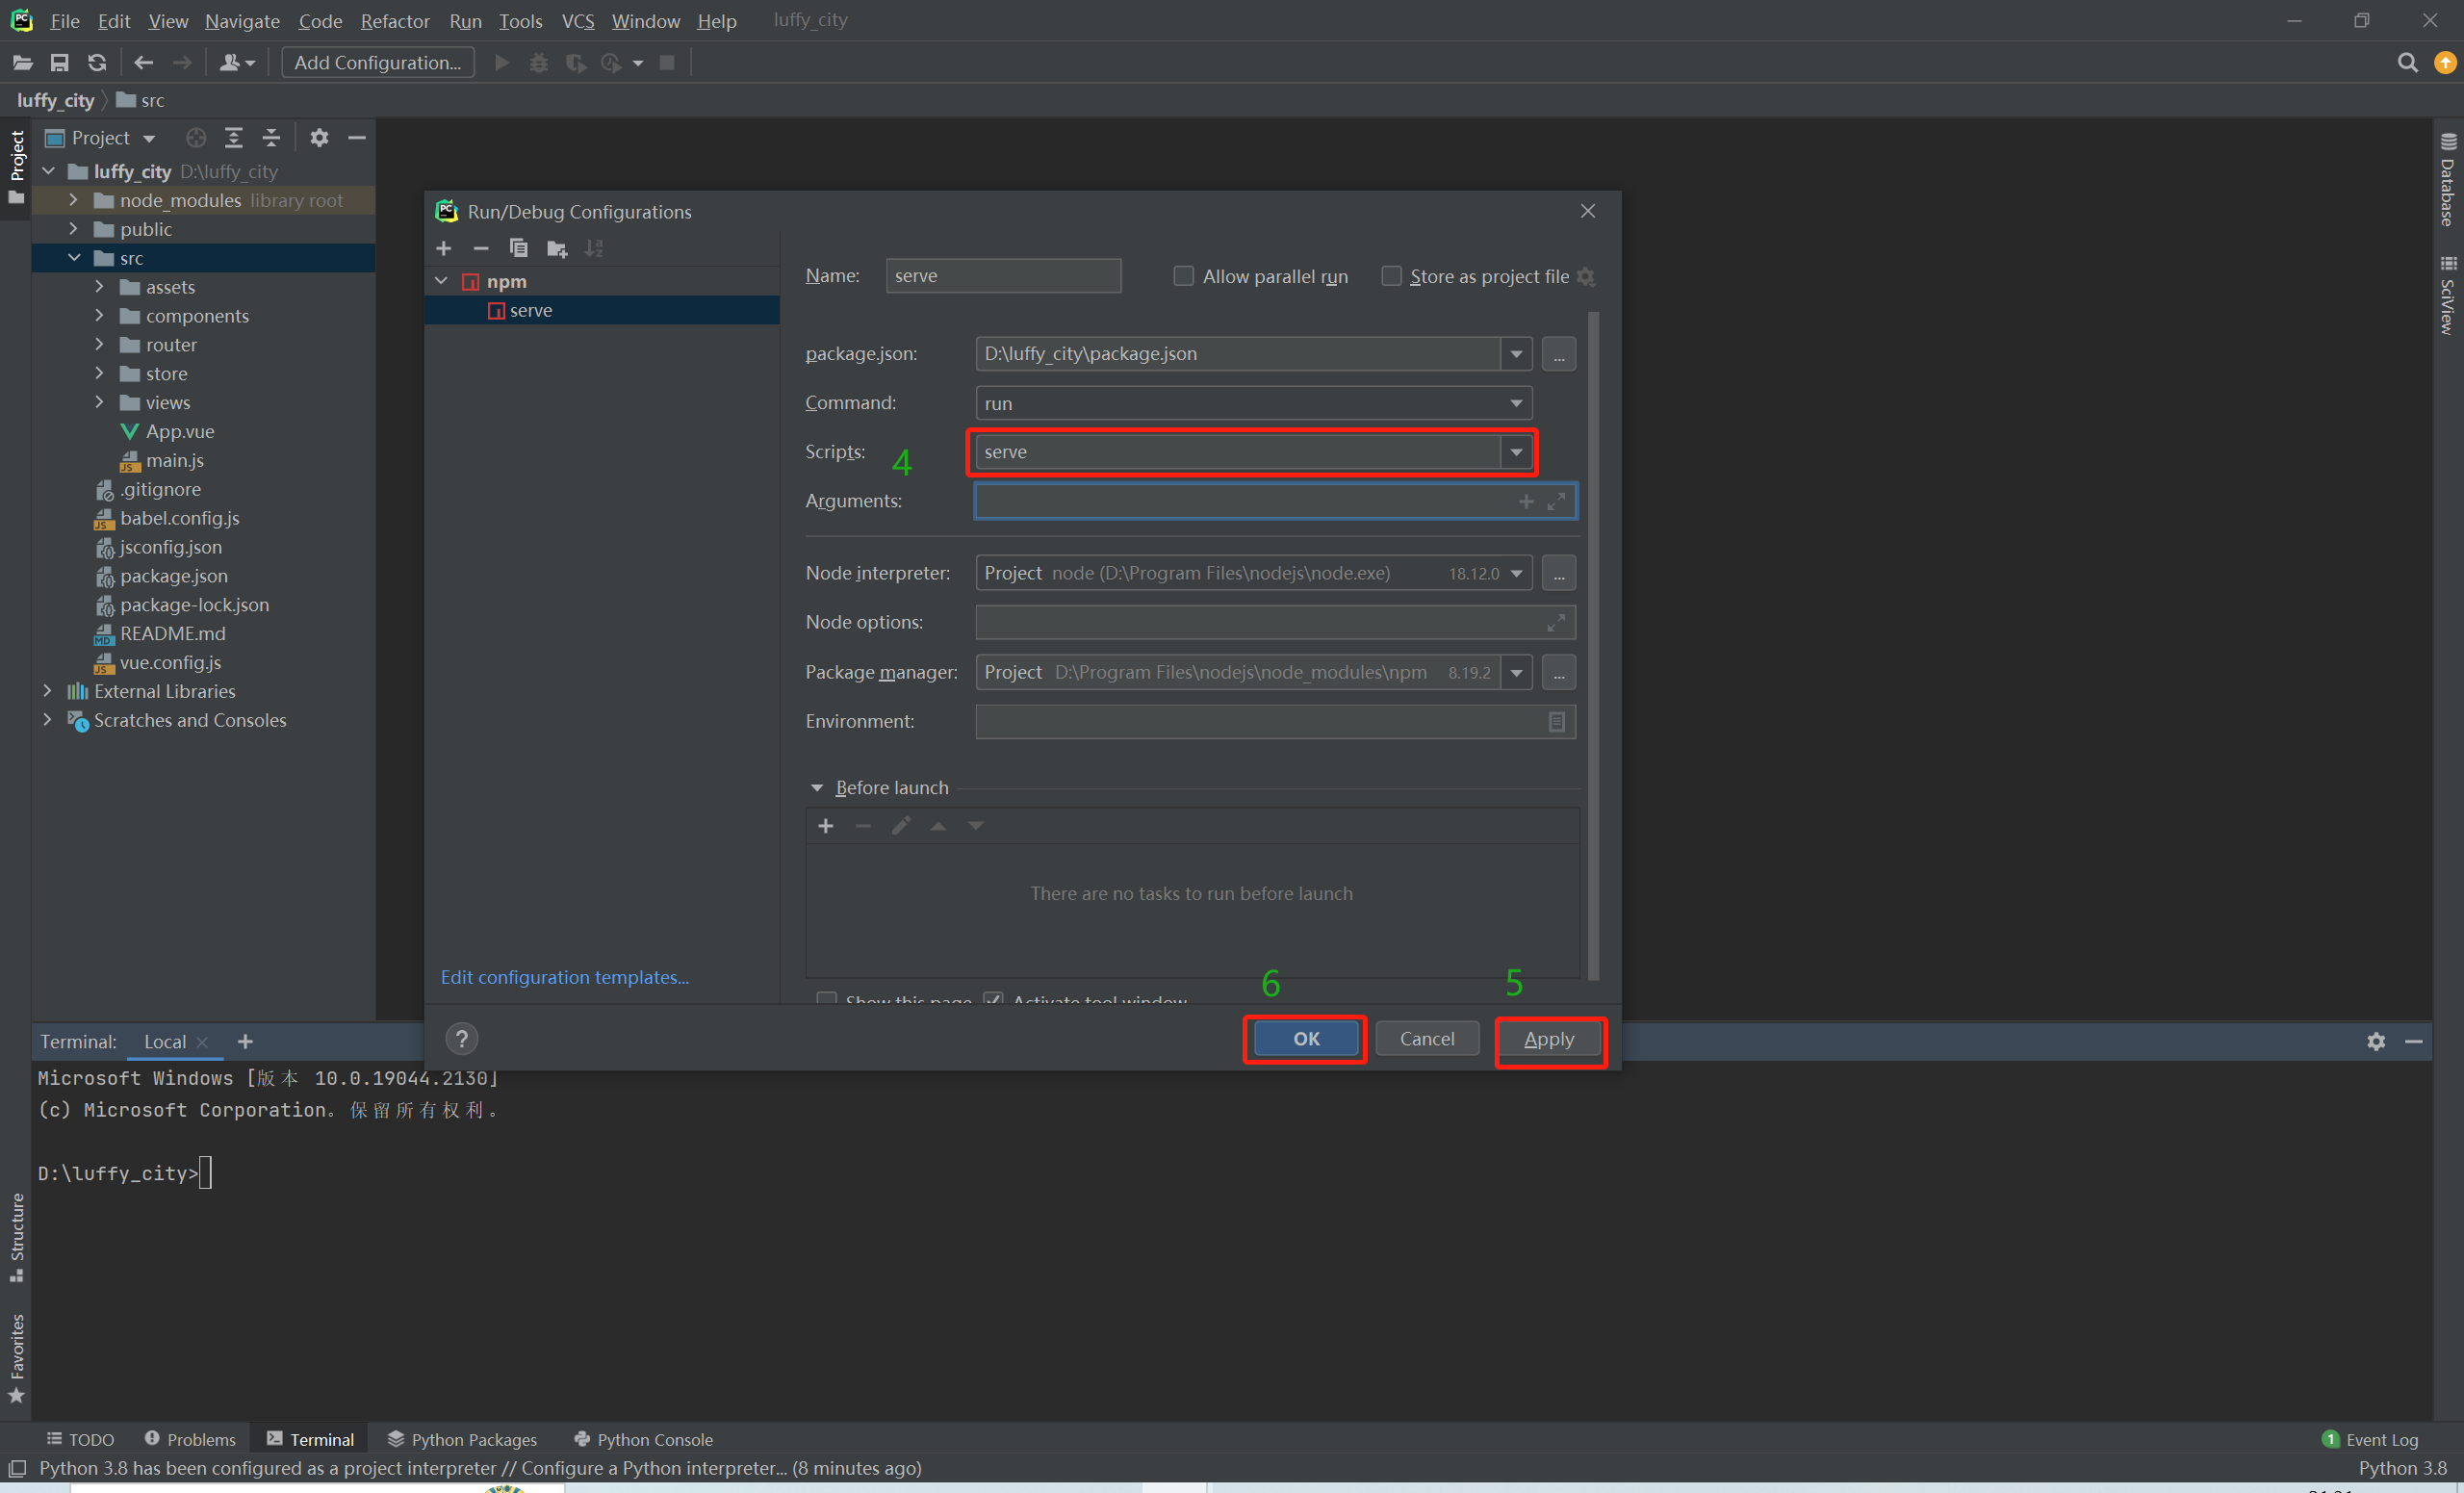
7.2 运行vue项目
7.3 修改vue相关配置
# App.vue中只保留
    <template>
      <div id="app">
        <router-view/>
      </div>
    </template>

# HomeView.vue
    <template>
      <div class="home">
        <h1>首页</h1>
      </div>
    </template>
    <script>
    export default {
      name: 'HomeView',
    }
    </script>

# router/index.js

    import Vue from 'vue'
    import VueRouter from 'vue-router'
    import HomeView from '../views/HomeView.vue'

    Vue.use(VueRouter)

    const routes = [
        {
            path: '/',
            name: 'home',
            component: HomeView
        },
    ]

    const router = new VueRouter({
        mode: 'history',
        base: process.env.BASE_URL,
        routes
    })

    export default router
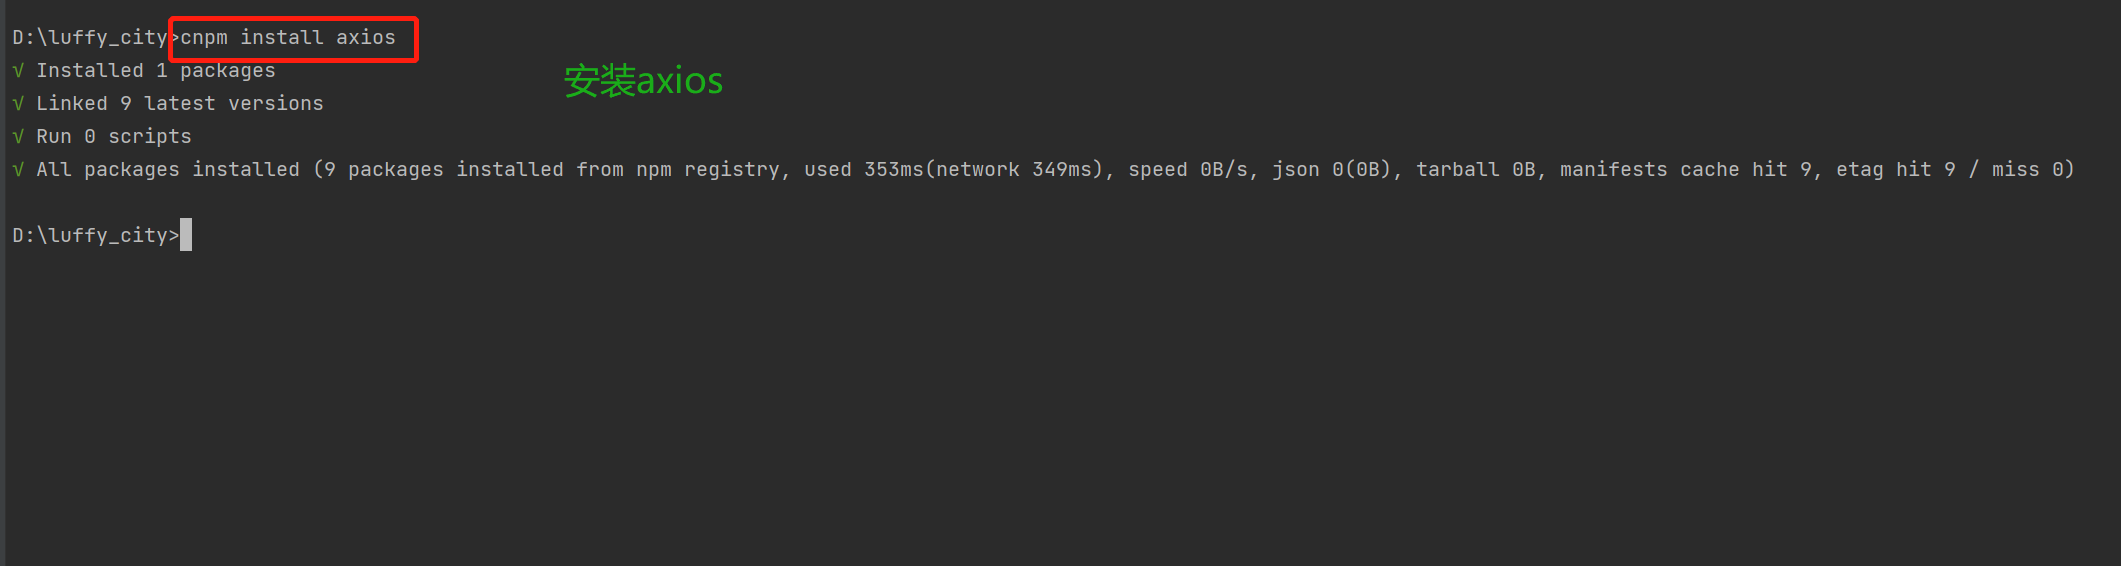
7.4 安装配置axios
# 安装axios
	cnpm install axios

# 配置在main.js中
    import axios from 'axios'
    Vue.prototype.$axios=axios

# 以后再任意组件中使用
	this.$axios.get()
7.5 安装配置elementui
# 安装elementui
	cnpm i element-ui -S

# 配置在main.js中
    import ElementUI from 'element-ui';
    import 'element-ui/lib/theme-chalk/index.css';
    Vue.use(ElementUI);
# 使用:在任意组件中复制粘贴
   (template,script,style)

7.6 引入bootstrap,jQuery样式
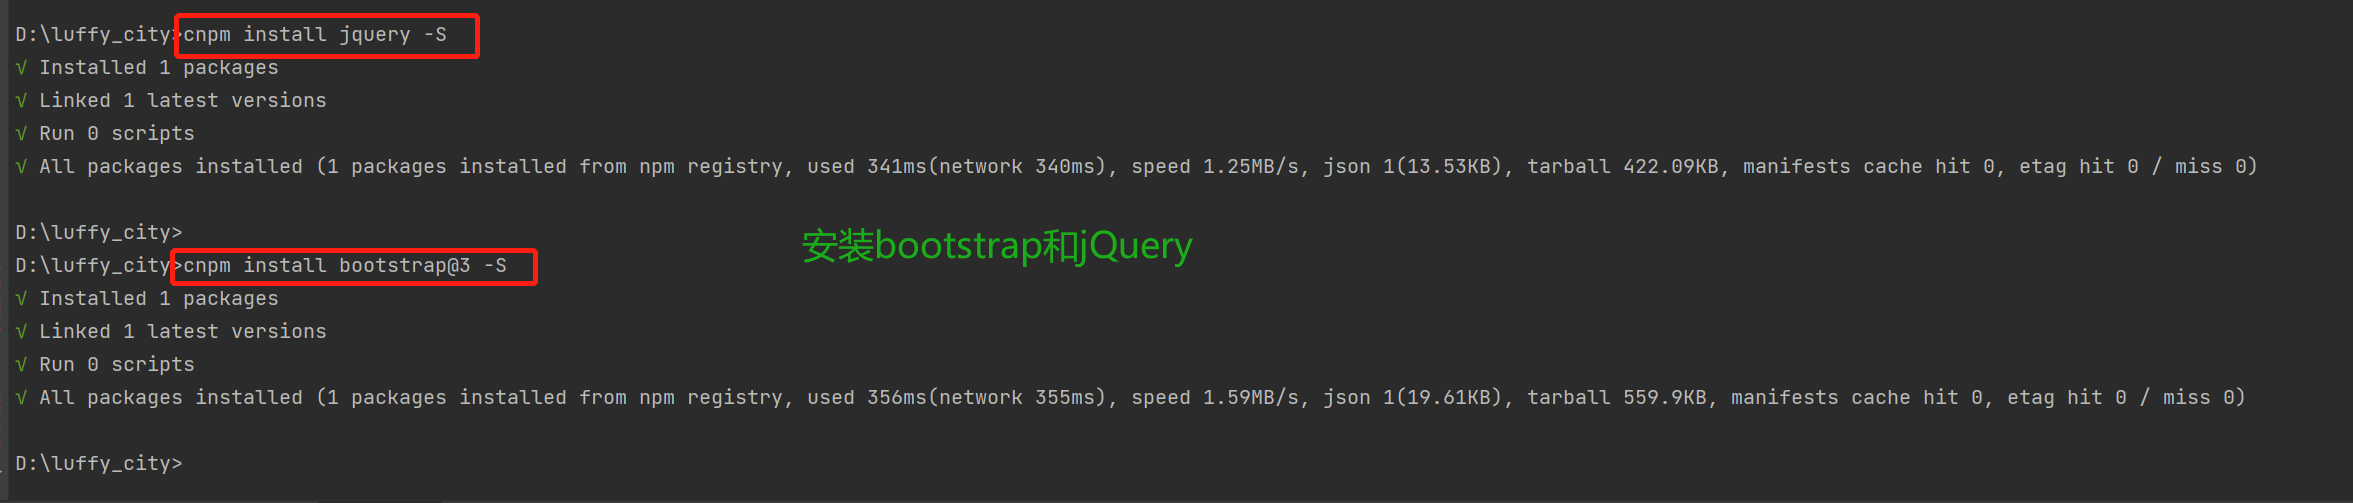
# 使用步骤:
	1 安装
        cnpm install jquery -S
        cnpm install bootstrap@3 -S

    2 配置:main.js
        import 'bootstrap'
        import 'bootstrap/dist/css/bootstrap.min.css'

    3 vue.config.js配置
        const webpack = require("webpack");
        module.exports = {
            configureWebpack: {
                plugins: [
                    new webpack.ProvidePlugin({
                        $: "jquery",
                        jQuery: "jquery",
                        "window.jQuery": "jquery",
                        "window.$": "jquery",
                        Popper: ["popper.js", "default"]
                    })
                ]
            }
        };
7.7 安装配置Vue-cookies
# 安装
	cnpm install vue-cookies -S
# 配置:main.js中
	import cookies from 'vue-cookies'
    Vue.prototype.$cookies=cookies
# 使用:任意组件中
	this.$cookies.set()

八、mysql拓展知识
=========================================================================================================================================
# mysql 使用localhost连接和使用ip地址链接有什么区别

MySQL有两种连接方式,一种是网络监听TCP/IP端口的模式,还有一种是socket模式。

socket模式
在Linux下,socket是一种特殊的文件,也叫做套接字,是应用层与TCP/IP协议族通信的中间软件抽象层。虽然性能会比较好,但是这种socket模式仅限本机使用,其他机器无法通过网络链接连接到socket文件
TCP/IP端口模式
这个就是为了让远程的应用连接到MySQL数据库的服务。
在MySQL配置中mysqld节中,可以设置绑定的对应的IP和端口,需要重启服务
如果有使用-h指定主机的都是使用远程登录的方式,如果没有就是使用socket的方式

mysql -h 127.0.0.1 的时候,使用TCP/IP连接, mysql server 认为该连接来自于127.0.0.1或者是 localhost.localdomain
mysql -h localhost 的时候,是不使用TCP/IP连接的,而使用 Unix socket。此时,mysqlserver则认为该 client 是来自 localhost
mysql权限管理中的"localhost"有特定含义:
注意:虽然两者连接方式有区别,但当localhost为默认的127.0.0.1时,两种连接方式使用的权限记录都是以下的1.row的记录(因为记录在前,先被匹配)

=========================================================================================================================================

# mysql中utf8和utf8mb4有什么区别

MySQL在5.5.3版本之后增加了这个utf8mb4的编码,mb4就是most bytes 4的意思,专门用来兼容四字节的unicode。其实,utf8mb4是utf8的超集,理论上原来使用utf8,然后将字符集修改为utf8mb4,也会不会对已有的utf8编码读取产生任何问题。当然,为了节省空间,一般情况下使用utf8也就够了。

既然utf8应付日常使用完全没有问题,那为什么还要使用utf8mb4呢? 低版本的mysql支持的utf8编码,最大字符长度为 3 字节,如果遇到 4 字节的字符就会出现错误了。

三个字节的 UTF-8 最大能编码的 Unicode 字符是 0xFFFFFF,也就是 Unicode 中的基本多文平面(BMP)。也就是说,任何不在基本多文平面的 Unicode字符,都无法使用MySQL原有的 utf8 字符集存储。

这些不在BMP中的字符包括哪些呢?最常见的就是Emoji 表情(Emoji 是一种特殊的 Unicode 编码,常见于IOS和Android手机上),和一些不常用的汉字,以及任何新增的 Unicode 字符等等。

理论上将, UTF-8 格式使用一至六个字节编码字符。最新的 UTF-8 规范只使用一到四个字节,正好能够表示所有的 17个 Unicode 平面。

而utf8 则是 Mysql 早期版本中支持的一种字符集,只支持最长三个字节的 UTF-8字符,也就是 Unicode 中的基本多文本平面。在MySQL5.5.3版本后,要在 Mysql 中保存 4 字节长度的 UTF-8 字符,就可以使用 utf8mb4 字符集了。例如可以用utf8mb4字符编码直接存储emoj表情,而不是存表情的替换字符。

为了获取更好的兼容性,应该总是使用 utf8mb4 而非 utf8. 对于 CHAR 类型数据,utf8mb4 会多消耗一些空间,根据 Mysql 官方建议,使用 VARCHAR 替代 CHAR。

 浙公网安备 33010602011771号