Spring Security OAuth2使用拦截器实现多用户类型认证
Spring Security OAuth2实现多用户类型认证
用OAuth2想实现一个认证服务器能够认证多种用户类型,如前台普通用户、后台管理员用户(分了不同的表了),想在请求token、刷新token的时候通过一个字段区分用户类型,但是OAuth2默认提供的UserDetailsService只允许传入一个参数,这样就区分不了用户类型了
public interface UserDetailsService {
    UserDetails loadUserByUsername(String var1) throws UsernameNotFoundException;
}
实现
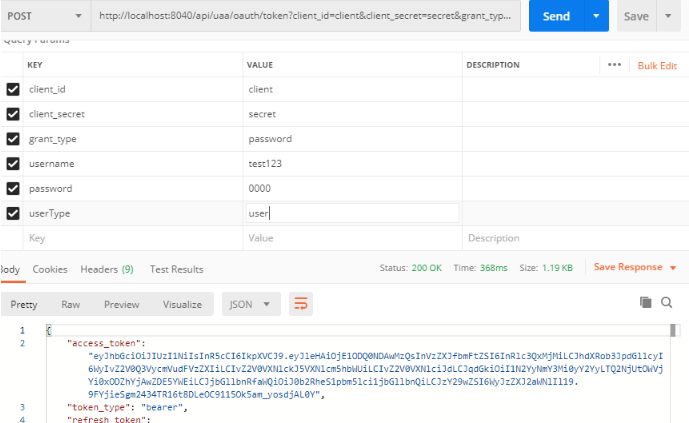
1 登陆获取token
1.1 新增CustomUserDetailsService extends UserDetailsService,新增自定义的方法
/**
 * 继承原来的UserDetailsService新增自定义方法
 */
public interface CustomUserDetailsService extends UserDetailsService {

    UserDetails loadUserByUsername(String var1, String var2) throws UsernameNotFoundException;

}
然后根据自己需要实现它,这里就不放出来了
public class UserDetailsServiceImpl implements CustomUserDetailsService {
    @Override
    public UserDetails loadUserByUsername(String username, String userType) throws UsernameNotFoundException {
        // 根据自己需要进行实现
        // 1.获取用户
        // 2.获取用户可访问权限信息
        // 3.构造UserDetails信息并返回
        return userDetail;
    }
}
从现在开始,所有需要用到userDetailsService的,全部都要替换成自定义CustomUserDetailsService
1.2 复制org.springframework.security.authentication.dao.DaoAuthenticationProvider 的代码,自定义 CustomAuthenticationProvider,然后进行修改retrieveUser()方法,其他不需要动
记得将自定义的CustomAuthenticationProvider中的userDetailsService替换成自定义的CustomUserDetailsService
protected final UserDetails retrieveUser(String username, UsernamePasswordAuthenticationToken authentication) throws AuthenticationException {
        this.prepareTimingAttackProtection();
        Map<String,String> map = (Map<String, String>) authentication.getDetails(); // 自定义添加
        try {
            String userType = map.get("userType"); // 自定义添加
            UserDetails loadedUser = this.getUserDetailsService().loadUserByUsername(username, userType); // 自定义添加userType参数
            if (loadedUser == null) {
                throw new InternalAuthenticationServiceException("UserDetailsService returned null, which is an interface contract violation");
            } else {
                return loadedUser;
            }
        } catch (UsernameNotFoundException var4) {
            this.mitigateAgainstTimingAttack(authentication);
            throw var4;
        } catch (InternalAuthenticationServiceException var5) {
            throw var5;
        } catch (Exception var6) {
            throw new InternalAuthenticationServiceException(var6.getMessage(), var6);
        }
    }
1.3 到WebSecurityConfig配置上面的CustomAuthenticationProvider
@Bean(name="customAuthenticationProvider")
    public AuthenticationProvider customAuthenticationProvider() {
        CustomAuthenticationProvider customAuthenticationProvider= new CustomAuthenticationProvider();
        customAuthenticationProvider.setUserDetailsService(userDetailsService);
        customAuthenticationProvider.setHideUserNotFoundExceptions(false);
        customAuthenticationProvider.setPasswordEncoder(passwordEncoder());
        return customAuthenticationProvider;
    }

    @Override
    protected void configure(AuthenticationManagerBuilder auth) throws Exception {
        auth.authenticationProvider(customAuthenticationProvider());
    }
到这里,就可以去获取token试试了
参考:
https://blog.csdn.net/weixin_43909881/article/details/104925068

 浙公网安备 33010602011771号