
springboot中使用@Value读取配置文件
一、配置文件配置
直接配置
在src/main/resources下添加配置文件application.properties
例如修改端口号
#端口号
server.port=8089
分环境配置
在src/main/resources下添加,application-pro.properties,application-dev.properties和application.properties三个文件
application.properties
spring.profiles.active=dev
application-pro.properties
#端口号
server.port=80
#自定义端口号读取
my.name=pzr.dev
application-dev.properties
#端口号
server.port=8089
#自定义端口号读取
my.name=pzr.pro
当application.propertie设置spring.profiles.active=dev时,则说明是指定使用application-dev.properties文件进行配置
二、配置文件参数读取
2.1、注解方式读取
1、@PropertySource配置文件路径设置,在类上添加注解,如果在默认路径下可以不添加该注解。
需要用@PropertySource的有:
- 例如非application.properties,classpath:config/my.properties指的是src/main/resources目录下config目录下的my.properties文件,
- 例如有
多配置文件引用,若取两个配置文件中有相同属性名的值,则取值为最后一个配置文件中的值 在application.properties中的文件,直接使用@Value读取即可,applicarion的读取优先级最高
@PropertySource({"classpath:config/my.properties","classpath:config/config.properties"})
public class TestController
2、@Value属性名,在属性名上添加该注解
@Value("${my.name}")
private String myName;
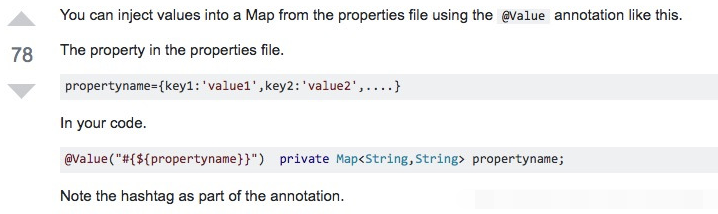
三、配置文件中配置集合类(Map、list)@Value注入map、List
yaml格式
@Value("#{'${list}'.split(',')}")
private List<String> list;

@Value("#{${maps}}")
private Map<String,String> maps;

@Value("#{${redirectUrl}}")
private Map<String,String> redirectUrl;
配置文件
list: topic1,topic2,topic3
maps: "{key1: 'value1', key2: 'value2'}"
redirectUrl: "{sso_client_id: '${id}',sso_client_secret: '${secret}',redirect_url: '${client.main.url.default}'}"
注意:
上面的list配置中,一定不要用“”把list所有的成员value包起来,要不然解析报错。
上面的map配置中,一定要用“”把map所对应的value包起来,要不然解析会失败,导致不能转成 Map<String,String>。
因为yaml语法中如果一个值以 “{” 开头, YAML 将认为它是一个字典, 所以我们必须引用它必须用”"
http://www.ansible.com.cn/docs/YAMLSyntax.html
yaml写法注意:
字符串默认不用加上单引号或者双引号
“”:双引号;不会转义字符串里面的特殊字符;特殊字符会作为本身想表示的意思
name: “zhangsan \n lisi”:输出;zhangsan 换行 lisi
‘’:单引号;会转义特殊字符,特殊字符最终只是一个普通的字符串数据
name: ‘zhangsan \n lisi’:输出;zhangsan \n lisi
properties格式
示例1:使用@Value读取application.properties里的配置内容
配置文件application.properties
spring.application.name=springbootdemo
server.port=8080
mail.username=application-duan
mail.password=application-duan123456
启动类
package com.dxz.property5;

import org.springframework.boot.autoconfigure.SpringBootApplication;
import org.springframework.boot.builder.SpringApplicationBuilder;

@SpringBootApplication
public class TestProperty5 {

    public static void main(String[] args) {
        //SpringApplication.run(TestProperty1.class, args);
        new SpringApplicationBuilder(TestProperty5.class).web(true).run(args);

    }
}
测试类:
package com.dxz.property5;

import org.springframework.beans.factory.annotation.Autowired;
import org.springframework.beans.factory.annotation.Value;
import org.springframework.context.annotation.PropertySource;
import org.springframework.web.bind.annotation.RequestMapping;
import org.springframework.web.bind.annotation.RestController;

@RestController
@RequestMapping("/task")
//@PropertySource("classpath:mail.properties")
public class TaskController {

    @Value("${mail.username}")
    private String userName;

    @Value("${mail.password}")
    private String password;

    @RequestMapping(value = { "/", "" })
    public String hellTask() {
        System.out.println("userName:" + userName);
        System.out.println("password:" + password);
        return "hello task !!";
    }

}
结果:
userName:application-duan
password:application-duan123456
示例2:使用@Value+@PropertySource读取其它配置文件(多个)内容
读取mail.properties配置
package com.dxz.property5;

import org.springframework.beans.factory.annotation.Autowired;
import org.springframework.beans.factory.annotation.Value;
import org.springframework.context.annotation.PropertySource;
import org.springframework.web.bind.annotation.RequestMapping;
import org.springframework.web.bind.annotation.RestController;

@RestController
@RequestMapping("/task")
@PropertySource("classpath:mail.properties")
public class TaskController {
    @Value("${mail.smtp.auth}")
    private String userName;

    @Value("${mail.from}")
    private String password;

    @RequestMapping(value = { "/", "" })
    public String hellTask() {
        System.out.println("userName:" + userName);
        System.out.println("password:" + password);
        return "hello task !!";
    }

}
结果:
userName:false
password:me@localhost
2.2、对象映射方式读取
- 首先建立对象与配置文件映射关系
- 方法中使用自动注入方式,将对象注入,调用get方法获取属性值
- 注意:新版本的@ConfigurationProperties没有了location属性,使用@PropertySource来指定配置文件位置
- prefix=”obj”指的是配置文件中的前缀,如obj.name,在定义对象属性名时为private String name;
- 读取配置文件中的集合时,使用List来接收数据,但List必须先实例化
测试类
package com.dxz.property6;

import org.springframework.beans.factory.annotation.Autowired;
import org.springframework.beans.factory.annotation.Value;
import org.springframework.context.annotation.PropertySource;
import org.springframework.web.bind.annotation.RequestMapping;
import org.springframework.web.bind.annotation.ResponseBody;
import org.springframework.web.bind.annotation.RestController;

@RestController
@RequestMapping("/task")
@PropertySource({ "classpath:mail.properties", "classpath:db.properties" })
public class TaskController {

    // 在application.properties中的文件,直接使用@Value读取即可,applicarion的读取优先级最高
    @Value("${mail.username}")
    private String myName;

    // 如果多个文件有重复的名称的属性话,最后一个文件中的属性生效
    @Value("${mail.port}")
    private String port;

    @Value("${db.username}")
    private String dbUserName;

    @Autowired
    ObjectProperties objectProperties;

    @RequestMapping("/test")
    @ResponseBody
    String test() {
        String result = "myName:" + myName + "\n port:" + port + "\n   dbUserName:" + dbUserName + "\n   objectProperties:"
                + objectProperties;
        System.out.println("result:=" + result);
        return result;
    }


}
启动类
package com.dxz.property6;

import org.springframework.boot.autoconfigure.SpringBootApplication;
import org.springframework.boot.builder.SpringApplicationBuilder;

@SpringBootApplication
public class TestProperty6 {

    public static void main(String[] args) {
        //SpringApplication.run(TestProperty1.class, args);
        new SpringApplicationBuilder(TestProperty6.class).web(true).run(args);

    }
}
ObjectProperties.java
package com.dxz.property6;

import java.util.ArrayList;
import java.util.List;

import org.springframework.boot.context.properties.ConfigurationProperties;
import org.springframework.context.annotation.PropertySource;
import org.springframework.stereotype.Component;

/**
 * 配置文件映射对象
 * @author DELL
 */
@Component
@PropertySource("classpath:config/object.properties")
@ConfigurationProperties(prefix = "obj")
public class ObjectProperties {

    private String name;
    private String age;
    // 集合必须初始化,如果找不到就是空集合,会报错
    private List<String> className = new ArrayList<String>();

    public List<String> getClassName() {
        return className;
    }

    public void setClassName(List<String> className) {
        this.className = className;
    }

    public String getName() {
        return name;
    }

    public void setName(String name) {
        this.name = name;
    }

    public String getAge() {
        return age;
    }

    public void setAge(String age) {
        this.age = age;
    }

    @Override
    public String toString() {
        return "ObjectProperties [name=" + name + ", age=" + age + ", className=" + className + "]";
    }


}
object.properties
#自定义属性读取
obj.name=obj.name
obj.age=obj.age
obj.className[0]=obj.className[0]
obj.className[1]=obj.className[1]
db.properties
db.username=admin
db.password=admin123456
mail.port=2555
结果:http://localhost:8080/task/test/
result:=myName:application-duan
 port:2555
   dbUserName:admin
   objectProperties:ObjectProperties [name=obj.name, age=obj.age, className=[obj.className[0], obj.className[1]]]

 浙公网安备 33010602011771号