使用Jekyll + Github Pages搭建静态网站
Jekyll 是 Github Pages 官方支持的静态网站生成工具,优点是在可以直接github上使用vscode online编辑md,提交后,github会承担生成html的工作。而使用hugo等工具,需要先在本地将md文件渲染成html,然后上传。
提示
- hugo的优点是快!
- 虽然github pages只支持渲染Jekyll,但是netlify、vercel等平台支持渲染hugo、jekyll等更多框架。
主题选择#
看了几个jekyll主题,发现 Chirpy 最得我心。在jekyll-template · GitHub Topics下,Chirpy主题排名第二。
本文记录Jekyll和chirpy的搭配使用。
安装Ruby和Jekyll#
前面说了github可以编译Jekyll,为什么还要在本地装一套环境呢。主要是为了方便调试,尤其是刚开始配置主题的时候。
比起Hugo来说,jekyll的安装要麻烦一些,需要安装的东西一大堆:
Follow the instructions in the Jekyll Docs to complete the installation of
Ruby,RubyGems,Jekyll, andBundler.
-
Download and install a Ruby+Devkit version from RubyInstaller Downloads. Use default options for installation.
-
Run the
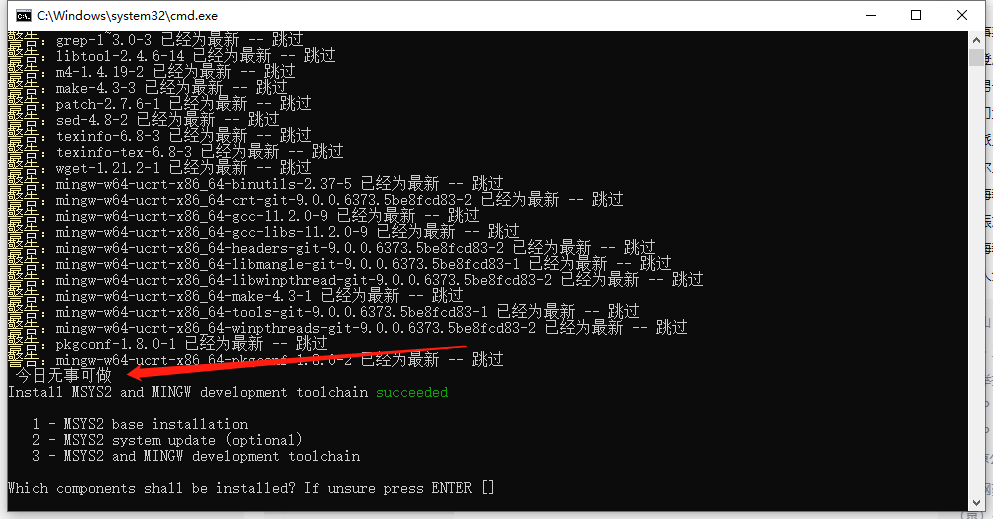
ridk installstep on the last stage of the installation wizard. This is needed for installing gems with native extensions. You can find additional information regarding this in the RubyInstaller Documentation第一次接触ruby,完全懵逼,不知道装了些啥,接近1个GB。打印的日志是清新脱俗。
-
Open a new command prompt window from the start menu, so that changes to the
PATHenvironment variable becomes effective. Install Jekyll and Bundler usinggem install jekyll bundler -
Check if Jekyll has been installed properly:
jekyll -v
到这里,本地环境就安装好了。
Chirpy主题的使用#
Install#
Creating a New Site#
跟着这里操作。简言之,使用其提供的 template repo 创建自己的 repo,命名为<GH_USERNAME>.github.io。
Installing Dependencies#
将创建的 repo(<GH_USERNAME>.github.io) clone 到本地,执行:
git clone git@github.com:<GH_USERNAME>/<GH_USERNAME>.github.io
cd <GH_USERNAME>.github.io
bundle
依赖安装完后,生成一个Gemfile.lock文件。
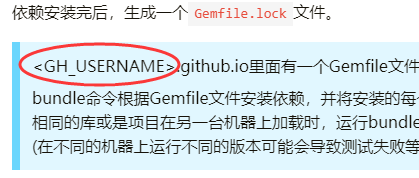
<GH_USERNAME>.github.io里面有一个Gemfile文件,它指定了你想要使用的gem的位置和版本。
bundle命令根据Gemfile文件安装依赖,并将安装的每个依赖的版本,记录在Gemfile.lock文件里。这样,当相同的库或是项目在另一台机器上加载时,运行bundle install将安装完全相同的版本,而不是最新的版本。(在不同的机器上运行不同的版本可能会导致测试失败等等)。简单来说就是保证在不同环境下gem版本相同。
Gemfile.lock文件可以提交到github,让github pages的deploy 脚本也使用相同的版本。但是,由于我是在Windows上运行bundle的,github pages的部署环境是linux。因此,需要运行以下命令,将 x86_64-linux 平台的一些库添加到Gemfile.lock里面(只有几个,多数是跨平台兼容的):
bundle lock --add-platform x86_64-linux
Configuration#
主要就是修改如下几个文件:
_config.yml#
timezone: Asia/Shanghai
google_site_verification: googledxxxxxxx.html # 去Google Search Console申请,用于google收录
avatar: assets/img/avatar/wy-avatar-339x335.jpg # 头像
comments:
active: utterances # 使用github issue作为文章的评论系统
utterances:
repo: whuwangyong/whuwangyong.github.io # <gh-username>/<repo>
issue_term: title # < url | pathname | title | ...>
paginate: 20
_tabs/about.md#
自定义“关于我”的内容。
favicon#
自定义网站图标。将favicon.ico文件放入assets/img/favicons/。Customize the Favicon - Chirpy (cotes.page)
_data/share.yml#
配置文章的分享选项,如Facebook、微博之类的。
Writing a New Post#
Writing a New Post | Chirpy (cotes.page)
- 在
_posts目录下创建YYYY-MM-DD-TITLE.md文件即可,必须按照此格式命名。可以使用子目录,用于分类 - 图片必须放在
/assets/下。最佳实践:放在/assets/img/posts/[YYYY-MM-DD-TITLE]目录下
Front Matter#
---
title: TITLE
date: YYYY-MM-DD HH:MM:SS +/-TTTT # 2022-01-01 13:14:15 +0800 只写日期也行;不写秒也行;这样也行 2022-03-09T00:55:42+08:00
categories: [TOP_CATEGORIE, SUB_CATEGORIE]
tags: [TAG] # TAG names should always be lowercase
author: # 不写默认就是自己
name: Full Name
link: https://example.com
# 以下默认false
math: true
mermaid: true
pin: true
---
分类#
支持多层级。如categories: [Java, Spring, AOP],最终的分类效果是Java/Spring/AOP,这样就可以复用笔记软件里面设置好的分类。
标签#
该主题的作者建议,TAG names should always be lowercase。我猜测这么做的原因是,大小写混用会导致相同含义的标签以多种形式出现,如:VSCode、VScode、vscode。学到了。在我的笔记软件里面,大小写混用的标签正让我苦不堪言。
img_path#
当文中很多图片具备共同的前缀时,可以将该前缀提取出来,放在Front Matter。
Liquid Codes#
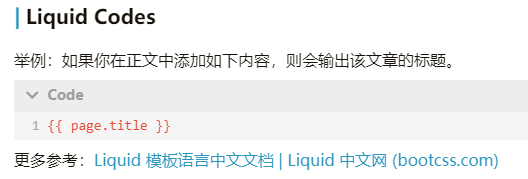
举例:如果你在正文中添加如下内容,则会输出该文章的标题。
{{ page.title }}
更多参考:Liquid 模板语言中文文档 | Liquid 中文网 (bootcss.com)
Running Local Server#
You may want to preview the site contents before publishing, so just run it by:
bundle exec jekyll s # serve, server, s Serve your site locally
# 编译命令是
bundle exec jekyll b # build, b Build your site
After a while, the local service will be published at http://127.0.0.1:4000 .
Deployment#
Deploy by Using Github Actions。直接提交到github即可。
Upgrading#
如前文所述,依赖的库及其版本都指定在Gemfile 里面,因此,修改此文件,更新jekyll-theme-chirpy的版本号即可:
- gem "jekyll-theme-chirpy", "~> 3.2", ">= 3.2.1"
+ gem "jekyll-theme-chirpy", "~> 3.3", ">= 3.3.0"
And then execute the following command:
bundle update jekyll-theme-chirpy
As the version upgrades, the critical files (for details, see the Startup Template) and configuration options will change. Please refer to the Upgrade Guide to keep your repo’s files in sync with the latest version of the theme.
发布时间与更新时间#
这就不需要倒腾额外的jekyll插件去实现这个功能了。如gjtorikian/jekyll-last-modified-at: A Jekyll plugin to show the last_modified_at time of a post. (github.com)
添加tab到左侧栏#
如新增“友情链接”tab。在_tabs目录下新建links.md:
---
title: 友情链接
icon: fas fa-link
order: 5
---
调整order和icon。icon去Font Awesome Icons里面找。然后修改_data/locales/en.yml和_data/locales/zh-CN.yml,在tabs:下添加links: Links和links: 友链,以适配中英文。
进阶内容#
用了两天,对Jekyll + Github Pages 的工作逻辑有了一些理解。
为什么使用Jekyll可以直接提交md#
在<github_username>.github.io根目录下,查看.github/workflows/pages-deploy.yml文件:
name: 'Automatic build'
on:
push:
branches:
- main
paths-ignore:
- .gitignore
- README.md
- LICENSE
jobs:
continuous-delivery:
runs-on: ubuntu-latest
steps:
- name: Checkout
uses: actions/checkout@v2
with:
fetch-depth: 0 # for posts's lastmod
- name: Setup Ruby
uses: ruby/setup-ruby@v1
with:
ruby-version: 2.7
bundler-cache: true
- name: Deploy
run: bash tools/deploy.sh
该文件定义了一个workflow:当push代码到main分支时,执行jobs里面定义的动作。最关键的是Deploy这一步,它执行了一个脚本:tools/deploy.sh。这个脚本做的事情,就是执行bundle exec jekyll build -d _site将md文件编译为html,生成静态网站,然后将_site下的内容push到gh-pages分支。到这里就很清楚了,是github帮助我们执行了build操作,将md转换成了html。
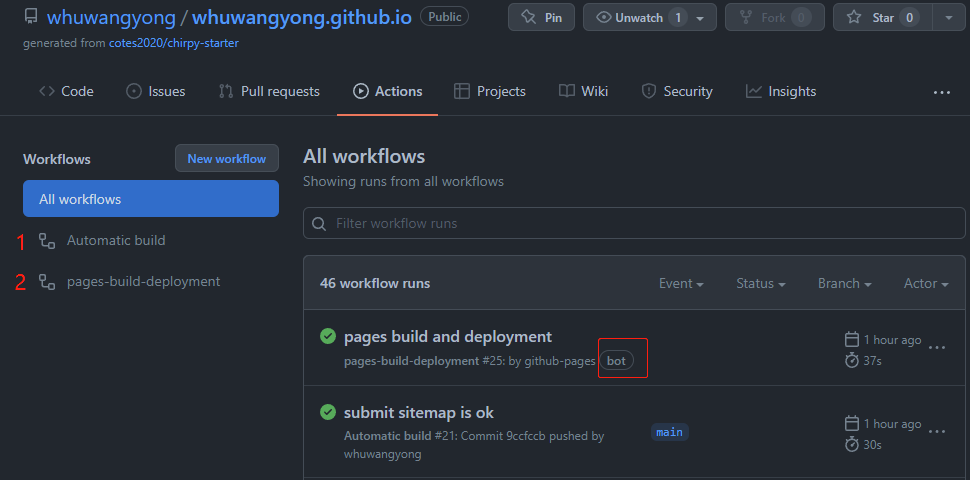
在github上查看你的github.io项目,在Actions下面可以看到每次提交新文章时触发的workflows:

第一个workflow就是上面提到的.github/workflows/pages-deploy.yml,第二个是github pages创建的,可以看到bot标志。点进workflow runs,可以看到执行的日志,根据日志能更加清楚的知道背后的流程。
如果使用hugo建站,github后台并没有hugo的环境,所以不能帮助我们编译md。这就需要我们自己编译好html,然后push到github.io项目。push之后的流程是一样的:由github pages的bot将编译好的静态网站发布到
https://<username>.github.io。
自定义workflow#
第一个亲测可行,后两个还没研究。
提交到谷歌/百度等搜索引擎#
修改tools/deploy.sh,在里面新增一个函数:在deploy之后,根据生成的 sitemap.xml 创建一个包含所有url的sitemap.txt文件。将该文件提交到百度资源平台。但是GitHub封了百度的爬虫,可以考虑在vercel上也部署一份,让百度去爬vercel。另一种方法是使用反向代理,让百度爬自己的主机,自己的主机去连接github。
至于google和bing,访问 Google Search Console 和 Bing Webmaster Tools 进行设置,添加博客地址之后就等着爬虫光临。
搜狗也可以试一试,GitHub没封搜狗。
# file_name: tools/deploy.sh
# 新增 submit_sitemap 函数,在 deploy 之后调用
submit_sitemap() {
echo "------ >>> submit_sitemap ---------"
grep "<loc>" sitemap.xml | grep -v 'html' | awk -F '[< >]' '{print $3}' > sitemap.txt
curl -H 'Content-Type:text/plain' --data-binary @sitemap.txt "http://data.zz.baidu.com/urls?site=https://whuwangyong.github.io&token=5os4wCK5ct7kBZRN"
curl -H 'Content-Type:text/plain' --data-binary @sitemap.txt "http://data.zz.baidu.com/urls?site=https://whuwangyong.vercel.app&token=5os4wCK5ct7kBZRN"
rm -f sitemap.txt
echo "------ submit_sitemap <<< ---------"
}
main() {
init
build
# ...
deploy
submit_sitemap
}
netlify、vercel是什么#
除了github pages,还有netlify、vercel等也能生成并部署静态网站。它们从<username>.github.io 的main分支拉取md源文件,然后在自己的资源上运行bundle jekyll exec build,将build之后的html放在它们自己的服务器上,并提供一个域名供你访问这个静态站点。
除了Jekyll,它们还支持Hugo、Hexo、Next.js等多种静态网站构建工具。也就是说,只将github作为一个代码托管平台,里面可以放Jekyll、Hugo等多种构建工具和md文件,netlify和vercel都可以将它们编译为html并发布出去。从这个方面说,它们比github强大。
Jekyll的Markdown处理器#
Jekyll默认的Markdown Processor是kramdown,这与我们常使用的typora、vscode的md解析器不同。kramdown会将pipe字符|解析为table语法。如果正文中有link或者image语法,且文本包含了|字符,需要对其进行转义。下述这种写在代码块里面可以,如果写在正文,就会当成表格了。
[A | B](http://foo.com)
[img | 1](http://img.com/1.jpg)
这个问题2014年就有人提了,但是作者一直没修复:
- Pipes inside image alt text lead to unwanted table output · Issue #135 · gettalong/kramdown (github.com)
- the conditional probability equation doesn't display normal · Issue #46 · gettalong/kramdown (github.com)
- Kramdown bug - pipe character in Markdown link creates a table · Issue #2818 · jekyll/jekyll (github.com)
- markdown - How do you disable tables in Kramdown? - Stack Overflow
- 对 Markdown 渲染引擎 kramdown 的几点 hack | 明无梦 (dreamxu.com)
- Table syntax · Issue #151 · gettalong/kramdown (github.com)
- Pipe characters in text creates table · Issue #317 · gettalong/kramdown (github.com)
- Bug - pipe character in Markdown link creates a table · Issue #431 · gettalong/kramdown (github.com) 这是2017年的issue,作者回复说2.x版本会修复,但仍然存在。在kramdown - syntax页面,搜索“Automatic and Manual Escaping”可以查看kramdown所有(可能)需要转义的字符。
所以,如果要继续用kramdown,要么禁用table语法,要么把所有用到|的地方全部转义。这两个我都不会选:不用table不可能;为了适应kramdown修改标准的md语法更不可能。
除了|字符,<>、liquid cldoe语法({{}})等也需要转义:

总之要注意的地方挺多,不能毫无顾忌地写markdown。
更改Jekyll的markdown处理器#
鉴于kramdown的上述问题,我尝试给Jekyll换一个Markdown处理器。根据文档Markdown Options - Jekyll,除了kramdown,Jekyll还支持jekyll-commonmark和jekyll-commonmark-ghpages。我分别试用了这两个处理器,问题更多。尤其是jekyll-commonmark-ghpages,其兼容的jekyll版本是3.9.x,与我使用的Chirpy主题(需要jekyll 4.x)不兼容。jekyll-commonmark倒是解决了|的问题,但是代码高亮有问题,有些代码始终无法渲染,花了整整一天翻遍了github也没找到jekyll-commonmark到底应该怎么配置。不负责任的说一句,这就是个坑。
Jekyll也支持自定义处理器,我没尝试。另一个优质主题jekyll-TeXt-theme同样用的kramdown。看来用Jekyll就避免不了kramdown。
搜索功能#
Chirpy主题的作者在这里提到,他使用的是Simple-Jekyll-Search实现的搜索功能。效果不错,速度飞快。
显示阅读量#
使用Google Page Views: Enable Google Page Views | Chirpy (cotes.page)
Reference#
本文同步发布于:


【推荐】国内首个AI IDE,深度理解中文开发场景,立即下载体验Trae
【推荐】编程新体验,更懂你的AI,立即体验豆包MarsCode编程助手
【推荐】抖音旗下AI助手豆包,你的智能百科全书,全免费不限次数
【推荐】轻量又高性能的 SSH 工具 IShell:AI 加持,快人一步
· 阿里最新开源QwQ-32B,效果媲美deepseek-r1满血版,部署成本又又又降低了!
· 开源Multi-agent AI智能体框架aevatar.ai,欢迎大家贡献代码
· Manus重磅发布:全球首款通用AI代理技术深度解析与实战指南
· 被坑几百块钱后,我竟然真的恢复了删除的微信聊天记录!
· AI技术革命,工作效率10个最佳AI工具