

SpringBoot整合Mybatis完整版
喜欢的朋友可以关注下,粉丝也缺。
自从Spring推出Boot,Cloud系列之后,一度成为热门的框架,现在大部分的招聘要求都要有相关的开发经验,借此我在这里就给大家分享一下如何玩转SpringBoot跟Mybatis。
这里我给大家提供我创建的demo下载地址
https://download.csdn.net/download/dsn727455218/10539629
在这里就不跟大家说废话,我们实际操作一番。
使用工具:
eclipse 版本随意
jdk 环境
mysql 数据库
这个工具的安装使用我就不给大家介绍,相信你们都能完成。
SpringBoot项目创建的方式:
1.访问 http://start.spring.io/
这个是最为简单的 输入项目名,包名,以及项目类型后,版本现在基本都是2.0+,下载导入到开发工具即可

2.Spring Boot CLI cmd命令操作
下载安装配置环境我就不多做介绍,很简单的操作这不是我介绍的重点
3.利用eclipse来创建SpringBoot 这才是我介绍的重点
首先我们需要在eclipse上面集成STS,至于这是什么,自己可以去Sping的官网看介绍。
eclipse安装:
Help -> Eclipse Marketplace…
Search或选择“Popular”标签,选择Spring Tool Suite (STS) for Eclipse插件,安装
网络不好的可以下载有点慢,慢慢等安装。
new project ,选择spring -> spring starter project
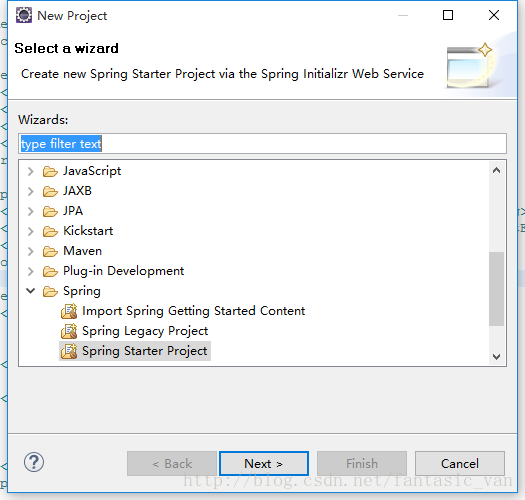
按自己的信息填写,我这里项目名叫demo1
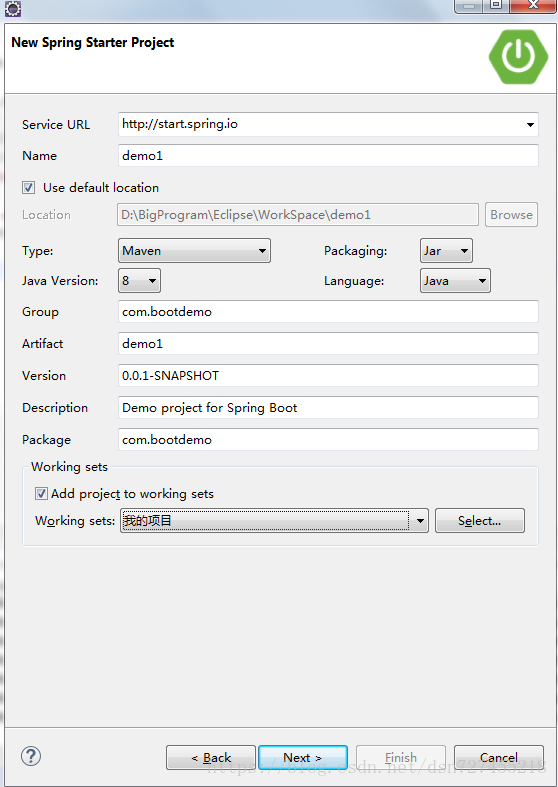
选择版本和组件
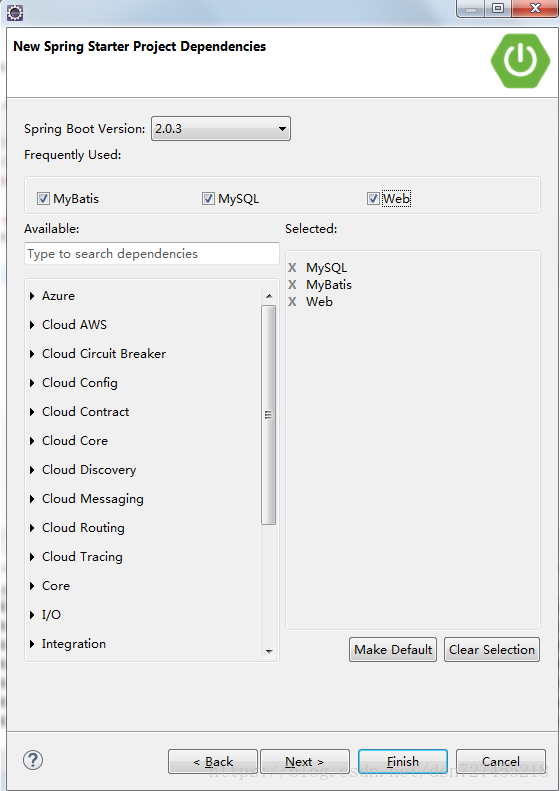
我这里选了2.0.3版本,现在基本都是2.0+的版本,选了mysql和web,mybatis,因为是web项目,都会选择web这个选项,其他的可以按自己需要选择,点击 Finish ,就会有一个新项目,不过需要等待几分钟,sts工具会生成spring boot目录的结构及文件
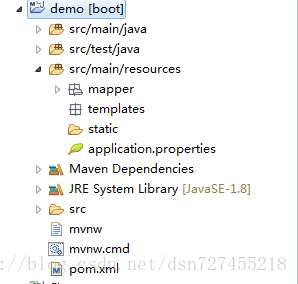
这就是我们最终的结构。
这里需要提示一点如果没有dependencies包,检查一下项目目录下.classpath 里面是否有
<classpathentry kind="con" path="org.eclipse.m2e.MAVEN2_CLASSPATH_CONTAINER"/>
没有就加上,重启eclipse即可,其他原因我就不做多的说明,相信你们能够发现。
接下来我们就来创建包
controller :控制层
dao:数据接口
service:实现类
mapper:这里是放dao层的xml文件 也就是mybatis的
entity:实体类
这几个包是做什么的你们应该能开明白
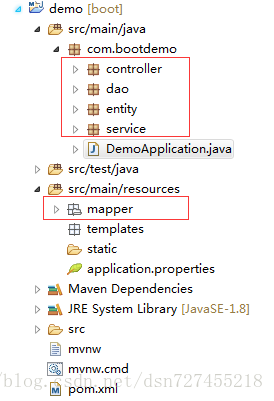
就是这个样子的
pom.xml 配置文件

这里我只是配置一个基础的,如果需要更加详细的配置文件可以参考我的另一篇文章
https://blog.csdn.net/dsn727455218/article/details/81028192
接下来我们就写写代码try-try
首先我们需要先创建一个userinfo表 字段(id,username,userpass,name)
对应的实体类UserInfo

/**
 * @author dsn
 *
 * @version 创建时间:2018年7月5日 上午11:30:00
 */
package com.bootdemo.entity;

/**
 * @author dsn
 * @version 创建时间:2018年7月5日 上午11:30:00
 */
public class UserInfo {

    /**
     * @return the id
     */
    public int getId() {
        return id;
    }

    /**
     * @param id
     *            the id to set
     */
    public void setId(int id) {
        this.id = id;
    }

    /**
     * @return the username
     */
    public String getUsername() {
        return username;
    }

    /**
     * @param username
     *            the username to set
     */
    public void setUsername(String username) {
        this.username = username;
    }

    /**
     * @return the userpass
     */
    public String getUserpass() {
        return userpass;
    }

    /**
     * @param userpass
     *            the userpass to set
     */
    public void setUserpass(String userpass) {
        this.userpass = userpass;
    }

    /**
     * @return the name
     */
    public String getName() {
        return name;
    }

    /**
     * @param name
     *            the name to set
     */
    public void setName(String name) {
        this.name = name;
    }

    private int id;
    private String username;
    private String userpass;
    private String name;

}
dao层接口UserInfoMapper 这里我是继承了BaseMapper父类,一些方法是可以共用的
/**
 * @author dsn
 *
 * @version 创建时间:2018年7月5日 上午11:35:10
 */
package com.bootdemo.dao;

import com.bootdemo.entity.UserInfo;

/**
 * @author dsn
 * @version 创建时间:2018年7月5日 上午11:35:10
 */
public interface UserInfoMapper extends BaseMapper<UserInfo> {
    //添加单个对象
    //    public int insert(User entity);
}
BaseMapper
package com.bootdemo.dao;

import java.util.List;

import org.apache.ibatis.annotations.Param;

public interface BaseMapper<T> {
    //添加单个对象
    public int insert(T entity);

    //修改单个对象
    public int update(T entity);

    //删除单个对象
    public int delete(T entity);

    public int deletebyname(T entity);

    //查询单个对象
    public T select(T entity);

    //查询多个对象
    public List<T> query();

    //根据分页查询多个对象
    public List<T> selectbypage(@Param(value = "pageSize") int pageSize, @Param(value = "currentPage") int currentPage);

    //根据搜索条件查询
    public List<T> searchbytj(@Param(value = "st") String st, @Param(value = "et") String et,
            @Param(value = "con") String con);

    //查询总条数
    public int selectCount();
}
service层UserInfoService 同样的我继承了BaseService
/**
 * @author dsn
 *
 * @version 创建时间:2018年7月5日 上午11:35:36
 */
package com.bootdemo.service;

import com.bootdemo.entity.UserInfo;

/**
 * @author dsn
 * @version 创建时间:2018年7月5日 上午11:35:36
 */
public interface UserInfoService extends BaseService<UserInfo> {

}
BaseService
package com.bootdemo.service;

import java.util.List;

import org.apache.ibatis.annotations.Param;

public interface BaseService<T> {
    // 添加单个对象
    public int insert(T entity) throws Exception;

    // 修改单个对象
    public int update(T entity) throws Exception;

    // 删除单个对象
    public int delete(T entity) throws Exception;

    public int deletebyname(T entity);

    // 查询单个对象
    public T select(T entity);

    //查询多个对象
    public List<T> query();

    //分页查询多个对象
    public List<T> selectbypage(@Param(value = "pageSize") int pageSize, @Param(value = "currentPage") int currentPage);

    //根据搜索条件查询
    public List<T> searchbytj(@Param(value = "st") String st, @Param(value = "et") String et,
            @Param(value = "con") String con);

    //查询总条�?
    public int selectCount();
}
mapper文件UserInfoMapper.xml 这是mybatis的sql
<?xml version="1.0" encoding="UTF-8" ?>
<!DOCTYPE mapper PUBLIC "-//mybatis.org//DTD Mapper 3.0//EN" "http://mybatis.org/dtd/mybatis-3-mapper.dtd" >
<mapper namespace="com.bootdemo.dao.UserInfoMapper" >
  <resultMap id="userResultMap" type="com.bootdemo.entity.UserInfo" >
    <id column="id" property="id" jdbcType="INTEGER" />
    <result column="name" property="name" jdbcType="VARCHAR" />
    <result column="username" property="username" jdbcType="VARCHAR" />
    <result column="userpass" property="userpass" jdbcType="VARCHAR" />
  </resultMap>
  <select id="selectList" parameterType="UserInfo" resultMap="userResultMap">
      select
    id,username,userpass,name
    from userinfo
    <where>
        disable='1'
        <if test="key!=null">
            and (
            username = #{key,jdbcType=VARCHAR}
                or
            name = #{key,jdbcType=VARCHAR}
            )
        </if>
    </where>
  </select>
  <insert id="insert" parameterType="UserInfo"
        useGeneratedKeys="true" keyProperty="id">
        insert into userinfo(name,username,userpass)
             values(#{name},#{username},#{userpass})
  </insert>
</mapper>
controller层UserInfoController
/**
 * @author dsn
 *
 * @version 创建时间:2018年7月12日 下午2:04:58
 */
package com.bootdemo.controller;

import javax.annotation.Resource;

import org.springframework.web.bind.annotation.RequestMapping;
import org.springframework.web.bind.annotation.ResponseBody;
import org.springframework.web.bind.annotation.RestController;

import com.bootdemo.entity.UserInfo;
import com.bootdemo.service.UserInfoService;

/**
 * @author dsn
 * @version 创建时间:2018年7月12日 下午2:04:58
 */
@RestController
@RequestMapping("user")
public class UserInfoController {

    @Resource
    public UserInfoService userinfoService;

    @RequestMapping("/add.do")
    @ResponseBody
    public String addUser(UserInfo user, String msg) {

        System.out.println(user.getUsername());

        try {
            int insert = userinfoService.insert(user);
            if (insert == 1) {
                msg = "插入成功";
            } else {
                msg = "插入成功";
            }
        } catch (Exception e) {
            e.printStackTrace();
        }
        return msg;

    }
}
需要注意的是我们需要在DemoApplication里面添加
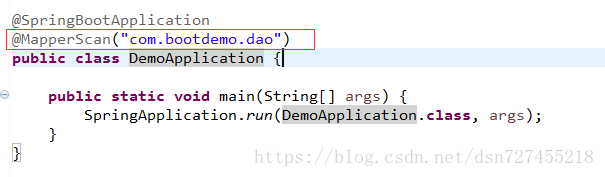
扫描映射文件不然启动项目会报错的
同样也可以再mapper接口类里面加@Mapper注解,两者皆可
我们只需要运行DemoApplication文件即可。
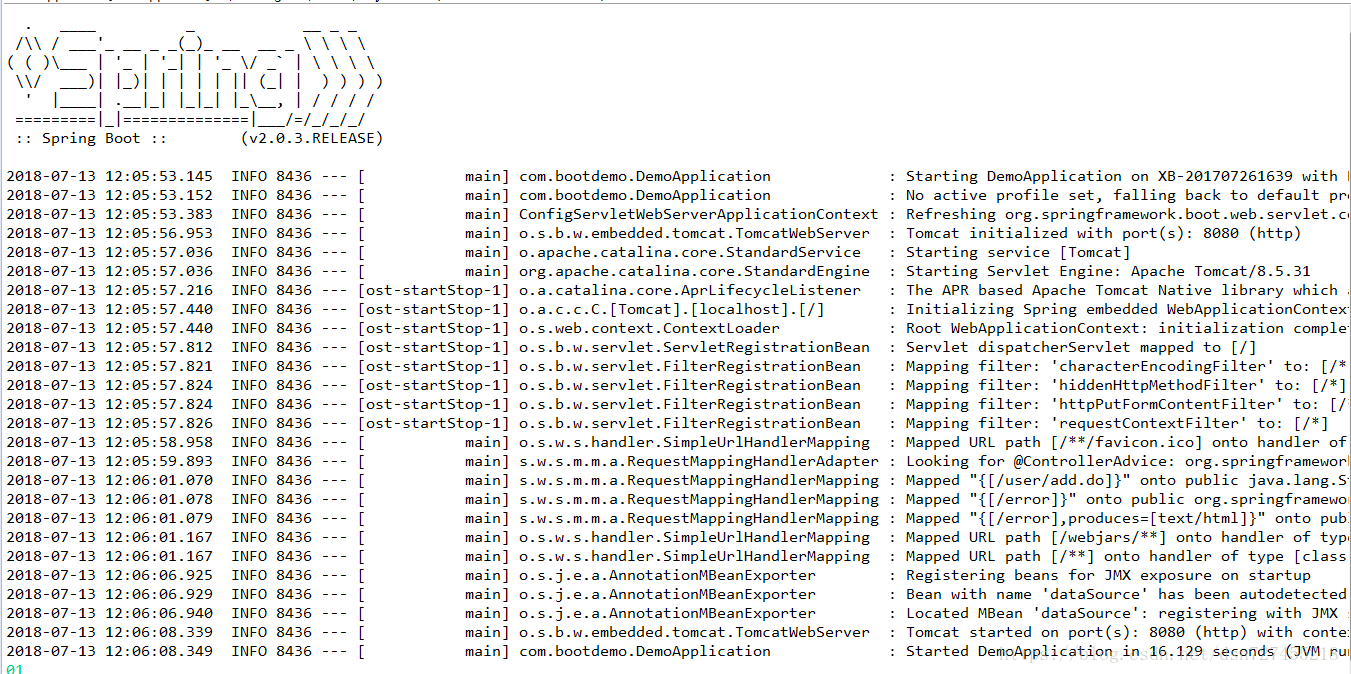
成功界面,我们会看到Spring大大的logo
平常我们web项目都是在tomcat等容器里面启动,这里为什么不需要呢,是SpringBoot已经集成了tomcat,所以不需要我们在配置了。
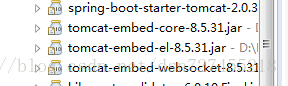
如果有的码友需要看注解的源码那么打开dependencies
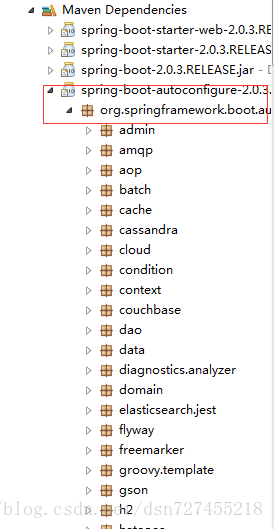
一些jdbc等等常用的配置文件信息都可以查看的。
这里我给大家提供我创建的demo下载地址
https://download.csdn.net/download/dsn727455218/10539629
如有需要可以加我Q群【308742428】大家一起讨论技术。
后面会不定时为大家更新文章,敬请期待。
喜欢的朋友可以关注下,粉丝也缺。
如果对你有帮助,请打赏一下!!!


【推荐】编程新体验,更懂你的AI,立即体验豆包MarsCode编程助手
【推荐】凌霞软件回馈社区,博客园 & 1Panel & Halo 联合会员上线
【推荐】抖音旗下AI助手豆包,你的智能百科全书,全免费不限次数
【推荐】博客园社区专享云产品让利特惠,阿里云新客6.5折上折
【推荐】轻量又高性能的 SSH 工具 IShell:AI 加持,快人一步
· C++代码改造为UTF-8编码问题的总结
· DeepSeek 解答了困扰我五年的技术问题
· 为什么说在企业级应用开发中,后端往往是效率杀手?
· 用 C# 插值字符串处理器写一个 sscanf
· Java 中堆内存和栈内存上的数据分布和特点
· 为DeepSeek添加本地知识库
· 精选4款基于.NET开源、功能强大的通讯调试工具
· DeepSeek智能编程
· 大模型工具KTransformer的安装
· [计算机/硬件/GPU] 显卡