

k8s笔记0528-基于KUBERNETES构建企业容器云手动部署集群记录-1
一、系统初始化
-------
系统环境初始化
1.安装Docker
第一步:使用国内Docker源
[root@linux-node1 ~]# cd /etc/yum.repos.d/
[root@linux-node1 yum.repos.d]# wget \
https://mirrors.aliyun.com/docker-ce/linux/centos/docker-ce.repo
第二步:Docker安装:
[root@linux-node1 ~]# yum install -y docker-ce
第三步:启动后台进程:
[root@linux-node1 ~]# systemctl start docker
2.准备部署目录
mkdir -p /opt/kubernetes/{cfg,bin,ssl,log}
3.准备软件包
百度网盘下载地址:
[https://pan.baidu.com/s/1zs8sCouDeCQJ9lghH1BPiw](https://pan.baidu.com/s/1zs8sCouDeCQJ9lghH1BPiw)
4.解压软件包
# tar zxf kubernetes.tar.gz
# tar zxf kubernetes-server-linux-amd64.tar.gz
# tar zxf kubernetes-client-linux-amd64.tar.gz
# tar zxf kubernetes-node-linux-amd64.tar.gz
-------
---配置docker官方源并用yum安装docker---
配置docker官方源并用yum安装docker
一、docker的官方安装文档:
https://docs.docker.com/engine/installation/linux/centos/
由docker给的文档可以看出它也只是去配置了一个docker的yum源、然后就通过这个源来安装docker了;在这个文档下我们采用手工配置
的方式
5.配置一个docker用的源:
5.1、为docker 增加一个新的yum配置文件;touch /etc/yum.repos.d/docker.repo
touch /etc/yum.repos.d/docker.repo
5.2、docker.repo的内容如下
复制代码
[docker-ce-stable]
name=Docker CE Stable - $basearch
baseurl=https://download.docker.com/linux/centos/7/$basearch/stable
enabled=1
gpgcheck=0 #我把这里设置成了0、说明我信任了这个源,不对它的rpm进行检察
gpgkey=https://download.docker.com/linux/centos/gpg
[docker-ce-stable-debuginfo]
name=Docker CE Stable - Debuginfo $basearch
baseurl=https://download.docker.com/linux/centos/7/debug-$basearch/stable
enabled=0
gpgcheck=1
gpgkey=https://download.docker.com/linux/centos/gpg
[docker-ce-stable-source]
name=Docker CE Stable - Sources
baseurl=https://download.docker.com/linux/centos/7/source/stable
enabled=0
gpgcheck=1
gpgkey=https://download.docker.com/linux/centos/gpg
[docker-ce-edge]
name=Docker CE Edge - $basearch
baseurl=https://download.docker.com/linux/centos/7/$basearch/edge
enabled=0
gpgcheck=1
gpgkey=https://download.docker.com/linux/centos/gpg
[docker-ce-edge-debuginfo]
name=Docker CE Edge - Debuginfo $basearch
baseurl=https://download.docker.com/linux/centos/7/debug-$basearch/edge
enabled=0
gpgcheck=1
gpgkey=https://download.docker.com/linux/centos/gpg
[docker-ce-edge-source]
name=Docker CE Edge - Sources
baseurl=https://download.docker.com/linux/centos/7/source/edge
enabled=0
gpgcheck=1
gpgkey=https://download.docker.com/linux/centos/gpg
[docker-ce-test]
name=Docker CE Test - $basearch
baseurl=https://download.docker.com/linux/centos/7/$basearch/test
enabled=0
gpgcheck=1
gpgkey=https://download.docker.com/linux/centos/gpg
[docker-ce-test-debuginfo]
name=Docker CE Test - Debuginfo $basearch
baseurl=https://download.docker.com/linux/centos/7/debug-$basearch/test
enabled=0
gpgcheck=1
gpgkey=https://download.docker.com/linux/centos/gpg
[docker-ce-test-source]
name=Docker CE Test - Sources
baseurl=https://download.docker.com/linux/centos/7/source/test
enabled=0
gpgcheck=1
gpgkey=https://download.docker.com/linux/centos/gpg
复制代码
6.安装docker:
复制代码
sudo yum install docker-ce
Loaded plugins: fastestmirror, langpacks
Loading mirror speeds from cached hostfile
Resolving Dependencies
--> Running transaction check
---> Package docker-ce.x86_64 0:17.03.1.ce-1.el7.centos will be installed
--> Processing Dependency: docker-ce-selinux >= 17.03.1.ce-1.el7.centos for package: docker-ce-17.03.1.ce-1.el7.centos.x86_64
--> Running transaction check
---> Package docker-ce-selinux.noarch 0:17.03.1.ce-1.el7.centos will be installed
--> Finished Dependency Resolution
Dependencies Resolved
===========================================================================================================
Package Arch Version Repository Size
===========================================================================================================
Installing:
docker-ce x86_64 17.03.1.ce-1.el7.centos docker-ce-stable 19 M
Installing for dependencies:
docker-ce-selinux noarch 17.03.1.ce-1.el7.centos docker-ce-stable 28 k
Transaction Summary
===========================================================================================================
Install 1 Package (+1 Dependent package)
Total download size: 19 M
Installed size: 19 M
Is this ok [y/d/N]: y
复制代码
7.直接下载rpm包的方式来安装:
7.1、我在安装docker的时候发现下载的速度只有3kB/s 然而文件大小有19M;就在我感觉安装无望的时候、我机智的想到了自己直接把rpm下载下来
看了下docker.repo 、发现centos7的源地址是 https://download.docker.com/linux/centos/7/$basearch/stable 所以我只要去
https://download.docker.com/linux/centos/7/x86_64/stable/Packages/
用迅雷(我是会员有加速)把rpm包下载下来就行了
下载如下文件:
docker-ce-17.03.0.ce-1.el7.centos.x86_64.rpm
docker-ce-selinux-17.03.0.ce-1.el7.centos.noarch.rpm
8.安装docker:
复制代码
ll
total 19096
-rwxrwxrwx 1 jianglexing jianglexing 19521288 May 30 20:05 docker-ce-17.03.0.ce-1.el7.centos.x86_64.rpm
-rw-r--r-- 1 jianglexing jianglexing 29108 May 30 20:15 docker-ce-selinux-17.03.0.ce-1.el7.centos.noarch.rpm
[root@workstudio docker]# yum localinstall *
Loaded plugins: fastestmirror, langpacks
Examining docker-ce-17.03.0.ce-1.el7.centos.x86_64.rpm: docker-ce-17.03.0.ce-1.el7.centos.x86_64
Marking docker-ce-17.03.0.ce-1.el7.centos.x86_64.rpm to be installed
Examining docker-ce-selinux-17.03.0.ce-1.el7.centos.noarch.rpm: docker-ce-selinux-17.03.0.ce-1.el7.centos.noarch
Marking docker-ce-selinux-17.03.0.ce-1.el7.centos.noarch.rpm to be installed
Resolving Dependencies
--> Running transaction check
---> Package docker-ce.x86_64 0:17.03.0.ce-1.el7.centos will be installed
---> Package docker-ce-selinux.noarch 0:17.03.0.ce-1.el7.centos will be installed
--> Finished Dependency Resolution
Dependencies Resolved
=======================================================================================================
Package Arch Version Repository Size
=======================================================================================================
Installing:
docker-ce x86_64 17.03.0.ce-1.el7.centos /docker-ce-17.03.0.ce-1.el7.centos.x86_64 65 M
docker-ce-selinux noarch 17.03.0.ce-1.el7.centos /docker-ce-selinux-17.03.0.ce-1.el7.centos.noarch 43 k
Transaction Summary
=======================================================================================================
Install 2 Packages
Total size: 65 M
Installed size: 65 M
Is this ok [y/d/N]: y
Downloading packages:
Running transaction check
Running transaction test
Transaction test succeeded
Running transaction
Installing : docker-ce-selinux-17.03.0.ce-1.el7.centos.noarch 1/2
setsebool: SELinux is disabled.
libsemanage.semanage_direct_install_info: Overriding docker module at lower priority 100 with module at priority 400.
Installing : docker-ce-17.03.0.ce-1.el7.centos.x86_64 2/2
Verifying : docker-ce-17.03.0.ce-1.el7.centos.x86_64 1/2
Verifying : docker-ce-selinux-17.03.0.ce-1.el7.centos.noarch 2/2
Installed:
docker-ce.x86_64 0:17.03.0.ce-1.el7.centos docker-ce-selinux.noarch 0:17.03.0.ce-1.el7.centos
Complete!
复制代码
9.启动docker:
复制代码
[root@workstudio docker]# systemctl start docker
[root@workstudio docker]# ps -ef | grep docker
root 4458 1 1 20:22 ? 00:00:00 /usr/bin/dockerd
root 4465 4458 0 20:22 ? 00:00:00 docker-containerd -l unix:///var/run/docker/libcontainerd/docker-containerd.sock --metrics-interval=0 --start-timeout 2m --state-dir /var/run/docker/libcontainerd/containerd --shim docker-containerd-shim --runtime docker-runc
root 4589 4333 0 20:22 pts/1 00:00:00 grep --color=auto docker
复制代码
10.测试docker是否能成功运行:
复制代码
[root@workstudio docker]# docker run hello-world
Unable to find image 'hello-world:latest' locally
latest: Pulling from library/hello-world
78445dd45222: Pull complete
Digest: sha256:c5515758d4c5e1e838e9cd307f6c6a0d620b5e07e6f927b07d05f6d12a1ac8d7
Status: Downloaded newer image for hello-world:latest
Hello from Docker!
This message shows that your installation appears to be working correctly.
To generate this message, Docker took the following steps:
1. The Docker client contacted the Docker daemon.
2. The Docker daemon pulled the "hello-world" image from the Docker Hub.
3. The Docker daemon created a new container from that image which runs the
executable that produces the output you are currently reading.
4. The Docker daemon streamed that output to the Docker client, which sent it
to your terminal.
To try something more ambitious, you can run an Ubuntu container with:
$ docker run -it ubuntu bash
Share images, automate workflows, and more with a free Docker ID:
https://cloud.docker.com/
For more examples and ideas, visit:
https://docs.docker.com/engine/userguide/
复制代码
如下是第一次运行hello-world 这个docker-image 由于它还不存在于本地、所以要下载它、这可能要用一点时间!
------
11.配置主机名
-----------------
-192.168.158.131
[root@linux-node1 ~]# cat /etc/hostname
linux-node1.example.com
[root@linux-node1 ~]# cat /etc/hosts
127.0.0.1 localhost localhost.localdomain localhost4 localhost4.localdomain4
::1 localhost localhost.localdomain localhost6 localhost6.localdomain6
192.168.158.131 linux-node1 linux-node1.example.com
192.168.158.132 linux-node2 linux-node2.example.com
192.168.158.133 linux-node3 linux-node3.example.com
-192.168.158.132
[root@linux-node1 ~]# cat /etc/hostname
linux-node1.example.com
[root@linux-node1 ~]# cat /etc/hosts
127.0.0.1 localhost localhost.localdomain localhost4 localhost4.localdomain4
::1 localhost localhost.localdomain localhost6 localhost6.localdomain6
192.168.158.131 linux-node1 linux-node1.example.com
192.168.158.132 linux-node2 linux-node2.example.com
192.168.158.133 linux-node3 linux-node3.example.com
-192.168.158.133
[root@linux-node1 ~]# cat /etc/hostname
linux-node1.example.com
[root@linux-node1 ~]# cat /etc/hosts
127.0.0.1 localhost localhost.localdomain localhost4 localhost4.localdomain4
::1 localhost localhost.localdomain localhost6 localhost6.localdomain6
192.168.158.131 linux-node1 linux-node1.example.com
192.168.158.132 linux-node2 linux-node2.example.com
192.168.158.133 linux-node3 linux-node3.example.com
13.配置k8s环境变量
-----------------
[root@linux-node1 ~]# vi .bash_profile
# .bash_profile
# Get the aliases and functions
if [ -f ~/.bashrc ]; then
. ~/.bashrc
fi
# User specific environment and startup programs
PATH=$PATH:$HOME/bin:/opt/kubernetes/bin
export PATH
~
[root@linux-node1 ~]# source .bash_profile
[root@linux-node1 kubernetes]# mv * /usr/local/src/
----------------------------------------------
二、手动制作ca证书
-------
2.1.下载ca证书packages
CFSSL Releases:
地址: https://pkg.cfssl.org
2.2三台主机分别执行
[root@linux-node1 src]# chmod +x cfssl*
[root@linux-node1 src]# ll
total 599052
-rwxr-xr-x 1 root root 6553600 May 28 15:03 cfssl-certinfo_linux-amd64
-rwxr-xr-x 1 root root 2277873 May 28 15:03 cfssljson_linux-amd64
-rwxr-xr-x 1 root root 10376657 May 28 15:03 cfssl_linux-amd64
-rw-r--r-- 1 root root 17108856 May 28 15:03 cni-plugins-amd64-v0.7.1.tgz
-rw-r--r-- 1 root root 10562874 May 28 15:03 etcd-v3.2.18-linux-amd64.tar.gz
-rw-r--r-- 1 root root 9706487 May 28 15:03 flannel-v0.10.0-linux-amd64.tar.gz
drwxr-xr-x 2 root root 6 May 28 15:14 kubernetes
-rwxr-xr-x 1 root root 13344537 May 28 15:03 kubernetes-client-linux-amd64.tar.gz
-rw-r--r-- 1 root root 112427817 May 28 15:03 kubernetes-node-linux-amd64.tar.gz
-rw-r--r-- 1 root root 428337777 May 28 15:03 kubernetes-server-linux-amd64.tar.gz
-rwxr-xr-x 1 root root 2716855 May 28 15:03 kubernetes.tar.gz
[root@linux-node1 src]#
[root@linux-node1 src]# pwd
/usr/local/src
[root@linux-node1 src]# mv cfssl-certinfo_linux-amd64 /opt/kubernetes/bin/cfssl-certinfo
[root@linux-node1 src]# mv cfssljson_linux-amd64 /opt/kubernetes/bin/cfssljson
[root@linux-node1 src]# mv cfssl_linux-amd64 /opt/kubernetes/bin/cfssl
[root@linux-node1 src]#
[root@linux-node1 src]# cd /opt/kubernetes/bin/
[root@linux-node1 bin]# ll
total 18764
-rwxr-xr-x 1 root root 10376657 May 28 15:03 cfssl
-rwxr-xr-x 1 root root 6553600 May 28 15:03 cfssl-certinfo
-rwxr-xr-x 1 root root 2277873 May 28 15:03 cfssljson
2.3 三台机器上验证下环境配置是否有效
[root@linux-node1 src]# cfssl
cfssl cfssl-certinfo cfssljson
2.4 配置信任关系:
[root@linux-node1 ~]# ssh-keygen -t rsa
Generating public/private rsa key pair.
Enter file in which to save the key (/root/.ssh/id_rsa):
Enter passphrase (empty for no passphrase):
Enter same passphrase again:
Your identification has been saved in /root/.ssh/id_rsa.
Your public key has been saved in /root/.ssh/id_rsa.pub.
The key fingerprint is:
SHA256:z6A3+6rGKtd07qFQsTlwGEdt3fmfxUiy5NL7e3o+RPA root@linux-node1.example.com
The key's randomart image is:
+---[RSA 2048]----+
| ..o. . . . |
| + o . =.. |
| o o. + =oo |
| o + . + oEo|
| = S . ...o|
| ..o.+ . o.|
| .+.o+ o .. |
| . ..+o.+ ..o|
| o.ooo+o. o*o|
+----[SHA256]-----+
[root@linux-node1 ~]# ssh-copy-id linux-node1
/usr/bin/ssh-copy-id: INFO: Source of key(s) to be installed: "/root/.ssh/id_rsa.pub"
The authenticity of host 'linux-node1 (192.168.158.131)' can't be established.
ECDSA key fingerprint is SHA256:MYIB9miyH8O4wKVzQf12WI3PKDv2oGD/8fkYLB43EUs.
ECDSA key fingerprint is MD5:f9:50:8a:88:29:99:6f:9d:c3:50:08:0d:80:aa:d2:df.
Are you sure you want to continue connecting (yes/no)? yes
/usr/bin/ssh-copy-id: INFO: attempting to log in with the new key(s), to filter out any that are already installed
/usr/bin/ssh-copy-id: INFO: 1 key(s) remain to be installed -- if you are prompted now it is to install the new keys
root@linux-node1's password:
Number of key(s) added: 1
Now try logging into the machine, with: "ssh 'linux-node1'"
and check to make sure that only the key(s) you wanted were added.
[root@linux-node1 ~]# ssh-copy-id linux-node2
/usr/bin/ssh-copy-id: INFO: Source of key(s) to be installed: "/root/.ssh/id_rsa.pub"
The authenticity of host 'linux-node2 (192.168.158.132)' can't be established.
ECDSA key fingerprint is SHA256:MYIB9miyH8O4wKVzQf12WI3PKDv2oGD/8fkYLB43EUs.
ECDSA key fingerprint is MD5:f9:50:8a:88:29:99:6f:9d:c3:50:08:0d:80:aa:d2:df.
Are you sure you want to continue connecting (yes/no)? yes
/usr/bin/ssh-copy-id: INFO: attempting to log in with the new key(s), to filter out any that are already installed
/usr/bin/ssh-copy-id: INFO: 1 key(s) remain to be installed -- if you are prompted now it is to install the new keys
root@linux-node2's password:
Number of key(s) added: 1
Now try logging into the machine, with: "ssh 'linux-node2'"
and check to make sure that only the key(s) you wanted were added.
[root@linux-node1 ~]# ssh-copy-id linux-node3
/usr/bin/ssh-copy-id: INFO: Source of key(s) to be installed: "/root/.ssh/id_rsa.pub"
The authenticity of host 'linux-node3 (192.168.158.133)' can't be established.
ECDSA key fingerprint is SHA256:MYIB9miyH8O4wKVzQf12WI3PKDv2oGD/8fkYLB43EUs.
ECDSA key fingerprint is MD5:f9:50:8a:88:29:99:6f:9d:c3:50:08:0d:80:aa:d2:df.
Are you sure you want to continue connecting (yes/no)? yes
/usr/bin/ssh-copy-id: INFO: attempting to log in with the new key(s), to filter out any that are already installed
/usr/bin/ssh-copy-id: INFO: 1 key(s) remain to be installed -- if you are prompted now it is to install the new keys
root@linux-node3's password:
Number of key(s) added: 1
Now try logging into the machine, with: "ssh 'linux-node3'"
and check to make sure that only the key(s) you wanted were added.
2.5 验证是否可以ssh
[root@linux-node1 ~]# ssh linux-node1
Last login: Mon May 28 12:02:17 2018 from 192.168.158.1
[root@linux-node1 ~]# exit
logout
Connection to linux-node1 closed.
[root@linux-node1 ~]# ssh linux-node2
Last login: Mon May 28 11:55:56 2018 from 192.168.158.1
[root@linux-node1 ~]# exit
logout
Connection to linux-node2 closed.
[root@linux-node1 ~]# ssh linux-node3
Last login: Mon May 28 12:05:52 2018 from 192.168.158.1
[root@linux-node1 ~]# exit
logout
Connection to linux-node3 closed.
[root@linux-node1 ~]# scp /opt/kubernetes/bin/cfssl* 192.168.158.132:/opt/kubernetes/bin
cfssl 100% 10MB 56.2MB/s 00:00
cfssl-certinfo 100% 6400KB 68.6MB/s 00:00
cfssljson 100% 2224KB 55.2MB/s 00:00
[root@linux-node1 ~]# scp /opt/kubernetes/bin/cfssl* 192.168.158.133:/opt/kubernetes/bin
cfssl 100% 10MB 56.6MB/s 00:00
cfssl-certinfo 100% 6400KB 69.3MB/s 00:00
cfssljson 100% 2224KB 64.4MB/s 00:00
[root@linux-node1 ~]#
2.6 初始化cfssl
[root@linux-node1 ~]# cd /usr/local/src/
[root@linux-node1 src]# mkdir ssl && cd ssl
[root@linux-node1 ssl]# cfssl print-defaults config > config.json
[root@linux-node1 ssl]# cfssl print-defaults csr > csr.json
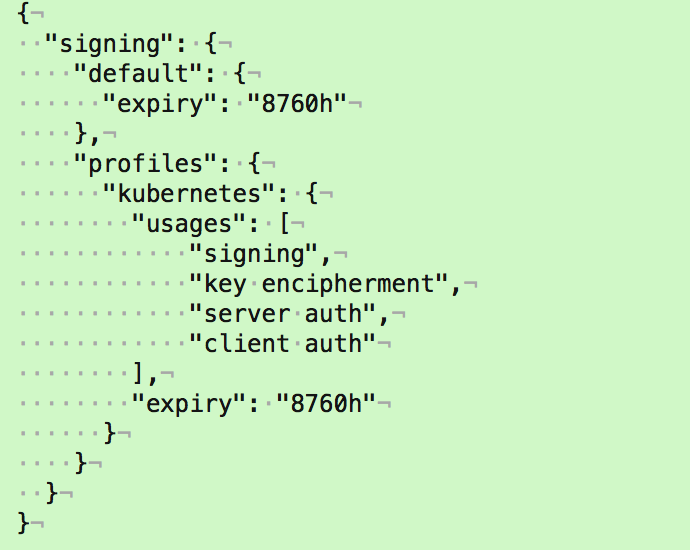
2.7 创建用来生成 CA 文件的 JSON 配置文件
[root@linux-node1 ssl]# vim ca-config.json
{
"signing": {
"default": {
"expiry": "8760h"
},
"profiles": {
"kubernetes": {
"usages": [
"signing",
"key encipherment",
"server auth",
"client auth"
],
"expiry": "8760h"
}
}
}
}
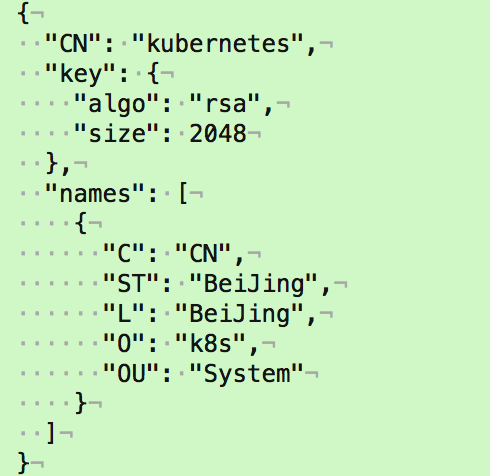
2.8.创建用来生成 CA 证书签名请求(CSR)的 JSON 配置文件
[root@linux-node1 ssl]# vim ca-csr.json
{
"CN": "kubernetes",
"key": {
"algo": "rsa",
"size": 2048
},
"names": [
{
"C": "CN",
"ST": "BeiJing",
"L": "BeiJing",
"O": "k8s",
"OU": "System"
}
]
}
2.9 生成CA证书(ca.pem)和密钥(ca-key.pem)
[root@ linux-node1 ssl]# cfssl gencert -initca ca-csr.json | cfssljson -bare ca
2018/05/28 15:44:51 [INFO] generating a new CA key and certificate from CSR
2018/05/28 15:44:51 [INFO] generate received request
2018/05/28 15:44:51 [INFO] received CSR
2018/05/28 15:44:51 [INFO] generating key: rsa-2048
2018/05/28 15:44:52 [INFO] encoded CSR
2018/05/28 15:44:52 [INFO] signed certificate with serial number 302019907392851974411889736490835358144222332453
[root@ linux-node1 ssl]# ls -l ca*
-rw-r--r-- 1 root root 290 Mar 4 13:45 ca-config.json
-rw-r--r-- 1 root root 1001 Mar 4 14:09 ca.csr
-rw-r--r-- 1 root root 208 Mar 4 13:51 ca-csr.json
-rw------- 1 root root 1679 Mar 4 14:09 ca-key.pem
-rw-r--r-- 1 root root 1359 Mar 4 14:09 ca.pem
2.10 分发证书
# cp ca.csr ca.pem ca-key.pem ca-config.json /opt/kubernetes/ssl
SCP证书到k8s-node1和k8s-node2节点
[root@linux-node1 ssl]# scp ca.csr ca.pem ca-key.pem ca-config.json 192.168.158.132:/opt/kubernetes/ssl/
ca.csr 100% 1001 921.4KB/s 00:00
ca.pem 100% 1359 1.3MB/s 00:00
ca-key.pem 100% 1675 1.7MB/s 00:00
ca-config.json 100% 291 394.3KB/s 00:00
[root@linux-node1 ssl]# scp ca.csr ca.pem ca-key.pem ca-config.json 192.168.158.133:/opt/kubernetes/ssl/
ca.csr 100% 1001 991.1KB/s 00:00
ca.pem 100% 1359 1.6MB/s 00:00
ca-key.pem 100% 1675 1.7MB/s 00:00
ca-config.json 100% 291 116.5KB/s 00:00
[root@linux-node1 ssl]# ls /opt/kubernetes/ssl/ -l
total 16
-rw-r--r-- 1 root root 291 May 28 15:47 ca-config.json
-rw-r--r-- 1 root root 1001 May 28 15:47 ca.csr
-rw------- 1 root root 1675 May 28 15:47 ca-key.pem
-rw-r--r-- 1 root root 1359 May 28 15:47 ca.pem
------------------------------------END----------------------------------------------

