Spring Cloud Zuul集成Swagger
写在前面 本文参考以下文章,请参考原文
Spring Cloud Zuul中使用Swagger汇总API接口文档
待解决问题
在微服务架构中,Swagger为各个微服务生成的API文档都都离散在各个微服务中,不方便查看,我们希望将这些接口都整合到一个文档中。那可以用Spring Cloud Zuul来解决这个问题
Spring Cloud Zuul 集成Swagger
1.准备服务注册中心eureka-server 请参考 Spring Cloud Eureka 服务治理--服务注册与发现
2.创建微服务swagger-service-a
step1. 创建微服务swagger-service-a(Spring Boot项目),添加eureka-client起步依赖,web起步依赖 和swagger依赖

<dependency>
            <groupId>org.springframework.boot</groupId>
            <artifactId>spring-boot-starter-web</artifactId>
        </dependency>
        <dependency>
            <groupId>org.springframework.cloud</groupId>
            <artifactId>spring-cloud-starter-netflix-eureka-client</artifactId>
        </dependency>
        <!-- https://mvnrepository.com/artifact/io.springfox/springfox-swagger2 -->
        <dependency>
            <groupId>io.springfox</groupId>
            <artifactId>springfox-swagger2</artifactId>
            <version>2.9.2</version>
        </dependency>
        <dependency>
            <groupId>io.springfox</groupId>
            <artifactId>springfox-swagger-ui</artifactId>
            <version>2.9.2</version>
        </dependency>
step2.在配置类添加注解@EnableDiscoveryClient ,,将当前应用 添加到 服务治理体系中,开启微服务注册与发现。
step3.配置swagger

package com.example.swaggerservicea;
import org.springframework.context.annotation.Bean;
import org.springframework.context.annotation.Configuration;

import springfox.documentation.builders.ApiInfoBuilder;
import springfox.documentation.builders.PathSelectors;
import springfox.documentation.builders.RequestHandlerSelectors;
import springfox.documentation.service.ApiInfo;
import springfox.documentation.spi.DocumentationType;
import springfox.documentation.spring.web.plugins.Docket;
import springfox.documentation.swagger2.annotations.EnableSwagger2;


@Configuration
@EnableSwagger2
public class SwaggerConfig {
    @Bean
    public Docket api() {

        return new Docket(DocumentationType.SWAGGER_2)
                .apiInfo(apiInfo())
                .select()
                .apis(RequestHandlerSelectors.any())
                .paths(PathSelectors.any()).build();
    }

    private ApiInfo apiInfo() {
        return new ApiInfoBuilder()
                .title("swagger-service-a 实例文档")
                .description("swagger-service-a 实例文档 1.0")
                .termsOfServiceUrl("https:github")
                .version("1.0")
                .build();
    }

}
step4.application.properties文件中添加配置

#微服务基本信息
spring.application.name=swagger-service-a
server.port=10010
#注册中心
eureka.client.serviceUrl.defaultZone=http://localhost:1001/eureka/
#要生成文档的package
swagger.base-package=com.example
step5.添加一个微服务提供的功能

import org.springframework.beans.factory.annotation.Autowired;
import org.springframework.cloud.client.discovery.DiscoveryClient;
import org.springframework.web.bind.annotation.GetMapping;
import org.springframework.web.bind.annotation.RestController;

@RestController
public class AaaController {
    @Autowired
    DiscoveryClient discoveryClient;

    @GetMapping("/service-a")
    public String dc() {
        String services = "service-a Services: " + discoveryClient.getServices();
        System.out.println(services);
        return services;
    }
}
step6.启动微服务,访问 http://localhost:10010/swagger-ui.html
3.创建微服务swagger-service-b (参考swagger-service-a ), 启动微服务swagger-service-b并访问http://localhost:10020/swagger-ui.html
4.构建API网关并整合Swagger
step1.创建API网关微服务swagger-api-gateway,添加eureka-client起步依赖,zuul起步依赖 和 swagger依赖 :spring-cloud-starter-netflix-eureka-client,spring-cloud-starter-netflix-zuul

        <dependency>
            <groupId>org.springframework.cloud</groupId>
            <artifactId>spring-cloud-starter-netflix-eureka-client</artifactId>
        </dependency>
        <dependency>
            <groupId>org.springframework.cloud</groupId>
            <artifactId>spring-cloud-starter-netflix-zuul</artifactId>
        </dependency>
        <!-- https://mvnrepository.com/artifact/io.springfox/springfox-swagger2 -->
        <dependency>
            <groupId>io.springfox</groupId>
            <artifactId>springfox-swagger2</artifactId>
            <version>2.9.2</version>
        </dependency>
        <dependency>
            <groupId>io.springfox</groupId>
            <artifactId>springfox-swagger-ui</artifactId>
            <version>2.9.2</version>
        </dependency>
step2.在配置类添加注解@SpringCloudApplication ,@EnableZuulProxy
step3.配置swagger

import org.springframework.context.annotation.Bean;
import org.springframework.context.annotation.Configuration;

import springfox.documentation.builders.ApiInfoBuilder;
import springfox.documentation.builders.PathSelectors;
import springfox.documentation.builders.RequestHandlerSelectors;
import springfox.documentation.service.ApiInfo;
import springfox.documentation.spi.DocumentationType;
import springfox.documentation.spring.web.plugins.Docket;
import springfox.documentation.swagger2.annotations.EnableSwagger2;


@Configuration
@EnableSwagger2
public class SwaggerConfig {
    @Bean
    public Docket api() {

        return new Docket(DocumentationType.SWAGGER_2)
                .apiInfo(apiInfo())
                .select()
                .apis(RequestHandlerSelectors.any())
                .paths(PathSelectors.any()).build();
    }

    private ApiInfo apiInfo() {
        return new ApiInfoBuilder()
                .title("swagger-service 实例文档")
                .description("swagger-service 实例文档 1.0")
                .termsOfServiceUrl("https:github")
                .version("1.0")
                .build();
    }

}
step4.配置swagger

package com.example.swaggerapigateway;

import java.util.ArrayList;
import java.util.List;

import org.springframework.context.annotation.Primary;
import org.springframework.stereotype.Component;

import springfox.documentation.swagger.web.SwaggerResource;
import springfox.documentation.swagger.web.SwaggerResourcesProvider;

@Component
@Primary
class DocumentationConfig implements SwaggerResourcesProvider {
    @Override
    public List<SwaggerResource> get() {
        List resources = new ArrayList<>();
        resources.add(swaggerResource("service-a", "/swagger-service-a/v2/api-docs", "2.0"));
        resources.add(swaggerResource("service-b", "/swagger-service-b/v2/api-docs", "2.0"));
        return resources;
    }

    private SwaggerResource swaggerResource(String name, String location, String version) {
        SwaggerResource swaggerResource = new SwaggerResource();
        swaggerResource.setName(name);
        swaggerResource.setLocation(location);
        swaggerResource.setSwaggerVersion(version);
        return swaggerResource;
    }
}
step5.application.properties文件中添加配置

#微服务基本信息
spring.application.name=swagger-api-gateway
server.port=10030
#注册中心
eureka.client.serviceUrl.defaultZone=http://localhost:1001/eureka/
#要生成文档的package
swagger.base-package=com.example
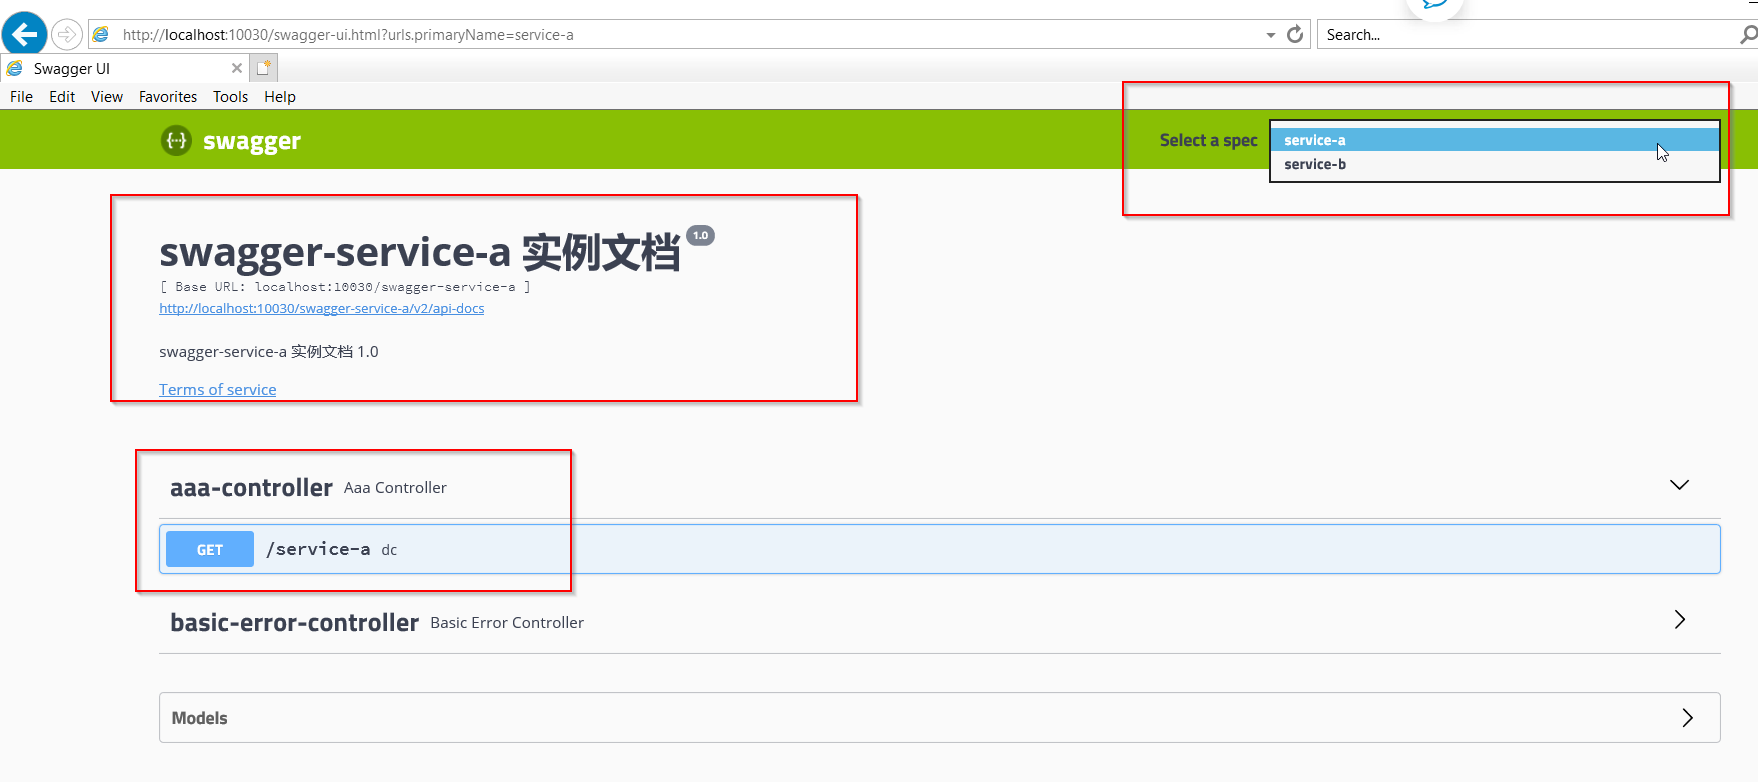
step6.启动微服务,访问 http://localhost:10030/swagger-ui.html


