【Mac系统 + Git】之上传项目代码到github上以及删除某个文件夹
目录
- 一、安装Git
- 二、创建.ssh文件
- 三、Github账号中添加Key
- 四、创建版本库Repository
- 五、上传更新新的代码到github上
- 六、删除github中某个文件夹
- 附录:github常见错误及扩展
一、安装Git
参考文章:《Mac下使用Git上传代码到Github仓库》
下载地址:https://git-scm.com/download/mac
下载后为.dmg文件,解压后双击安装.pkg文件

输入指令:
test:~ zhan$ git --version
git version 2.18.0
二、创建.ssh文件 返回目录
打开终端,输入下面指令,查看.ssh是否存在
test:~ zhan$ cd ~/.ssh
test:.ssh zhan$
test:~ zhan$ cd .ssh/
test:.ssh zhan$ ls
known_hosts
查看文件夹下的文件,只有known_hosts,感觉少了点什么
如果没有.ssh文件夹,请参考《Mac如何添加生成ssh》 、《Mac生成添加ssh公钥》
假设你在Github注册账号为: xxxx@xxx.com
Terminal中运行
//默认直接按 回车 就可以了
test:.ssh zhan$ ssh-keygen -t rsa -C xxx@xxx.com
Generating public/private rsa key pair.
Enter file in which to save the key (/Users/zhan/.ssh/id_rsa):
Enter passphrase (empty for no passphrase):
Enter same passphrase again:
Your identification has been saved in /Users/zhan/.ssh/id_rsa.
Your public key has been saved in /Users/zhan/.ssh/id_rsa.pub.
The key fingerprint is:
SHA256:xCNUrcwiwpMVb2Se4zucMD0V9+SX+WeZ4/TdAdX1Spk xxx@xxx.com
The key's randomart image is:
+---[RSA 2048]----+
|    ..+.o.. .  .+|
|    .* o o.+  .=o|
| . o  Bo=.  o.E .|
|  = .+.=+.   o.oo|
|   oo.+.S     .*+|
|     + +      o.B|
|      =        .+|
|       .         |
|                 |
+----[SHA256]-----+
输入命令:ls,查看.ssh下的文件
id_rsa id_rsa.pub known_hosts
多出两个文件,.pub是公钥,另一个是密钥。
三、Github账号中添加Key 返回目录
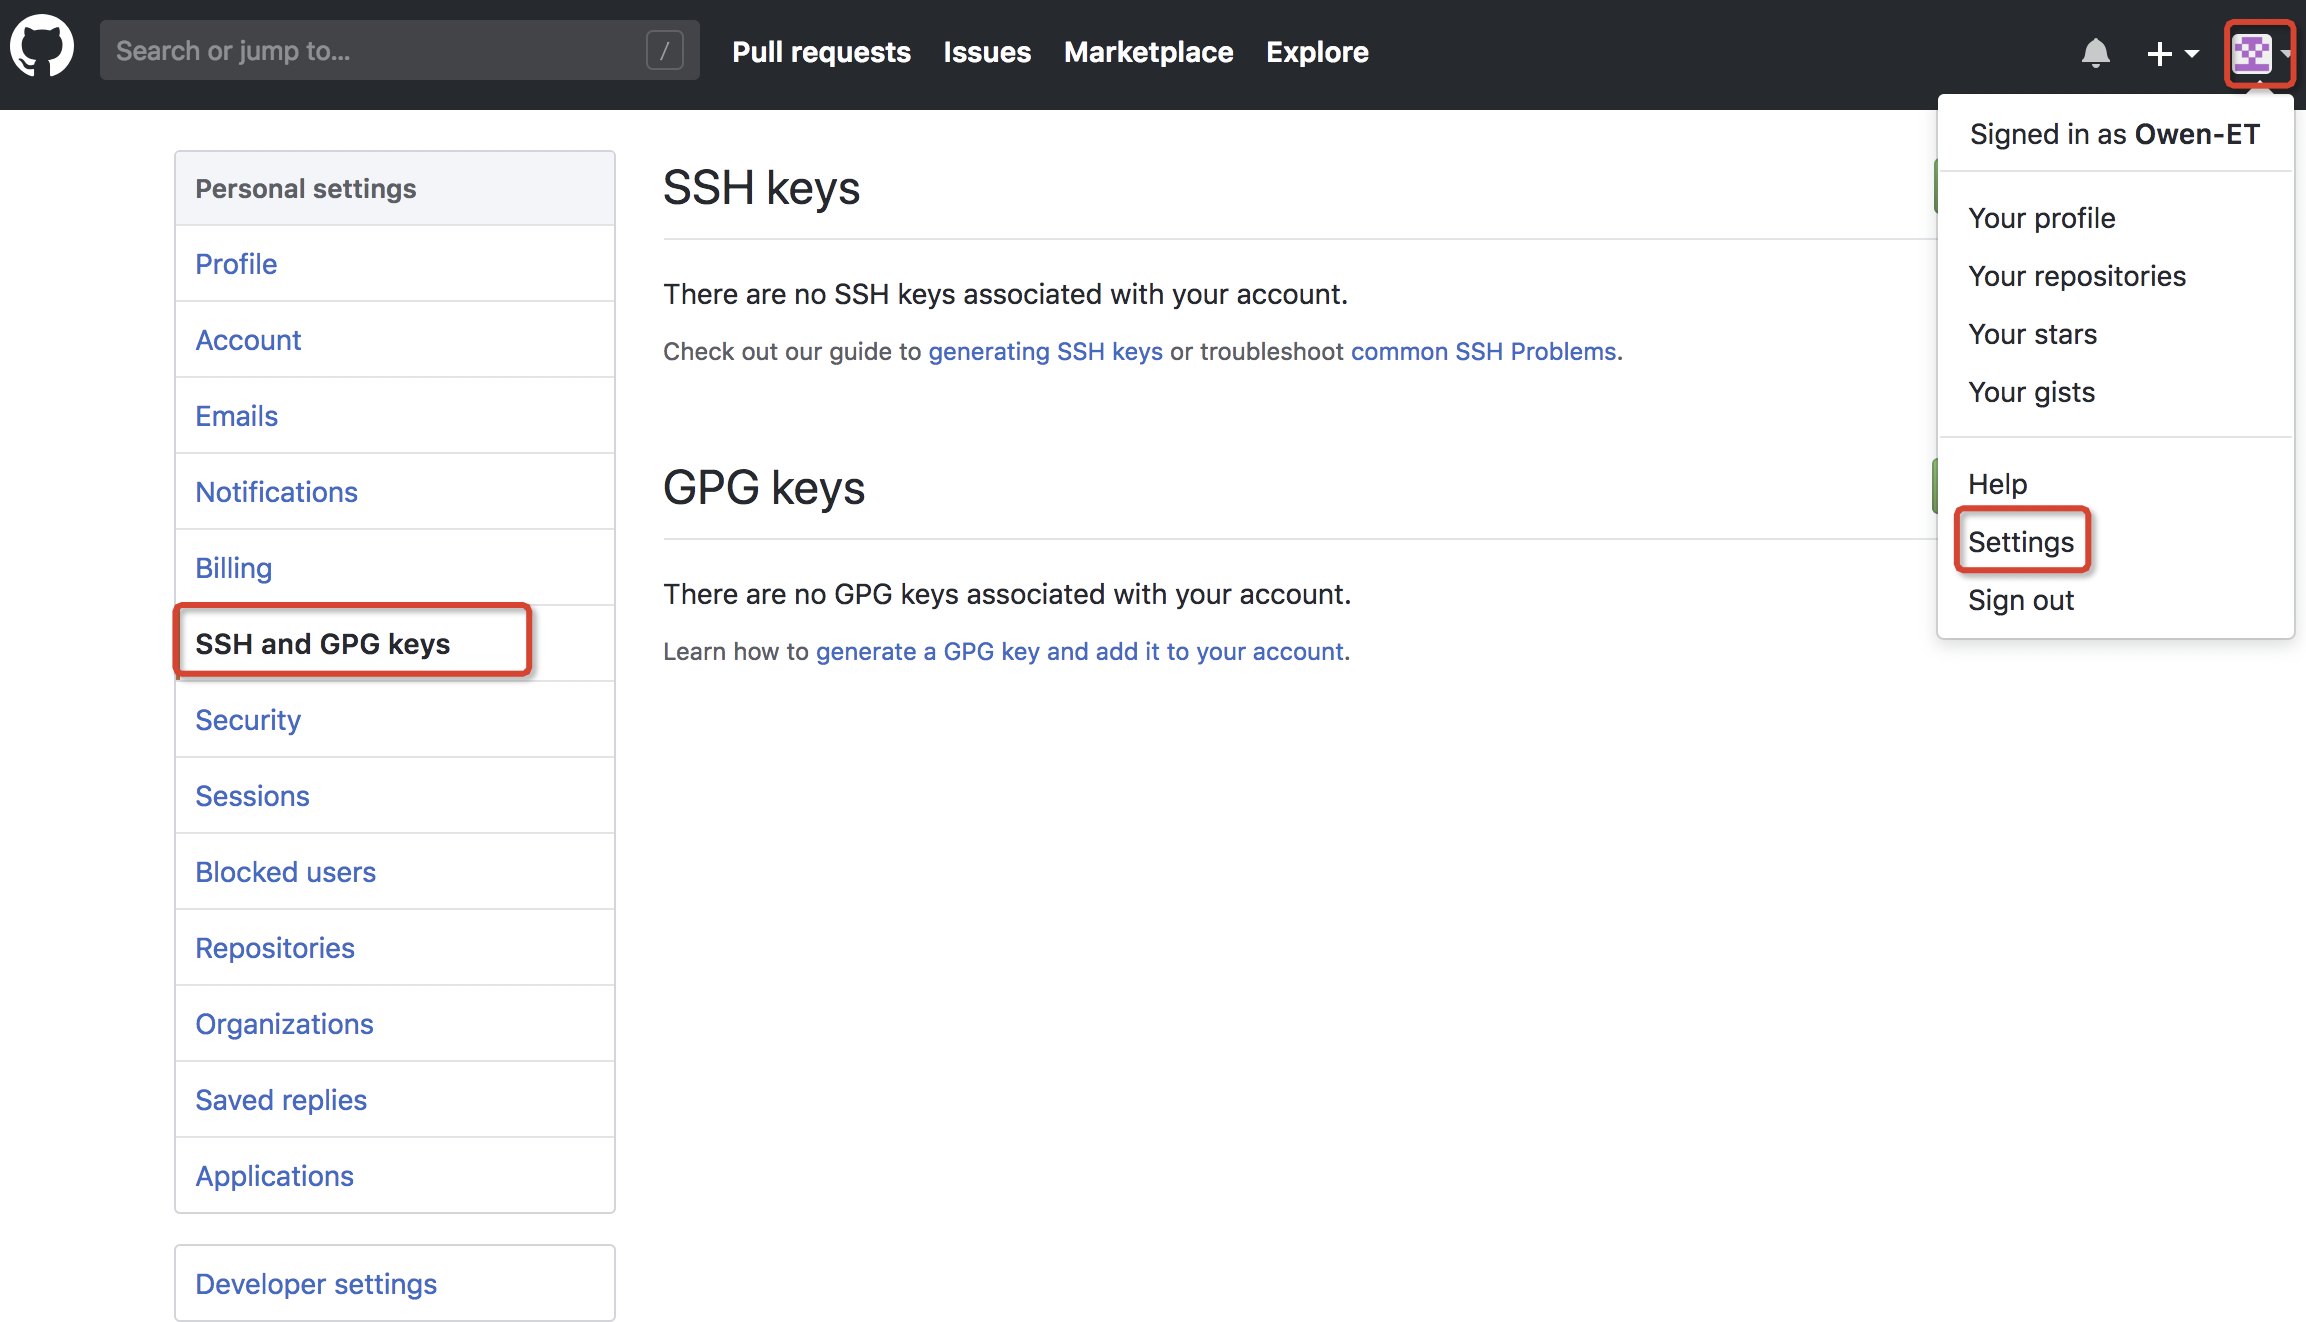
点击【头像】 ->Settings ->SSH and GPG keys ->
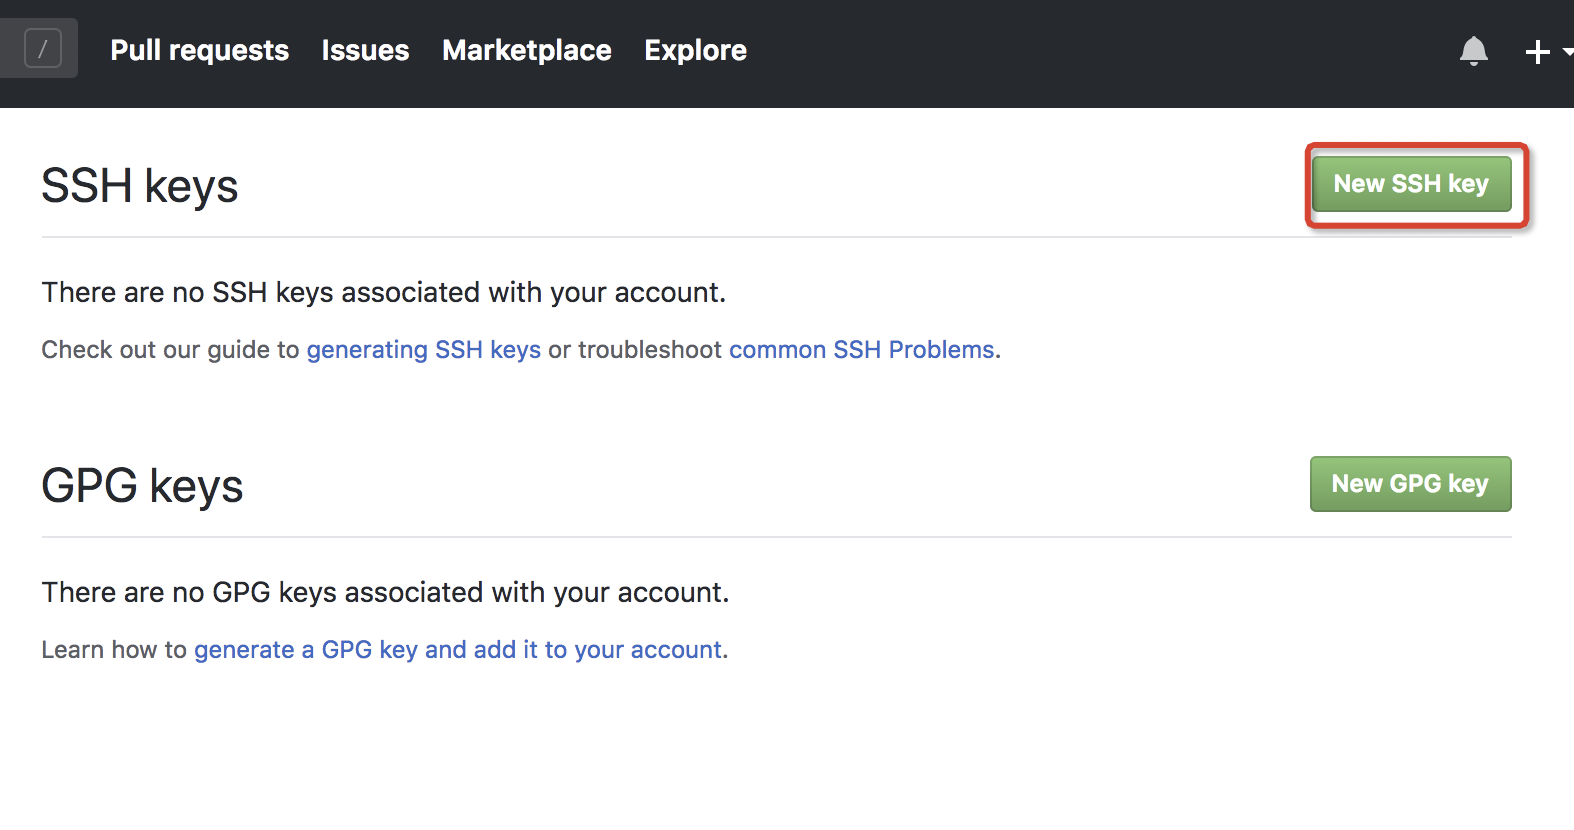
点击【New SSH key】按钮
输入Title、Key
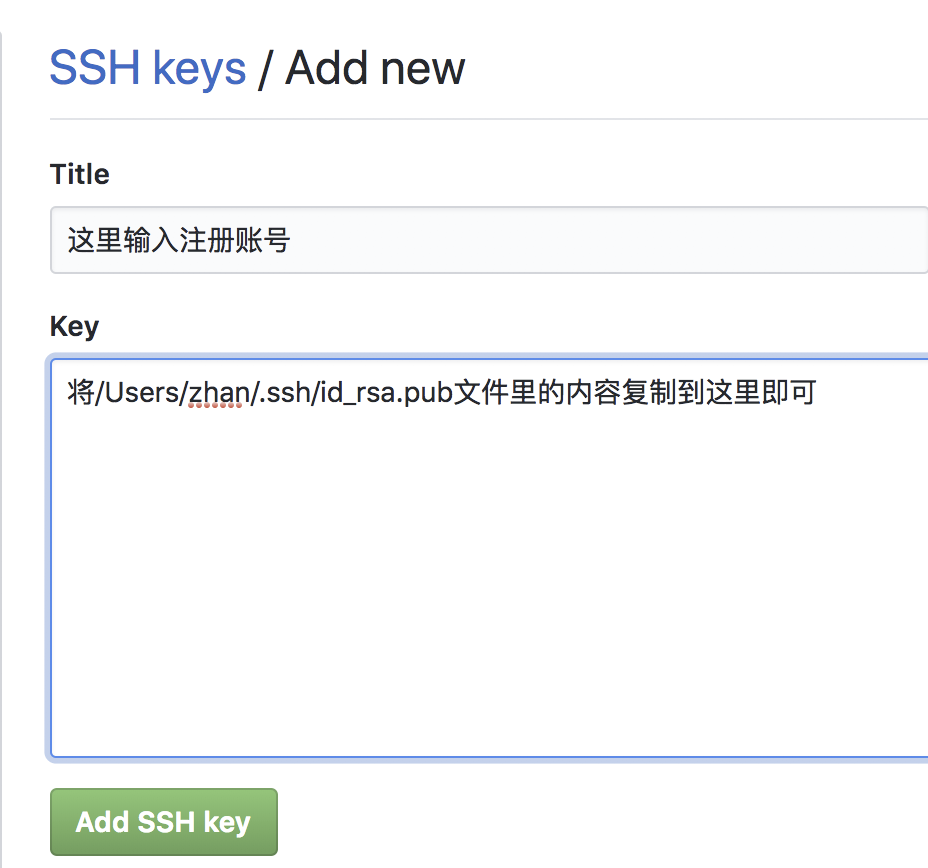
执行下面的命令行,直接复制文件里的内容:
pbcopy < ~/.ssh/id_rsa.pub
或查看:
cat ~/.ssh/id_rsa.pub
复制到里面后,点击【Add SSH key】按钮。
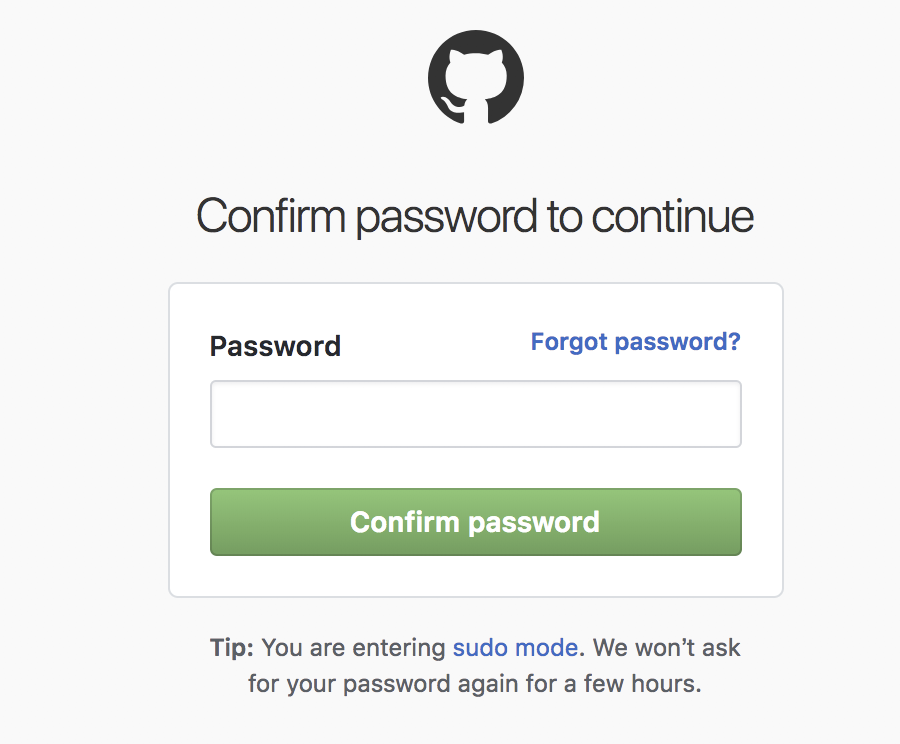
下面继续确认登录github的密码:
如果添加Key成功的话,如下图所示,同时你也会在邮箱里收到一个提醒邮件,内容是你添加了一个Key.


四、创建版本库Repository 返回目录
首先,返回到主页,www.github.com

进入到了 “Create a New Repository”页面:

紧接着按照以下步骤进行本地仓库的创建及代码上传。打开终端,输入以下命令:
$ echo "TestRepository" >> README.md  //新建一个README文档并添加内容,若上一步勾选了创建README.md,提交时导致冲突
$ git init //初始化本地仓库
$ git add README.md   //添加刚刚创建的README文档
$ git commit -m "你的注释...."   //提交到本地仓库,并写一些注释
$ git remote add origin git@github.com:yourname/xxxx.git
//连接远程仓库并建了一个名叫:origin的别名,当然可以为其他名字,但是origin一看就知道是别名,youname记得替换成你的用户名
$ git push -u origin master
//将本地仓库的文件提交到别名为origin的地址的master分支下,-u为第一次提交,需要创建master分支,下次就不需要了
或者:
//创建 README.md 文件, 并向里面写入`This Is My First Testing Description....`字符串。

echo "# This Is My First Testing Description...." >> README.md
git init
git add README.md
git commit -m "first commit" //commit备注
git remote add origin https://github.com/imthinktwice/TestRepository.git
git push -u origin master
但是执行git commit -m "first commit"报错:
test:Git zhan$ git commit -m "first commit"
*** Please tell me who you are.
Run
git config --global user.email "you@example.com"
git config --global user.name "Your Name"
to set your account's default identity.
Omit --global to set the identity only in this repository.
fatal: unable to auto-detect email address (got 'zhan@test.(none)')
参考:《git fatal: unable to auto-detect email address》
解决办法,输入指令:
git config --global user.email "you@example.com"

#查看本地配置
git config --local -l
#编辑config文件
git config --local -e

如何在终端编辑文件,参照:《Mac Git 配置全局gitconfig》
再执行下面:
#再执行命令
git commit -m "first commit"
#显示结果
test:Git zhan$ git commit -m "first commit"
[master (root-commit) 4d3f7a6] first commit
 1 file changed, 1 insertion(+)
 create mode 100644 README.md
commit成功!!
再继续执行命令:
git remote add origin git@github.com:yourname/xxxx.git

git push -u origin master
=====================================================
#result:
Enumerating objects: 3, done.
Counting objects: 100% (3/3), done.
Writing objects: 100% (3/3), 221 bytes | 221.00 KiB/s, done.
Total 3 (delta 0), reused 0 (delta 0)
remote:
remote: Create a pull request for 'master' on GitHub by visiting:
remote:      https://github.com/Owen-ET/TestRepository/pull/new/master
remote:
To github.com:Owen-ET/TestRepository.git
 * [new branch]      master -> master
Branch 'master' set up to track remote branch 'master' from 'origin'.
github中创建成功!!!!
再返回github网址查看:
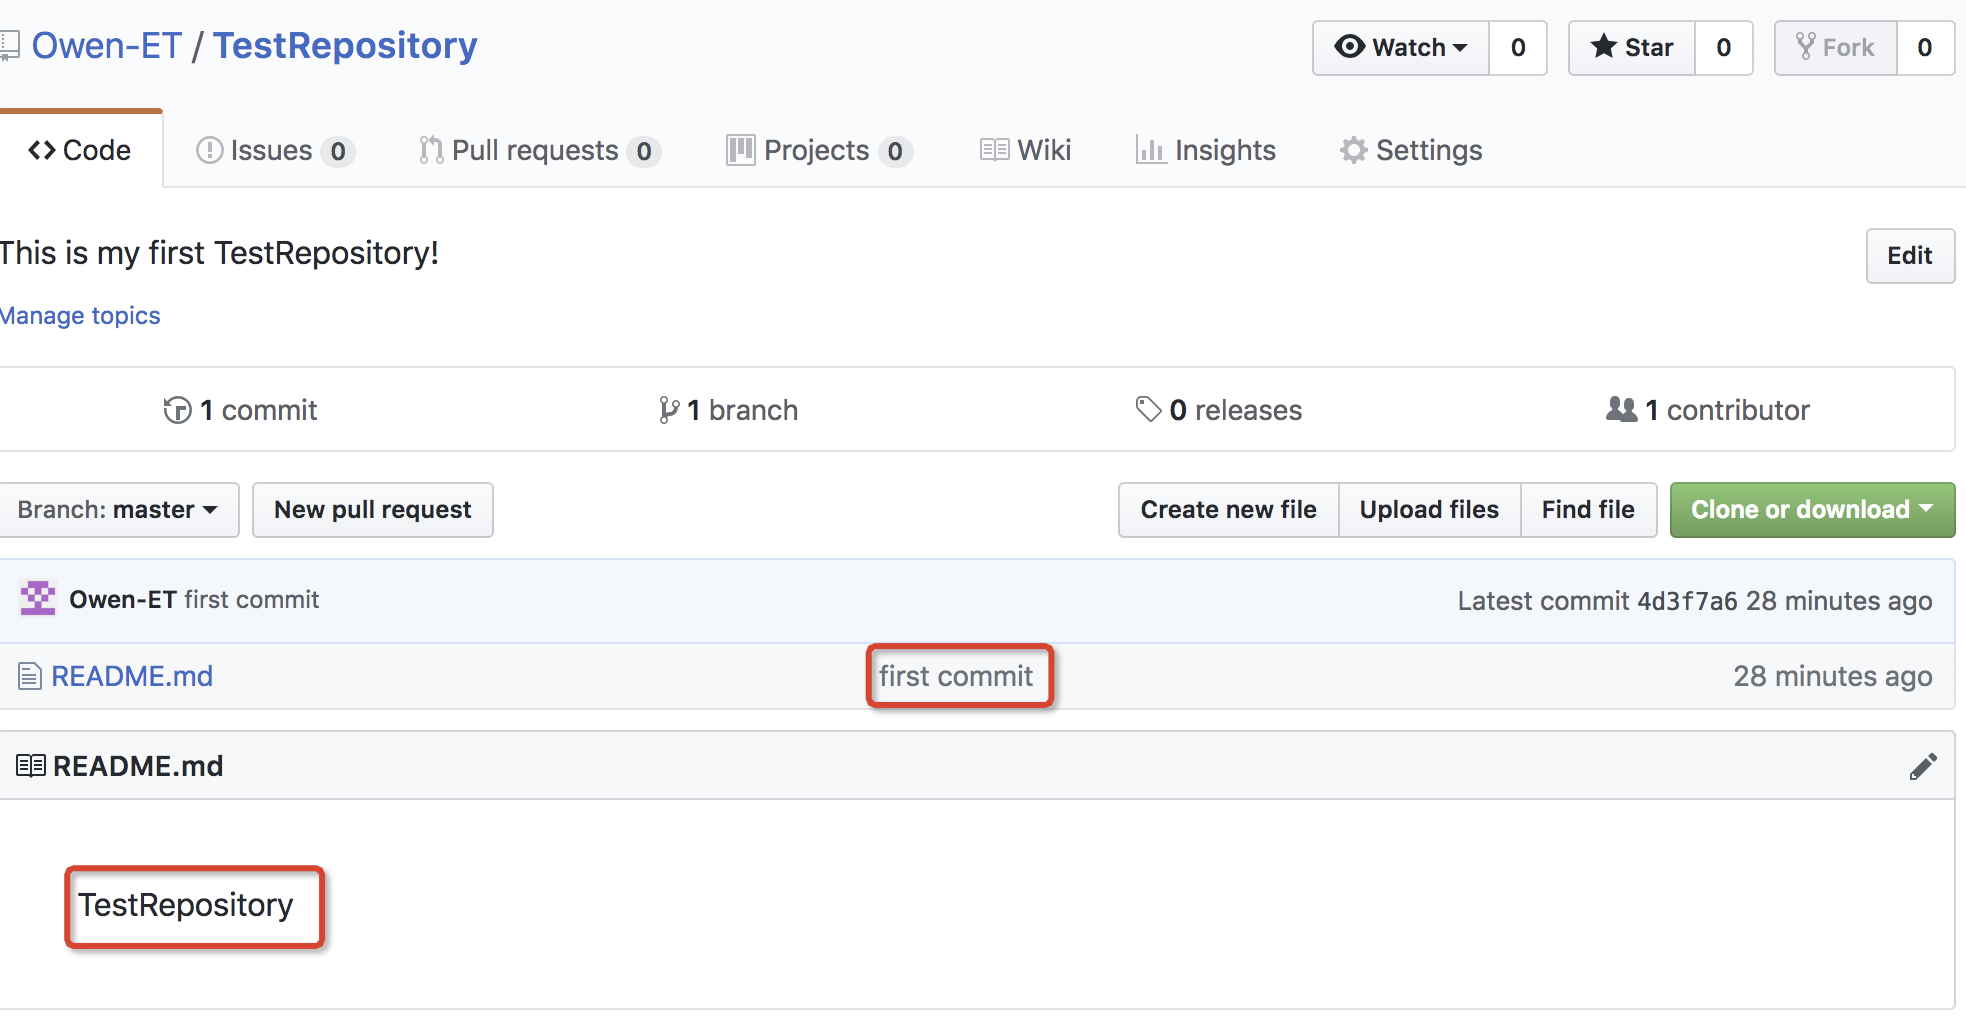
看看,上传github上成功!!
五、上传更新新的代码到github上 返回目录
首先在之前上传的项目中,新建一个子项目,如图
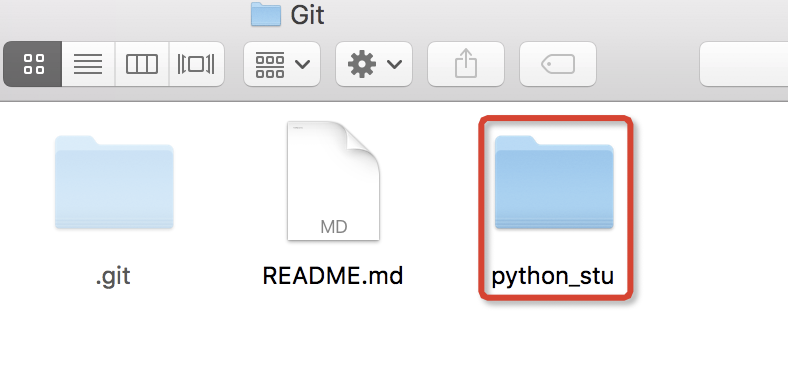
输入命令:git status
查看项目下文件状态,如下:
On branch master
Your branch is up to date with 'origin/master'.

Untracked files:
  (use "git add <file>..." to include in what will be committed)

	.DS_Store
	python_stu/

nothing added to commit but untracked files present (use "git add" to track)
其中“python_stu/”文件夹是我新建的,上传到github需要add添加
所以执行命令:
#添加文件夹
git add python_stu/

#提交文件夹,并注释
git commit -m "上传py文件2018-09-19"

#继续查看状态,python_stu/文件夹已添加
git status

On branch master
Your branch is ahead of 'origin/master' by 1 commit.
  (use "git push" to publish your local commits)

Untracked files:
  (use "git add <file>..." to include in what will be committed)

	.DS_Store

nothing added to commit but untracked files present (use "git add" to track)
继续执行
test:Git zhan$ git pull   #同步代码

Already up to date.

test:Git zhan$ git push origin   #把代码推到服务器上

Enumerating objects: 5, done.

Counting objects: 100% (5/5), done.

Delta compression using up to 4 threads.

Compressing objects: 100% (3/3), done.

Writing objects: 100% (4/4), 866 bytes | 866.00 KiB/s, done.

Total 4 (delta 0), reused 0 (delta 0)

To github.com:Owen-ET/TestRepository.git

   4d3f7a6..9110914  master -> master
上面可参考文章:《mac下如何把项目提交、更新到gitHub上》
返回到github上,如图:

六、删除github中某个文件夹 返回目录
只需要一下几步就可以完成删除
# 删除文件夹
git rm -r --cached python_stu/

# 提交,添加操作说明
git commit -m '删除stu文件夹'

# 将本次更改更新到github项目上去
git push -u origin master
参考文章:《删除github中某个文件夹》
汇总:
GitHub上传项目
126,(66)

先cd到git文件夹下,把新建的项目复制到git下
再查看状态:git status

#添加文件夹
git add python_stu/

#提交文件夹,并注释
git commit -m "上传py文件2018-09-19"

#继续查看状态,python_stu/文件夹已添加
git status

test:Git zhan$ git pull   #同步代码

test:Git zhan$ git push origin   #把代码推到服务器上

====================================

删除github上的文件

# 删除target文件夹
git rm -r --cached python_stu/

# 提交,添加操作说明
git commit -m '删除stu文件夹'

# 将本次更改更新到github项目上去
git push -u origin master
七、附录: 返回目录
================扩展:==================================
.git目录看不到怎么办,参考:《Mac上如果看不到.git目录的解决方法》
.git路径为就是自己初始化init创建git时的路径!
=======================================================
posted on 2019-06-08 09:50 dreamhighqiu 阅读(1120) 评论(0) 编辑 收藏 举报


