小程序自定义组件理解
1.先从page文件夹的页面开始,然后我们进行代码编写,按照不用模板的方式书写
2.创建一个component文件夹,然后将page页面wxml代码转移,此时最好设置一些可变参数,已方便之后使用。
3.在代码转移时,我们一般来说是界面从main.wxml->main.js->component.wxml->component.js->component.json->main.json
4.嵌套模块组件的方法:main.wxml->main.js->bigcomponent.wxml->bigcomponent.js->bigcomponent.json->main.json->smallcomponent.wxml->smallcomponent.js->smallcomponent.json->bigcomponent.json
演示理解
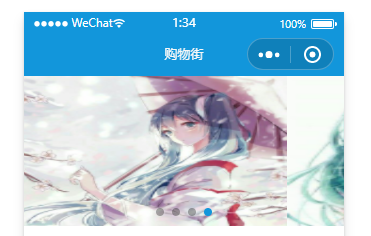
1.轮播图演示
main.wxml
<w-swiper list="{{banners}}" />
main.js
data: {
banners: ['url1', 'url2', 'url3', 'url4']
}
component.wxml
<swiper class="swiper" circular="true"autoplay="true" interval="3000" duration="300" indicator-dots="true" indicator-active-color="#1296db">
<block wx:for="{{list}}" wx:key="{{index}}">
<swiper-item class="swiper-item">
<image class="image"src="{{item}}"/>
</swiper-item>
</block>
</swiper>
component.js
properties: {
    list: {
    type: Array,
    value: []
    }
},
component.json
{
"component": true,
"usingComponents": {}
}
main.json
{
"usingComponents": {
    "w-swiper": "../../components/w-swiper/w-swiper",
}
}
轮播图演示界面图
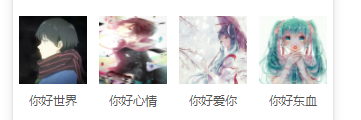
2.推荐数据的显示演示
main.wxml
<w-recommend recommends="{{recommends}}" />
main.js
data: {
recommends: [{
image: 'url4',
text: '你好世界'
}, {
image: 'url3',
text: '你好心情'
},
{
image: 'url2',
text: '你好爱你'
},
{
image: 'url1',
text: '你好东血'
}
]
}
component.wxml
<view class="recommend">
<block wx:for="{{recommends}}" wx:key="{{index}}">
<view class="recommend-item">
<image src="{{item.image}}" />
<view>{{item.text}}</view>
</view>
</block>
</view>
component.js
properties: {
    recommends: {
    type: Array,
    value: []
    }
},
component.json
{
"component": true,
"usingComponents": {}
}
main.json
{
"usingComponents": {
    "w-recommend": "../childcpns/w-recommend/w-recommend"
}
}
推荐数据的显示演示界面图
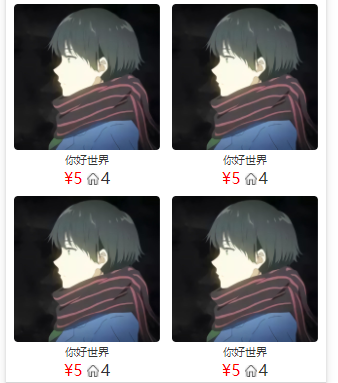
3.商品数据展示演示(高级—嵌套模块组件)
main.wxml
<w-goods goods="{{goods[currentType].list}}" />
main.js
data: {
    //服务器对应数据改变
goods: {
'pop': {
    page: 0,
    list: [{
    image: 'ur1',
    title: '你好世界',
    price: 5,
    cfav: 4
    }, {
    image: 'url2',
    title: '你好世界',
    price: 5,
    cfav: 4
    }, {
    ...
    }, {
    ...
    }]
},
'new': {
    ......
},
'sell': {
    ......
}
}
}
bigcomponent.wxml
<view class="goods">
<block wx:for="{{goods}}" wx:key="{{index}}">
    <w-goods-item class="item" item="{{item}}" />
</block>
</view>
bigcomponent.js
properties: {
goods: {
    type: Array,
    value: []
}
},
main.json
{
"usingComponents": {
    "w-goods": "../childcpns/w-goods/w-goods"
}
}
smallcomponent.wxml
<view class="goods-item">
<image class="image" src="{{item.image}}" mode="widthFix" />
<view class="desc-info">
    <view class="title">{{item.title}}</view>
    <view class="info">
    <text class="price">¥{{item.price}}</text>
    <image  class="icon" src="../../assets/home.png"/>
    <text class="cfav">{{item.cfav}}</text>
    </view>
</view>
</view>
smallcomponent.js
properties: {
item: {
    type: 'object',
    value: {}
}
},
smallcomponent.json
{
    "component": true,
    "usingComponents": {}
}
bigcomponent.json
{
"component": true,
"usingComponents": {
    "w-goods-item": "../w-goods-item/w-goods-item"
}
}
商品数据展示演示界面图


【推荐】国内首个AI IDE,深度理解中文开发场景,立即下载体验Trae
【推荐】编程新体验,更懂你的AI,立即体验豆包MarsCode编程助手
【推荐】抖音旗下AI助手豆包,你的智能百科全书,全免费不限次数
【推荐】轻量又高性能的 SSH 工具 IShell:AI 加持,快人一步
· AI与.NET技术实操系列:向量存储与相似性搜索在 .NET 中的实现
· 基于Microsoft.Extensions.AI核心库实现RAG应用
· Linux系列:如何用heaptrack跟踪.NET程序的非托管内存泄露
· 开发者必知的日志记录最佳实践
· SQL Server 2025 AI相关能力初探
· 震惊!C++程序真的从main开始吗?99%的程序员都答错了
· 【硬核科普】Trae如何「偷看」你的代码?零基础破解AI编程运行原理
· 单元测试从入门到精通
· 上周热点回顾(3.3-3.9)
· winform 绘制太阳,地球,月球 运作规律