

https://www.bilibili.com/video/BV1nY411a7T8?p=14
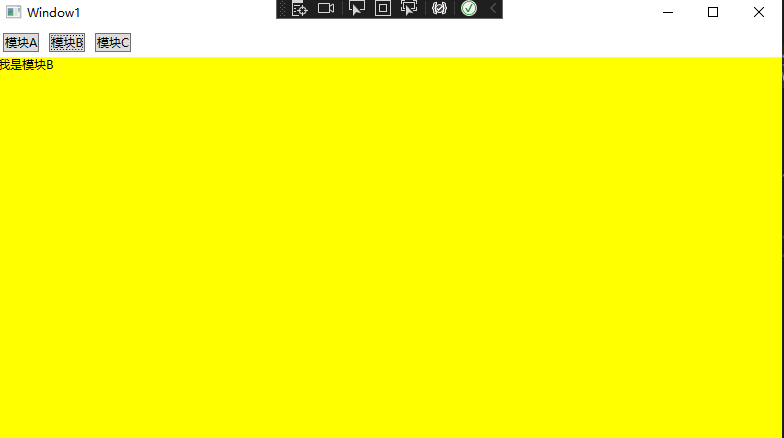
点击模块A、B、C 下方切换ABC对应的模块页面
1 2 3 4 5 6 7 8 | <prism:PrismApplication x:Class="WPF01.App" xmlns:prism="http://prismlibrary.com/" xmlns="http://schemas.microsoft.com/winfx/2006/xaml/presentation" xmlns:x="http://schemas.microsoft.com/winfx/2006/xaml" xmlns:local="clr-namespace:WPF01" > <Application.Resources> </Application.Resources></prism:PrismApplication> |

using DryIoc;
using Prism.DryIoc;
using Prism.Ioc;
using System.Windows;
using WPF01.Views;

namespace WPF01
{
    public partial class App : PrismApplication
    {
        protected override Window CreateShell()
        {
            return Container.Resolve<MainView>();
        }
        protected override void RegisterTypes(IContainerRegistry containerRegistry)
        {
        }
    }
}
MainView.xaml
<Window x:Class="WPF01.Views.MainView"
        xmlns="http://schemas.microsoft.com/winfx/2006/xaml/presentation"
        xmlns:x="http://schemas.microsoft.com/winfx/2006/xaml"
        xmlns:d="http://schemas.microsoft.com/expression/blend/2008"
        xmlns:mc="http://schemas.openxmlformats.org/markup-compatibility/2006"
        xmlns:local="clr-namespace:WPF01.Views"
        xmlns:prism="http://prismlibrary.com/"
        prism:ViewModelLocator.AutoWireViewModel="True"
        mc:Ignorable="d"
        Title="Window1" Height="450" Width="800">
    <Grid>
        <Grid.RowDefinitions>
            <RowDefinition Height="auto"></RowDefinition>
            <RowDefinition></RowDefinition>
        </Grid.RowDefinitions>
        <WrapPanel>
            <Button Content="模块A" Margin="5"  Command="{Binding OpenCommand }" CommandParameter="ViewA" ></Button>
            <Button Content="模块B" Margin="5"  Command="{Binding OpenCommand }" CommandParameter="ViewB" ></Button>
            <Button Content="模块C" Margin="5"  Command="{Binding OpenCommand }" CommandParameter="ViewC" ></Button>
        </WrapPanel>
        <ContentControl Grid.Row="1"  Content="{Binding Body}" ></ContentControl>
    </Grid>
</Window>
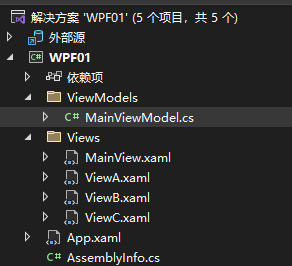
Views:
创建用户控件页面UserControl 分别放置ABC三个
ViewModels下创建 MainViewModel
using Prism.Commands;
using Prism.Mvvm;
using WPF01.Views;

namespace WPF01.ViewModels
{
    public class MainViewModel : BindableBase
    {
        /// <summary>
        /// 定义带参代理给前端调用
        /// </summary>
        public DelegateCommand<string> OpenCommand { get; private set; }
        public MainViewModel()
        {
            OpenCommand = new DelegateCommand<string>(Open);
        }

        private object body;
        public object Body { get { return body; } set { body = value; RaisePropertyChanged(); } }

        private void Open(string obj)
        {
            switch (obj)
            {
                case "ViewA": Body = new ViewA(); break;
                case "ViewB": Body = new ViewB(); break;
                case "ViewC": Body = new ViewC(); break;
            }
        }
    }
}
本文来自博客园,作者:董锡振,转载请注明原文链接:https://www.cnblogs.com/dongxizhen/p/16556926.html


【推荐】国内首个AI IDE,深度理解中文开发场景,立即下载体验Trae
【推荐】编程新体验,更懂你的AI,立即体验豆包MarsCode编程助手
【推荐】抖音旗下AI助手豆包,你的智能百科全书,全免费不限次数
【推荐】轻量又高性能的 SSH 工具 IShell:AI 加持,快人一步
· 震惊!C++程序真的从main开始吗?99%的程序员都答错了
· winform 绘制太阳,地球,月球 运作规律
· 【硬核科普】Trae如何「偷看」你的代码?零基础破解AI编程运行原理
· 上周热点回顾(3.3-3.9)
· 超详细:普通电脑也行Windows部署deepseek R1训练数据并当服务器共享给他人