Python制作二维码和条形码扫描器 (pyzbar)
条码在生活中随处可见,其可分为三类:一维条码、二维条码、三维条码
一维条码:
我们平时习惯称为条形码。条形码是将宽度不等的多个黑条和空白,按照一定的编码规则排列,用以表达一组信息的图形标识符。常见的条形码是由反射率相差很大的黑条(简称条)和白条(简称空)排成的平行线图案。
二维条码:
二维条码简称为二维码,常见的二维码为QR Code,QR全称Quick Response,是一个近几年来移动设备上超流行的一种编码方式,它比传统的Bar Code条形码能存更多的信息,也能表示更多的数据类型。
三维条码:
三维条码具有更大的信息容量、相同的识别便易性和较好的安全性。三维码的主要特征在于利用色彩或灰度(或称黑密度)表示不同的数据并进行编码。
一、实现效果
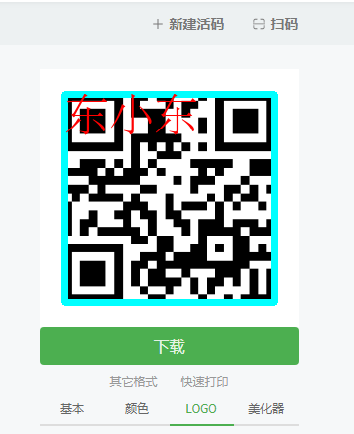
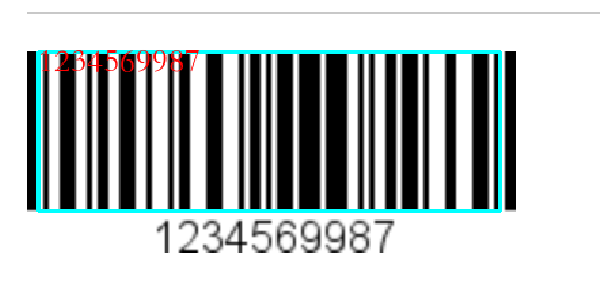
二、安装所需的库
2.1、安装扫描库
安装命令:pip3 install pyzbar
其实Python的条码扫描库,一直都有一个很是出名,那就是zbar,但此库虽然牛,却已经停止维护了,如果是python3,则不能使用zbar库了,python2.7还是可以用的。忙活了一下午才发现我的python3.5不能用zbara库,哈哈蓝瘦
2.2、安装其他必要库
后续功能需要用到PIL和OpenCV-Python相关库,可参考以下链接进行简单认识和库的安装
三、系统环境准备
3.1、Windows环境
如果是Windows电脑则可以跳过。* 0 *
3.2、树莓派环境
第一步:插入并打开CSI摄像头(参考:https://www.cnblogs.com/dongxiaodong/p/9814119.html)
第二步:配置系统启动之后加载bcm2835-v4l2这个模块,原因是树莓派中的camera module是放在/boot/目录中以固件形式加载的,不是一个标准的V4L2的摄像头驱动,所以用opencv的(cv2.VideoCapture(0)会无视频数据),加上这句之后就可以解决以上问题。
命令:sudo vi /etc/modules
加入:bcm2835-v4l2

四、实现简单的图识别
使用pyzbar和PIL 进行图片的二维码识别,并输出识别结果
识别结果:

找到一张二维码图片,并下载其中二维码:
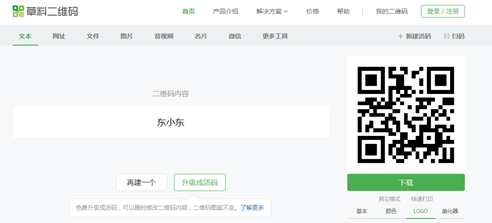
基本代码:
 1 import pyzbar.pyzbar as pyzbar
 2 from PIL import Image,ImageEnhance
 3
 4 image = "imgx\dongxiao.png"
 5
 6 img = Image.open(image)
 7 #处理图片
 8 #img = ImageEnhance.Brightness(img).enhance(2.0)#增加亮度
 9
10 #img = ImageEnhance.Sharpness(img).enhance(17.0)#锐利化
11
12 #img = ImageEnhance.Contrast(img).enhance(4.0)#增加对比度
13
14 #img = img.convert('L')#灰度化
15
16 #显示原图,调用系统默认的图片显示器
17 img.show()
18
19 texts = pyzbar.decode(img)
20 #输出结果
21 for text in texts:
22     tt = text.data.decode("utf-8")
23     print(tt)
五、图识别进阶
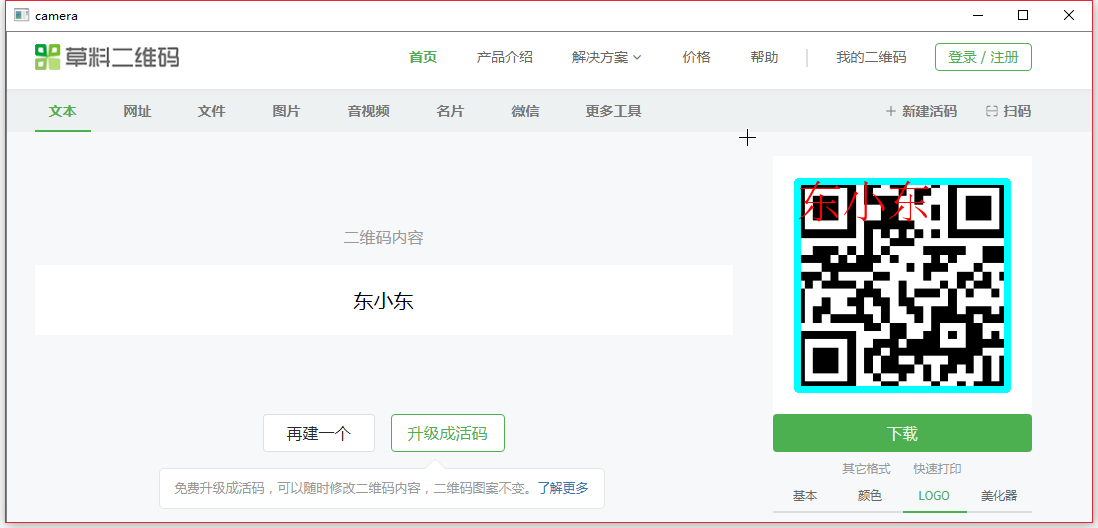
使用pyzbar和PIL 及OpenCV-Python,实现二维码图片框选和在图片上印字体
识别结果:
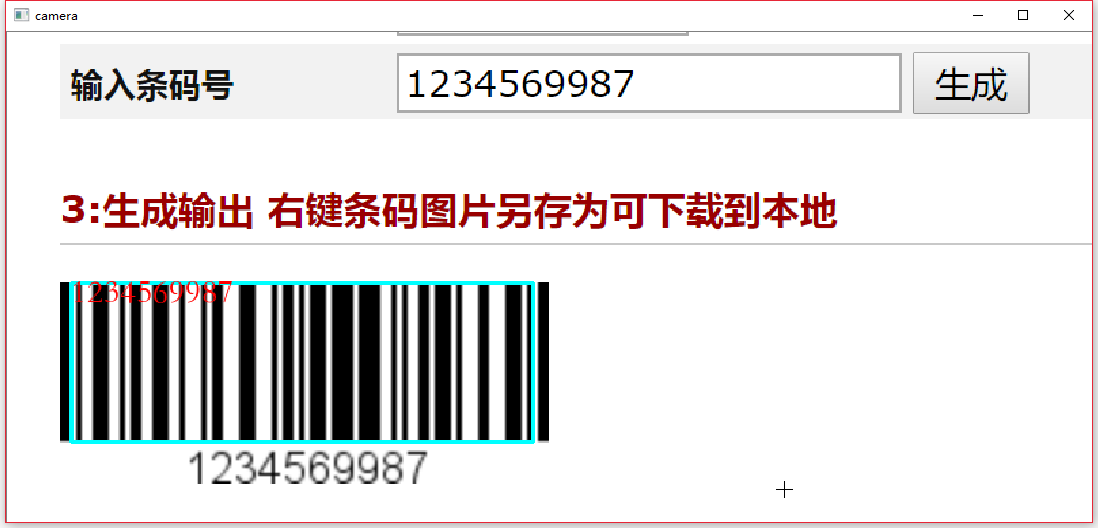
基本代码:
 1 import cv2
 2 import pyzbar.pyzbar as pyzbar
 3 import numpy
 4 from PIL import Image, ImageDraw, ImageFont
 5
 6 def decodeDisplay(imagex1):
 7     # 转为灰度图像
 8     gray = cv2.cvtColor(imagex1, cv2.COLOR_BGR2GRAY)
 9     barcodes = pyzbar.decode(gray)
10
11     for barcode in barcodes:
12
13         # 提取条形码的边界框的位置
14         # 画出图像中条形码的边界框
15         (x, y, w, h) = barcode.rect
16         cv2.rectangle(imagex1, (x, y), (x + w, y + h), (255, 255, 0), 2)
17
18         # 条形码数据为字节对象,所以如果我们想在输出图像上
19         # 画出来,就需要先将它转换成字符串
20         barcodeData = barcode.data.decode("utf-8")
21         barcodeType = barcode.type
22
23         #不能显示中文
24         # 绘出图像上条形码的数据和条形码类型
25         #text = "{} ({})".format(barcodeData, barcodeType)
26         #cv2.putText(imagex1, text, (x, y - 10), cv2.FONT_HERSHEY_SIMPLEX,5, (0, 0, 125), 2)
27
28         #更换为:
29         img_PIL = Image.fromarray(cv2.cvtColor(imagex1, cv2.COLOR_BGR2RGB))
30
31         # 参数(字体,默认大小)
32         font = ImageFont.truetype('fontx/hwst.ttf', 25)
33         # 字体颜色(rgb)
34         fillColor = (255,0,0)
35         # 文字输出位置
36         position = (x, y-10)
37         # 输出内容
38         str = barcodeData
39
40         # 需要先把输出的中文字符转换成Unicode编码形式(  str.decode("utf-8)   )
41
42         draw = ImageDraw.Draw(img_PIL)
43         draw.text(position, str, font=font, fill=fillColor)
44         # 使用PIL中的save方法保存图片到本地
45         # img_PIL.save('02.jpg', 'jpeg')
46
47         # 转换回OpenCV格式
48         imagex1 = cv2.cvtColor(numpy.asarray(img_PIL), cv2.COLOR_RGB2BGR)
49
50
51         # 向终端打印条形码数据和条形码类型
52         print("扫描结果==》 类别: {0} 内容: {1}".format(barcodeType, barcodeData))
53     cv2.imshow("camera", imagex1)
54     # 窗口等待任意键盘按键输入,0为一直等待,其他数字为毫秒数
55     cv2.waitKey(0)
56
57     # 销毁窗口,退出程序
58     cv2.destroyAllWindows()
59
60 def detect():
61     cv2.namedWindow("camera",cv2.WINDOW_NORMAL)
62     frame=cv2.imread("imgx\dongxiao2.png")
63     decodeDisplay(frame)
64
65
66 if __name__ == '__main__':
67     detect()
六、实现视频实时读取
OpenCV-Python视频读取,并帧处理视频,实现条码的动态框选和识别
识别结果:
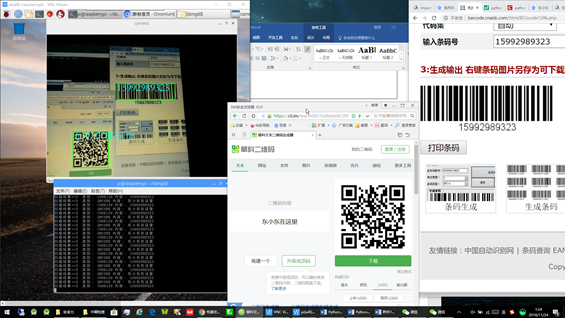
基本代码:
 1 import cv2
 2 import pyzbar.pyzbar as pyzbar
 3 import numpy
 4 from PIL import Image, ImageDraw, ImageFont
 5
 6 def decodeDisplay(imagex1):
 7     # 转为灰度图像
 8     gray = cv2.cvtColor(imagex1, cv2.COLOR_BGR2GRAY)
 9     barcodes = pyzbar.decode(gray)
10
11     for barcode in barcodes:
12
13         # 提取条形码的边界框的位置
14         # 画出图像中条形码的边界框
15         (x, y, w, h) = barcode.rect
16         cv2.rectangle(imagex1, (x, y), (x + w, y + h), (0, 255, 0), 2)
17
18         # 条形码数据为字节对象,所以如果我们想在输出图像上
19         # 画出来,就需要先将它转换成字符串
20         barcodeData = barcode.data.decode("utf-8")
21         barcodeType = barcode.type
22
23         #不能显示中文
24         # 绘出图像上条形码的数据和条形码类型
25         #text = "{} ({})".format(barcodeData, barcodeType)
26         #cv2.putText(imagex1, text, (x, y - 10), cv2.FONT_HERSHEY_SIMPLEX,5, (0, 0, 125), 2)
27
28
29         #更换为:
30         img_PIL = Image.fromarray(cv2.cvtColor(imagex1, cv2.COLOR_BGR2RGB))
31
32         # 参数(字体,默认大小)
33         font = ImageFont.truetype('fontx/hwst.ttf', 35)
34         # 字体颜色(rgb)
35         fillColor = (0,255,255)
36         # 文字输出位置
37         position = (x, y-10)
38         # 输出内容
39         str = barcodeData
40
41         # 需要先把输出的中文字符转换成Unicode编码形式(  str.decode("utf-8)   )
42
43
44         draw = ImageDraw.Draw(img_PIL)
45         draw.text(position, str, font=font, fill=fillColor)
46         # 使用PIL中的save方法保存图片到本地
47         # img_PIL.save('02.jpg', 'jpeg')
48
49         # 转换回OpenCV格式
50         imagex1 = cv2.cvtColor(numpy.asarray(img_PIL), cv2.COLOR_RGB2BGR)
51
52
53         # 向终端打印条形码数据和条形码类型
54         print("扫描结果==》 类别: {0} 内容: {1}".format(barcodeType, barcodeData))
55     cv2.imshow("camera", imagex1)
56
57
58 def detect():
59     cv2.namedWindow("camera",cv2.WINDOW_NORMAL)
60     camera = cv2.VideoCapture(0)
61
62     while True:
63         # 读取当前帧
64         ret, frame = camera.read()
65         #print(ret.shape)
66         decodeDisplay(frame)
67
68         if(cv2.waitKey(5)==27):
69             break
70     camera.release()
71     cv2.destroyAllWindows()
72
73
74 if __name__ == '__main__':
75     detect()
参考:
http://www.cnblogs.com/xushengming/p/9872061.html
https://blog.csdn.net/zx66zx/article/details/82785334
https://blog.csdn.net/x115104/article/details/78878599
https://blog.csdn.net/shanzhizi/article/details/50755168


