spring整合mybatis入门

一.搭建springboot框架
springboot矿建我是通过maven进行搭建的,maven搭建可参考以下博客,这里我就不多说了.
maven搭建步骤可参考博客:http://www.cnblogs.com/dollstory/p/7608506.html
开始搭建springboot
1.在pom.xml中添加以下依赖
<parent>
<groupId>org.springframework.boot</groupId>
<artifactId>spring-boot-starter-parent</artifactId>
<version>1.5.7.RELEASE</version>
<relativePath />
</parent>
<properties>
<project.build.sourceEncoding>UTF-8</project.build.sourceEncoding> <java.version>1.8</java.version> </properties>
<dependencies>
<!-- springboot启动包 -->
<dependency>
<groupId>org.springframework.boot</groupId>
<artifactId>spring-boot-starter</artifactId>
</dependency>
<!-- springboot核心web -->
<dependency>
<groupId>org.springframework.boot</groupId>
<artifactId>spring-boot-starter-web</artifactId>
</dependency>
<!-- springboot日志 -->
<dependency>
<groupId>org.springframework.boot</groupId>
<artifactId>spring-boot-starter-logging</artifactId>
</dependency>
<!-- springboot测试依赖 -->
<dependency>
<groupId>org.springframework.boot</groupId>
<artifactId>spring-boot-starter-test</artifactId>
<scope>test</scope>
</dependency>
</dependencies>
<build>
<finalName>springboot-mybatis</finalName>
<!-- 为了生成可执行jar包,必须加入 spring-boot-maven-plugin -->
<plugins>
<plugin>
<groupId>org.springframework.boot</groupId>
<artifactId>spring-boot-maven-plugin</artifactId>
</plugin>
<plugin>
<groupId>org.apache.maven.plugins</groupId>
<artifactId>maven-surefire-plugin</artifactId>
<configuration>
<skip>true</skip>
</configuration>
</plugin>
</plugins>
</build>
2.创建springboot入口类,该类必须放在包根目录
package com.baibeiyun;
import org.springframework.boot.SpringApplication;
import org.springframework.boot.autoconfigure.SpringBootApplication;
import org.springframework.web.bind.annotation.RequestMapping;
import org.springframework.web.bind.annotation.RestController;
@RestController
@SpringBootApplication
public class Application {
public static void main(String[] args) {
SpringApplication.run(Application.class, args);
}
@RequestMapping("/")
int getByPhone() {
return 1;
}
}
@RestController
因为我们例子是写一个web应用,因此写的这个注解,这个注解相当于同时添加@Controller和@ResponseBody注解。
@EnableAutoConfiguration
Spring Boot建议只有一个带有该注解的类。
@EnableAutoConfiguration作用:Spring Boot会自动根据你jar包的依赖来自动配置项目。例如当你项目下面有HSQLDB的依赖时,Spring Boot会创建默认的内存数据库的数据源DataSource,如果你自己创建了DataSource,Spring Boot就不会创建默认的DataSource
@SpringBootApplication
由于大量项目都会在主要的配置类上添加@Configuration,@EnableAutoConfiguration,@ComponentScan三个注解。
因此Spring Boot提供了@SpringBootApplication注解,该注解可以替代上面三个注解(使用Spring注解继承实现)。
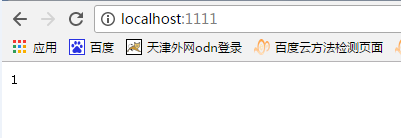
启动main方法即可启动
在网页中输入http://localhost:1111(我的端口是1111,springboot默认端口8080)
二.结合mybatis
1.在pom.xml中添加以下依赖
<!-- mybatis-springboot -->
<dependency>
<groupId>org.mybatis.spring.boot</groupId>
<artifactId>mybatis-spring-boot-starter</artifactId>
<version>1.1.1</version>
</dependency>
<!-- sql -->
<dependency>
<groupId>mysql</groupId>
<artifactId>mysql-connector-java</artifactId>
</dependency>
2.添加application.properties文件
#设定springboot端口号
server.port= 1111
#mybatis 配置映射文件,若纯注释则可忽略
mybatis.mapper-locations: classpath*:com.baibeiyun.base.mapper/*.xml
#mysql
spring.datasource.name = testjtzs
spring.datasource.url= jdbc:mysql://rm-bp1e1i361uzhr5250o.mysql.rds.aliyuncs.com:3306/testjtzs?characterEncoding=utf-8
spring.datasource.username= jiaotongdba01
spring.datasource.password= Zrtg20170416
#添加druid时使用,否则可忽略
spring.datasource.type = com.alibaba.druid.pool.DruidDataSource
spring.datasource.driver-class-name = com.mysql.jdbc.Driver
spring.datasource.filters = stat
spring.datasource.maxActive = 20
spring.datasource.initialSize = 1
spring.datasource.maxWait = 60000
spring.datasource.minIdle = 1
spring.datasource.timeBetweenEvictionRunsMillis = 60000
spring.datasource.minEvictableIdleTimeMillis = 300000
spring.datasource.validationQuery = select 'x'
spring.datasource.testWhileIdle = true
spring.datasource.testOnBorrow = false
spring.datasource.testOnReturn = false
spring.datasource.poolPreparedStatements = true
spring.datasource.maxOpenPreparedStatements = 20
3.进行编程
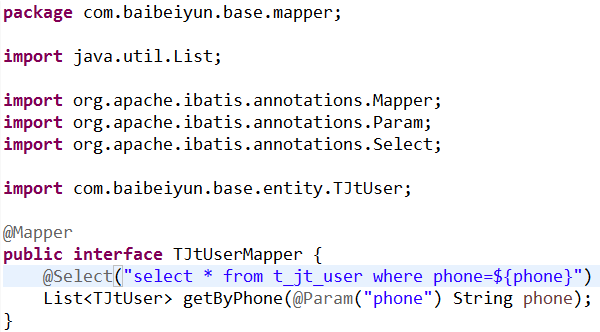
创建mapper,可通过两种形式进行编写
1)注释:
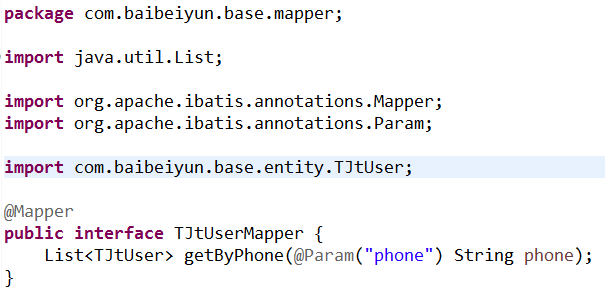
2)编写mapper映射文件
<?xml version="1.0" encoding="UTF-8" ?>
<!DOCTYPE mapper PUBLIC "-//mybatis.org//DTD Mapper 3.0//EN" "http://mybatis.org/dtd/mybatis-3-mapper.dtd" >
<mapper namespace="com.baibeiyun.base.mapper.TJtUserMapper">
<resultMap id="BaseResultMap" type="com.baibeiyun.base.entity.TJtUser">
<id column="Id" property="id" jdbcType="INTEGER" />
<result column="sex" property="sex" jdbcType="INTEGER" />
<result column="img" property="img" jdbcType="VARCHAR" />
<result column="nick_name" property="nickName" jdbcType="VARCHAR" />
<result column="phone" property="phone" jdbcType="VARCHAR" />
<result column="password" property="password" jdbcType="VARCHAR" />
<result column="age" property="age" jdbcType="INTEGER" />
<result column="birthday" property="birthday" jdbcType="DATE" />
<result column="hobby" property="hobby" jdbcType="VARCHAR" />
<result column="region" property="region" jdbcType="VARCHAR" />
<result column="user_type" property="userType" jdbcType="INTEGER" />
<result column="lock_end_time" property="lockEndTime" jdbcType="TIMESTAMP" />
<result column="real_name" property="realName" jdbcType="VARCHAR" />
<result column="card_number" property="cardNumber" jdbcType="VARCHAR" />
<result column="rescue_img" property="rescueImg" jdbcType="VARCHAR" />
<result column="drive_license" property="driveLicense"
jdbcType="VARCHAR" />
<result column="car_num" property="carNum" jdbcType="VARCHAR" />
<result column="car_type" property="carType" jdbcType="INTEGER" />
<result column="engine_num" property="engineNum" jdbcType="VARCHAR" />
<result column="longitude" property="longitude" jdbcType="VARCHAR" />
<result column="latitude" property="latitude" jdbcType="VARCHAR" />
<result column="label_id" property="labelId" jdbcType="VARCHAR" />
<result column="all_money" property="allMoney" jdbcType="DOUBLE" />
<result column="money" property="money" jdbcType="DOUBLE" />
<result column="all_point" property="allPoint" jdbcType="INTEGER" />
<result column="point" property="point" jdbcType="INTEGER" />
<result column="register_time" property="registerTime"
jdbcType="TIMESTAMP" />
<result column="last_login_time" property="lastLoginTime"
jdbcType="TIMESTAMP" />
<result column="token" property="token" jdbcType="VARCHAR" />
<result column="remark" property="remark" jdbcType="VARCHAR" />
<result column="program_notice" property="programNotice"
jdbcType="INTEGER" />
<result column="host_notice" property="hostNotice" jdbcType="INTEGER" />
<result column="activity_notice" property="activityNotice"
jdbcType="INTEGER" />
<result column="news_notice" property="newsNotice" jdbcType="INTEGER" />
<result column="road_notice" property="roadNotice" jdbcType="INTEGER" />
<result column="frozen_status" property="frozenStatus"
jdbcType="INTEGER" />
<result column="del_status" property="delStatus" jdbcType="INTEGER" />
<result column="province" property="province" jdbcType="VARCHAR" />
<result column="city" property="city" jdbcType="VARCHAR" />
<result column="home_page" property="homePage" jdbcType="INTEGER" />
</resultMap>
<select id="getByPhone" resultMap="BaseResultMap" parameterType="java.lang.String">
select * from t_jt_user where phone=#{phone,jdbcType=VARCHAR}
</select>
</mapper>
创建entity
package com.baibeiyun.base.entity;
import java.util.Date;
public class TJtUser {
private Integer id;
private Integer sex;
private String img;
private String nickName;
private String phone;
private String password;
private Integer age;
private Date birthday;
private String hobby;
private String region;
private Integer userType;
private Date lockEndTime;
private String realName;
private String cardNumber;
private String rescueImg;
private String driveLicense;
private String carNum;
private Integer carType;
private String engineNum;
private String longitude;
private String latitude;
private String labelId;
private Double allMoney;
private Double money;
private Integer allPoint;
private Integer point;
private Date registerTime;
private Date lastLoginTime;
private String token;
private String remark;
private Integer programNotice;
private Integer hostNotice;
private Integer activityNotice;
private Integer newsNotice;
private Integer roadNotice;
private Integer frozenStatus;
private Integer delStatus;
private String province;
private String city;
private Integer homePage;
set和get方法忽略
}
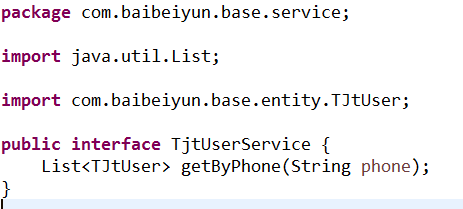
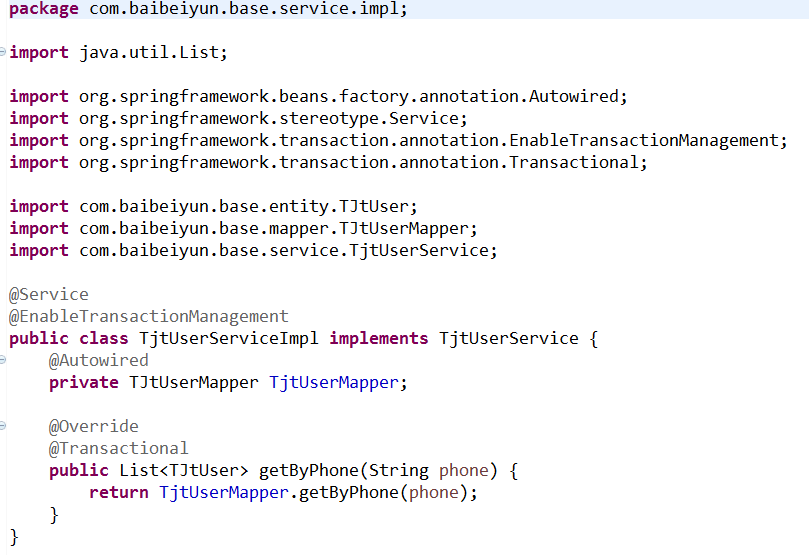
创建service
创建控制层

启动application
3.在tomcat中启动项目
springboot项目可直接通过main方法进行调试,但想在外部tomcat中启动项目则需加以下配置
1)启动类继承SpringBootServletInitializer并重写configure方法
@SpringBootApplication public class Application extends SpringBootServletInitializer { @Override protected SpringApplicationBuilder configure(SpringApplicationBuilder application) { return application.sources(Application.class); } public static void main(String[] args) throws Exception { SpringApplication.run(Application.class, args); } }
2)在pom.xml文件中,project下面增加package标签
<packaging>war</packaging>
3)还是在pom.xml文件中,dependencies下面添加
<dependency> <groupId>org.springframework.boot</groupId> <artifactId>spring-boot-starter-tomcat</artifactId> <scope>provided</scope> </dependency>
这样,只需要以上3步就可以打包成war包,并且部署到tomcat中了。需要注意的是这样部署的request url需要在端口后加上项目的名字才能正常访问。spring-boot更加强大的一点就是:即便项目是以上配置,依然可以用内嵌的tomcat来调试,启动命令和以前没变,还是:mvn spring-boot:run。
如果需要在springboot中加上request前缀,需要在application.properties中添加server.contextPath=/prefix/即可。其中prefix为前缀名。这个前缀会在war包中失效,取而代之的是war包名称,如果war包名称和prefix相同的话,那么调试环境和正式部署环境就是一个request地址了。
4.springboot整合swagger
1)在pom.xml文件中加入swagger2和swagger-ui依赖
<dependency>
<groupId>io.springfox</groupId>
<artifactId>springfox-swagger2</artifactId>
<version>2.6.1</version>
</dependency>
<dependency>
<groupId>io.springfox</groupId>
<artifactId>springfox-swagger-ui</artifactId>
<version>2.6.1</version>
</dependency>
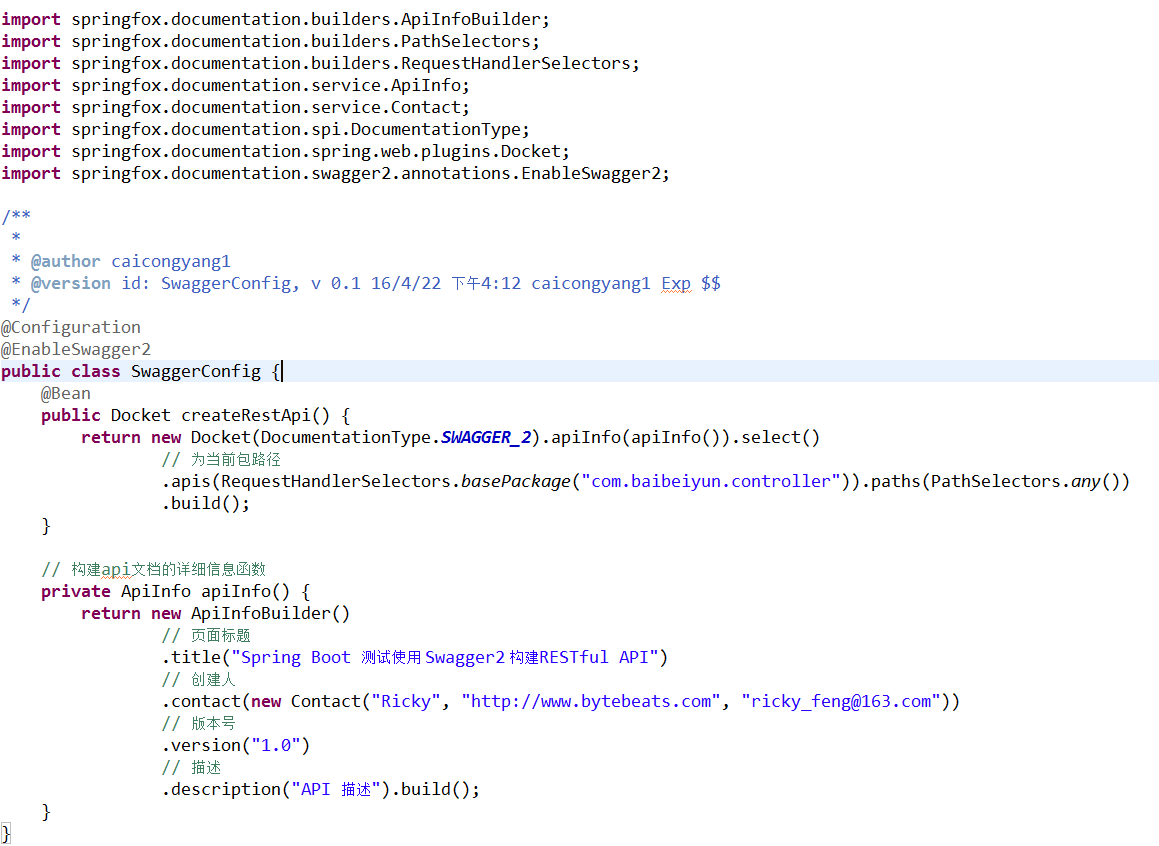
2)在工程中添加类SwaggerConfig并映射Docket