
支付-stripe
国外三大支付paypal,braintree,stripe,有兴趣可以去了解一下他们的区别。
支付宝和paypal基本只需要发送charge信息请求交给后端做就ok了,那么stripe前端也只需要收集卡信息,拿到token给后端就ok了。
那就来说说主角stripe支付:官方文档
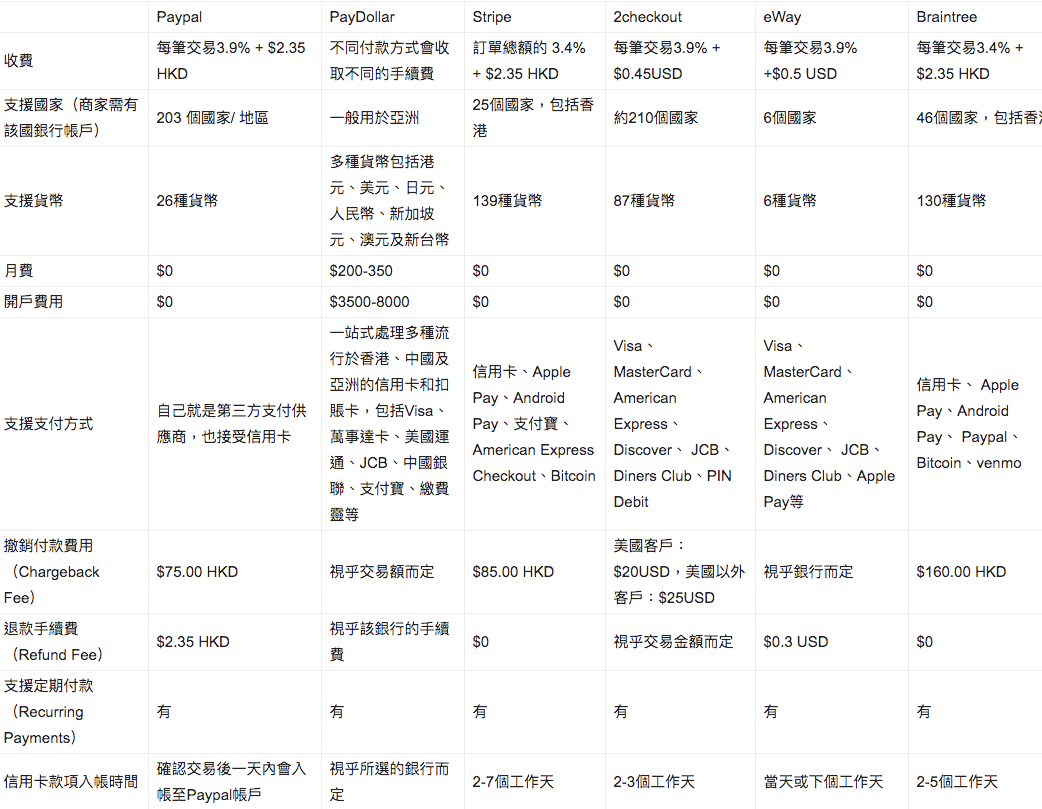
stripe官方说分为六步,如下图:
step1: 收集卡信息 step2 :创建customer step3:支付金额
step4和step5:计划(月付和年付等)
step6:成功
其实相对于普遍来说 step4和step5不用考虑,所有我们就只有4步。
前端stripe支付步骤:
1:引入stripe.js(为了方便测试,简便引入stripe.js,引入axios为了测试退款请求)
<!DOCTYPE html>
<html>
  <head>
    <meta charset="utf-8">
    <meta name="viewport" content="width=device-width,initial-scale=1.0">
    <title>测试stripe支付demo</title>
    <script src="https://js.stripe.com/v3/"></script>
    <script src="https://cdn.bootcss.com/axios/0.16.0/axios.min.js"></script>
  </head>
  <body>
    <div id="app"></div>
    <!-- built files will be auto injected -->
  </body>
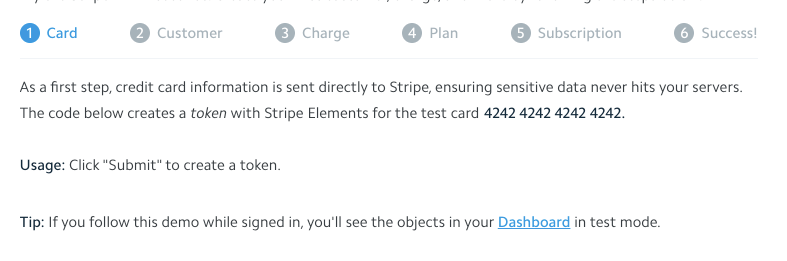
2:接下来就是按照官方文档步骤走,粘贴复制,先创建页面收集卡信息。
  <div style="width: 60%;margin: 0 auto">
      <div>stripe demo支付demo</div>
      <form action="http://xxxxxxx/test/stripe/pay.json" method="post" id="payment-form">
        <div class="form-row">
          <label for="card-element">
            Credit or debit card
          </label>
          <div id="card-element" name="token">
            <!-- A Stripe Element will be inserted here. -->
          </div>
          <div style="margin-top: 20px">
            <input placeholder="请输入费用" name="charger"> USD
          </div>
          <!-- Used to display form errors. -->
          <div id="card-errors" role="alert"></div>
        </div>

        <button style="margin-top: 20px">Submit Payment</button>
      </form>

      <div>
        <div style="margin-top: 40px">测试退款(两个都请输入)</div>
        <input style="margin-top: 20px" placeholder="请输入退款的交易单号" v-model="value">
        <div style="margin-top: 20px">
          <input placeholder="请输入退款金额" v-model="charge">
        </div>
        <div style="margin-top: 20px">
          <button @click="refund">发起退款</button>
        </div>
      </div>
    </div>
3.创建stripe客户端,将stripe提供的卡页面内嵌到页面中,用于收集卡信息,然后监听form表单提交,阻止表单提交前先去给stripe交互。
     // Create a Stripe client.
        const stripe = Stripe(process.env.PUB_KEY);
        // Create an instance of Elements.
        var elements = stripe.elements();

        // Custom styling can be passed to options when creating an Element.
        // (Note that this demo uses a wider set of styles than the guide below.)
        var style = {
          base: {
            color: '#32325d',
            lineHeight: '18px',
            fontFamily: '"Helvetica Neue", Helvetica, sans-serif',
            fontSmoothing: 'antialiased',
            fontSize: '16px',
            '::placeholder': {
              color: '#aab7c4'
            }
          },
          invalid: {
            color: '#fa755a',
            iconColor: '#fa755a'
          }
        };

        // Create an instance of the card Element.
        var card = elements.create('card', {style: style});

        // Add an instance of the card Element into the `card-element` <div>.
        card.mount('#card-element');

        var form = document.getElementById('payment-form');
        form.addEventListener('submit', function(event) {
          event.preventDefault();

          stripe.createToken(card).then(function(result) {
            if (result.error) {
              // Inform the customer that there was an error.
              var errorElement = document.getElementById('card-errors');
              errorElement.textContent = result.error.message;
            } else {
              stripeTokenHandler(result.token);
              // Send the token to your server.
            }
          });
        });

        function stripeTokenHandler(token) {
          // Insert the token ID into the form so it gets submitted to the server
          var form = document.getElementById('payment-form');
          var hiddenInput = document.createElement('input');
          hiddenInput.setAttribute('type', 'hidden');
          hiddenInput.setAttribute('name', 'stripeToken');
          hiddenInput.setAttribute('value', token.id);
          form.appendChild(hiddenInput);

          // Submit the form
          form.submit();
        }
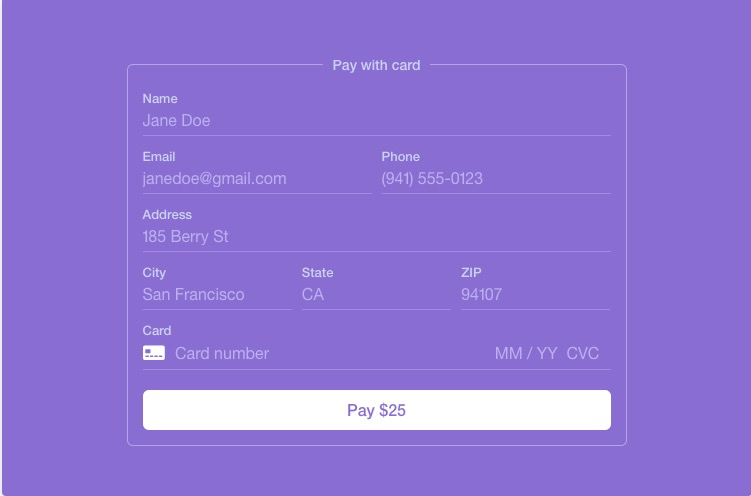
一些stripe提供的样式:stripe element examples 地址

4.与stripe交互完之后,会得到stripe给你的token,你可以在写一些表单input拿到用户输入的信息和token表单提交submit一起传给服务器,后端得到token就可以创建customer了。
这里展示下token信息:
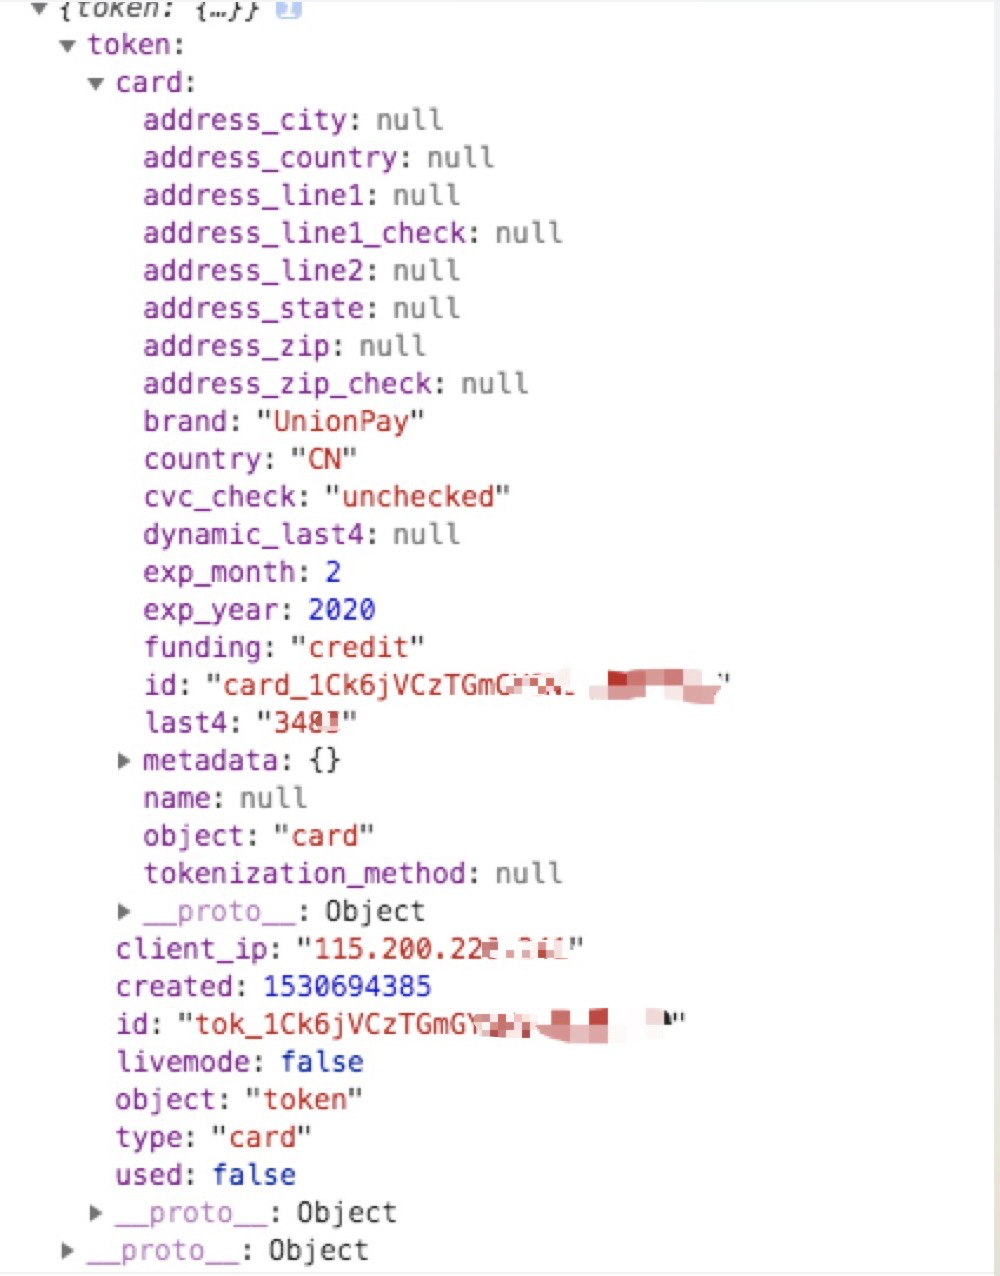
那么我们就完成我们的任务的,接下来就是后端的工作了,注stripe支付是相当于主动拉,从信用卡主动扣款,不像支付宝是被动拉,需要用户主动发起付款支付(如转账,扫码)
-----原创文章,©版权所有,转载请注明标明出处:http://www.cnblogs.com/doinbean

 浙公网安备 33010602011771号