图像轮廓
- 简介
边缘有一些零零散散的线段也可以当做边缘,反正梯度上下左右发生差异,就把它当做边缘了。
图像的轮廓必须是一个整体,不是零零散散的,而是连在一块的。
图像轮廓函数:cv2.findContours(img,mode,method)

mode:轮廓检索模式
RETR_EXTERNAL :只检索最外面的轮廓。
RETR_LIST:检索所有的轮廓,并将其保存到一条链表当中。
RETR_CCOMP:检索所有的轮廓,并将他们组织为两层:顶层是各部分的外部边界,第二层是空洞的边界。
RETR_TREE:检索所有的轮廓,并重构嵌套轮廓的整个层次。( 最常用 )

method:轮廓逼近方法
CHAIN_APPROX_NONE:以Freeman链码的方式输出轮廓,如下图左所示。所有其他方法输出多边形 ( 顶点的序列 ),如下图右所示。
CHAIN_APPROX_SIMPLE:压缩水平的、垂直的和斜的部分,也就是,函数只保留他们的终点部分,如下图右所示。

为了更高的准确率,轮廓检测使用二值图像
- 图像二值化
import cv2 #opencv的缩写为cv2
import matplotlib.pyplot as plt # matplotlib库用于绘图展示
import numpy as np # numpy数值计算工具包
# 魔法指令,直接展示图,Jupyter notebook特有
%matplotlib inline
def cv_show(img,name):
cv2.imshow(name,img)
cv2.waitKey()
cv2.destroyAllWindows()
img = cv2.imread('01_Picture/08_Car.png')
cv_show(img,'img')
gray = cv2.cvtColor(img,cv2.COLOR_BGR2GRAY)
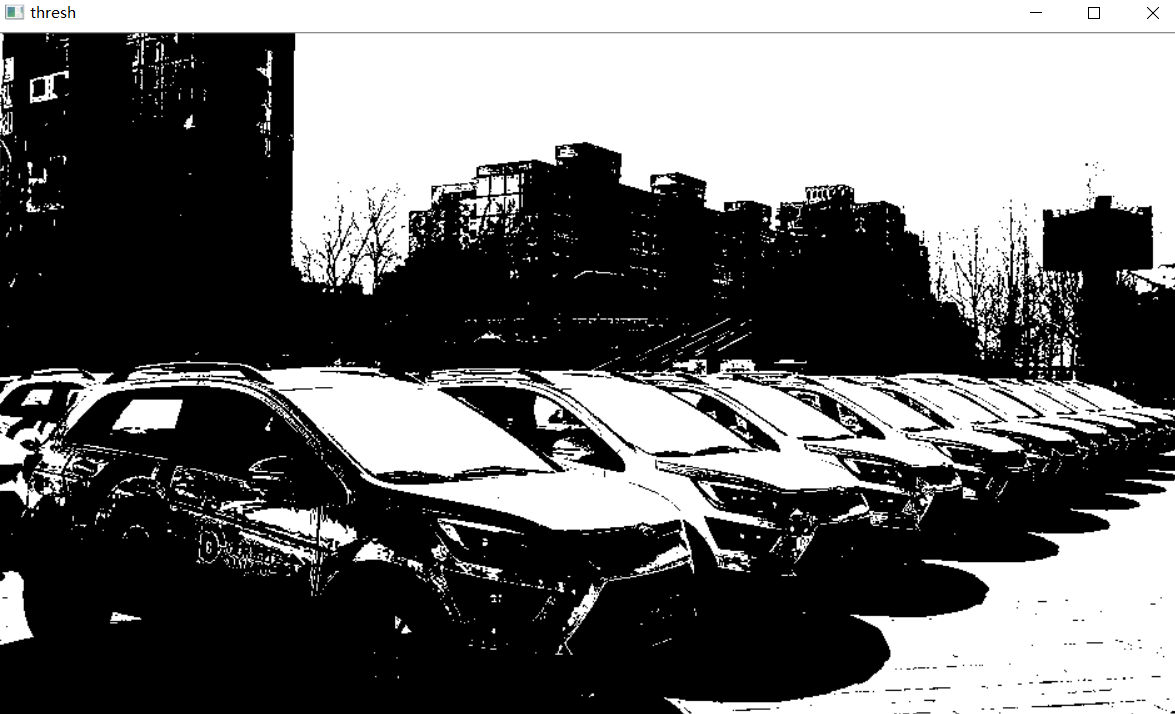
ret, thresh = cv2.threshold(gray, 127, 255, cv2.THRESH_BINARY) # 大于 17 的取 255,小于 127 的取 0
cv_show(thresh,'thresh')
- 执行结果
点击查看详情

- 轮廓检测
# 做完二值后,再用图像轮廓检测函数再去做
binary, contours, hierarchy = cv2.findContours(thresh, cv2.RETR_TREE, cv2.CHAIN_APPROX_NONE)
cv_show(binary,'binary') # 返回的二值化后的图像
print(np.array(contours).shape) # 轮廓点的信息
print(hierarchy) # hierarchy 是把轮廓结果保存在层级结构当中,暂时用不上
- 执行结果
点击查看详情
(2579,)
[[[   1   -1   -1   -1]
  [   2    0   -1   -1]
  [   3    1   -1   -1]
  ...,
  [  -1 2575 2577   -1]
  [2578   -1   -1 2576]
  [  -1 2577   -1 2576]]]

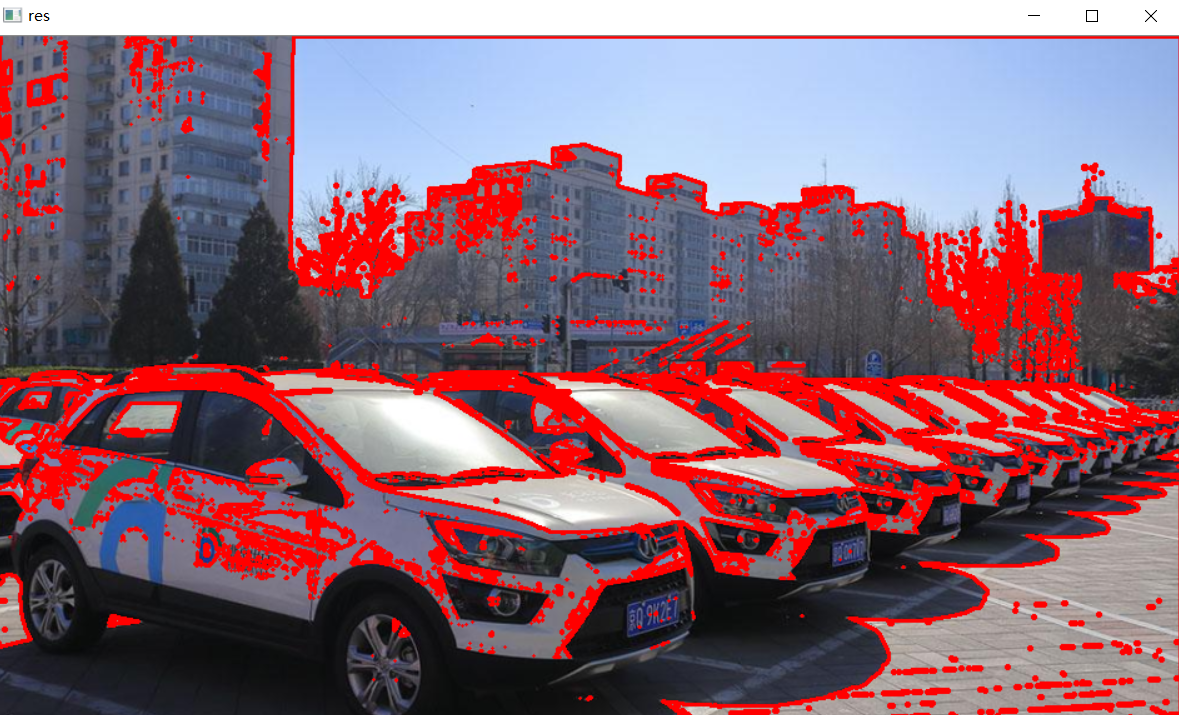
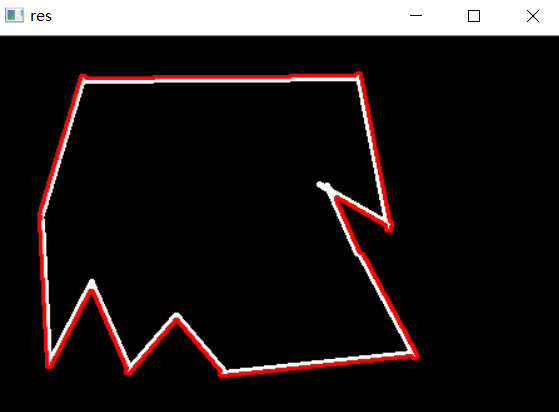
- 绘制所有轮廓
# 传入参数:图像、轮廓、轮廓索引(自适应,画所有轮廓),颜色模式,线条厚度
# 注意需要copy,要不原图会变。。。
cv_show(img,'img')
draw_img = img.copy() # 若不用拷贝后的,而是用原图画轮廓,则画轮廓图绘把原始的输入图像重写,覆盖掉
res = cv2.drawContours(draw_img,contours,-1,(0,0,255),2)
cv_show(res,'res')
点击查看详情
- 绘制某个轮廓
draw_img = img.copy()
res = cv2.drawContours(draw_img,contours,70,(0,0,255),2) # 画 70 号轮廓
cv_show(res,'res')
- 执行结果
点击查看详情

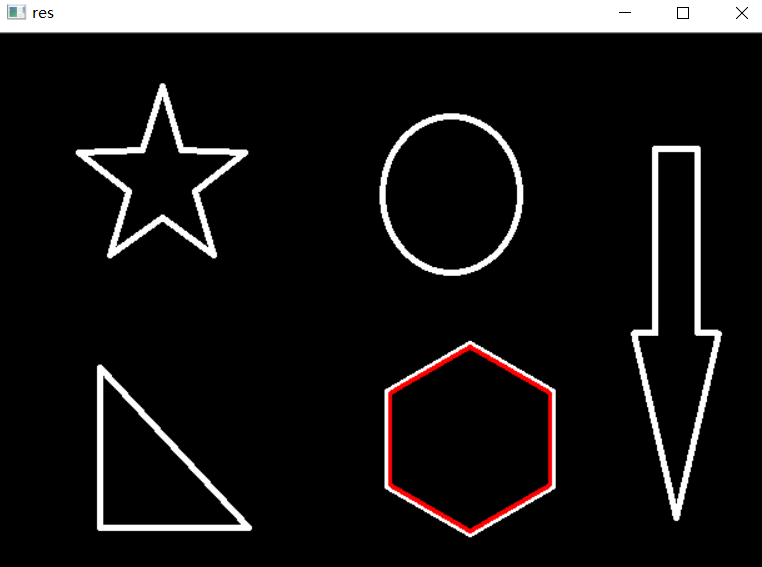
- 综合展示
img = cv2.imread('01_Picture/10_contours.png')
gray = cv2.cvtColor(img,cv2.COLOR_BGR2GRAY)
ret, thresh = cv2.threshold(gray, 127, 255, cv2.THRESH_BINARY) # 大于17的取255,小于127的取0

binary, contours, hierarchy = cv2.findContours(thresh, cv2.RETR_TREE, cv2.CHAIN_APPROX_NONE)

draw_img = img.copy() # 若不用拷贝后的,而是用原图画轮廓,则画轮廓图绘把原始的输入图像重写,覆盖掉
res = cv2.drawContours(draw_img,contours,3,(0,0,255),2)
cv_show(res,'res')
- 执行结果
点击查看详情
- 轮廓特征提取
img = cv2.imread('01_Picture/10_contours.png')
gray = cv2.cvtColor(img,cv2.COLOR_BGR2GRAY)
ret, thresh = cv2.threshold(gray, 127, 255, cv2.THRESH_BINARY) # 大于17的取255,小于127的取0

binary, contours, hierarchy = cv2.findContours(thresh, cv2.RETR_TREE, cv2.CHAIN_APPROX_NONE)

cnt = contours[0] # 通过轮廓索引,拿到该索引对应的轮廓特征
print(cv2.contourArea(cnt)) # 该轮廓的面积
print(cv2.arcLength(cnt,True)) # 该轮廓的周长,True表示闭合的
- 执行结果
8500.5
437.9482651948929
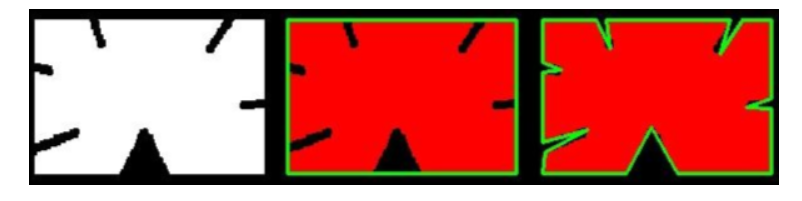
- 轮廓近似
正常轮廓展示是最右边的图,但是当我们需要轮廓没有那么不规则,而是想要轮廓近似成规则的形状,这就叫轮廓近似,近似成下图中中间图像的轮廓。

一条呈抛物线的曲线的端点为 A、B 两点,取曲线上到直线 AB 距离最大的点,该点为 C 点,若 C 点到直线的距离小于设置的阈值,则可以把直线 AB 当做曲线的近似,若 C 点到直线的距离大于设置的阈值,那么曲线不能用直线 AB 来近似,而 AC 曲线可能用 AC 直线来代替、BC曲线可能用 BC 直线来代替。再通过阈值来判断是否可以代替
- 正常轮廓展示
img = cv2.imread('01_Picture/11_contours2.png')
gray = cv2.cvtColor(img,cv2.COLOR_BGR2GRAY)
ret, thresh = cv2.threshold(gray, 127, 255, cv2.THRESH_BINARY) # 大于17的取255,小于127的取0

binary, contours, hierarchy = cv2.findContours(thresh, cv2.RETR_TREE, cv2.CHAIN_APPROX_NONE)

draw_img = img.copy() # 若不用拷贝后的,而是用原图画轮廓,则画轮廓图绘把原始的输入图像重写,覆盖掉
res = cv2.drawContours(draw_img,contours,-1,(0,0,255),2)
cv_show(res,'res')
-
执行结果

-
轮廓近似展示
img = cv2.imread('01_Picture/11_contours2.png')

gray = cv2.cvtColor(img,cv2.COLOR_BGR2GRAY)
ret, thresh = cv2.threshold(gray, 127, 255, cv2.THRESH_BINARY) # 大于17的取255,小于127的取0
binary, contours, hierarchy = cv2.findContours(thresh, cv2.RETR_TREE, cv2.CHAIN_APPROX_NONE)
cnt = contours[0]

draw_img = img.copy()
res = cv2.drawContours(draw_img,[cnt],-1,(0,0,255),2)
cv_show(res,'res')

epsilon = 0.1 * cv2.arcLength(cnt,True) # 周长的百分比,这里用 0.1 的周长作阈值
approx = cv2.approxPolyDP(cnt,epsilon,True) # 第二个参数为阈值
draw_img = img.copy()
res = cv2.drawContours(draw_img,[approx],-1,(0,0,255),2)
cv_show(res,'res')
- 执行结果

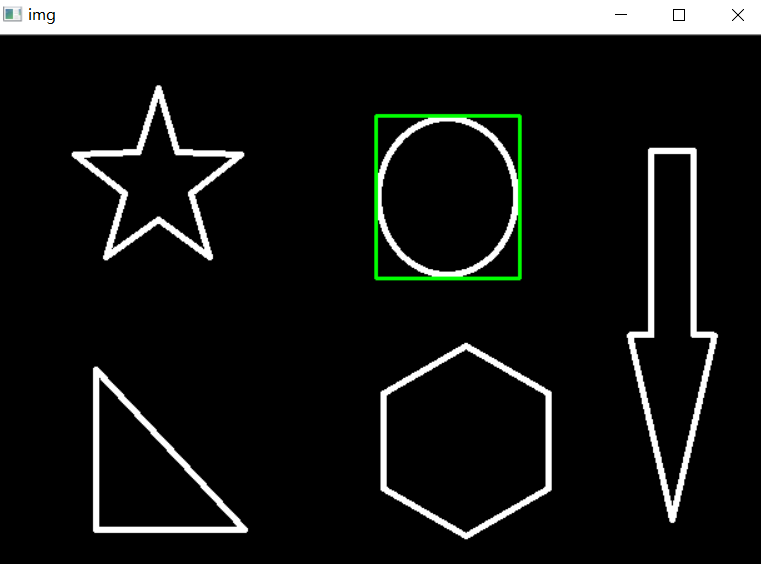
- 外接矩形
img = cv2.imread('01_Picture/10_contours.png')

gray = cv2.cvtColor(img,cv2.COLOR_BGR2GRAY)
ret, thresh = cv2.threshold(gray, 127, 255, cv2.THRESH_BINARY) # 大于17的取255,小于127的取0
binary, contours, hierarchy = cv2.findContours(thresh, cv2.RETR_TREE, cv2.CHAIN_APPROX_NONE)
cnt = contours[6]

x,y,w,h = cv2.boundingRect(cnt) # 可以得到矩形四个坐标点的相关信息
img = cv2.rectangle(img,(x,y),(x+w,y+h),(0,255),2)
cv_show(img,'img')

area = cv2.contourArea(cnt)
rect_area = w * h
extent = float(area) / rect_area
print('轮廓面具与边界矩形比:',extent)
# 执行结果:轮廓面具与边界矩形比: 0.7732441471571906
- 执行结果
点击查看详情
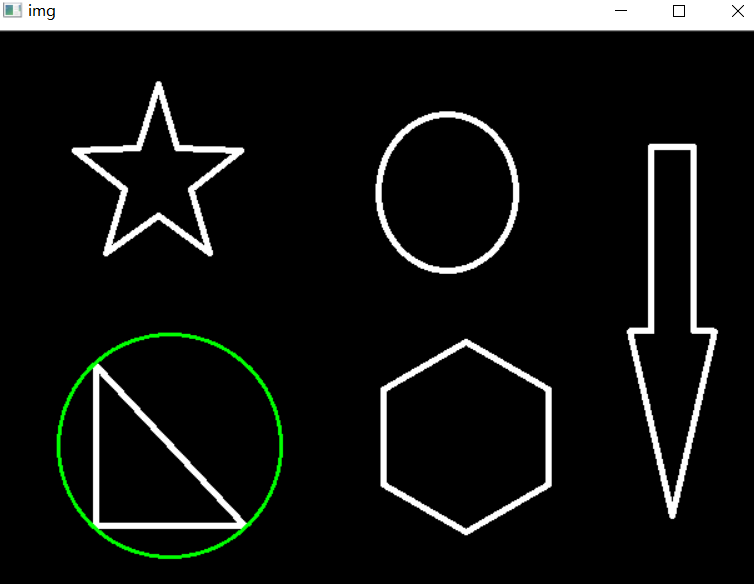
- 外接圆
img = cv2.imread('01_Picture/10_contours.png')

gray = cv2.cvtColor(img,cv2.COLOR_BGR2GRAY)
ret, thresh = cv2.threshold(gray, 127, 255, cv2.THRESH_BINARY) # 大于17的取255,小于127的取0
binary, contours, hierarchy = cv2.findContours(thresh, cv2.RETR_TREE, cv2.CHAIN_APPROX_NONE)
cnt = contours[0]

draw_img = img.copy()
(x,y),redius = cv2.minEnclosingCircle(cnt)
center = (int(x),int(y))
redius = int(redius)
img = cv2.circle(draw_img,center,redius,(0,255,0),2)
cv_show(img,'img')
- 执行结果

 浙公网安备 33010602011771号